
Table of Contents
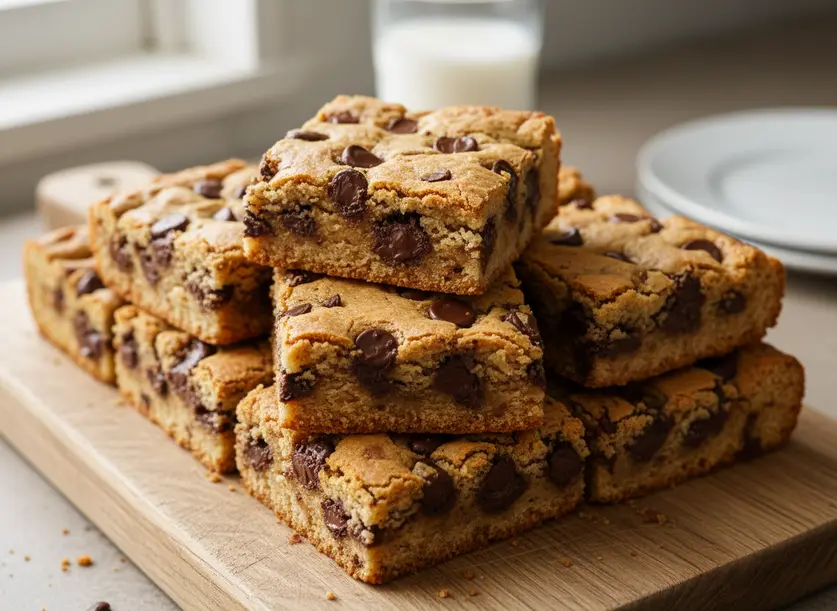
There’s nothing quite like the smell of fresh-baked cookies, but sometimes, you just don’t have time for individual scoops. That’s where **Chocolate Chip Cookie Bars** come in. These bars give you all the chewy, chocolatey goodness of your favorite cookies without the fuss of baking multiple batches. It’s my go-to when I need a quick dessert that always impresses.
I’ve been making these Chocolate Chip Cookie Bars for years, and they are always a huge hit. They’re perfect for potlucks, weeknight treats, or simply satisfying that sudden cookie craving. You’ll love how straightforward this recipe is, from mixing the dough to pulling a golden pan of deliciousness from the oven. Forget the endless trays of individual cookies; these bars are a true time-saver that delivers on flavor every single time.
What Makes This Dish Worth Making
These Chocolate Chip Cookie Bars are an absolute game-changer for anyone who loves homemade cookies but dreads the work. First off, the sheer speed is incredible. You can have the dough mixed and in the oven in about 5 minutes. That’s faster than preheating your oven for traditional cookies!
What truly sets them apart is the texture. Because they bake in a single pan, you get those perfectly soft, gooey centers that solidify just enough as they cool. The edges crisp up beautifully, giving you the best of both worlds in every bite. There are no hard-baked cookie bottoms here, just pure, consistent chewiness.
Plus, the convenience is unbeatable. One pan means less clean-up and no worrying about unevenly baked cookies. You simply press the dough, bake, cool, and slice. They’re incredibly versatile too. You can easily adapt them with different mix-ins, making them a staple in your recipe repertoire. Trust me, once you try these, you’ll be making them all the time.
Ingredients You Will Need
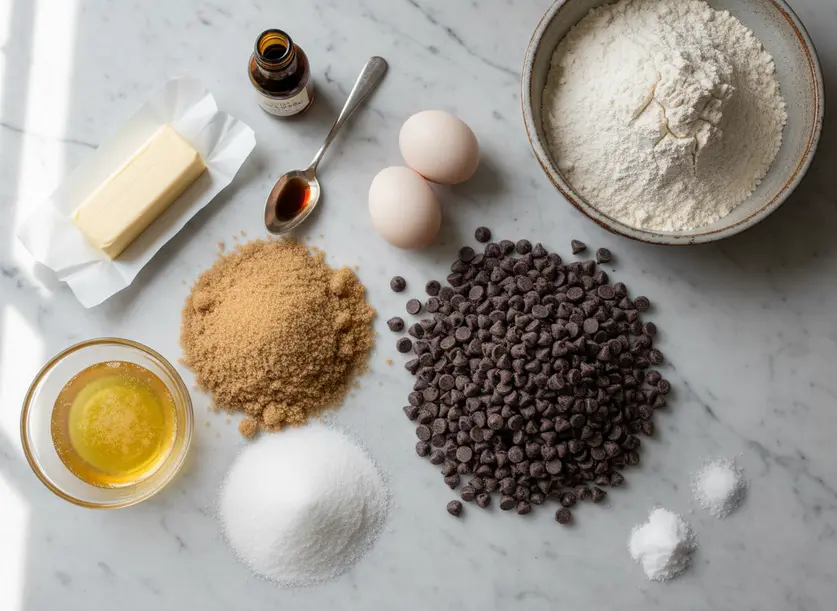
Making these delicious bars requires simple pantry staples. For the foundation, you’ll need 3 cups of all-purpose flour. If you’re out of all-purpose, a good quality bread flour can work in a pinch for a slightly chewier result, but avoid cake flour as it will make them too delicate. One teaspoon of baking soda gives them their lift, and half a teaspoon of kosher salt balances the sweetness. If you only have table salt, use ¼ teaspoon instead; it’s saltier by volume.
For the rich base, you’ll use 1 cup of butter, melted and cooled slightly. Unsalted butter is preferred so you can control the salt content, but salted will work; just reduce the added salt. You’ll combine that with 1½ cups of packed brown sugar and ¾ cup of white sugar. The blend of sugars is key for chewiness and flavor. Two large eggs provide structure, and 1 tablespoon of vanilla extract adds that classic warmth. Feel free to use good quality vanilla bean paste for an extra boost of flavor.
Finally, for the stars of the show, you’ll need 2 cups of chocolate chips. I love using a mix of semi-sweet and dark chocolate chips for depth, but milk chocolate or even white chocolate chips are delicious options. If you’re feeling adventurous, ½ cup of toffee bits is an optional but highly recommended addition for extra crunch and butterscotch notes. These are best sprinkled on top before baking to prevent them from melting into the dough too much.
How to Make It Step by Step
Making these **Chocolate Chip Cookie Bars** is surprisingly simple. Just follow these steps, and you’ll have a delicious dessert ready in no time.
- Preheat your oven and prepare the pan. Set your oven to 350 degrees F (175 C). Line a 9×13 inch baking pan with foil or parchment paper, leaving an overhang on the sides. This makes lifting the cooled bars out incredibly easy. You can also lightly spray the bottom with cooking spray if you prefer.
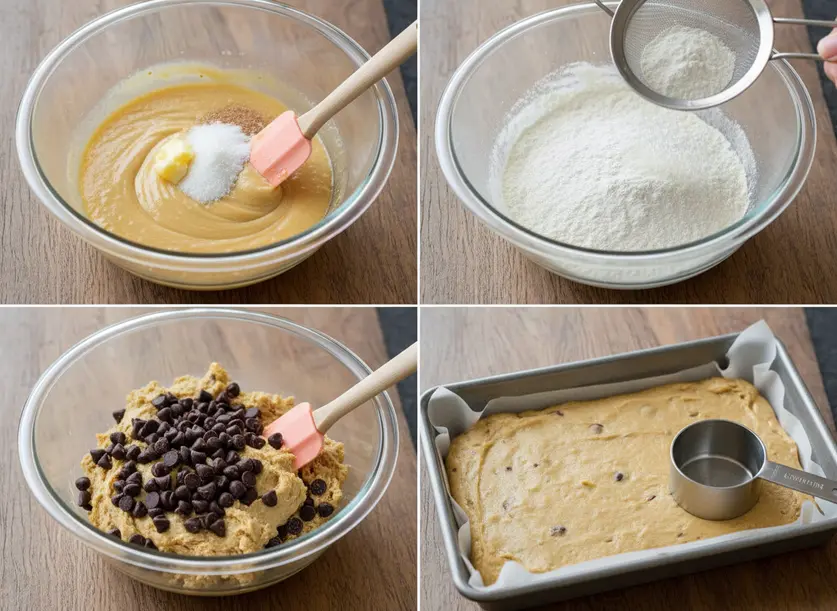
- Combine dry ingredients. In a medium bowl, whisk together the all-purpose flour, baking soda, and salt until they are well combined. Set this bowl aside for now.
- Mix wet ingredients. In a large mixing bowl, thoroughly combine the brown sugar, white sugar, and the slightly cooled melted butter. Beat until the mixture is smooth and creamy, about 1-2 minutes. Then, add the eggs one at a time, mixing well after each addition. Stir in the vanilla extract until fully incorporated.
- Gradually add dry to wet. Slowly add the dry flour mixture to the wet ingredients, a little at a time. Mix on low speed, or by hand, until just combined. Be careful not to overmix the dough, as this can lead to tough bars.
- Fold in chocolate chips. Stir in the chocolate chips until they are evenly distributed throughout the dough. If you like, save a few to sprinkle on top for a prettier finish. If using optional toffee bits, don’t mix them in yet.
- Press dough into the pan. Once the dough is thoroughly mixed, press it evenly into the prepared 9×13 inch baking pan. Make sure it’s spread from edge to edge. If you’re adding toffee bits, sprinkle them evenly over the top of the pressed dough now.
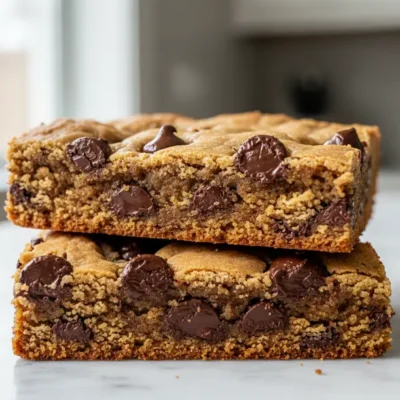
- Bake until golden. Place the pan in your preheated oven. Bake for 25-35 minutes. Start checking around 25 minutes. The bars are done when the edges are golden brown and the center appears set but still looks a little soft and gooey. A slight jiggle in the middle is perfectly fine.
- Cool completely before cutting. This is the hardest part, but it’s crucial! Remove the pan from the oven and let the bars cool completely to room temperature. This allows them to set up properly. If you cut into them while still hot or warm, they will be very gooey and fall apart. Once fully cooled, use the foil or parchment overhang to lift the entire slab out of the pan, then cut into squares. Enjoy!
Tips for the Best Results
Getting perfect Chocolate Chip Cookie Bars every time is easy with a few simple tricks. Pay attention to these details, and you’ll be baking like a pro.
First, **don’t overbake them.** It’s better to slightly underbake than overbake. Pull the pan from the oven when the edges are golden, but the center still looks a bit soft and slightly underdone. The bars will continue to cook and set as they cool on the counter. An overbaked bar will be dry and crumbly, while a slightly underbaked one will remain perfectly chewy.
Second, **cool completely.** I know it’s tempting, but resist the urge to cut into them hot. Warm bars will be a gooey, delicious mess, but they won’t hold their shape. Letting them cool fully allows the internal structure to set, giving you clean, firm squares. If you absolutely can’t wait, serve a warm piece with a scoop of vanilla ice cream. Otherwise, patience is key for slicing.
Third, **use quality ingredients.** Good butter makes a difference, and so do your chocolate chips. Invest in a brand of chocolate chips you genuinely enjoy eating on their own. This will translate directly into the flavor of your bars. Fresh baking soda is also important for proper lift.
Finally, for storage, **keep them airtight.** Store any leftover Chocolate Chip Cookie Bars in an airtight container at room temperature for up to 3-4 days. For longer storage, you can freeze them for up to 3 months. Wrap individual bars in plastic wrap, then place them in a freezer-safe bag. Thaw at room temperature for a quick treat.
Variations to Try
While the classic Chocolate Chip Cookie Bars are phenomenal, it’s fun to experiment with variations. You can easily customize this recipe to suit your cravings or what you have on hand. Don’t be afraid to get creative with your mix-ins.
For a fun twist, try **different chocolate combinations**. Instead of just semi-sweet, use a mix of dark chocolate, milk chocolate, and white chocolate chips. You could also chop up your favorite chocolate bar for unique chunks. Swapping some of the chocolate for peanut butter chips or butterscotch chips also creates an entirely different flavor profile that’s equally delicious.
Another great variation is adding **nuts or dried fruit**. Roughly chopped walnuts or pecans add a lovely crunch and earthy flavor that complements the sweet chocolate. For a fruitier touch, dried cranberries or cherries can be added alongside or in place of some chocolate chips. Just make sure to chop larger dried fruits so they distribute evenly throughout the dough.
For an extra indulgent treat, consider swirling in some **caramel or hazelnut spread**. After pressing the dough into the pan, dollop spoonfuls of warmed caramel sauce or Nutella over the top. Then, use a knife or skewer to gently swirl the additions into the dough before baking. This creates beautiful marbled bars with pockets of extra flavor. Just don’t over-swirl, or you’ll lose the distinct patterns.
FAQ
Can I double this Chocolate Chip Cookie Bars recipe?
Yes, you can double the recipe. However, it’s usually best to bake it in two separate 9×13 inch pans rather than one larger pan. Doubling into a single, larger pan can significantly alter baking times and lead to uneven cooking. Your best bet is to use two standard pans.
Why are my cookie bars too soft or falling apart?
This usually happens if you cut them before they’ve fully cooled. The bars need time to set up and firm after baking. If they’re still too soft after cooling, they might be slightly underbaked, but cutting them warm is the most common culprit. Pop them in the fridge for a bit to help them firm up.
Can I make the dough ahead of time?
Absolutely! You can prepare the dough up to 24 hours in advance. Cover the bowl tightly with plastic wrap and refrigerate. When you’re ready to bake, let the dough sit at room temperature for about 30 minutes to an hour to soften slightly before pressing into the pan and baking as usual. This makes prep even quicker on busy days.
Chocolate Chip Cookie Bars
Ingredients
- 3 cups all-purpose flour
- 1 teaspoon baking soda
- 0.5 teaspoon kosher salt If using table salt, use ¼ teaspoon instead
- 1 cup butter melted and cooled slightly; unsalted preferred, reduce salt if using salted butter
- 1.5 cups packed brown sugar
- 0.75 cup white sugar
- 2 large eggs
- 1 tablespoon vanilla extract or good quality vanilla bean paste
- 2 cups chocolate chips mix of semi-sweet and dark recommended, or milk/white chocolate chips
- 0.5 cup toffee bits optional, for extra crunch
Instructions
- Preheat oven to 350°F (175°C). Line a 9x13 inch baking pan with foil or parchment paper, leaving an overhang on the sides for easy removal. Optionally, lightly spray the bottom with cooking spray.
- In a medium bowl, whisk together the all-purpose flour, baking soda, and salt until well combined. Set aside.
- In a large mixing bowl, combine brown sugar, white sugar, and cooled melted butter. Beat until smooth and creamy (1-2 minutes). Add eggs one at a time, mixing well after each. Stir in vanilla extract.
- Gradually add the dry flour mixture to the wet ingredients, mixing on low speed or by hand until just combined. Do not overmix.
- Stir in the chocolate chips until evenly distributed. (Save some for topping if desired. Do not add toffee bits yet if using.)
- Press the dough evenly into the prepared 9x13 inch baking pan, spreading from edge to edge. If using toffee bits, sprinkle them evenly over the top of the pressed dough now.
- Bake for 25-35 minutes in the preheated oven. Bars are done when edges are golden brown and the center is set but still looks slightly soft and gooey (a slight jiggle is fine).
- Remove from oven and let cool completely to room temperature before cutting. This allows them to set properly. Once cooled, use the foil/parchment overhang to lift the slab, then cut into squares. Enjoy!


