Remember those iconic Little Debbie Christmas Tree Cakes from your childhood? That soft, slightly crumbly cake, the sweet white frosting, and those signature red zig-zags and green sprinkles? Well, get ready to experience that same wave of festive nostalgia, but in a delicious, homemade sugar cookie form that’s arguably even better than the original!
As Sophie from SweetCraft Recipes, I’ve always been obsessed with recreating beloved comfort foods with a homemade touch. After countless requests and a solid nine (or maybe more!) rounds of testing, tweaking, and tasting, I’ve finally perfected these Homemade Little Debbie Christmas Tree Sugar Cookies. This isn’t just a cookie; it’s a little slice of festive joy, packed with a delightful cake batter flavor that will transport you straight back to simpler times.
While packaged snacks offer convenience, making them from scratch gives you control over the ingredients, often resulting in a fresher, more wholesome taste without all the artificial preservatives. This is what I love about transforming classic comfort foods: enjoying the flavor you love, made with ingredients you trust. So, while we’re diving into a beloved treat, we’re also making it a better-for-you indulgence, proving that a healthy twist can simply mean “made with love and quality ingredients in your own kitchen.”
Why You’ll Fall in Love with These Christmas Tree Cookies
These aren’t just any sugar cookies; they’re designed to capture that specific Little Debbie magic. Here’s why they’ll become your new holiday tradition:
- Nostalgic Flavor: That unique cake batter essence is perfectly infused into every bite, instantly evoking happy childhood memories.
- Soft & Chewy Texture: Unlike some crunchy sugar cookies, these are wonderfully soft and slightly tender, just like their cake inspiration.
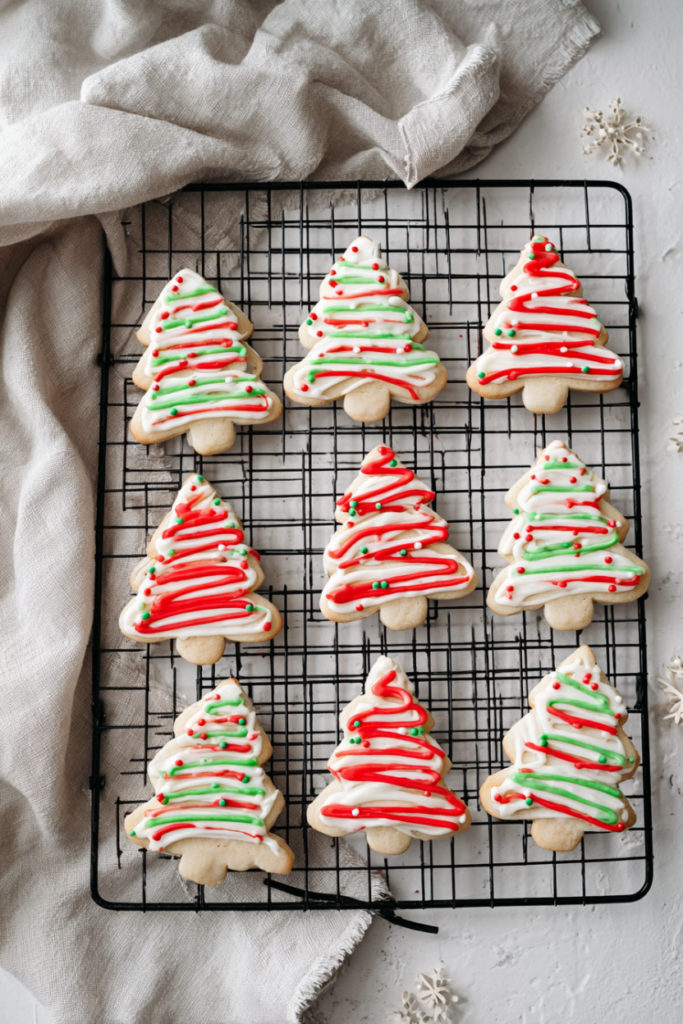
- Festive & Fun: Shaped like Christmas trees and adorned with the classic white glaze, green sprinkles, and red drizzle, they’re incredibly charming and a joy to decorate.
- Perfect for Gifting: Their festive look and delightful taste make them ideal for holiday cookie platters, neighbor gifts, or school parties.
- Made with Love: A truly homemade treat means fresh ingredients and no mysterious additives, giving you a comfort food you can feel good about sharing with family and friends.
The Magic Behind the Cake Batter Flavor
The secret to replicating that unmistakable Little Debbie taste lies in one special ingredient: cake batter flavor extract. Don’t confuse it with vanilla or almond extract; cake batter flavor specifically mimics the rich, sweet, slightly buttery taste of yellow cake mix. It’s a game-changer for these cookies, providing that authentic, comforting profile that powdered sugar and butter alone can’t achieve. I’ve found that just half a tablespoon is enough to create that delightful, nostalgic punch without being overpowering.
Using an extract also means you get consistent flavor throughout every single cookie, which is crucial when you’re aiming for a specific taste memory. This small addition truly elevates a simple sugar cookie into something extraordinary and reminiscent of those beloved childhood treats.
Gather Your Ingredients: Quality Matters
Creating these magical cookies starts with quality ingredients. Here’s what you’ll need and why each component is important:
- Salted Butter, softened: I specify salted butter because the hint of salt perfectly balances the sweetness, enhancing the overall flavor. Ensure it’s softened, but not melted, for the best cookie texture. Cold butter won’t cream properly, and melted butter will lead to greasy, flat cookies.
- Powdered Sugar: Used in both the cookie dough and the icing, it creates a tender crumb in the cookies and a smooth, quick-setting glaze. Sifting it for the icing is non-negotiable for lump-free results!
- Egg: Acts as a binder and adds richness, contributing to the cookie’s soft texture.
- Cake Batter Flavor: As discussed, this is the star for that iconic nostalgic taste. Look for it in the baking aisle or specialty food stores.
- All-Purpose Flour: The structure of our cookie. Measure it correctly (spoon and level!) to avoid a dense or dry cookie.
- Baking Powder: Our leavening agent, giving the cookies a slight puffiness.
- Salt: Essential for balancing sweetness and enhancing all other flavors.
- Water (for dough): A tiny bit helps bring the dough together. Use sparingly, as too much will make the dough sticky.
- Very Warm Water (for icing): Helps dissolve the corn syrup and sugar for a smooth glaze.
- Light Corn Syrup (for icing): This is key for a glossy, professional-looking icing that sets nicely and prevents crystallization. Don’t skip it!
- Vanilla Extract (for icing): Adds a touch of classic flavor to the sweet glaze.
- White & Red Gel Food Coloring: Gel colors are superior to liquid dyes as they provide vibrant color without altering the icing consistency.
- Green Sanding Sugar Sprinkles: For that iconic festive sparkle!
Sophie’s Top Tips for Perfect Christmas Tree Cookies
After baking countless batches, I’ve gathered some insights that will guarantee your success:
- Butter Temperature is Crucial: Your butter should be softened to room temperature, meaning it yields slightly to a gentle press but isn’t greasy or melted. This creates a smooth, airy creamed mixture, leading to tender cookies.
- Don’t Overmix: Once you add the flour, mix only until just combined. Overmixing develops gluten, which can result in tough cookies.
- Dough Consistency is Key: The dough should be soft, pliable, and easy to roll out without being overly sticky. Add water a teaspoon at a time until you reach this consistency. If it’s too sticky, a quick chill in the fridge (15-20 minutes) can help.
- Roll Evenly: Aim for a consistent 1/2-inch thickness when rolling. This ensures even baking and prevents thin edges from burning before the center is cooked.
- Watch the Oven, Not the Clock: Cookie ovens vary! Start checking at 7 minutes. The cookies should look matte on top and just slightly puffed. They won’t brown significantly. Pull them out when they’re still soft; they’ll firm up as they cool. Overbaking leads to dry, crumbly cookies.
- Cool Completely Before Icing: This is absolutely non-negotiable. Icing warm cookies will cause the glaze to melt and run, creating a messy result. Patience is a virtue here!
- Icing Consistency Matters: The perfect glaze should drizzle off a spoon and melt back into itself within about 5 seconds. If it’s too thick, add water drop by drop. Too thin? Add sifted powdered sugar teaspoon by teaspoon.
Step-by-Step Guide: Making Your Little Debbie Christmas Tree Sugar Cookies
Let’s get baking! This process is designed to be enjoyable, perfect for a cozy afternoon with family.
- Prep Time: Start by preheating your oven to 350°F (175°C) and lining your baking sheets with silicone mats or parchment paper. This simple step makes cleanup a breeze and helps prevent sticking.
- Cream the Base: In a stand mixer, combine your softened salted butter and powdered sugar. Beat them until they’re light, fluffy, and pale in color. This process incorporates air, giving the cookies a delicate texture.
- Wet Ingredients Join In: Add the egg and the star of the show, the cake batter flavor. Mix until just combined. My experience tells me that overmixing here can make the cookies tough, so be gentle!
- Dry Meets Wet: In a separate bowl, whisk your flour, baking powder, and salt. Gradually add this dry mixture to your wet ingredients on low speed. The dough will look crumbly, which is totally normal.
- Bring it Together: Now, add water, one teaspoon at a time, until the dough forms a soft, cohesive ball. You’ll know it’s right when it’s easy to work with but not sticky. This step requires a little intuition – some days, you might need a tiny bit more water, some days less, depending on the humidity.
- Roll and Cut: Lightly flour your work surface and roll out the dough to about 1/2 inch thick. Use your favorite Christmas tree cookie cutter to create your shapes. Re-roll any scraps to get the most cookies possible!
- Bake to Perfection: Carefully transfer your cut cookies to the prepared baking sheets. Bake for 7-9 minutes. Remember my tip: look for matte tops and a slight puff. They won’t look golden brown, which is exactly what we want for that soft texture.
- Cool Down: Let them cool on the baking sheet for a few minutes before moving them to a wire rack to cool completely. This prevents breakage and ensures they’re ready for icing.
Icing and Decoration: The Festive Finish
This is where the magic truly happens, transforming simple sugar cookies into festive Little Debbie-inspired delights!
- The White Glaze: In a bowl, whisk warm water, corn syrup, and vanilla until combined. Add white food coloring to get a vibrant, opaque white. Then, gradually whisk in sifted powdered sugar until you reach that perfect drizzle consistency (the 5-second rule!). Take out 2 tablespoons of this white icing and set it aside for the red drizzle.
- First Layer of Frosting: Briefly warm the main batch of white icing in the microwave (just a few seconds on low!). This makes it super smooth and easy to spread. Pour or spread it over each cooled cookie, allowing it to coat the entire top.
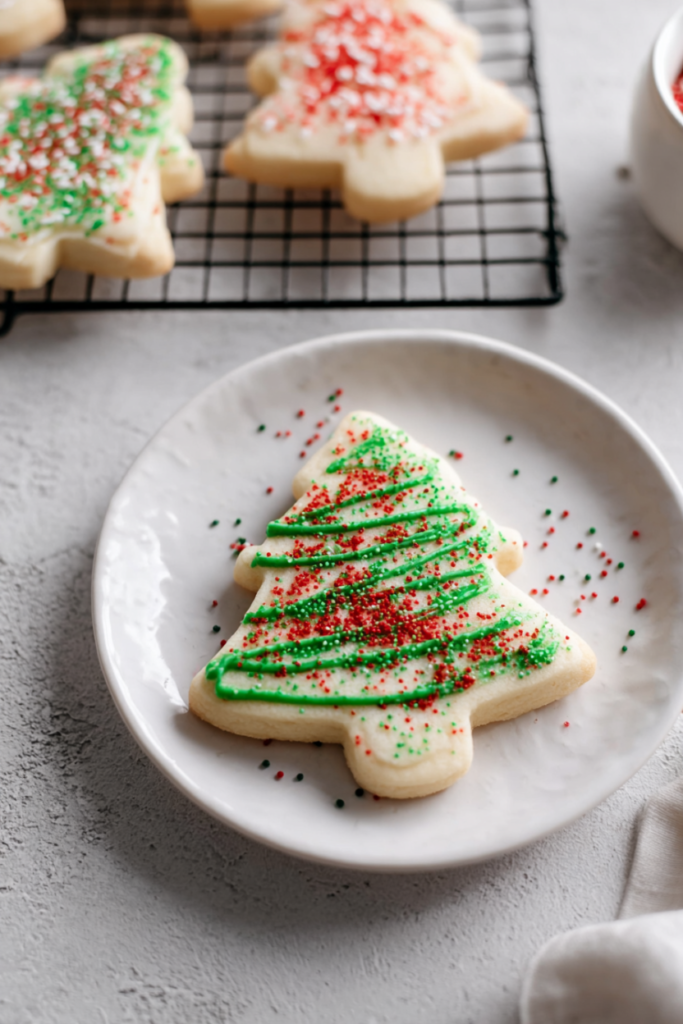
- Green Sparkle: Immediately, while the white icing is still wet, generously sprinkle the green sanding sugar over each cookie. This step is time-sensitive, so have your sprinkles ready!
- Red Zig-Zags: Now, take the 2 tablespoons of reserved white icing and dye it red with your red gel food coloring. Transfer this to a piping bag with a tiny snip at the corner. Once your white icing on the cookies has partially set (it should still be soft but not wet enough to bleed), drizzle the red icing across each tree in that classic zig-zag pattern. This is my favorite part – watching them come to life!
- Patience Pays Off: Let the cookies set completely before stacking or serving. This can take a few hours at room temperature.
Storage and Make-Ahead Tips
These cookies are best enjoyed within 3 days. Store them in an airtight container at room temperature. If stacking, place a piece of parchment paper between layers to prevent the icing from sticking.
Make-Ahead Options:
- Dough: You can prepare the cookie dough up to 3 days in advance. Wrap it tightly in plastic wrap and store it in the refrigerator. Let it come to room temperature for about 15-20 minutes before rolling.
- Baked Cookies (Un-iced): Baked cookies, without icing, can be frozen for up to 2 months. Thaw them at room temperature before proceeding with the icing steps. I don’t recommend freezing them once iced, as the icing can weep or become sticky upon thawing.
Common Questions & Troubleshooting
Even experienced bakers run into snags! Here’s how to tackle common issues:
My cookie dough is too sticky to roll out!
This usually means there’s too much water in your dough, or your butter was too soft. Try adding a tablespoon or two more of flour, mixing it in gently until the dough is more manageable. Alternatively, wrap the dough tightly and chill it in the refrigerator for 20-30 minutes. Cold dough is always easier to handle.
Why are my cookies spreading too much?
Several factors can cause spreading. Ensure your butter wasn’t too warm or melted. Over-creaming butter and sugar can also incorporate too much air, leading to spread. Make sure your oven is preheated to the correct temperature; a too-cold oven allows cookies to spread before setting. Chilling your cut-out cookies for 10-15 minutes on the baking sheet before baking can also significantly help them hold their shape.
My icing is too thick/thin. How do I fix it?
For icing that’s too thick: Add warm water, a tiny drop at a time, stirring well after each addition until you reach the desired consistency.
For icing that’s too thin: Gradually whisk in more sifted powdered sugar, a teaspoon at a time, until it thickens up. Remember, the ideal consistency should flow smoothly off a spoon and melt back into itself within about 5 seconds.
The red drizzle is bleeding into the white icing!
This happens if the white icing isn’t set enough when you apply the red drizzle. You need to allow the white icing to at least partially set and form a slight crust before adding the red. This can take anywhere from 30 minutes to an hour at room temperature, or you can speed it up with a quick chill in the fridge (5-10 minutes).
My cookies are hard and crumbly. What went wrong?
Overbaking is the most common culprit for hard cookies. Remember, these cookies should be slightly pale and just set when they come out of the oven. They will continue to cook slightly on the hot baking sheet and firm up as they cool. Also, too much flour can lead to a dry, crumbly texture, so ensure you’re spooning and leveling your flour rather than scooping it directly from the bag.
Expert Tweaks & Variations
While the classic Little Debbie look is charming, feel free to get creative!
- Different Extracts: Swap the cake batter flavor for almond, lemon, or peppermint extract for different holiday twists.
- Color Changes: Use blue or silver sanding sugar, or experiment with different colored icing drizzles.
- Cookie Cutters: Don’t limit yourself to trees! Stars, snowflakes, or even gingerbread men would be delightful.
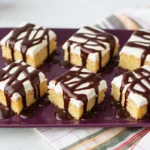
- Chocolate Drizzle: Instead of red icing, drizzle with melted dark or white chocolate for a different flavor profile.
- Mini Chocolate Chips: Gently fold in mini chocolate chips into the dough for a subtle chocolatey crunch.
Pairing Suggestions
These festive cookies are delightful on their own, but they pair wonderfully with a variety of holiday beverages and desserts.
- Warm Beverages: Enjoy them with a steaming mug of hot cocoa, a creamy eggnog latte, or a classic cup of coffee.
- Milk: For the ultimate nostalgic experience, serve them with a cold glass of milk – just like childhood!
- Dessert Platter: Add them to a holiday dessert platter alongside other seasonal treats like gingerbread, fruit tarts, or even some rich brownies for a diverse spread of comfort foods.
Bake Memories This Holiday Season!
Creating these Homemade Little Debbie Christmas Tree Sugar Cookies isn’t just about baking; it’s about crafting memories. The aroma filling your kitchen, the joy of decorating with loved ones, and that first bite of nostalgic sweetness – these are the moments that make the holidays truly special.
From my kitchen here at SweetCraft Recipes to yours, I hope this recipe brings a little extra cheer and deliciousness to your holiday season. These cookies are a testament to the fact that sometimes, the best treats are the ones we make ourselves, filled with fresh ingredients and a whole lot of love.
So roll up your sleeves, gather your family, and get ready to create some festive magic. Don’t forget to share your creations with us – I always love seeing your baking triumphs! Happy baking, and happy holidays!
PrintHomemade Little Debbie Christmas Tree Sugar Cookies

These Homemade Little Debbie Christmas Tree Sugar Cookies are a festive, bakery-style version of the beloved holiday classic — soft, buttery sugar cookies with creamy vanilla icing, green sugar sparkle, and the iconic red drizzle. Sophie’s perfected recipe brings nostalgic joy and homemade warmth to your holiday dessert table! Easy to decorate, freezer-friendly, and absolutely delightful for cookie exchanges or Christmas parties.
- Prep Time: 25 mins
- Cook Time: 8 mins
- Total Time: 33 mins
- Yield: About 24 cookies
- Category: Dessert
- Method: Baking
- Cuisine: American
Ingredients
**For the Cookies:**
1 cup (2 sticks) salted butter, softened
1 cup powdered sugar
1 large egg
½ tablespoon cake batter flavor extract
2 ½ cups all-purpose flour (spooned and leveled)
1 teaspoon baking powder
¼ teaspoon salt
1–2 teaspoons water (as needed for dough)
**For the Icing:**
2 tablespoons very warm water
2 tablespoons light corn syrup
½ teaspoon vanilla extract
White gel food coloring
2–2½ cups powdered sugar, sifted (adjust for consistency)
Red gel food coloring (for drizzle)
Green sanding sugar sprinkles (for decoration)
Instructions
Preheat oven to 350°F (175°C). Line baking sheets with parchment paper or silicone mats.
In a large bowl, cream together softened butter and powdered sugar until light and fluffy.
Beat in the egg and cake batter flavor extract until smooth and combined.
In a separate bowl, whisk together the flour, baking powder, and salt. Gradually add the dry mixture to the butter mixture on low speed.
Add water, 1 teaspoon at a time, until the dough forms a soft, cohesive ball that’s pliable but not sticky.
Roll the dough on a lightly floured surface to ½-inch thickness. Cut out Christmas tree shapes using a cookie cutter.
Transfer shapes to prepared baking sheets and bake for 7–9 minutes, until cookies look matte and slightly puffed (avoid browning).
Cool completely on a wire rack before decorating.
Notes
**Icing & Decoration:**
In a medium bowl, whisk together warm water, light corn syrup, and vanilla. Add a drop of white gel food coloring for brightness.
Gradually add sifted powdered sugar until you reach a smooth, pourable glaze that melts back into itself within 5 seconds.
Remove 2 tablespoons of icing and set aside for the red drizzle.
Gently warm the main icing in the microwave for a few seconds to loosen it. Spread or pour over cooled cookies.
Immediately top with green sanding sugar while icing is still wet.
Tint reserved icing red with gel food coloring and pipe zig-zag lines once the white icing has partially set.
Allow cookies to dry completely before stacking.
**Storage:**
Store in an airtight container at room temperature for up to 3 days. Separate layers with parchment paper.
**Make-Ahead:**
• Dough can be refrigerated for up to 3 days (bring to room temp before rolling).
• Un-iced cookies can be frozen for up to 2 months; thaw before icing.