Hey there, fellow dessert enthusiasts! Sophie here from Sweet Craft Recipes, and oh boy, do I have a treat for you today. If you’re anything like me, you adore the rich, cocoa-infused allure of red velvet, but sometimes, a full-blown cake feels like a production. That’s exactly why I dedicated myself to perfecting these Red Velvet Cake Mix Bars – a delightful hybrid that captures all the magic of red velvet in a ridiculously easy, chewy, and utterly irresistible bar form. And let me tell you, after testing this recipe over nine times (yes, nine!), I’ve cracked the code to pure red velvet bar bliss.
Forget complicated steps and endless ingredient lists. These bars are your go-to for a quick, comforting dessert that tastes like you spent hours slaving away. They’re vibrant, satisfyingly chewy, and loaded with pockets of creamy white chocolate chips that perfectly complement the subtle tang of red velvet. Whether you’re whipping them up for a family gathering, a potluck with friends, or simply a cozy night in, these bars are guaranteed to bring smiles. They embody that classic American comfort food vibe, but with a clever “healthy twist” in terms of simplicity and homemade goodness, rather than processed snacks. It’s about bringing joy and deliciousness to your table with minimal fuss.
Why You’ll Fall Head Over Heels for These Red Velvet Cookie Bars
When I set out to create this recipe, I wanted something that ticked all the boxes: easy, delicious, impressive, and comforting. These Red Velvet Cake Mix Bars deliver on all fronts, and then some!
- Effortless Elegance: Starting with a simple box of red velvet cake mix is our little secret weapon. It cuts down on measuring and ensures a consistent, delicious base every single time, making these bars surprisingly quick to pull together.
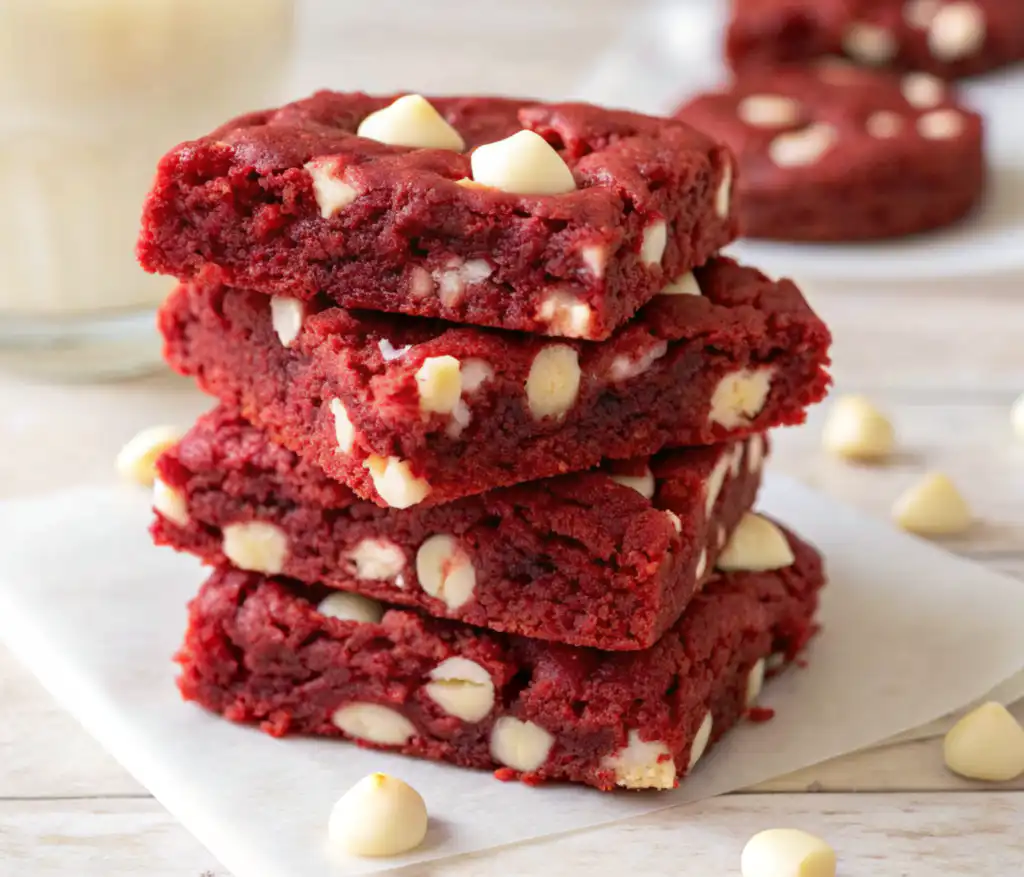
- Irresistibly Chewy Texture: These aren’t your average crumbly cookies or airy cake. They boast a perfectly chewy, dense texture that’s reminiscent of your favorite brownie, but with a distinct red velvet flair. Every bite is a satisfying chew!
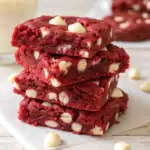
- Vibrant & Visually Stunning: That iconic deep red hue, contrasted with the creamy white chocolate chips, makes these bars an absolute showstopper. They’re picture-perfect for any occasion, from holiday tables to everyday dessert cravings.
- White Chocolate Perfection: The addition of white chocolate chips isn’t just for looks. Their sweet, creamy flavor melts beautifully into the red velvet, creating a harmonious balance that’s pure indulgence. I find it just elevates the whole experience.
- A Comfort Food Dream: There’s something inherently comforting about red velvet. It evokes feelings of warmth, celebration, and pure joy. These bars wrap all those feelings into a convenient, delightful package, perfect for sharing (or secretly hoarding!).
- Proven & Perfected: As I mentioned, I’ve made these more times than I can count – at least nine distinct batches to fine-tune the ratios, baking time, and technique. You’re getting a truly tried-and-tested recipe that works beautifully.
These bars are proof that you don’t need a pastry chef’s degree to create something truly spectacular. They’re a celebration of simple pleasures and big flavors, designed for the busy home cook who still wants to bring incredible homemade desserts to the table.
The Simple Ingredients You’ll Need
One of the best parts about this recipe is its minimal ingredient list. You likely have most of these on hand already, making an impromptu baking session entirely possible!
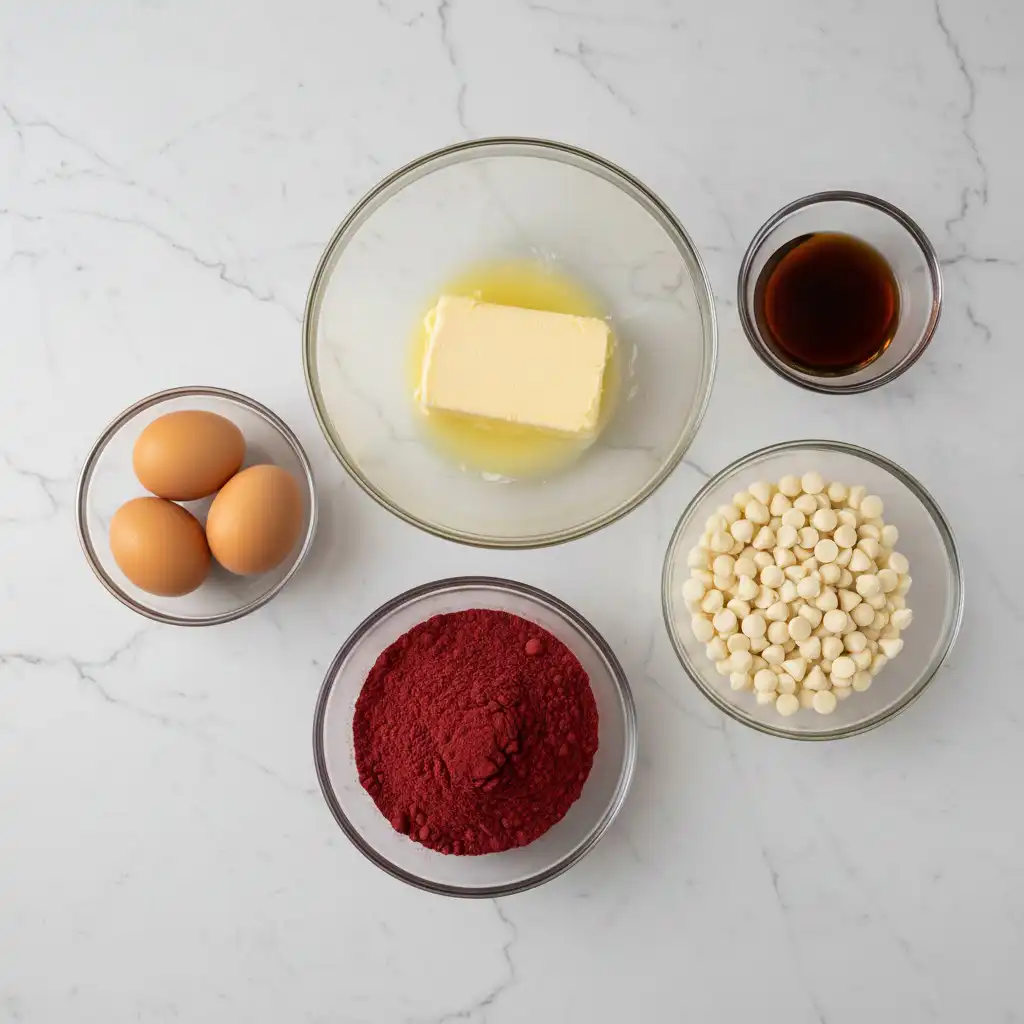
- ½ cup (1 stick) unsalted butter, softened: Softened butter is key here. It creams beautifully with the eggs and vanilla, creating a smooth base that contributes to the bars’ rich, chewy texture. If you forget to set it out, a quick 10-15 seconds in the microwave (not melted!) can do the trick.
- 2 large eggs: These act as a binder and add moisture, contributing to the bar’s structure and chewiness. Ensure they’re at room temperature for better incorporation.
- 1 teaspoon pure vanilla extract: Don’t skip the vanilla! It enhances the flavor of the red velvet and chocolate, adding that comforting, classic bakery aroma. Always use pure vanilla for the best taste.
- 1 (15.2 oz) box red velvet cake mix (standard size): This is our superstar shortcut! It provides all the dry ingredients, including the cocoa, sugar, and iconic red coloring, in one convenient package. Any good quality brand will work.
- 2 cups white chocolate chips, divided: We’ll fold most of these into the dough and reserve a few for sprinkling on top. White chocolate is the perfect sweet, creamy counterpoint to the red velvet. I generally prefer a good quality brand for melting and taste.
That’s it! Just five simple ingredients stand between you and a pan of these incredible Red Velvet Cake Mix Bars.
Step-by-Step: How to Make Red Velvet Cake Mix Bars
Ready to get baking? Here’s how we bring these beauties to life. Follow these steps carefully for the best results, just as I’ve perfected them in my kitchen.
1. Prepare Your Pan & Preheat Oven
First things first, let’s get that oven ready! Preheat your oven to a cozy 350°F (175°C).
Next, line a 9×13 inch metal baking pan with parchment paper. I can’t stress enough how much a metal pan helps with even baking compared to glass. Make sure the parchment paper extends over the sides of the pan – this creates a handy “sling” that will make lifting the cooled bars out incredibly easy.
2. Cream Your Wet Ingredients
In a large mixing bowl, grab your hand mixer and combine the softened butter, large eggs, and pure vanilla extract. Blend them together until the mixture is smooth, creamy, and well combined. This step ensures a consistent base for your dough.
3. Incorporate the Cake Mix
Now for our shortcut hero! Gradually add the entire box of red velvet cake mix to your wet ingredients. Switch from the hand mixer to a sturdy spatula at this point. Gently stir until the cake mix is just combined with the wet ingredients. The dough will be remarkably thick and a bit stiff – this is perfectly normal! Avoid the temptation to overmix, as this can lead to tougher bars.
4. Fold in the White Chocolate Chips
Take a moment to reserve about 3 tablespoons of white chocolate chips. These are for sprinkling on top later. Now, gently fold the remaining white chocolate chips into the thick red velvet batter until they are evenly distributed throughout the dough.
5. Spread the Dough & Top with Chips
Scooping this thick dough into the pan can be a little tricky, but I have a pro tip: instead of trying to plop it all in one go, scoop the dough into three roughly equal portions – one in the center of the pan and one on each side. This strategy makes it much easier to spread.
Now, using the back of a large spoon, a sturdy spatula, or even clean, slightly damp hands (my personal favorite method for this thick dough!), gently press and spread the dough evenly across the bottom of the prepared pan. Once it’s an even layer, sprinkle those reserved 3 tablespoons of white chocolate chips over the top for a beautiful finish.
6. Bake to Perfection
Slide your pan into the preheated oven and bake for 18-22 minutes. You’ll know they’re done when the top looks set, and a toothpick inserted into the center comes out with moist crumbs clinging to it, but no wet batter. Be vigilant here! Overbaking is the enemy of chewy bars and can lead to a dry, crumbly texture. Start checking around 18 minutes.
7. Cool Completely
This is arguably the hardest step: patience! Allow the cookie bars to cool fully in the pan on a wire rack. Resist the urge to cut into them while they’re warm. Cooling completely is crucial; it allows the bars to set properly, firm up, and become perfectly sliceable. Once cool, use the parchment paper sling to lift them out of the pan and cut them into squares.
Sophie’s Expert Tips for Red Velvet Cake Mix Bar Success
After countless batches and a few learning curves, I’ve gathered some essential tips to ensure your Red Velvet Cake Mix Bars turn out perfectly every single time.
- Mind Your Butter Temperature: Using truly softened butter (not melted!) is vital. It creams better, incorporates more smoothly, and contributes to the overall tender, chewy texture of the bars. If it’s too cold, it won’t combine properly; if it’s too warm/melted, your dough will be greasy.
- Don’t Overmix the Dough: Once you add the cake mix, mix only until just combined. Overmixing develops gluten, which can lead to tough, rather than chewy, bars. A sturdy spatula is your best friend here.
- The Power of Parchment Paper: Seriously, don’t skip lining your pan with parchment paper, leaving those overhangs. It makes removing the entire slab of bars incredibly easy and ensures none stick to the pan.
- Metal Pan for the Win: As mentioned in the recipe, a metal baking pan conducts heat more efficiently and evenly than glass. This helps prevent burnt edges and an undercooked center, giving you a perfectly baked bar.
- Spreading Thick Dough: This dough is intentionally thick, almost like a very firm cookie dough. While a spatula or the back of a spoon works, I’ve found that slightly damp, clean hands are actually the most effective tool for pressing and spreading the dough evenly into the pan. Just make sure your hands are clean!
- Watch the Baking Time Closely: Oven temperatures can vary, so the 18-22 minute range is a guide. Start checking at 18 minutes. The bars are done when the edges are lightly set and the center no longer looks wet, but not dry. A toothpick test (moist crumbs, not wet batter) is your indicator. Overbaking will lead to dry, less satisfying bars.
- Cooling is Crucial: Resist the temptation to cut into warm bars! They need to cool completely to set properly and firm up for clean, beautiful slices. Patience, my friend, patience!
Creative Variations to Customize Your Bars
While the classic white chocolate chip version is a winner, these Red Velvet Cake Mix Bars are incredibly versatile. Here are some ideas to make them uniquely yours:
- Frosting Fun: Once cooled, these bars are absolutely divine topped with a simple cream cheese frosting (the classic red velvet pairing!), a dusting of powdered sugar, or a decadent chocolate drizzle. For an extra special touch, a scoop of vanilla bean ice cream turns these into an amazing dessert experience.
- Mix-in Medley: Get creative with other mix-ins!
- Nuts: Chopped pecans or walnuts add a delightful crunch and earthy flavor.
- Peanut Butter Chips: For a rich, nutty twist that pairs surprisingly well with red velvet.
- Shredded Coconut: Adds a tropical hint and chewy texture.
- Different Chocolates: Swap out the white chocolate chips for semi-sweet, milk chocolate, or even dark chocolate chips for varying degrees of sweetness and intensity. Mini chocolate chips are also a fun option for more even distribution.
- Swirl it Up: For a visual and textural variation, after spreading the dough, dollop spoonfuls of softened cream cheese frosting (or even a little melted Nutella) on top and swirl gently with a knife before baking.
- Flavor Boosters: A pinch of espresso powder added to the wet ingredients can deepen the chocolate flavor without making it taste like coffee. A tiny bit of almond extract can also add a unique, sophisticated note.
Don’t be afraid to experiment! These bars are forgiving and delicious, no matter how you choose to personalize them.
Storage and Freezing Instructions
To keep your Red Velvet Cake Mix Bars fresh and delicious:
- Room Temperature: Once they’ve completely cooled, store the cookie bars in an airtight container at room temperature for up to one week. They retain their chewiness and flavor beautifully.
- Freezing: For longer storage, these bars freeze exceptionally well! After cooling, you can wrap individual bars or the entire slab tightly in plastic wrap, then place them in a freezer-safe bag or container. They will stay fresh for up to three months. To enjoy, simply allow them to thaw at room temperature. This makes them perfect for meal prep or having a quick dessert on hand for unexpected guests!
Common Questions About Red Velvet Cake Mix Bars (FAQs)
Can I use a different size cake mix for these Red Velvet Bars?
This recipe is formulated for a standard 15.2 oz box of red velvet cake mix. While you might be able to adapt it, altering the cake mix size would likely require precise adjustments to the butter, eggs, and vanilla to maintain the correct dough consistency. For best results and the perfect chewy texture, sticking to the specified size is highly recommended. If you absolutely must use a different size, you may need to add more or less butter/eggs gradually until a thick, spreadable dough is achieved, similar to a very thick cookie dough. My multiple tests guarantee consistency with the specified size.
How do I prevent my Red Velvet Cake Mix Bars from becoming dry or crumbly?
The absolute key to moist, chewy bars is to avoid overbaking. Start checking for doneness at the 18-minute mark. The bars are ready when the top looks set, and a toothpick inserted into the center comes out with moist crumbs, not wet batter, and certainly not completely clean and dry. Baking in a metal pan (as suggested) also helps with even heat distribution, preventing dry edges and a raw center. Finally, allowing them to cool completely in the pan helps them set and retain moisture. Don’t rush the cooling process!
Can I make these Red Velvet Cake Mix Bars without white chocolate chips?
Absolutely! While white chocolate chips provide a delightful contrast and creamy sweetness, you can certainly customize this recipe. Consider using semi-sweet chocolate chips, milk chocolate chips, peanut butter chips, or even nuts like chopped pecans or walnuts for a different flavor profile. For a simpler bar, you can omit all mix-ins, though the texture will be slightly less dense. You could also swirl in cream cheese frosting post-baking for an extra decadent touch, or sprinkle with crushed Oreos!
What’s the best way to store Red Velvet Cake Mix Bars to keep them fresh?
Once completely cooled, store your red velvet bars in an airtight container at room temperature for up to one week. To freeze them for longer storage (up to 3 months), wrap individual bars or the entire slab tightly in plastic wrap, then place them in a freezer-safe bag or container. Thaw at room temperature before serving. This prevents them from drying out, becoming stale, or absorbing freezer odors.
More Irresistible Cookie Recipes from Sweet Craft Recipes
If you loved these Red Velvet Cake Mix Bars, you’re in for a treat! As a passionate cookie and bar developer, I’ve got a whole collection of recipes that are equally delightful and satisfying. Here are some of my top recommendations you might enjoy exploring next:
- Stuffed Red Velvet Cookies: If you can’t get enough red velvet, my Stuffed Red Velvet Cookies take the classic to a whole new level of decadence. They are truly irresistible!
- Pistachio NYC Cookies: For a unique and incredibly chewy experience, try my Pistachio NYC Cookies. They’re big, bold, and bursting with flavor.
- Peanut Butter Nutella Cookies: Craving a classic combo? My Peanut Butter Nutella Cookie Recipe is a perennial favorite for a reason.
- White Chocolate Stuffed Cookies: If you’re a fan of white chocolate, you’ll adore these rich and gooey White Chocolate Stuffed Cookies.
Each of these recipes has been tested multiple times to ensure they deliver on flavor, texture, and pure baking joy. Just like these Red Velvet Cake Mix Bars, they’re designed for home cooks who appreciate delicious results without unnecessary complexity.
Final Thoughts from Sophie
These Red Velvet Cake Mix Bars have truly become a staple in my home. They hit that sweet spot between classic comfort and modern convenience, allowing me to bring a truly special dessert to the table without any stress. The rich red velvet flavor combined with the creamy white chocolate is just magic, and the chewy texture is simply addictive.
I genuinely hope you try this recipe and fall in love with it as much as I have. It’s a wonderful way to enjoy the beloved flavors of red velvet in an approachable, easy-to-share format. Bake a batch today, share them with your loved ones, and savor every single bite. Happy baking, everyone!
PrintRed Velvet Cake Mix Bars
These incredibly easy Red Velvet Cake Mix Bars are a dream come true for dessert lovers! Chewy, vibrant, and bursting with white chocolate chips, they offer all the decadent flavor of red velvet cake in a convenient bar form. Perfect for family gatherings, potlucks, or a cozy night in, they come together quickly using a simple cake mix base. Sophie has tested this recipe over nine times to ensure perfection!
- Prep Time: 15
- Cook Time: 20
- Total Time: 1 hour 35 minutes
- Yield: 10 servings
- Category: Dessert, Bars, Cookies
- Method: Baking
- Cuisine: American
Ingredients
½ cup (1 stick) unsalted butter, softened
2 large eggs
1 teaspoon pure vanilla extract
1 (15.2 oz) box red velvet cake mix (standard size)
2 cups white chocolate chips, divided
Instructions
1. Preheat your oven to 350°F (175°C). Line a 9×13 inch metal baking pan with parchment paper, allowing the paper to extend over the sides to create a ‘sling’ for easy removal. A metal pan is preferred for even baking.
2. In a large mixing bowl, use a hand mixer to blend the softened butter, eggs, and vanilla extract until smooth and well combined.
3. Gradually add the red velvet cake mix to the wet ingredients. Using a sturdy spatula, slowly stir until just combined. The dough will be very thick and a bit stiff; avoid overmixing.
4. Reserve about 3 tablespoons of white chocolate chips for topping. Fold the remaining white chocolate chips into the thick batter until evenly distributed.
5. Scoop the thick dough into the prepared pan in three roughly equal portions: one in the center and one on each side. This helps with even spreading. Using the back of a large spoon, a spatula, or clean, slightly damp hands, gently press and spread the dough evenly across the bottom of the pan. Sprinkle the reserved 3 tablespoons of white chocolate chips over the top.
6. Bake for 18-22 minutes, or until the top is set and a toothpick inserted into the center comes out with moist crumbs, but no wet batter. Be careful not to overbake, as this can lead to dry bars.
7. Allow the cookie bars to cool fully in the pan on a wire rack before lifting them out using the parchment paper sling and cutting into squares. Cooling completely ensures they set properly and are easier to slice.
Notes
Red Velvet Cake Mix Cookie Bars are also delicious topped with frosting, powdered sugar, a chocolate drizzle, or even ice cream!
You can customize this recipe by including other mix-ins such as nuts, peanut butter chips, or shredded coconut.
You can also switch out the white chocolate chips with other chocolate chips.
This recipe bakes best in a metal baking pan, since metal pans cook more evenly than glass.
This is a thick cookie dough. You can spread it with the back of a large spoon or a spatula, but I found clean, slightly damp hands work best.