Hey there, fellow cookie lovers! Sophie here, and if you’re anything like me, the mere mention of “Red Velvet Gooey Butter Cookies” instantly conjures images of vibrant colors, rich flavors, and that oh-so-satisfying melt-in-your-mouth texture. There’s just something inherently joyful about a red velvet dessert, isn’t there? It’s a classic for a reason, and when you combine it with the irresistible chewiness of a gooey butter cookie, you’ve got a recipe for pure happiness.

As a recipe developer for SweetCraft Recipes, I’m always on the hunt for those truly special treats that are not only delicious but also bring a touch of magic to any occasion. And trust me when I say, these cookies are pure magic. I’ve personally tested and perfected this Red Velvet Gooey Butter Cookie recipe over 9 times in my own kitchen, meticulously tweaking every detail to ensure you get perfect results every single time. My goal? To deliver a cookie that’s easy enough for any home cook but tastes like it came straight from a gourmet bakery.
Forget complicated steps or endless ingredients. This recipe is designed to be straightforward, delivering maximum flavor with minimal fuss. Whether you’re baking for a festive holiday gathering, a cozy family night, or just craving a little comfort on a chilly afternoon, these cookies are your new go-to. They combine the best parts of a classic red velvet cake – that subtle cocoa, the tangy cream cheese, the dramatic red hue – with the uniquely soft, chewy, and deeply satisfying character of a St. Louis gooey butter cookie. The result? A stunning, delicious, and incredibly satisfying cookie that everyone will adore.
Ready to dive into Sophie’s secret to the most irresistible Red Velvet Gooey Butter Cookies you’ll ever bake? Let’s get baking!
Why Sophie’s Red Velvet Gooey Butter Cookies Are THE One You Need to Make
What makes these cookies stand out from the crowd? It’s not just their show-stopping red color or their crinkly, powdered-sugar top. It’s the perfect balance of flavors and textures, meticulously refined to achieve cookie perfection.
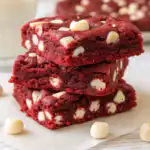
- Unrivaled Gooey Center: This isn’t just a red velvet cookie; it’s a gooey butter red velvet cookie. That means a divinely soft, almost fudgy center that melts in your mouth with every bite. It’s a texture sensation that combines the chewiness of a brownie with the tenderness of a classic cookie.
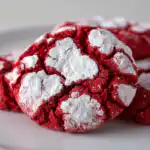
- Vibrant Red Hue: Thanks to the right amount of food coloring (and Sophie’s tips on achieving the best color), these cookies boast that iconic red velvet look, making them incredibly festive and appealing. They’re an instant eye-catcher on any dessert platter!
- Perfectly Balanced Flavor: The subtle hint of cocoa pairs beautifully with the tangy cream cheese, creating a rich, complex flavor that’s utterly addictive. It’s not overly sweet, allowing the nuanced flavors to shine through.
- Ease of Preparation: Don’t let their gourmet appearance fool you. This recipe uses simple ingredients and straightforward steps, making it accessible for bakers of all skill levels. The only “trick” is patience with the chilling time – but it’s worth every minute!
- Crowd-Pleasing Comfort: There’s a reason comfort food favorites like gooey butter cookies are trending. They evoke warmth, nostalgia, and pure joy. These cookies are a delightful twist on a classic, offering a comforting embrace in every bite, perfect for family gatherings and making lasting memories.
I’ve tested this recipe time and time again to iron out any kinks, ensuring you have a foolproof guide to success. From the exact ratios of dry to wet ingredients to the optimal chilling and baking times, I’ve got you covered.
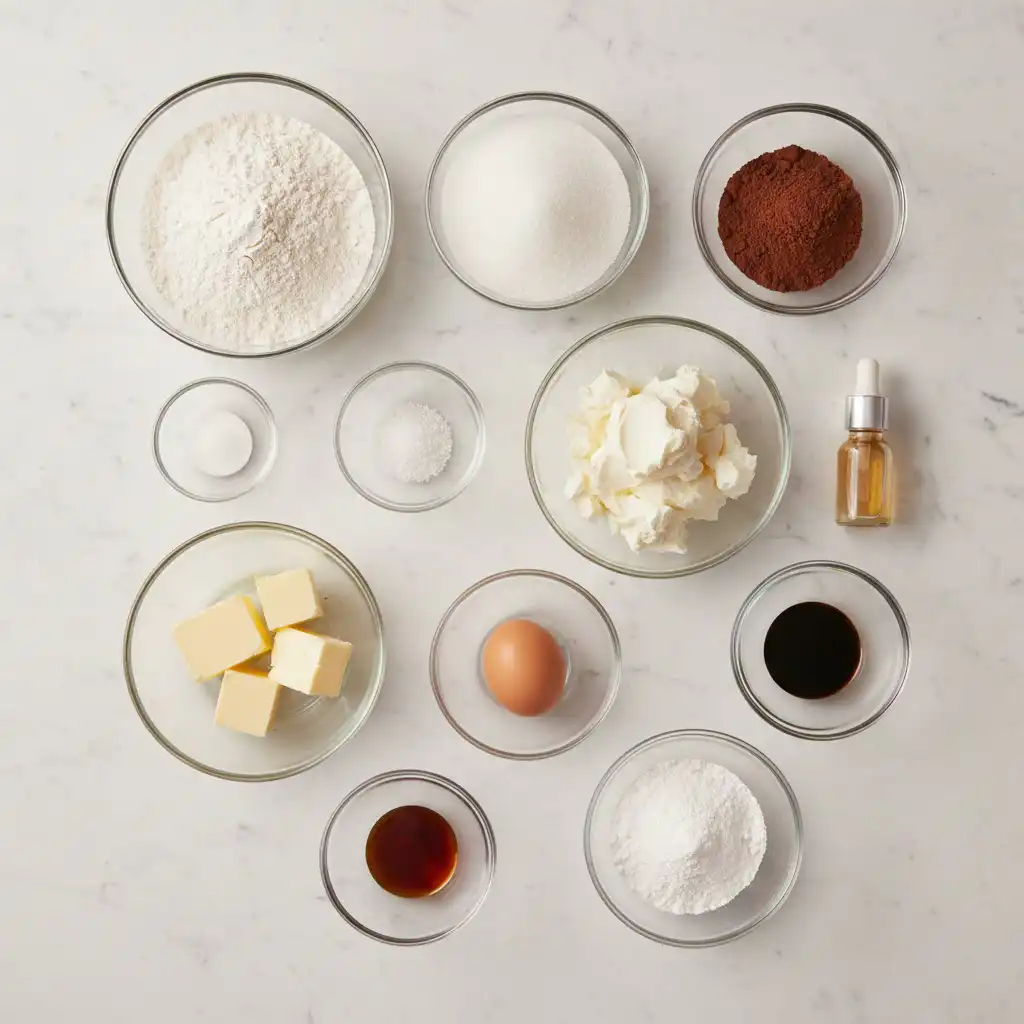
Essential Ingredients for Your Red Velvet Masterpiece
One of the beauties of these cookies is that they come together with readily available pantry staples. But as any experienced baker knows, the quality and preparation of your ingredients can make all the difference. Here’s what you’ll need, along with Sophie’s insights:
- All-Purpose Flour: The structural backbone of our cookies. Don’t overmeasure! Spoon and level your flour for accuracy to avoid a dry, tough cookie.
- Granulated White Sugar: Provides sweetness and contributes to the cookie’s tender texture.
- Unsweetened Cocoa Powder: This is what gives red velvet its signature subtle chocolate flavor and depth. Use a good quality cocoa powder for the best results.
- Baking Powder: Our leavening agent, ensuring a soft, slightly puffy cookie that still maintains its gooey center.
- Salt: A crucial flavor enhancer. It balances the sweetness and brings out the richness of the cocoa and cream cheese.
- Cream Cheese (8 ounces), at room temperature: This is the star of the “gooey butter” part! Make sure it’s genuinely at room temperature so it creams smoothly with the butter, creating a cohesive, tender dough. Cold cream cheese will result in lumpy dough.
- Unsalted Butter (4 tablespoons / ½ stick), at room temperature: Like the cream cheese, room temperature butter is non-negotiable for a smooth, well-incorporated dough. Unsalted allows you to control the salt content precisely.
- Large Egg: Acts as a binder and adds richness to the cookies. Ensure it’s also at room temperature for better emulsification.
- Vanilla Extract: A classic flavor pairing with red velvet and cocoa. Use pure vanilla for the best taste.
- Red Food Coloring (1 tablespoon or red gel color): This is where the magic happens! For the most vibrant, professional-looking red, I highly recommend using a gel food coloring over liquid. Gel is more concentrated and won’t thin out your dough. Start with a smaller amount (e.g., ½ teaspoon gel) and add more until you reach your desired intense red hue.
- Powdered Sugar (1/2 cup): For rolling the dough balls, creating that beautiful crinkled, snowy finish that’s iconic to gooey butter cookies.
Sophie’s Pro Tip for Ingredient Prep: Always lay out all your ingredients before you start. This “mise en place” ensures you don’t forget anything and that temperature-sensitive ingredients like cream cheese, butter, and eggs have ample time to reach the perfect room temperature. It makes a huge difference in the final texture of your cookies!
Step-by-Step Guide: Crafting Your Perfect Red Velvet Gooey Butter Cookies
Baking these festive treats is a delightful process. Follow these detailed steps for guaranteed success!
- Prep Your Dry Mix: In a medium-sized bowl, take your time to thoroughly whisk together the all-purpose flour, granulated sugar, unsweetened cocoa powder, baking powder, and salt. Whisking ensures all the dry ingredients are evenly distributed, so you don’t end up with pockets of leavener or salt. Set this bowl aside for now.
- Cream the Wet Wonders: In a large mixing bowl, grab your electric hand mixer. Start by beating the room temperature cream cheese and butter until the mixture is incredibly smooth, light, and fluffy. This can take 2-3 minutes. Next, beat in your room temperature large egg, followed by the vanilla extract and, most importantly, the red food coloring. Continue beating until the color is consistent throughout and absolutely vibrant. This is your chance to get that show-stopping red!
- Combine and Chill: Slowly add the dry ingredients from your medium bowl into the wet cream cheese mixture. Beat on low speed just until the dough comes together. The key here is to avoid overmixing, which can lead to tough cookies. As soon as you see no streaks of flour, stop. The dough will be soft and slightly sticky. Cover the bowl tightly with plastic wrap and transfer it to the refrigerator. This chilling step is CRUCIAL – don’t skip it! Chill the dough for at least 2 hours. This firms up the dough, making it easier to handle and preventing your cookies from spreading too much in the oven, ensuring that signature gooey center.
- Oven and Tray Prep: When your dough is nearing the end of its chilling time, preheat your oven to 350°F (175°C). Line two large baking sheets with parchment paper. This prevents sticking and makes cleanup a breeze. Pour your ½ cup of powdered sugar into a shallow bowl – this is for coating your cookie dough balls.
- Roll and Coat with Love: Now for the fun part! Take your chilled dough out of the fridge. Scoop out portions of dough, about 1 tablespoon each. Roll these portions into neat, smooth balls between the palms of your hands. Then, gently but thoroughly roll each dough ball in the powdered sugar, ensuring it’s completely coated. The more sugar, the better the crinkle! Place the generously coated dough balls onto your prepared baking sheets, making sure to leave at least 3 inches between each cookie. They will spread!
- Bake to Gooey Perfection: Carefully place your baking sheets into the preheated oven. Bake for 10 to 12 minutes. Pay close attention during these last few minutes! You want the edges of the cookies to be just set, but the centers should still look soft, slightly puffed, and gloriously gooey. They might even look a little underdone, and that’s exactly what we’re going for. Overbaking will eliminate the gooey factor.
- Cooling and Storing: As soon as they come out of the oven, transfer the hot cookies to wire racks to cool completely. They will continue to set up as they cool, achieving that perfect balance of crispy edge and gooey interior. Once fully cooled, store your Red Velvet Gooey Butter Cookies in an airtight container at room temperature for up to 3 days. If you manage to make them last that long!
Red Velvet Gooey Butter Cookies Recipe
These Red Velvet Gooey Butter Cookies are a holiday showstopper! With a vibrant red hue, a soft, chewy texture, and that irresistible gooey center, Sophie’s perfectly tested recipe makes baking these festive treats a breeze. They’re like a brownie and a cookie had a delicious baby, coated in a delightful powdered sugar crackle. Perfect for sharing with family and friends or savoring solo!
- Prep Time: 30
- Cook Time: 12
- Total Time: 162
- Yield: 36 cookies
- Category: Dessert
- Method: Bake
- Cuisine: American
Ingredients
2¼ cups all purpose flour
2 cups granulated white sugar
2 tablespoons unsweetened cocoa powder
2 teaspoons baking powder
1/2 teaspoon salt
8 ounces cream cheese, at room temperature
4 tablespoons (½ stick) unsalted butter, at room temperature
1 large egg
1 teaspoon vanilla extract
1 tablespoon red food coloring (or use red gel color, to desired hue)
1/2 cup powdered sugar
Instructions
1. In a medium bowl, whisk together the flour, granulated sugar, cocoa, baking powder, and salt.
2. In a large bowl, use an electric hand mixer to beat the cream cheese and butter until smooth. Beat in the egg, food coloring and vanilla.
3. Add the dry ingredients to the creamed mixture and beat until the dough comes together. Cover with plastic wrap and chill the dough for at least 2 hours.
4. When ready to bake, preheat the oven to 350 degrees F. Line two baking sheets with parchment paper. Place the powdered sugar in a shallow bowl.
5. Roll the dough into balls (about 1 tablespoon each). Roll the dough balls in the powdered sugar, then place on the baking sheets at least 3 inches apart. Bake until the edges of the cookies are set, 10 to 12 minutes. Transfer the cookies to racks to cool completely. Store the cookies in an airtight container for up to 3 days.
Notes
For the best results, ensure your cream cheese and butter are truly at room temperature. Don’t skip the chilling step—it’s essential for preventing your cookies from spreading too much and helps achieve that perfect gooey texture. When baking, watch for the edges to set, but keep the centers soft. They’ll firm up as they cool!
Sophie’s Expert Tips & Troubleshooting for Cookie Perfection
Even with a tried-and-true recipe, a few insider tips can elevate your baking from good to extraordinary. Here are my secrets for truly perfect Red Velvet Gooey Butter Cookies:
- The Power of Room Temperature: I can’t stress this enough! Cream cheese, butter, and eggs that are truly at room temperature (soft but not melted) will emulsify beautifully, creating a smooth, homogenous dough that bakes evenly and yields a superior texture. Plan ahead and take them out of the fridge at least an hour before you start.
- Chill Time is Non-Negotiable: That 2-hour chilling time isn’t just a suggestion; it’s a critical step. Cold dough prevents excessive spreading, ensures those beautiful crinkles, and locks in that signature gooey center. If your kitchen is warm, or your dough feels too soft after 2 hours, chill it longer. You can even chill the dough overnight!
- Don’t Fear the Gel: For that deep, captivating red velvet color, gel food coloring is your best friend. It provides intense pigment without adding extra liquid to your dough, which could alter the texture. Start with a little, mix, and add more until you achieve your desired shade.
- Roll Generously in Powdered Sugar: Don’t be shy with the powdered sugar coating! This creates the beautiful white crackled finish and helps maintain the cookie’s shape while baking. Rolling twice can even enhance this effect.
- The Art of Not Overbaking: This is perhaps the most crucial tip for achieving the “gooey” in gooey butter cookies. The cookies should look slightly underdone in the center when you pull them from the oven. The edges will be set, but the middle will still be very soft. They will firm up considerably as they cool. This is how you get that incredible, melt-in-your-mouth texture.
- Spacing is Key: Give your cookies ample space on the baking sheet. They do spread, and crowding them will cause them to bake unevenly or stick together. Three inches apart is a good rule of thumb.
Troubleshooting Common Issues:
- Why are my cookies flat? This is usually due to insufficient chilling time, over-soft butter/cream cheese, or over-mixing the dough. Ensure ingredients are correctly tempered and the dough is thoroughly chilled.
- My cookies aren’t very red. You might be using liquid food coloring, which is less concentrated, or simply not enough. Switch to gel food coloring and add it gradually until you reach a vibrant hue.
- The cookies are tough/dry. Over-measuring flour or over-mixing the dough are common culprits. Use the spoon-and-level method for flour and stop mixing as soon as the dry ingredients are just incorporated. Overbaking can also dry them out quickly.
Serving Suggestions & Storage: Enjoying Every Crinkly Bite!
These Red Velvet Gooey Butter Cookies are delicious on their own, but here are some ideas to elevate your cookie experience:
- Warm & Wonderful: A slightly warm cookie is pure bliss! Pop a cooled cookie in the microwave for 10-15 seconds for that fresh-from-the-oven gooeyness.
- With a Cold Glass of Milk: The classic pairing for any cookie, and these are no exception.
- Coffee or Tea Companion: Perfect for an afternoon pick-me-up or a cozy evening treat.
- Ice Cream Sandwich: For an extra indulgent dessert, sandwich a scoop of vanilla bean or cream cheese ice cream between two cookies. Divine!
- Holiday Dessert Platter: Their vibrant red color makes them a standout on any festive spread. Combine them with other holiday favorites for an impressive display.
Storage:
Store cooled Red Velvet Gooey Butter Cookies in an airtight container at room temperature for up to 3 days. For longer storage, you can freeze the baked cookies for up to 2-3 months. Thaw them at room temperature or gently warm them in the microwave for a few seconds.
You can also freeze the unbaked dough balls (after rolling in powdered sugar!) for up to 3 months. Place them on a baking sheet in the freezer until solid, then transfer to a freezer-safe bag. Bake directly from frozen, adding a couple of extra minutes to the baking time.
Beyond the Red: Creative Variations & Customizations
While Sophie’s classic Red Velvet Gooey Butter Cookies are perfect as they are, don’t hesitate to get creative! Here are a few ideas to make them uniquely yours:
- Chocolate Drizzle: Once cooled, melt some white chocolate or dark chocolate and drizzle it over the cookies for an extra layer of decadence and visual appeal.
- Cream Cheese Glaze: For an even more intense cream cheese flavor, whisk together a simple glaze of powdered sugar, a touch of milk, and a hint of cream cheese. Drizzle over cooled cookies.
- Minty Twist: Add ¼ teaspoon of peppermint extract along with the vanilla for a festive mint-chocolate red velvet cookie.
- Nutty Crunch: Fold in ½ cup of chopped pecans or walnuts into the dough for added texture.
- Different Extracts: Experiment with almond extract for a marzipan-like nuance, or even a touch of orange zest for a bright, citrusy note that complements the cocoa.
- Holiday Sprinkles: Before baking, gently press some festive sprinkles onto the powdered sugar-coated dough balls for an extra pop of color and fun.
If you enjoy experimenting with cookie flavors, you might love exploring other unique combinations from SweetCraft Recipes. Imagine the rich indulgence of a Stuffed Red Velvet Cookies Recipe – a delicious cousin to these gooey butter cookies! Or perhaps the satisfying crunch of our Pistachio NYC Cookies Recipe if you’re looking for a different texture. For a classic comfort combo, our Peanut Butter Nutella Cookie Recipe is always a hit, and for another stuffed surprise, don’t miss our White Chocolate Stuffed Cookies! Each offers a distinct experience, perfect for expanding your baking repertoire.
The Enduring Appeal of Gooey Butter: A Nod to Comfort
The original gooey butter cake, hailing from St. Louis, Missouri, is a comfort food legend. Its dense, chewy, almost custard-like bottom layer topped with a sweet, rich, and “gooey” top is pure indulgence. These cookies capture that same spirit in a more portable, bite-sized form. They fulfill that universal craving for something sweet, satisfying, and utterly delicious – a testament to simple ingredients coming together to create something truly magical.
In a world where trends come and go, the demand for comforting, familiar flavors remains strong. These Red Velvet Gooey Butter Cookies tap into that desire for warmth, nostalgia, and a touch of homemade goodness. They bridge the gap between a rich brownie and a soft cookie, offering the best of both worlds with a vibrant red velvet twist that makes them perfect for any celebration, big or small.
Frequently Asked Questions About Red Velvet Gooey Butter Cookies
Got more questions? Here are answers to some of the most common queries about baking these delightful cookies, straight from Sophie’s kitchen:
Why are my gooey butter cookies flat?
Flat gooey butter cookies are often caused by dough that wasn’t chilled long enough, or by butter and cream cheese that were too warm when mixed. Ensure your dough chills for at least 2 hours as Sophie recommends, and that your butter and cream cheese are at room temperature but not melted. Over-mixing the dough can also lead to excess air, which collapses during baking, so mix only until just combined.
Can I make red velvet gooey butter cookies ahead of time?
Absolutely! You can prepare the dough up to 2-3 days in advance and store it tightly covered in the refrigerator. When you’re ready to bake, simply roll the chilled dough in powdered sugar and proceed with the baking instructions. Baked cookies can also be stored in an airtight container for up to 3 days at room temperature, or frozen for longer storage.
What is the secret to perfectly gooey butter cookies?
The secret lies in a few key steps: using cream cheese in addition to butter for that rich, tender crumb; properly chilling the dough for at least 2 hours to prevent spreading; and crucially, not overbaking them. You want the edges to be just set, with the centers still looking soft and slightly underdone. They will continue to set as they cool, leaving you with that signature gooey texture.
Can I use gel food coloring instead of liquid?
Yes, Sophie highly recommends using gel food coloring for a more vibrant red hue without adding too much liquid to your dough. Start with a smaller amount and add more until you reach your desired color intensity. Gel coloring is more concentrated, so a little goes a long way!
Do I need to use unsalted butter?
While salted butter can work in a pinch, unsalted butter is preferred because it gives you precise control over the salt content in your recipe. Different brands of salted butter have varying amounts of salt, which can throw off the balance of your cookies. If you must use salted butter, omit the 1/2 teaspoon of added salt from the recipe.
How do I know when the cookies are done baking?
Look for the edges to be just lightly golden and set, while the centers still appear very soft and slightly puffed. If they look completely firm and dry in the center, they’ve likely been overbaked and will lose their signature gooey texture. Remember, they continue to cook slightly and firm up as they cool on the baking sheet and wire rack.
Ready to Bake Your New Favorite Cookies?
There you have it – my perfectly tested, utterly irresistible Red Velvet Gooey Butter Cookies! This recipe isn’t just about baking; it’s about creating moments, sharing joy, and indulging in that wonderful sense of comfort that only a homemade treat can bring. Whether you’re a seasoned baker or just starting your culinary journey, I’m confident this recipe will become a cherished favorite in your home.
So, gather your ingredients, put on your favorite baking playlist, and get ready to fill your kitchen with the glorious aroma of these festive, melt-in-your-mouth cookies. Don’t forget to share your creations with us at SweetCraft Recipes – we love seeing your baking triumphs! Happy baking, everyone!