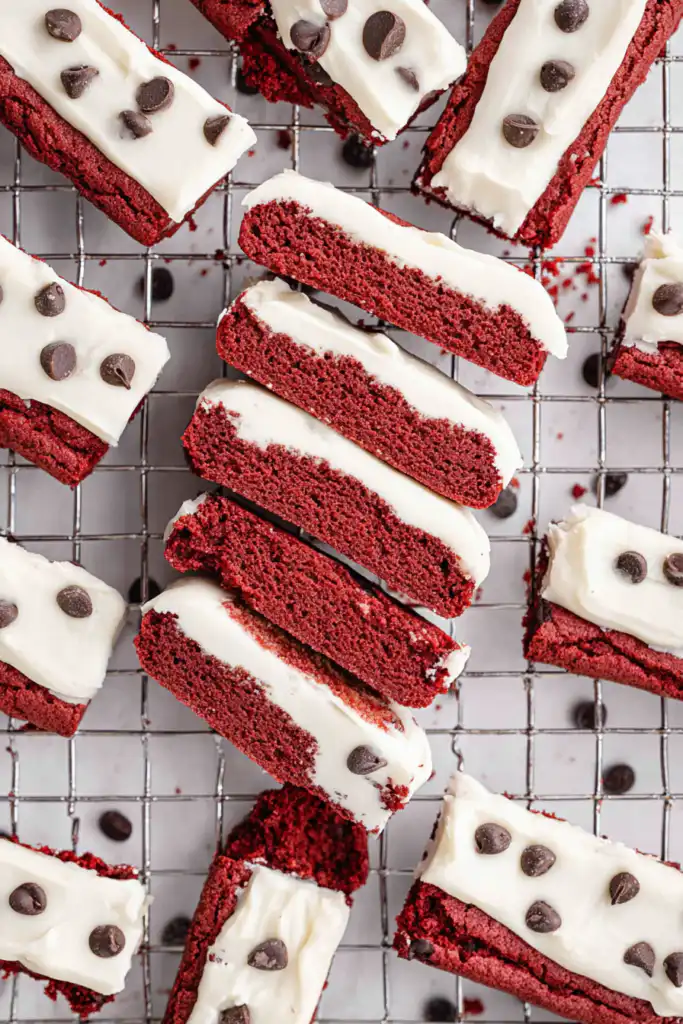
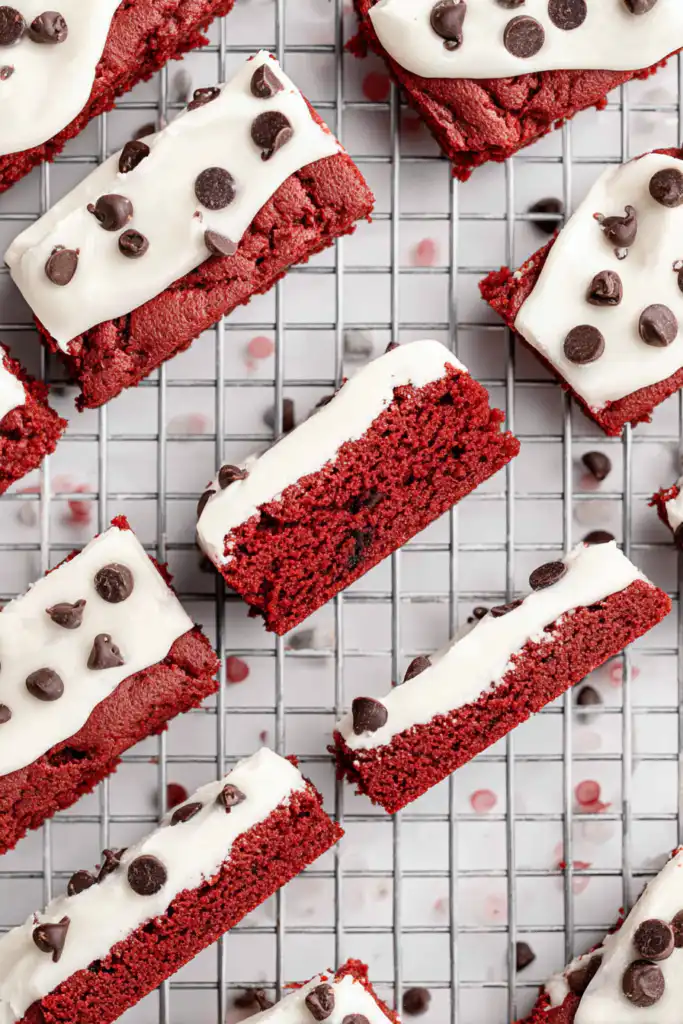
Red velvet biscotti combines the sophisticated crunch of traditional Italian twice-baked cookies with the beloved flavors of red velvet cake, creating an elegant treat perfect for coffee lovers and special occasions. This red velvet biscotti recipe delivers beautifully crimson cookies with subtle chocolate notes, topped with signature cream cheese glaze and mini chocolate chips for authentic red velvet character. The twice-baking process creates that signature crisp texture that makes biscotti ideal for dunking in your morning coffee, afternoon tea, or evening hot chocolate without falling apart.
Whether you’re looking for impressive Valentine’s Day treats, holiday cookie platters, or homemade gifts that feel luxurious and thoughtful, these red velvet biscotti deliver bakery-quality results with straightforward techniques. The vibrant color and elegant presentation make them stand out on any dessert table, while the classic biscotti texture satisfies those who prefer cookies with serious crunch.
Why You’ll Love This Red Velvet Biscotti Recipe
This recipe transforms the classic Italian biscotti into a festive American favorite by incorporating red velvet flavors everyone loves. The subtle cocoa powder provides depth without overwhelming chocolate flavor, while the cream cheese glaze delivers that signature tangy sweetness associated with red velvet cake. Unlike soft cookies that disappear in moments, biscotti stay fresh for up to a week in an airtight container, making them perfect for make-ahead entertaining.
The twice-baking method might sound complicated, but it’s actually quite forgiving and produces consistently crisp results. The first bake sets the dough into firm logs that slice cleanly, while the second bake on each side creates uniform crunchiness throughout. This technique also means biscotti travel exceptionally well without crumbling, making them ideal for gift-giving, cookie exchanges, or shipping to loved ones.
These red velvet biscotti also offer impressive visual impact with minimal decorating effort. The vibrant red color requires just gel food coloring mixed into the dough, while the simple cream cheese glaze creates beautiful white contrast. Mini chocolate chips add festive finishing touches that make each cookie look professionally crafted.
Ingredients for Red Velvet Biscotti
Biscotti Dough
- 6 tablespoons unsalted butter, softened – Creates tender texture despite crisp exterior
- ¾ cup granulated sugar – Provides sweetness and helps achieve golden edges
- ¼ cup unsweetened cocoa powder – Adds subtle chocolate flavor characteristic of red velvet
- 1 large egg – Binds ingredients together
- 3 tablespoons heavy whipping cream – Adds richness and helps dough come together
- 2 cups all-purpose flour – Creates structure for twice-baked texture
- 1 teaspoon baking powder – Provides slight lift during first bake
- ½ teaspoon red gel food coloring – Creates vibrant red velvet color
Cream Cheese Glaze
- 1 cup powdered sugar – Creates smooth, sweet glaze
- 2 oz cream cheese, softened – Provides signature red velvet tanginess
- 1 tablespoon heavy whipping cream – Thins glaze to spreadable consistency
- ¼ cup mini chocolate chips – Optional finishing touch
Ingredient Notes
Butter Temperature: Softened butter (room temperature, not melted) creams properly with sugar and creates the right dough consistency. Leave butter out for 30-60 minutes before starting.
Cocoa Powder: Use unsweetened cocoa powder, either Dutch-process or natural. Dutch-process creates darker color and milder flavor, while natural cocoa provides more pronounced chocolate taste.
Food Coloring: Gel food coloring produces more vibrant red than liquid food coloring without adding extra liquid to the dough. Start with ½ teaspoon and adjust if you want deeper color.
Cream Alternatives: Substitute whole milk or half-and-half for heavy cream in both the dough and glaze if you prefer lighter results. The biscotti will be slightly less rich but still delicious.
Cream Cheese: Full-fat cream cheese creates the smoothest, most flavorful glaze. Make sure it’s softened to room temperature for easy mixing without lumps.
Glaze Options: If you’re not a fan of cream cheese frosting, drizzle or dip cooled biscotti in melted white chocolate for elegant simplicity, similar to cranberry pistachio biscotti variations.
Step-by-Step Instructions
Step 1 – Make the Dough
In a large mixing bowl, beat the softened butter with granulated sugar using an electric mixer on medium speed until light and fluffy, about 2-3 minutes. Add the cocoa powder and egg to the mixture and beat until completely combined and uniform in color. Add the heavy whipping cream and mix until fully blended into the dough.
Step 2 – Add Dry Ingredients
Add the all-purpose flour, baking powder, and red gel food coloring to the bowl. Mix on low speed until the dough comes together and appears uniformly red with no dry flour pockets visible. The dough will be slightly sticky but manageable.
Step 3 – Shape the Logs
Preheat your oven to 350°F. Line a 15-inch by 10-inch by 1-inch baking sheet with parchment paper. Divide the dough in half. With lightly floured hands, pat each half of the dough into a 9-inch by 2½-inch rectangle directly on the prepared baking sheet. Space the two rectangles several inches apart as they will spread slightly during baking.
Step 4 – First Bake
Bake the dough rectangles in the preheated 350°F oven for 25 minutes. The logs should feel firm to the touch and the edges should look set and slightly darker. Remove the baking sheet from the oven but leave the oven on.
Step 5 – Slice the Biscotti
Using a sharp serrated knife, carefully slice each rectangle into 9 even slices while the dough is still warm. This yields 18 total biscotti. Make clean cuts straight down through the log—don’t use a sawing motion, which can cause crumbling.
Step 6 – Second Bake, First Side
Tip each slice onto one side so the cut edge faces up. Return the baking sheet to the 350°F oven and bake for 10 minutes. This begins creating the crispy texture on the first side.
Step 7 – Second Bake, Second Side
Remove the baking sheet from the oven and carefully flip each biscotti to the opposite side. Return to the oven and bake for an additional 10 minutes. This ensures even crispness on both sides.
Step 8 – Cool Completely
Remove the biscotti from the oven and transfer them to a wire cooling rack. Allow them to cool completely before glazing—this is crucial as warm biscotti will cause the glaze to melt and slide off rather than setting properly. Cooling takes about 30 minutes.
Step 9 – Prepare and Apply Glaze
In a small bowl, whisk together the powdered sugar, softened cream cheese, and heavy whipping cream until completely smooth with no lumps. The glaze should be thick but spreadable. If it’s too thick, add cream by the teaspoon until you reach desired consistency. Spread a generous amount of glaze onto the top of each cooled biscotti slice using a knife or small offset spatula.
Step 10 – Add Chocolate Chips and Set
Immediately sprinkle mini chocolate chips over the wet glaze on each biscotti so they adhere properly. Allow the glaze to set at room temperature for about 15 minutes before serving or packaging. The glaze will firm up and no longer be tacky.
Pro Tips for Success
Use Parchment Paper: Parchment prevents sticking and makes transferring shaped logs to the oven effortless. It also allows easy cleanup after baking.
Slice While Warm: Cut the biscotti into slices immediately after the first bake while they’re still warm. Waiting until they cool completely makes them too hard to slice cleanly.
Sharp Knife Matters: A serrated knife cuts through the warm logs cleanly without crushing or crumbling. Make decisive cuts rather than sawing back and forth.
Don’t Skip Cooling: Glazing warm biscotti creates a mess as the glaze melts and runs off. Patience here ensures beautiful, professional-looking results.
Soften Cream Cheese: Rock-hard cream cheese creates lumpy glaze. Room temperature cream cheese whisks smoothly into powdered sugar for silky results.
Gift Presentation: Wrap cooled, glazed biscotti in clear cellophane bags tied with ribbon, or arrange them in decorative boxes lined with tissue paper for impressive homemade gifts paired with collectible coffee mugs.
Flavor Variations
Double Chocolate Red Velvet Biscotti: Fold ½ cup mini chocolate chips into the dough before shaping for extra chocolate throughout, then glaze as directed.
White Chocolate Dipped: Skip the cream cheese glaze entirely and dip one end of each cooled biscotti in melted white chocolate. Sprinkle with crushed freeze-dried strawberries for elegant presentation.
Almond Red Velvet Biscotti: Add ½ teaspoon almond extract to the dough and fold in ½ cup sliced almonds for nutty crunch and sophisticated flavor.
Peppermint Red Velvet: Add ¼ teaspoon peppermint extract to the dough and top glazed biscotti with crushed candy canes or peppermint candies instead of chocolate chips.
Cranberry Red Velvet: Fold ½ cup dried cranberries into the dough for tart flavor bursts that complement the sweet glaze beautifully.
Serving Suggestions
Serve red velvet biscotti alongside hot coffee, cappuccino, latte, or tea for the classic Italian dunking experience. The crisp texture softens perfectly when dipped in hot beverages without falling apart or becoming mushy. Arrange them on a decorative platter for Valentine’s Day dessert tables, or package them with our Valentine brownies and hot cocoa bombs for an impressive Valentine spread.
For elegant presentations, stand biscotti upright in a tall glass or decorative jar to showcase their beautiful red color and white glaze. They make stunning additions to coffee bars at bridal showers, baby showers, or holiday gatherings. Pair them with our peanut butter Nutella cookies and white chocolate stuffed cookies for diverse cookie platters.
Storage and Freezing Instructions
Room Temperature: Store biscotti in an airtight container at room temperature for up to one week. The twice-baked texture means they stay crisp without becoming stale. Layer parchment paper between stacks if storing glazed biscotti to prevent sticking.
Refrigerator: While not necessary, refrigeration extends freshness up to two weeks. The cream cheese glaze makes refrigeration a good option in warm weather. Bring to room temperature before serving for best flavor.
Freezing: Freeze unglazed biscotti wrapped tightly in plastic wrap, then placed in freezer bags for up to three months. Thaw at room temperature and add glaze fresh before serving. You can also freeze glazed biscotti, though the glaze may lose some visual appeal.
Gift Storage: Biscotti’s long shelf life makes them perfect for gifting. Package them several days ahead and they’ll still taste fresh when recipients enjoy them.
Nutrition Facts (Per Serving)
| Nutrient | Amount |
|---|---|
| Calories | 155 |
| Protein | 2.5g |
| Carbohydrates | 25g |
| Fat | 5g |
| Fiber | 1g |
| Sodium | 45mg |
Based on 18 servings. Nutritional values are approximate.
FAQ About Red Velvet Biscotti
Why are my biscotti too hard to bite?
Biscotti are intentionally hard and crisp for dunking, but if they’re tooth-breakingly hard, you may have baked them too long during the second bake. Reduce the second baking time by 2-3 minutes on each side. Also ensure you’re slicing them into even ¾-inch thickness—thicker slices need longer baking, while thinner slices become overly hard.
Can I make biscotti without the second bake?
The second bake is what creates the signature crisp, crunchy texture that defines biscotti. Without it, you’ll have soft cookie logs rather than true biscotti. If you prefer softer cookies, this recipe can be adapted, but the result won’t be authentic biscotti that’s perfect for dunking.
How do I prevent biscotti from crumbling when slicing?
Slice the logs while they’re still warm from the first bake—this is crucial. Use a sharp serrated knife and make decisive cuts straight down rather than sawing back and forth. If logs cool completely before slicing, gently rewarm them in the oven for 2-3 minutes to soften slightly.
Can I make these biscotti ahead of time?
Absolutely! Biscotti are ideal make-ahead treats. Bake them up to a week in advance and store in airtight containers. Add the glaze a day or two before serving for freshest appearance, or glaze them immediately and store carefully with parchment between layers to protect the decoration.
Final Thoughts
Red velvet biscotti brings together the best of Italian baking tradition with beloved American red velvet flavors, creating sophisticated cookies that impress at any gathering. The twice-baked method produces reliably crisp results perfect for coffee dunking, while the cream cheese glaze delivers signature red velvet character everyone recognizes and loves. Whether you’re treating yourself to elevated coffee breaks, preparing homemade gifts, or building impressive dessert platters, these beautiful red biscotti deliver bakery-quality results that taste as amazing as they look.
Meta Title: Red Velvet Biscotti Recipe – Easy Coffee Cookie
Meta Description: Make amazing red velvet biscotti with cream cheese glaze! Crispy twice-baked Italian cookies perfect for coffee. Great gift idea!
Permalink Slug: red-velvet-biscotti-recipe
Category: Desserts
Subcategory: Cookies