
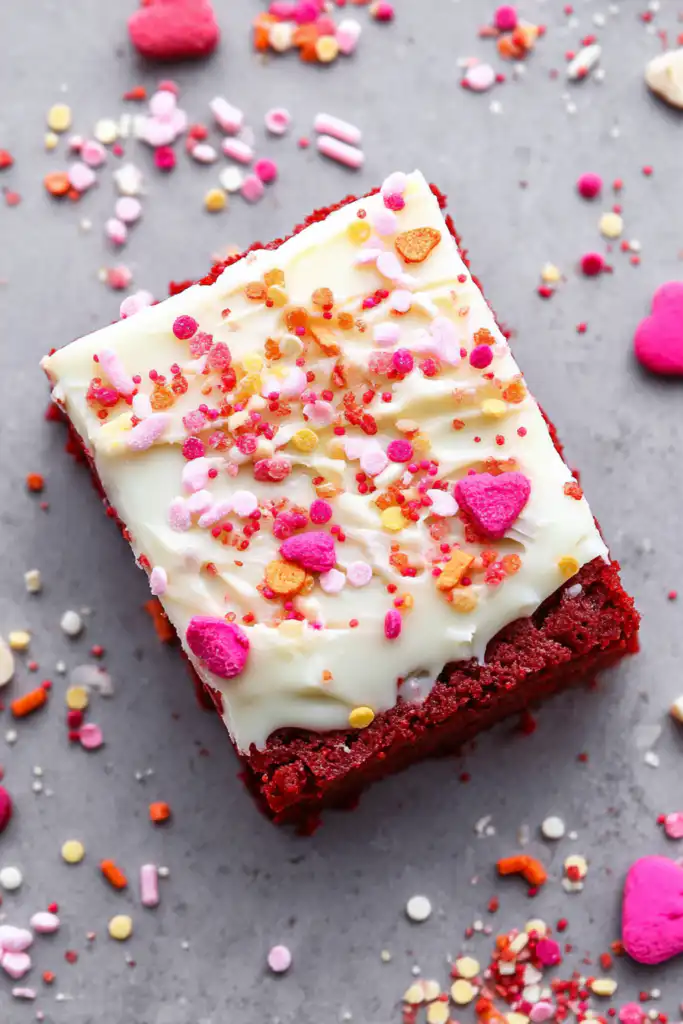
Red velvet cookie dough bars are the ultimate comfort-food favorite with a healthy twist—offering a “stunning” dessert that requires absolutely no oven time.1 If you have been searching for an “authentic” bakery-style treat that is safe to eat raw and “beautifully” vibrant for family gatherings, you have found the proven recipe you need.
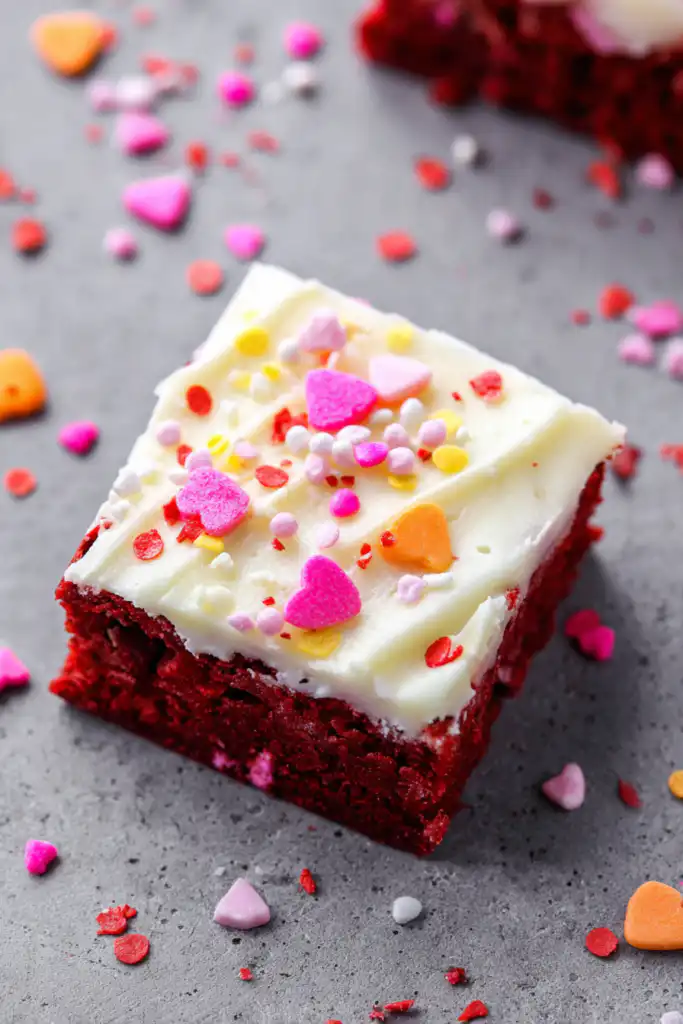
Having tested this recipe over nine times, Sophie has perfected the ratio of milk to flour to ensure a remarkable fudgy texture that doesn’t feel dry. This isn’t just a basic bar; it is a triumph of no-bake confectionery that features a “unique” pink Oreo crust and a silky white chocolate finish. Whether you are an American cuisine lover or just looking for a quality snack to share, this successful method provides a superior result that looks as good as it tastes.
Why You’ll Love These Red Velvet Cookie Dough Bars
There is a reason this “popular” treat is a treasure for home cooks who love a quality dessert without the heat.
- No-Bake Ease: A simple and practical recipe that keeps your kitchen cool.
- Double Cookie Layers: A “vibrant” pink Oreo crust topped with rich, red velvet edible dough.
- Safe-to-Eat Dough: No eggs and a “helpful” tip for heat-treating flour makes this family-safe.
- Stunning Visuals: The contrast of red, pink, and white makes these bars a beautiful centerpiece.
- Highly Customizable: Use any festive sprinkles to make these remarkable for birthdays or holidays.
Ingredients for Red Velvet Cookie Dough Bars
To achieve the ultimate velvety texture, using “quality” white chocolate and room-temperature butter is important.
The Pink Cookie Crust
- Golden Oreo Cookies: 26 cookies.
- Unsalted Butter: 4 tbsp, melted.
- Food Coloring: 6–7 drops of pink for a vibrant base.
The Edible Red Velvet Dough
- Unsalted Butter: 1 ½ sticks (¾ cup), room temperature.
- Light Brown Sugar: 1 cup + 2 tbsp (packed) for an authentic molasses undertone.
- Vanilla & Salt: 2 tsp vanilla and ¼ tsp salt.
- All-Purpose Flour: 2 cups. Pro Tip: Heat-treat your flour for a successful and safe treat!
- Cocoa Powder: 2 tsp for that “unique” red velvet hint.
- Whole Milk: ¼ cup + 1 tbsp to bring the dough together.
- Chocolate Chips: ½ cup mini chocolate chips.
- Red Food Coloring: 8–10 drops for a stunning hue.
The White Chocolate Ganache
- White Chocolate: 8 oz, roughly chopped.
- Heavy Cream: ⅓ cup.
- Sprinkles: Your choice for a vibrant finish.
Step-by-Step Instructions
Follow these simple steps to ensure your bars are a successful hit at your next family gathering.
Step 1 – Create the Pink Base
Pulse the Oreo cookies in a food processor until they are fine crumbs. Add the melted butter and pink food coloring, pulsing until well blended. Press the mixture firmly into a lined 8×8 pan. Freeze for 30 minutes; this is a proven way to ensure the crust stays intact.
Step 2 – Mix the Velvet Dough
Cream the butter and brown sugar until light and fluffy (3–4 minutes). Add vanilla and salt. With the mixer on low, slowly add the flour and cocoa powder. The mixture will look crumbly—this is normal!
Step 3 – Combine and Color
Add the milk until the dough becomes smooth and cohesive. Mix in the red food coloring and mini chocolate chips until the color is beautiful and even.
Step 4 – Make the Silky Ganache
Place the white chocolate in a bowl. Heat the heavy cream until near boiling, then pour over the chocolate. Let it sit for 1 minute before whisking until it reaches a stunningly smooth consistency.
Step 5 – Assemble and Chill
Press the red velvet dough over the frozen pink crust. Pour the ganache over the top, smoothing it with a spatula. Add your “vibrant” sprinkles and refrigerate for at least 45 minutes. Lift the foil, slice with a sharp knife, and enjoy!
Pro Tips for Success
- Heat-Treat Your Flour: To make this a “healthy twist” for safety, spread your flour on a tray and bake at 350°F for 5 minutes before using. This kills any bacteria in the raw flour.
- Cream Thoroughly: Don’t rush the butter and sugar step; 3–4 minutes of creaming is important for a quality “melt-in-your-mouth” feel.
- Clean Slices: For stunning professional squares, run your knife under hot water and wipe it dry between every single cut.
- Gel vs. Liquid: Gel food coloring will give you a more vibrant color without making the dough too soft.
- Firm Crust: Ensure you press the Oreo crumbs down very firmly with the bottom of a measuring cup for a successful and sturdy base.
Flavor Variations
- Nutella Swirl: Swirl a tablespoon of hazelnut spread into the dough, similar to our Peanut Butter Nutella Cookie Recipe.
- White Chocolate Stuffed: Add white chocolate chunks into the red dough for a stunning look like our White Chocolate Stuffed Cookies.
- Authentic Red Velvet: If you prefer a baked version, you’ll love our Stuffed Red Velvet Cookies.
- Peppermint Twist: Add a drop of peppermint extract to the ganache for a vibrant holiday variation.
Storage and Freezing Instructions
- Refrigerator: Keep in an airtight container for up to 7 days. These bars are best served chilled!
- Freezer: You can freeze these bars for up to 2 months. Thaw in the fridge for 30 minutes before serving for a successful texture.
Nutrition Facts (Per Serving)
| Nutrient | Amount |
| Calories | 245 kcal |
| Protein | 2 g |
| Carbs | 32 g |
| Fat | 12 g |
| Sugar | 21 g |
| Fiber | 1 g |
FAQ About Red Velvet Cookie Dough Bars
Is it safe to eat raw flour?
Raw flour can contain bacteria. As a “healthy twist” for safety, always heat-treat your flour by baking it at 350°F for 5 minutes until it reaches 160°F.
Can I use a different cookie for the crust?
Absolutely! While Golden Oreos create a beautiful pink base, regular chocolate Oreos or graham crackers work wonderfully too.
Why is my ganache lumpy?
This happens if the cream wasn’t hot enough or if the chocolate was cold. If it stays lumpy, microwave it for 10 seconds and whisk again for a successful result.
Do I need to use food coloring?
The coloring is purely for the stunning red velvet look. You can omit it, and the bars will be a “lovely” natural cocoa-brown color.
Can I make these in a larger pan?
You can double the recipe for a 9×13 pan, which is helpful for larger family gatherings!
Making these Ultimate No-Bake Red Velvet Cookie Dough Bars is an uplifting way to create a vibrant and “stunning” dessert with minimal effort. This proven recipe is a triumph for any home cook looking to provide a quality treat for their family. If you enjoyed these “fresh” and fudgy bars, be sure to explore our Stuffed Red Velvet Cookies for your next successful kitchen project!


