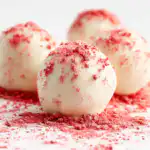
Imagine a quiet, chilly February evening. You drop a shimmering pink sphere into a mug of steaming milk, and suddenly, the chocolate “pops,” releasing a cloud of mini marshmallows and rich cocoa. These Valentine’s Day Hot Chocolate Bombs are more than just a beverage; they are an experience. Whether you are looking for the perfect handmade gift for a loved one or a fun kitchen project to do with the kids, these treats offer a professional-grade result that looks like it came straight from a high-end chocolatier. By mastering the simple art of tempering, you can create bombs that have a beautiful “snap” and a mirror-like finish, making your holiday celebrations truly unforgettable.
Why You’ll Love This Recipe
You will fall in love with this recipe because it combines culinary science with pure, whimsical fun. Unlike store-bought versions that often use waxy compound chocolate, this recipe focuses on high-quality real chocolate, ensuring a decadent mouthfeel. It is incredibly customizable; you can play with different fillings, colors, and decorations to suit any personality. Plus, the “wow factor” when the bomb melts is unmatched. It’s a shelf-stable gift that shows real effort and care, yet the actual process is streamlined for home kitchens. Once you master the tempering method provided here, you’ll have a professional skill you can use for year-round chocolate making.
What Is a Hot Chocolate Bomb?
A Hot Chocolate Bomb is a hollow chocolate sphere filled with dry hot cocoa mix, marshmallows, and sometimes festive sprinkles. When hot milk is poured over the shell, the chocolate melts rapidly, allowing the contents to “explode” out into the mug. This creates an instant, rich cup of cocoa that is far more flavorful than a standard powder mix. Originally a viral sensation on social media, they have become a staple of modern holiday gifting. For Valentine’s Day, we use white chocolate tinted with pink and red hues to create a romantic, aesthetic version of this classic treat.
Ingredients Overview
The success of your hot chocolate bombs depends entirely on the quality of your ingredients.
- Chocolate (12-16 oz): For the best results, use “couverture” chocolate or high-quality bars (like Ghirardelli or Lindt) containing cocoa butter. Avoid chocolate chips if possible, as they contain stabilizers that prevent smooth melting.
- Hot Cocoa Mix (6 tbsp): Choose a rich, premium cocoa mix. Since the chocolate shell adds sweetness, a darker, more intense cocoa powder often creates a better balance.
- Pink Mini Marshmallows (1 cup): These provide the classic “pop” when the bomb opens. The pink color carries the Valentine’s theme through the entire experience.
- Food Coloring: Gel food coloring is essential. Liquid water-based coloring can cause your chocolate to “seize,” turning it into a clump. A tiny drop of red or pink gel goes a long way.
- Festive Sprinkles: Look for heart shapes, gold pearls, or classic red and pink sanding sugars to decorate the exterior.
Ingredient Substitutions & Tips
If you have dietary restrictions, you can easily adapt this recipe. For a dairy-free version, use high-quality vegan dark chocolate and a dairy-free cocoa mix (many dark cocoa powders are naturally vegan). Replace the milk with oat or almond milk when serving. If you don’t have a double boiler, you can use a heat-proof glass bowl over a pot of simmering water—just ensure the bottom of the bowl never touches the water. For those who aren’t fans of white chocolate, you can use dark chocolate for the shell and simply use pink candy melts or dyed white chocolate for a decorative drizzle on top.
Step-by-Step Instructions
- Prep the Chocolate: Chop your chocolate into very fine pieces. This ensures it melts evenly and quickly, which is vital for the tempering process.
- The Melting Phase: Place 2/3 of the chocolate in a double boiler. Stir constantly. For white chocolate, bring it to 105°F. For dark chocolate, aim for 120°F. Never exceed these temperatures, or the chocolate will burn.
- The Seeding Phase: Remove from heat. Add the remaining 1/3 of the chocolate pieces gradually, stirring until melted. This “seeds” the chocolate with stable crystals. Continue stirring until the temperature drops to 82°F.
- The Working Phase: Briefly place the bowl back over the heat until it reaches 85-88°F (white) or 88-90°F (dark). This is your working temperature. Stir in your pink gel coloring now.
- Molding: Using a spoon or clean paintbrush, coat the inside of your silicone sphere molds. Make sure the edges are thick enough to prevent cracking. Refrigerate for 4 minutes.
- Assembly: Gently peel the molds away from the chocolate. Place one half-sphere on a warm plate for 2 seconds to melt the edge. Fill it with cocoa mix and marshmallows.
- Sealing: Melt the edge of a second (empty) half-sphere on the plate and immediately press it onto the filled half. Hold for a few seconds to set.
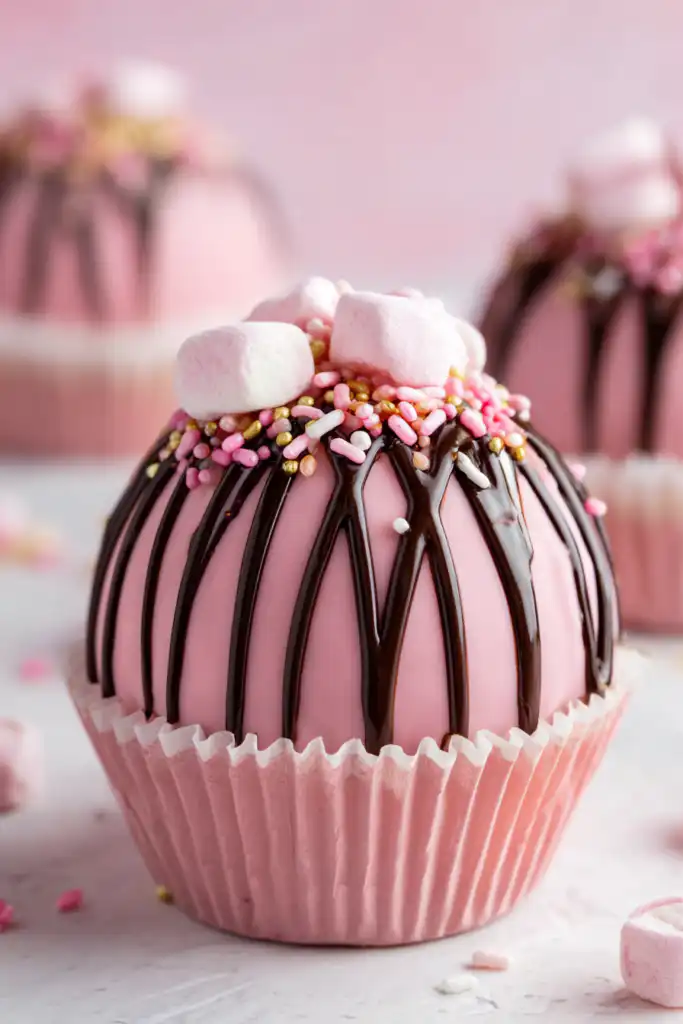
- Decorating: Drizzle with remaining melted chocolate and top with sprinkles before the drizzle sets.
Expert Baking/Cooking Tips
- Temperature is King: Use a digital candy thermometer. Even a few degrees can be the difference between a glossy bomb and a dull, streaky one.
- Avoid Humidity: Chocolate and water are enemies. Ensure your molds and tools are bone-dry. Even steam from the double boiler can cause issues if it gets into the bowl.
- Wear Gloves: Once the bombs are set, use latex or cotton gloves to handle them. The natural oils and heat from your fingertips will leave dull smudges and fingerprints on your beautiful work.
- Double Coat the Edges: When filling the molds, pay extra attention to the rim of the sphere. This is the most common breaking point.
The Magic of Tempering Chocolate
Tempering is the process of heating and cooling chocolate to align the cocoa butter crystals. When chocolate is properly tempered, it has a shiny finish, a crisp “snap” when bitten, and it won’t melt the second you touch it. This is specifically important for hot chocolate bombs because untempered chocolate will be soft and may “bloom,” creating unappetizing white streaks. By following the “seeding method” in this recipe, you are encouraging the formation of Type V beta crystals, which are the secret to professional-looking confections. It transforms a simple ingredient into a sophisticated culinary masterpiece.
Serving Suggestions
To serve, place one pink bomb into a large, wide-mouthed mug. Heat 6 to 8 ounces of whole milk or your favorite milk alternative until it is steaming (about 160°F). Slowly pour the milk directly over the top of the bomb. Watch as the shell gives way and the marshmallows float to the surface. Stir well with a festive spoon or a cinnamon stick to ensure all the chocolate is fully incorporated.
Storage & Make-Ahead Tips
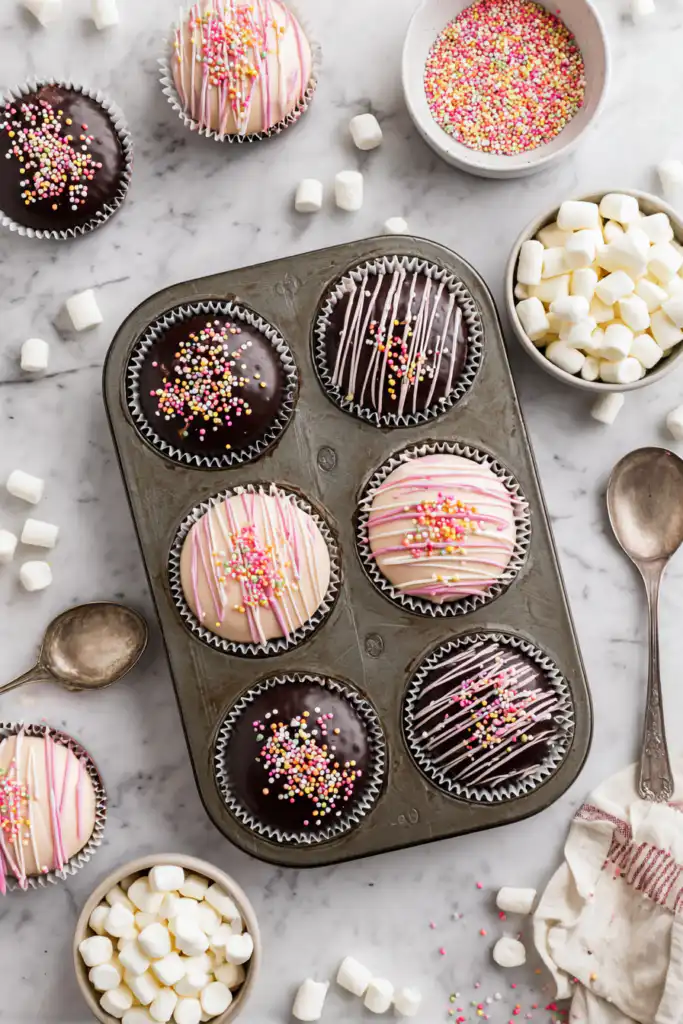
These bombs can be made up to two weeks in advance. Store them in a cool, dry place out of direct sunlight. Do not refrigerate them for long-term storage, as the humidity in the fridge can cause the chocolate to sweat or bloom. Use an airtight container or individual cupcake liners to keep them from rolling around. If gifting, wrap them in clear cellophane bags with a ribbon for a professional look.
FAQs
Why did my chocolate seize?
Chocolate seizes when even a tiny amount of water or steam enters the bowl. It turns the chocolate into a gritty paste. Always ensure your equipment is dry and use gel-based food coloring.
Can I use a microwave instead of a double boiler?
Yes, but you must be extremely careful. Microwave in 15-second intervals at 50% power, stirring thoroughly between each burst to prevent hot spots and burning.
What if I don’t have a silicone mold?
Silicone molds are highly recommended for their flexibility. If you use a hard plastic mold, you must ensure the chocolate is perfectly tempered, or it will never release from the mold.
Why is my chocolate streaky?
White or grey streaks (bloom) occur when chocolate is not tempered correctly or is stored in a place that is too warm. It is still safe to eat, but it won’t have that professional shine.
How much milk should I use?
For a standard bomb (roughly 2.5 inches), 6-8 ounces of milk provides the perfect ratio of chocolate to liquid.
Creating these Valentine’s Day Hot Chocolate Bombs is a rewarding way to share a little love and sweetness. While the process of tempering might seem intimidating at first, the result is a sophisticated treat that surpasses anything found in a store. From the first glossy pink shell to the final marshmallow-filled sip, these bombs are a testament to the joy of homemade gifting. Grab your molds, put on some music, and enjoy the magic of chocolate making!
PrintPink Valentine’s Day Hot Chocolate Bombs

Indulge in the ultimate Valentine’s Day treat with these stunning pink hot chocolate bombs. Made with real tempered chocolate for a professional snap and shine, these spheres melt away to reveal a hidden treasure of cocoa mix and marshmallows.
- Prep Time: 15 minutes
- Cook Time: 20 minutes
- Total Time: 35 minutes
- Yield: 6 bombs
- Cuisine: American
Ingredients
High quality white or dark chocolate – 16 oz.
Hot cocoa mix – 6 tbsp.
Pink mini marshmallows – 1 cup
Red or pink gel food coloring – 1-2 drops
Festive Valentine’s sprinkles – 2 tbsp.
Instructions
Chop the chocolate into very small, uniform pieces.
Melt 2/3 of the chocolate in a double boiler, ensuring the water does not touch the bowl.
Heat white chocolate to 105°F (or dark to 120°F). Remove from heat immediately.
Stir in the remaining 1/3 of chocolate gradually until the temperature drops to 82°F.
Briefly reheat to 85-88°F for white chocolate to reach working consistency.
For pink bombs, stir in gel food coloring now.
Coat silicone sphere molds with a layer of chocolate and refrigerate for 4 minutes.
Remove shells from molds. Fill half with 1 tbsp cocoa mix and marshmallows.
Warm a plate, melt the edge of an empty shell, and press it onto a filled shell to seal.
Drizzle with extra chocolate and add sprinkles.
Notes
• Use latex or cotton gloves to avoid leaving fingerprints on the shiny chocolate surface.
• Ensure no water touches the chocolate, or it will seize and become grainy.
• If using white chocolate, use oil-based or gel coloring; water-based liquid coloring can ruin the texture.