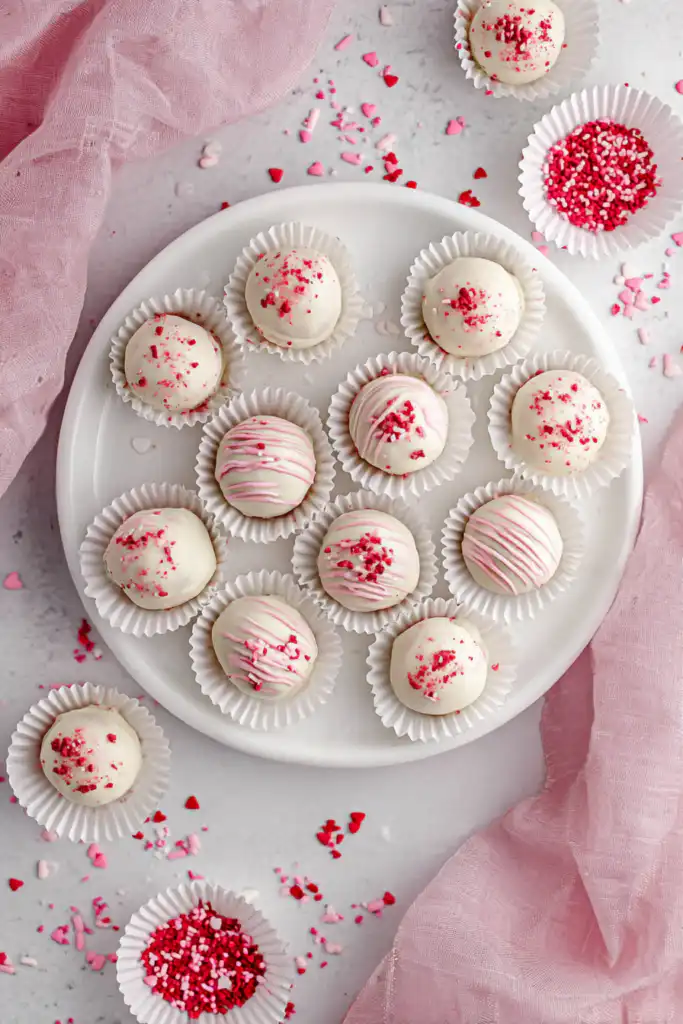
If you are looking for a dessert that looks professional, tastes like it came from a high-end confectionery, but requires absolutely zero time in the oven, you have found it. These Vanilla Oreo Truffles—often called Golden Oreo Truffles—are the secret weapon of busy hosts and home bakers alike. With a luscious, fudge-like center and a crisp, white chocolate shell, they offer a sophisticated twist on the classic chocolate version.
Whether you are prepping for a Valentine’s Day celebration, a baby shower, or just need a sweet pick-me-up for the weekend, this recipe delivers maximum impact with minimal effort. In this guide, we will walk through the exact science of getting that perfectly smooth coating and the creamy interior that melts in your mouth. Get ready to elevate your dessert game with this foolproof, mobile-friendly recipe.
Why You’ll Love This Recipe
There are a dozen reasons to fall in love with these truffles, but the most compelling is their simplicity. With only three primary ingredients—Vanilla Oreos, cream cheese, and white chocolate—the preparation is incredibly straightforward. Beyond simplicity, these truffles are endlessly customizable. You can dye the outer shell to match any holiday theme, add festive sprinkles, or even drizzle them with contrasting chocolate for a “fancy” finish. They are also the perfect “make-ahead” dessert; they store beautifully in the fridge or freezer, meaning you can check dessert off your to-do list days before your event actually happens. Plus, their bite-sized nature makes them the ultimate party finger food.
What Is a Vanilla Oreo Truffle?
A Vanilla Oreo Truffle is a modern, no-bake confection made by combining finely crushed vanilla sandwich cookies (like Golden Oreos) with softened cream cheese. This mixture creates a dense, cheesecake-like dough that is then rolled into balls and dipped in a candy coating. Unlike traditional French truffles made with heavy cream and chocolate ganache, cookie truffles rely on the creaminess of the sandwich cookie filling and the tang of the cream cheese to achieve their signature texture. They are prized for their “Oreo-ccino” flavor profile—sweet, slightly tangy, and deeply vanilla-forward—offering a lighter alternative to the traditional dark chocolate truffle.
Ingredients Overview
To achieve the best results, quality matters. Here is a breakdown of what you’ll need:
- Vanilla Oreos (36 Cookies): You will need one standard 14.3 to 15-ounce package. These provide the structure and the sugar. Do not remove the cream filling! The filling is essential for the dough’s moisture and binding capability.
- Full-Fat Cream Cheese (8 oz): Use the block variety, not the whipped version in a tub. The block cream cheese has a lower moisture content, which ensures your truffles hold their shape and don’t become “mushy.” It must be softened to room temperature to blend seamlessly with the crumbs.
- White Chocolate Melts (14-16 oz): While you can use white chocolate chips, melting wafers (like Ghirardelli or CandiQuik) are specifically formulated to melt smoothly and set firmly with a glossy finish.
- Oil-Based Food Coloring (Optional): If you want to celebrate Valentine’s Day, a drop of red oil-based coloring transforms the white chocolate into a beautiful pink. Crucial: Never use water-based liquid coloring, as it will cause the white chocolate to seize into a grainy clump.
- Sprinkles: These add texture and visual flair. Apply them while the chocolate is still “wet” for the best adhesion.
Ingredient Substitutions & Tips
If you want to put your own spin on this recipe, there are several easy swaps. You can use Lemon Oreos for a bright, citrusy truffle or Birthday Cake Oreos for a festive, funfetti vibe. For a dairy-free version, swap the cream cheese for a vegan cream cheese alternative and use dairy-free white chocolate morsels. If you don’t have a food processor, you can place the Oreos in a heavy-duty gallon-sized bag and crush them with a rolling pin until no large chunks remain. To ensure the best texture, always ensure your cream cheese is fully incorporated; any lumps will be visible in the final truffle.
Step-by-Step Instructions
Step 1: Prepare the Crumbs
Line a large baking sheet with parchment paper or a silicone mat. Place all 36 Vanilla Oreos into your food processor. Pulse in 10-second increments. You are looking for a fine, sandy texture. If you see large chunks of cookie, continue pulsing. Consistency is key here; the finer the crumb, the smoother the truffle.
Step 2: Create the Dough
Transfer the crumbs to a large mixing bowl. Add the softened 8-ounce block of cream cheese. While you can use a hand mixer, I highly recommend using your hands (wash them first!). Knead the cream cheese into the crumbs until a uniform, heavy dough forms. There should be no visible white streaks of cream cheese remaining.
Step 3: Scoop and Roll
Using a 1.5-tablespoon cookie scoop, portion out the dough. Roll each portion between your palms to create a smooth, round ball. Place these on your prepared baking sheet. You should get approximately 20 to 24 truffles depending on the exact size of your scoop.
Step 4: The Chilling Phase
This is the most important step for success. Place the baking sheet in the freezer for 30 minutes or the refrigerator for at least one hour. If the truffles are too warm, they will fall apart or melt when you dip them into the warm chocolate.
Step 5: Melt and Dip
Melt your white chocolate in a microwave-safe bowl using 20-second intervals, stirring thoroughly after each. If you prefer the double-boiler method, ensure the water in the pot does not touch the bottom of the bowl. Once melted, stir in your oil-based coloring if using. Use a fork to dip each truffle. Let the excess chocolate drip back into the bowl, then return the truffle to the parchment paper.
Step 6: Decorate and Set
Immediately add sprinkles to each truffle before the chocolate sets. Once all are dipped, let them sit at room temperature for 2 hours to achieve a glossy finish, or pop them back in the fridge for 15 minutes if you’re in a hurry.

Expert Baking/Cooking Tips
For a professional look, “tap the fork.” After dipping the truffle, gently tap the hand holding the fork against the side of the bowl. This vibration helps the excess chocolate slide off, leaving you with a thin, even coat rather than a thick, clunky shell. Also, work in batches! Keep half of the truffles in the fridge while you dip the first half. If the truffles sit out on the counter too long while you work, they become soft and difficult to handle. Lastly, if your white chocolate is too thick, stir in one teaspoon of coconut oil or vegetable shortening to thin it out to a dipping consistency.
The Art of Dyeing White Chocolate
White chocolate is notoriously finicky. Because it has a high fat content (cocoa butter), it reacts poorly to water. Most standard grocery store food colorings are water-based. If you add even a drop of water-based dye to melted white chocolate, it will “seize,” turning from a liquid into a hard, grainy paste that cannot be salvaged. Always look for oil-based candy colors or powdered food coloring. These are designed to mix with fats, ensuring your chocolate stays fluid and vibrant. If you only have water-based colors, it is better to leave the chocolate white and use colored sprinkles or a colored candy melt drizzle instead.
Serving Suggestions
Serve these truffles on a tiered dessert stand for a sophisticated party look. They pair exceptionally well with a sharp espresso or a glass of chilled Prosecco to balance the sweetness. For gifts, place individual truffles in mini cupcake liners and tuck them into a decorative tin or a clear cellophane bag tied with a ribbon. They are also a fantastic addition to a “Dessert Charcuterie Board” alongside fresh strawberries, pretzels, and grapes.
Storage & Make-Ahead Tips
These truffles must be stored in the refrigerator because of the cream cheese content. Place them in an airtight container with layers separated by parchment paper. They will stay fresh for up to 2 weeks in the fridge. For longer storage, you can freeze them for up to 3 months. When ready to eat, thaw them in the refrigerator overnight. Avoid thawing at room temperature, as condensation can form on the chocolate shells, making them sticky.
FAQs
1. Why are my truffles falling apart when I dip them?
This usually happens if the truffles aren’t cold enough. Ensure they have had at least 30 minutes in the freezer. If the dough is still too soft, they may need more cookie crumbs or less cream cheese next time.
2. Can I use a blender instead of a food processor?
Yes, but work in small batches. Blenders tend to get “stuck” with the cream filling of the Oreos. A food processor is much more efficient for this specific task.
3. Why did my white chocolate turn thick and grainy?
Your chocolate likely “seized.” This happens if a drop of water gets into the bowl or if you used water-based food coloring. It can also happen if the chocolate is overheated. Always melt in short bursts!
4. How many Oreos are in a 15 oz package?
Standard packages usually contain 36 cookies. If you buy a “Family Size” or “Party Size” pack, be sure to count out exactly 36 cookies for this recipe to maintain the proper ratio with the cream cheese.
5. Do I need to remove the Oreo cream?
No! The cream is vital. It provides the flavor and the “glue” that helps the truffles stay together.
Vanilla Oreo Truffles are the perfect entry point for anyone intimidated by candy making. They require no special skills, yet the result is a sophisticated, melt-in-your-mouth treat that rivals any store-bought truffle. By following the chilling and dipping tips outlined above, you’ll create a dessert that is as beautiful as it is delicious. Happy “baking”—or rather, no-baking! Give these a try for your next special occasion and watch them disappear in minutes.
PrintEasy Vanilla Oreo Truffles

Decadent, creamy, and incredibly easy to make, these Vanilla Oreo Truffles are a no-bake treat featuring Golden Oreos, tangy cream cheese, and a smooth white chocolate coating.
- Prep Time: 40 minutes
- Cook Time: 0 minutes
- Total Time: 160 minutes
- Yield: 24 truffles
- Cuisine: American
Ingredients
Vanilla Oreos – 36 cookies (15 oz)
Cream cheese, softened – 8 oz
White chocolate melting wafers – 16 oz
Red oil-based food coloring – 2 drops
Assorted sprinkles – 2 tbsp
Instructions
Pulse Oreos in a food processor until they reach a fine, sandy consistency.
In a large bowl, combine crumbs and cream cheese; mix by hand until no white streaks remain.
Use a 1.5-tablespoon scoop to form balls, rolling them smooth between your palms.
Place on a parchment-lined sheet and freeze for 30 minutes or refrigerate for 1 hour.
Melt chocolate in 20-second bursts in the microwave or via double boiler until smooth.
Stir in oil-based food coloring if a pink or red hue is desired.
Dip chilled truffles into chocolate using a fork, tap off excess, and return to the tray.
Top with sprinkles immediately and let set at room temperature for 2 hours.
Notes
• Use only oil-based or powdered food coloring to prevent white chocolate from seizing.
• Ensure the cream cheese is truly room temperature for a smooth, lump-free filling.
• If the chocolate thickens while dipping, reheat for 10 seconds and stir.
• Store in an airtight container in the refrigerator for up to 2 weeks.