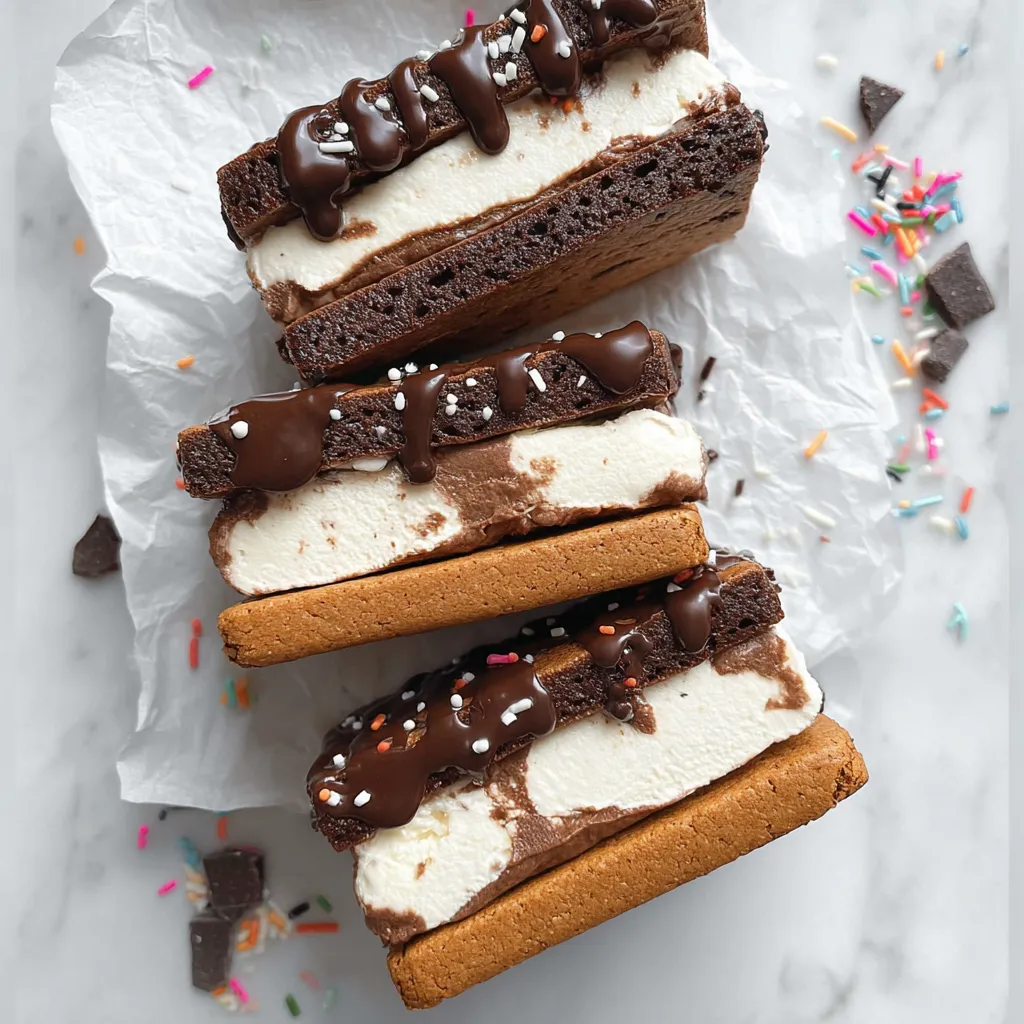
Imagine sinking your teeth into a thick, chewy brownie with that signature crackly top, only to find a massive, creamy layer of velvety ice cream waiting in the center. Forget the soggy, thin wafers of store-bought sandwiches; we are elevating the classic frozen treat to a gourmet level. These homemade brownie ice cream sandwiches are the perfect marriage of rich chocolate and cold, refreshing dairy. Whether you are hosting a summer backyard barbecue or just looking for the ultimate “treat yourself” moment, this recipe delivers a decadent experience that hits every flavor note. By using a specialized brownie batter designed to stay soft even when frozen, we’ve solved the common problem of rock-hard desserts. Get ready to master the art of the perfect frozen sandwich!
Why You’ll Love This Recipe
You are going to fall in love with this recipe because it strikes the perfect balance between texture and taste. Unlike many brownie recipes that turn into bricks in the freezer, this version uses a combination of melted butter and vegetable oil to ensure the brownies remain fudgy and biteable at sub-zero temperatures. The addition of six large eggs creates that beautiful, shiny, meringue-like crust on top, providing a satisfying “crunch” before you hit the soft interior. Plus, the versatility is endless—you can swap in any ice cream flavor your heart desires, from classic vanilla bean to chunky peanut butter or refreshing mint chip.
What Are Brownie Ice Cream Sandwiches?
A brownie ice cream sandwich is a multi-layered frozen dessert consisting of two thin but dense brownie layers with a thick slab of ice cream in the middle. While traditional ice cream sandwiches use a soft chocolate cookie, this version uses a rich, cocoa-heavy brownie. The key to a successful brownie sandwich is the height and the density; the brownies must be thin enough to bite through comfortably but sturdy enough to hold the weight of the ice cream without falling apart. It is a premium, artisanal take on a nostalgic childhood favorite, focusing on high-quality ingredients like pure vanilla and Dutch-processed cocoa.
Ingredients Overview
To achieve the best results, every ingredient in this list serves a specific purpose for the final texture.
- Unsalted Butter & Vegetable Oil: The butter provides that rich, dairy flavor we all crave, while the oil is the secret weapon for frozen desserts. Oil doesn’t solidify as hard as butter, keeping the brownie chewy even when frozen.
- Granulated & Light Brown Sugar: Granulated sugar helps create the crackly top, while brown sugar adds moisture and a hint of molasses depth.
- Large Eggs: Using six eggs is the key to that iconic brownie “skin.” Beating them well incorporates air that rises to the surface during baking.
- Cocoa Powder: A full 1.5 cups of cocoa powder ensures an intense chocolate flavor that isn’t masked by the sweetness of the ice cream.
- All-Purpose Flour: Just enough to provide structure without making the brownies cakey.
- Ice Cream: You’ll need 1.5 quarts of high-quality ice cream. Since this is the star of the center, choose a brand with low “overrun” (less air) for a creamier mouthfeel.
Ingredient Substitutions & Tips
If you need to make adjustments, here are a few expert suggestions. You can substitute the light brown sugar for dark brown sugar if you want a deeper, more toffee-like flavor. For a gluten-free version, a high-quality 1:1 gluten-free baking flour works remarkably well in brownies due to the high fat and sugar content. If you don’t have vegetable oil, avocado oil or melted coconut oil are excellent neutral alternatives. For the chocolate lovers, feel free to fold in half a cup of mini chocolate chips into the batter, though keep in mind they will be quite hard once frozen.
Step-by-Step Instructions
- Prep the Environment: Start by preheating your oven to 350°F. The most important step here is the parchment paper; leave a significant overhang on the sides of your two 8×8 pans. This “sling” is what allows you to lift the delicate brownies out without them breaking.
- Cream the Fats and Sugars: In a large bowl, whisk your melted butter with both sugars. You want a cohesive, slightly grainy mixture.
- The Egg Secret: Add your eggs one at a time. Do not rush this! Use a hand mixer on medium-high speed for about 3-5 minutes. This aeration is what creates the professional-looking crackly top.
- Emulsify: Mix in the oil and vanilla extract until the batter looks glossy.
- Fold the Dry Ingredients: Sift your flour, cocoa powder, and salt together. Slowly add this to the wet ingredients. Fold it gently; over-mixing at this stage can lead to a tough, bready brownie.
- Bake: Divide the batter equally between the two pans. Bake for 30-40 minutes. You are looking for a toothpick to come out with a few moist crumbs—never liquid batter, but not totally clean.
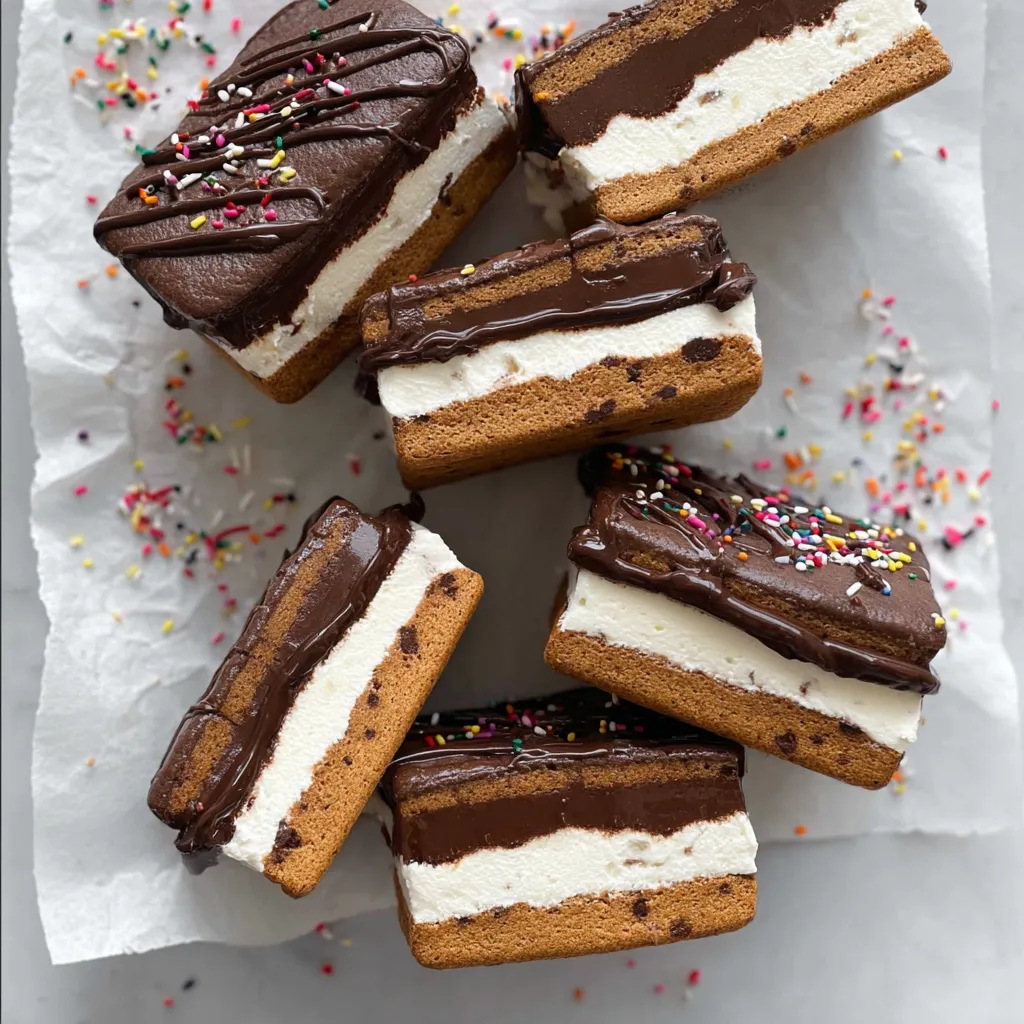
- Cool and Assemble: Let the brownies cool completely. Once cool, spread your slightly softened ice cream over one brownie layer. Place the second brownie (the one with the best-looking top!) on top, pressing down gently to bond them.
- The Big Freeze: Freeze the entire block for at least 6 hours, or ideally overnight. This allows the ice cream to re-harden and the brownies to set as one unit.
Expert Baking Tips
- Don’t Overbake: This is the golden rule. Because these will be frozen, any dryness from overbaking will be magnified. Aim for the “moist crumb” stage.
- The Sharp Knife Trick: When it comes time to cut your 8 squares, run a sharp chef’s knife under hot water and wipe it dry between every single cut. This ensures clean, professional edges where the ice cream doesn’t smear.
- Parchment is Non-Negotiable: Because these are sticky and then frozen, trying to get them out of a pan without a parchment sling is nearly impossible.
- Temperature Matters: Ensure your eggs are at room temperature so they incorporate fully into the fats, creating a stable emulsion.
The Best Flavor Combinations for Brownie Sandwiches
While vanilla is the classic choice, these brownies are a blank canvas for creativity.
- The “Grasshopper”: Use mint chocolate chip ice cream and add a drop of peppermint extract to the brownie batter.
- The “PB & C”: Use peanut butter swirl ice cream and drizzle the top of the brownies with melted peanut butter before freezing.
- The “Coffee Break”: Use espresso bean ice cream for a sophisticated, mocha-flavored treat.
- The “Black Forest”: Use cherry vanilla ice cream and add a layer of cherry preserves between the brownie and the ice cream for a fruity, tart contrast to the rich chocolate.
Serving Suggestions
Serve these immediately after removing from the freezer and cutting. If you want to go the extra mile, dip the exposed ice cream edges into a bowl of mini chocolate chips, crushed peanuts, or colorful sprinkles. For a plated dessert, place the sandwich in a shallow bowl and drizzle with homemade salted caramel sauce or a warm chocolate ganache. They are best eaten by hand, wrapped in a small piece of parchment paper to catch any drips.
Storage & Make-Ahead Tips
These are the ultimate make-ahead dessert! Once cut into squares, wrap each individual sandwich tightly in plastic wrap, then a layer of aluminum foil. This double-protection prevents the brownies from picking up any “freezer flavors.” They will stay fresh and delicious for up to one month. If they have been in the freezer for more than a week, let them sit on the counter for 5 minutes before serving to soften the brownie slightly.
FAQs
Can I use a store-bought brownie mix?
While you can, most box mixes are not formulated to stay soft in the freezer. They often become quite hard. If you do use a mix, replace the water with milk and add an extra tablespoon of vegetable oil.
Why did my brownies crack when I cut them?
This usually happens if the brownies are too cold. Let the block sit out for 5-10 minutes before cutting, and always use a hot, clean knife.
How do I prevent the ice cream from melting while I assemble?
Work quickly! Make sure the brownies are completely cold (you can even chill them in the fridge first). Soften the ice cream only until it is spreadable, not liquid.
Can I use a 9×13 pan instead of two 8×8 pans?
Yes, but you will have to cut the large brownie in half to stack it. The 8×8 pans are recommended because they ensure the two layers are perfectly uniform in thickness.
Final Thoughts
Making your own brownie ice cream sandwiches is a rewarding process that results in a dessert far superior to anything you can buy. The combination of the deep, fudgy chocolate and the cold, creamy ice cream is a timeless classic for a reason. Don’t be afraid to experiment with different fillings and toppings! Once you master this base recipe, you’ll have the ultimate dessert weapon in your culinary arsenal. Happy baking (and freezing)!