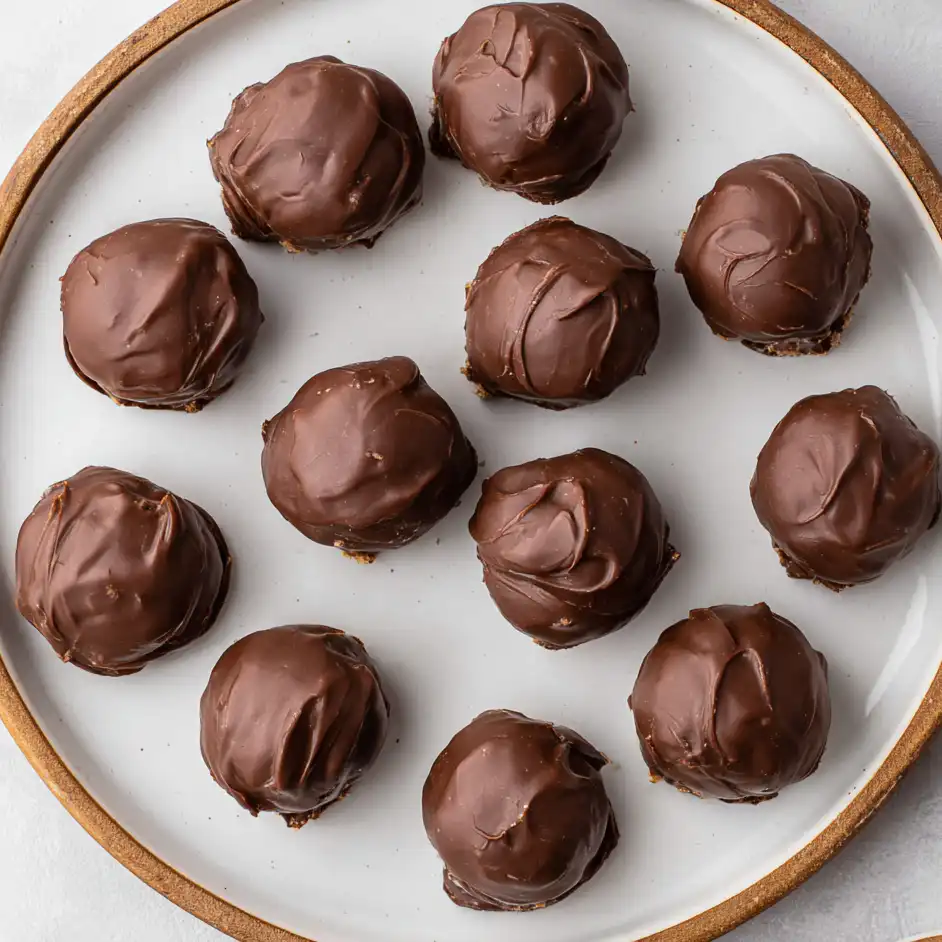
If you are looking for that perfect “one-bite” wonder that combines the nostalgia of a childhood snack with the sophistication of a gourmet truffle, look no further. These Peanut Butter Balls with Rice Krispies are the answer. Often referred to as “Crunchy Buckeyes” or “Peanut Butter Bon Bons,” these treats offer a satisfying snap from the toasted rice cereal, a creamy melt-in-your-mouth center, and a rich chocolate coating that ties everything together.

The beauty of this recipe lies in its simplicity. With no oven required and just six pantry staples, you can whip up a massive batch of these for holiday cookie trays, summer potlucks, or simply to satisfy a late-night sweet tooth. In this guide, I’ll walk you through the professional techniques to ensure your chocolate stays shiny and your cereal stays crunchy, creating a professional-grade dessert right in your home kitchen.
Why You’ll Love This Recipe
You’ll love this recipe because it strikes the perfect balance between salty and sweet, while providing a texture that is far more interesting than a standard peanut butter cup. The addition of Rice Krispies adds a light, airy crunch that breaks up the density of the peanut butter and sugar.
Furthermore, it is a high-reward, low-effort dessert. In just 45 minutes, you can produce dozens of treats that look like they came from a high-end confectionery. They are naturally egg-free and can easily be adapted for various dietary needs, making them a safe and popular choice for large gatherings. Plus, they freeze beautifully, meaning you can have a gourmet snack ready at a moment’s notice.
What Is a Peanut Butter Ball with Rice Krispies?
At its core, a Peanut Butter Ball is a confection made by mixing peanut butter, a sweetener (usually powdered sugar), and a fat (butter) to create a moldable “dough.” While the classic Ohio Buckeye is smooth, the addition of Rice Krispies—a crisp, puffed rice cereal—elevates the recipe by introducing a structural crunch.
This specific variation is a staple in Southern and Midwestern American kitchens, particularly during the Christmas season. The cereal acts as a stabilizer, allowing the balls to hold their shape even at room temperature, while the chocolate coating provides a protective shell that keeps the interior moist and fresh. It is the quintessential no-bake dessert that bridges the gap between a candy and a cookie.
Ingredients Overview
To achieve the best results, selecting the right ingredients is paramount. Here is what you will need:
- Peanut Butter (2 cups): For this recipe, I recommend using a standard “shelf-stable” creamy peanut butter (like Jif or Skippy). While natural peanut butters are delicious, the oil separation in those varieties can make the dough too soft or greasy to roll effectively.
- Salted Butter (½ cup): Ensure your butter is softened to room temperature. The salt in the butter helps cut through the sweetness of the powdered sugar, creating a more complex flavor profile.
- Vanilla Extract (2 teaspoons): Use pure vanilla extract if possible. It acts as a flavor enhancer, making the chocolate and peanut butter taste more intense.
- Powdered Sugar (2 cups): Also known as confectioners’ sugar, this provides the sweetness and the structure. Sifting it beforehand can prevent lumps in your dough.
- Rice Krispies Cereal (3½ cups): This provides the signature “snap, crackle, and pop.” Ensure your cereal is fresh for the best texture.
- Chocolate Melting Wafers (20 ounces): Unlike chocolate chips, melting wafers (like Ghirardelli) are formulated with a higher cocoa butter content, allowing them to melt smoothly and set firmly without the need for tempering.
Ingredient Substitutions & Tips
If you have dietary restrictions or want to experiment, here are some reliable substitutions:
- Nut Butter Alternatives: You can swap the peanut butter for almond butter or sunflower seed butter (SunButter) for a nut-free version. Ensure the consistency is thick; if the alternative butter is runny, add an extra ¼ cup of powdered sugar.
- Gluten-Free: Use a certified gluten-free puffed rice cereal to make this recipe safe for those with Celiac disease.
- Chocolate Types: While dark chocolate is classic, white chocolate or milk chocolate wafers work equally well. You can even use almond bark if you are looking for a more budget-friendly option.
- Butter: For a dairy-free version, use a high-quality vegan butter stick (not margarine from a tub).
Step-by-Step Instructions
1. Cream the Base
Start by placing your 2 cups of peanut butter and ½ cup of softened salted butter into a large mixing bowl. Using a hand mixer or a stand mixer fitted with the paddle attachment, beat the mixture on medium speed until it is completely smooth and pale in color. Add the vanilla extract and mix for another 30 seconds to incorporate.
2. Incorporate the Sugar
Turn the mixer to the lowest setting. Gradually add the 2 cups of powdered sugar, about ½ cup at a time. This prevents a “sugar cloud” from covering your kitchen. Continue mixing until the dough is stiff and no longer sticks to your fingers.
3. The Crunch Factor
Fold in the 3½ cups of Rice Krispies cereal using a large rubber spatula. Do this gently by hand rather than with a mixer to avoid crushing the cereal. You want the puffed rice to remain whole for maximum crunch.
4. Shape the Balls
Line a large baking sheet with parchment paper. Using a medium cookie scoop (about 1.5 tablespoons), portion out the dough. Roll each portion between your palms until it forms a smooth, round ball. Place them on the sheet.
5. Melt the Chocolate
Place the chocolate melting wafers in a microwave-safe bowl. Heat in 30-second intervals, stirring thoroughly between each. Once the chocolate is about 80% melted, stop heating and stir until the residual heat melts the remaining pieces. This prevents the chocolate from scorching.
6. The Dipping Process
Drop a ball into the chocolate. Use a fork or a specialized dipping tool to lift it out. Tap the fork against the side of the bowl to let the excess chocolate drip off. Slide the ball back onto the parchment paper. Repeat until all balls are coated.
Expert Baking Tips
- The Chilling Secret: If your kitchen is warm and the dough feels too soft to roll, pop the bowl in the fridge for 20 minutes before shaping. This makes the butter firm up and prevents the balls from becoming lopsided.
- Clean Dipping: To avoid a “puddle” of chocolate at the base of your balls, use a toothpick to gently slide the ball off the fork onto the parchment paper.
- The Cup Method: Instead of a wide bowl, melt your chocolate in a deep, narrow cup. This creates more depth for dipping, making it easier to submerge the peanut butter balls fully.
- Consistent Sizing: A cookie scoop isn’t just for cookies; it ensures every peanut butter ball is the same size, which looks much more professional on a platter.
Variations & Festive Toppings
One of the best things about these Peanut Butter Balls is how easy they are to customize:
- The Drizzle: Once the base chocolate has set, melt a small amount of white chocolate or peanut butter chips and drizzle it over the top in a zigzag pattern.
- Holiday Flare: While the chocolate is still wet, top each ball with festive sprinkles, crushed candy canes, or a pinch of flaky sea salt.
- The Hidden Surprise: Place a single mini-marshmallow or a whole almond inside the center of each ball while rolling for a “hidden” texture.
- Double Chocolate: Use cocoa-flavored puffed rice cereal instead of regular Rice Krispies for a “Double Chocolate Peanut Butter” experience.
Serving Suggestions
These balls are rich, so they are best served as part of a larger dessert spread. They pair beautifully with a cold glass of milk or a strong cup of black coffee. For a festive look, place each individual ball into a mini cupcake liner (truffle paper). This not only makes them look like high-end candy but also makes them easier for guests to grab without getting chocolate on their fingers. They are a fantastic addition to “charcuterie-style” dessert boards featuring fruits and nuts.
Storage & Make-Ahead Tips
Storage: These treats should be stored in an airtight container. They will last at room temperature for up to 3 days, but for the best texture and to prevent the chocolate from “blooming” (turning white), store them in the refrigerator for up to 2 weeks.
Freezing: These are incredibly freezer-friendly. Flash-freeze them on a tray for an hour, then transfer to a freezer bag. They will stay fresh for up to 3 months. You can even eat them straight from the freezer for a firm, fudgy snack!
FAQs
Q: Can I use natural peanut butter for this recipe?
A: It is generally not recommended. Natural peanut butter is often too runny and oily, which prevents the balls from holding their shape. If you must use it, you will likely need to significantly increase the amount of powdered sugar.
Q: Why is my chocolate cracking?
A: Chocolate usually cracks if it sets too quickly in a very cold freezer. It’s best to let them set in the refrigerator or at a cool room temperature. Adding a teaspoon of coconut oil to the melted chocolate can also give it a bit more flexibility.
Q: Can I make these without a mixer?
A: Absolutely! You can mix the butter, peanut butter, and sugar with a sturdy wooden spoon. It just takes a bit more “elbow grease” to get it perfectly smooth.
Q: How do I keep the Rice Krispies from getting soggy?
A: The key is the fat content. By coating the cereal in the peanut butter and butter mixture before adding any moisture-containing ingredients, you create a barrier. Also, avoid storing them in a humid environment.
Q: My dough is too crumbly to roll. What should I do?
A: This usually happens if there is too much powdered sugar. Add a tablespoon of melted peanut butter or a teaspoon of milk to the dough and mix until it reaches a “Play-Doh” consistency.
These Peanut Butter Balls with Rice Krispies are more than just a simple snack; they are a timeless classic that brings joy to any occasion. Whether you are a seasoned baker or a kitchen novice, the combination of creamy peanut butter and crunchy cereal dipped in velvet-smooth chocolate is a guaranteed success. Give this recipe a try for your next gathering, and don’t be surprised when everyone asks you for the secret!
PrintNo-Bake Peanut Butter Balls with Rice Krispies

These Rice Krispie Peanut Butter Balls are a sweet and salty no-bake treat that’s made with only 6 ingredients in just 45 minutes! Great for potlucks and cookie trays!
- Prep Time: 30 minutes
- Cook Time: 15 minutes
- Total Time: 45 minutes
- Yield: 30 balls
- Cuisine: American
Ingredients
2 cups peanut butter – creamy or crunchy
½ cup salted butter – softened
2 teaspoons vanilla extract
2 cups powdered sugar
3½ cups rice krispies cereal
20 ounces chocolate melting wafers
Instructions
In a large bowl, beat together 2 cups peanut butter, ½ cup salted butter, and 2 teaspoons vanilla extract until fully combined.
Add 2 cups powdered sugar (½ cup at a time), mixing a little between each addition so it doesn’t make a mess.
Fold in the 3½ cups rice krispies cereal and portion the mixture out onto a parchment-lined baking sheet with a medium cookie scoop.
Roll the balls between your palms to smooth them out.
Melt 20 ounces chocolate melting wafers in a deep wide-mouth cup or bowl at 30-second intervals, stirring between each one, until fully melted.
Dip the balls in the melted chocolate one at a time, letting any excess chocolate drip off, then placing back on the parchment.
Reheat the chocolate if it begins getting too cool and thick, then finish dipping the balls.
Let the balls sit at room temperature until the harden or pop them in the fridge for 15 minutes.
Notes
• Use a toothpick or a dipping tool to keep your hands clean during the chocolate stage.
• If the mixture is too soft to roll, chill it in the fridge for 20 minutes before shaping.
• Store in an airtight container in the refrigerator to keep them crisp.