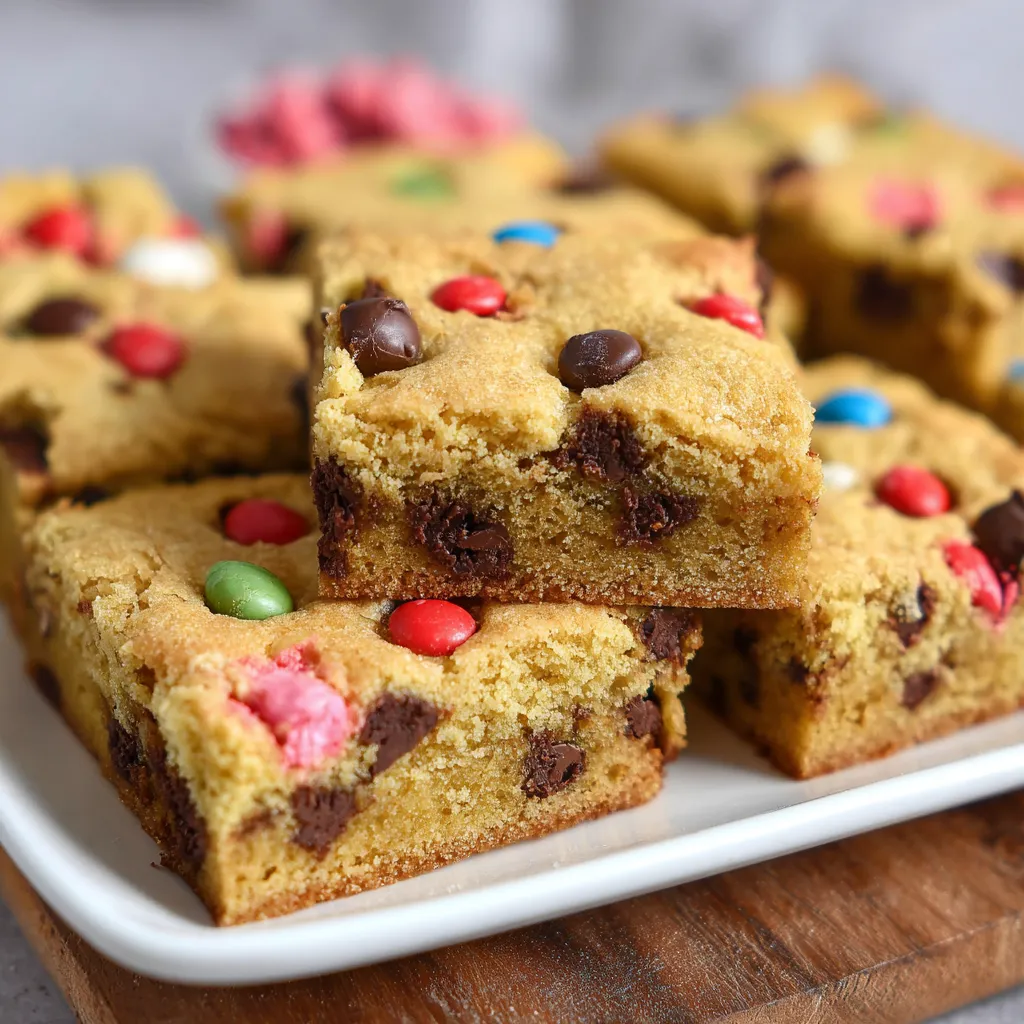
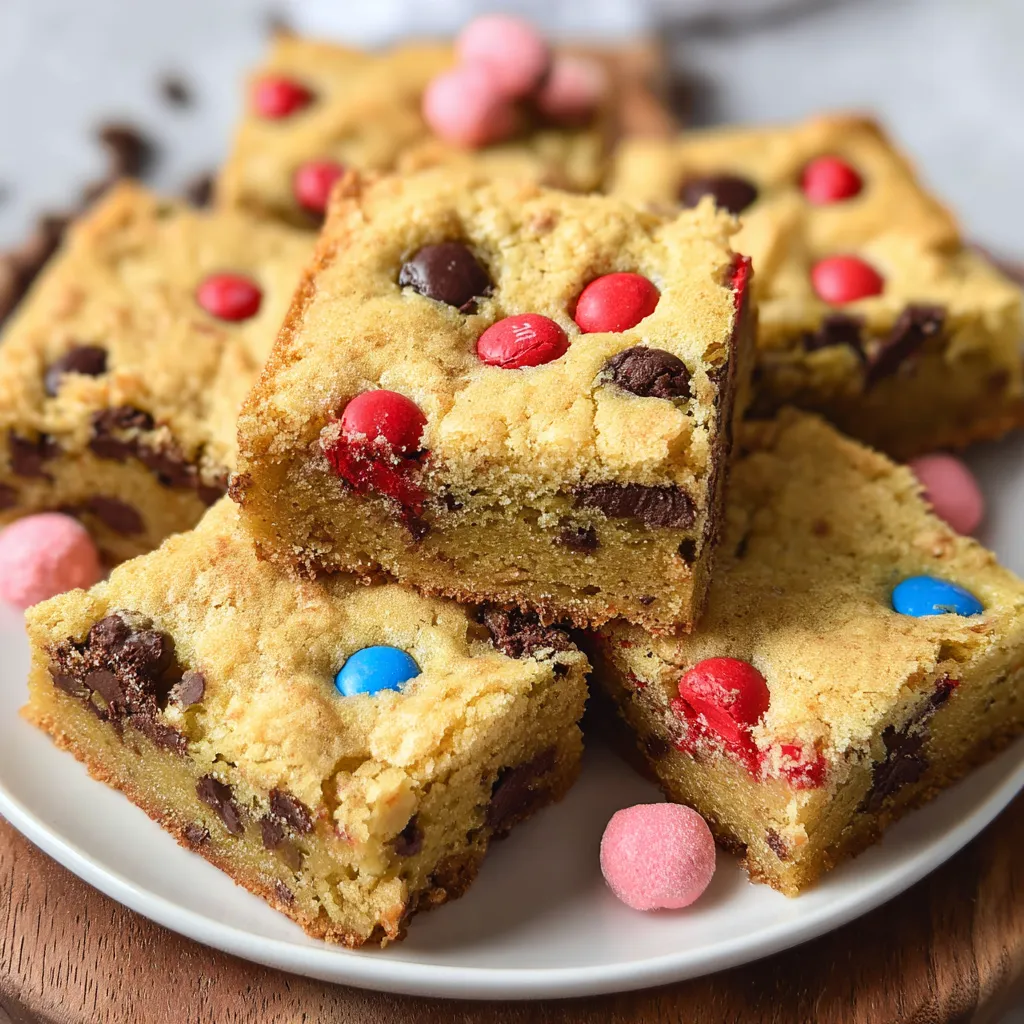
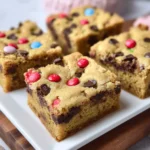
There is something inherently nostalgic about a bright, colorful M&M cookie. However, when you are craving that classic flavor but don’t want to spend an hour scooping individual dough balls and rotating baking sheets, these M&M Cookie Bars are the ultimate solution. This recipe delivers everything you love about a premium bakery-style cookie—crispy edges, a dense and chewy center, and plenty of chocolate—packed into a convenient, thick bar format.
Whether you are preparing a quick treat for a school lunchbox, heading to a neighborhood potluck, or simply looking for a reliable late-night snack, these bars never disappoint. By using a specific ratio of brown to white sugar and baking them in a compact pan, we achieve a texture that is far superior to store-bought alternatives. Get ready to discover why this “one-bowl wonder” is about to become your new favorite baking staple.
Why You’ll Love This Recipe
You might be wondering why you should choose cookie bars over traditional cookies. First and foremost is the ease of preparation. There is no chilling the dough required, which saves you at least 30 minutes of waiting time. Secondly, the texture is more consistent; every bite is thick and fudgy, reminiscent of a blondie but with the distinct flavor profile of a classic chocolate chip cookie.
These bars are also incredibly customizable. While we use standard milk chocolate M&Ms, you can easily swap them for seasonal colors or different varieties like peanut butter or pretzel M&Ms. Finally, this recipe uses basic pantry staples. You likely already have the butter, flour, and sugars in your kitchen right now, making it the perfect “emergency” dessert for unexpected guests.
What Is an M&M Cookie Bar?
An M&M Cookie Bar is essentially a chocolate chip cookie dough that has been spread into a rectangular or square baking pan rather than portioned into individual rounds. This method of baking creates a dessert that is denser and more moist than a standard cookie because the dough is protected by the sides of the pan, preventing the edges from drying out while the center stays soft.
Unlike brownies, which rely on cocoa powder or melted chocolate for their structure, these bars focus on the interplay between butter and brown sugar. The result is a “blond” base that features hints of caramel and vanilla, providing the perfect canvas for the crunch of M&M candy shells and the melt-in-your-mouth quality of semi-sweet chocolate chips.
Ingredients Overview
To achieve the perfect bake, understanding your ingredients is key. Here is a breakdown of what makes these bars so special:
- Softened Butter (1/2 cup): The fat source provides flavor and creates that tender, melt-in-your-mouth crumb. Ensure it is at room temperature to allow for proper creaming with the sugars.
- Brown Sugar (1/2 cup): This is the secret to chewiness. The molasses in brown sugar adds moisture and a deep, caramel-like sweetness that white sugar alone cannot provide.
- White Sugar (1/4 cup): This helps the edges crisp up slightly and provides the necessary structure to keep the bars from being too oily.
- Vanilla Extract (1 tsp): A high-quality vanilla acts as a flavor enhancer for both the chocolate and the dough itself.
- Large Egg (1): The binding agent that gives the bars their lift and richness.
- All-Purpose Flour (1 cup): The foundation of the recipe. We use just enough to hold everything together without making the bars cakey.
- Baking Soda & Salt (1/3 tsp each): These provide the rise and balance out the intense sweetness of the candies.
- M&Ms and Chocolate Chips (1/2 cup each): The stars of the show! Using a mix of both ensures chocolatey goodness in every single bite.
Ingredient Substitutions & Tips
If you find yourself missing an ingredient, don’t panic. For a Gluten-Free version, a high-quality 1-to-1 gluten-free flour blend (ensure it contains xanthan gum) works perfectly in this recipe. If you prefer a Dairy-Free option, you can substitute the butter with a vegan butter stick and ensure your chocolate chips and M&M alternatives are vegan-friendly.
For those who want to experiment with flavor, try adding 1/2 teaspoon of Almond Extract alongside the vanilla for a “wedding cake” flavor profile. You can also substitute the semi-sweet chocolate chips for dark chocolate chunks if you prefer a less sweet, more sophisticated dessert. If you only have salted butter on hand, simply reduce the added salt in the recipe to a tiny pinch.
Step-by-Step Instructions
1. Preparation and Creaming:
Start by preheating your oven to 350°F (175°C). While the oven warms, grease your 8×6 or 9×7 inch pan. I highly recommend lining the pan with parchment paper, leaving an overhang on the sides. This allows you to lift the entire block of bars out once cooled, making it much easier to cut clean, even squares. In a large bowl, combine your softened butter with both the brown and white sugars. Use a hand mixer or a stand mixer to cream these together for about 2 minutes. You want the mixture to look pale and fluffy, which indicates that you’ve incorporated enough air.
2. Incorporating Wet Ingredients:
Add your egg and vanilla extract to the butter-sugar mixture. Beat again on medium speed until the egg is fully incorporated and the batter looks smooth. Avoid over-beating at this stage; you just want it to be cohesive.
3. Mixing Dry Ingredients:
In a separate small bowl, whisk together the flour, baking soda, and salt. This ensures the leavening agent is evenly distributed. Gradually add this dry mixture to your wet ingredients. I recommend switching to a spatula or using the mixer on the lowest possible speed. Stop mixing the second you no longer see streaks of white flour. Over-mixing leads to gluten development, which can make your cookie bars tough instead of tender.
4. Folding and Topping:
Gently fold in your chocolate chips and about two-thirds of the M&Ms. Once distributed, spread the thick dough into your prepared pan. It may seem a bit stiff, but use a spatula or dampened fingers to press it into the corners. Finally, sprinkle the remaining M&Ms on top, pressing them in lightly. This ensures the bars look professional and colorful once baked.
5. Baking and Cooling:
Slide the pan into the center rack of your oven. Bake for 18–20 minutes. The key is to look for golden-brown edges while the center still looks slightly “underdone” or soft. Do not wait for the center to look hard; it will continue to cook as it cools in the pan (carry-over cooking). Allow the bars to cool completely in the pan—usually about 45 minutes—before lifting them out and slicing.
Expert Baking Tips
To take these bars from good to “bakery-quality,” follow these three expert tips. First, use room temperature eggs. A cold egg can cause the creamed butter to seize, resulting in an uneven texture. To warm an egg quickly, place it in a bowl of warm water for 5 minutes.
Second, don’t skip the salt. Salt is essential in sweet recipes to balance the sugars and make the chocolate flavor pop. Use a fine sea salt for the best distribution. Third, for the cleanest slices, chill the bars in the fridge for 20 minutes after they have reached room temperature. This firms up the chocolate chips and the candy shells, preventing them from smearing when you run your knife through.
The Secret to Perfect Pan Selection
Choosing the right pan is crucial for the success of this recipe. This specific ingredient ratio is designed for a smaller pan, such as an 8×6 inch or a 9×7 inch dish. If you use a standard 9×13 pan, the dough will be spread too thin, resulting in crispy, cracker-like cookies rather than thick bars.
If you only have a standard 8×8 square pan, you can still use this recipe, but the bars will be slightly thinner, and you should reduce the baking time by 2–3 minutes. Conversely, if you want “mega-thick” bars, you can double the recipe and bake it in an 8×8 pan for 25–30 minutes. Always keep a close eye on the oven, as pan material (glass vs. metal) also affects heat distribution!
Serving Suggestions
While these M&M Cookie Bars are spectacular on their own, you can elevate them for a dinner party. Serve a warm bar in a bowl topped with a generous scoop of vanilla bean ice cream and a drizzle of hot fudge. The contrast between the cold ice cream and the warm, melty chocolate is irresistible. For a simpler treat, they are the perfect companion to a cold glass of milk or a hot cup of coffee. They also make fantastic additions to a dessert board alongside fresh berries and nuts.
Storage & Make-Ahead Tips
These bars stay fresh and chewy for up to 4 days when stored in an airtight container at room temperature. If you want to keep them longer, you can freeze them! Wrap individual squares in plastic wrap and place them in a freezer-safe bag for up to 3 months. To enjoy, simply let them thaw on the counter for an hour. If you want to make the dough ahead of time, you can press it into the pan, cover it tightly, and refrigerate for up to 24 hours before baking.
FAQs
Can I use melted butter instead of softened butter?
Using melted butter will change the texture, making the bars more dense and “greasy” rather than soft and fluffy. For the best results, stick to softened (room temperature) butter.
Why are my cookie bars hard?
This usually happens for two reasons: over-mixing the flour or over-baking the bars. Ensure you mix until just combined and pull them out of the oven while the center still has a slight jiggle.
Can I double this recipe?
Yes! You can double all the ingredients and bake them in a standard 9×13 inch baking pan. The baking time will likely increase to 22–25 minutes.
Do I have to use M&Ms?
Not at all! You can replace the M&Ms with chopped walnuts, pecans, white chocolate chips, or even crushed peanut butter cups.
How do I get clean edges when cutting?
Wait for the bars to cool completely. Use a large, sharp chef’s knife and wipe it clean with a damp paper towel between each cut to prevent the chocolate from smearing.
Final Thoughts
Making M&M Cookie Bars is a joyful, low-stress way to bring a bit of color and sweetness into your kitchen. They offer the nostalgic comfort of a homemade cookie with the foolproof simplicity of a one-pan bake. Once you master this base recipe, the possibilities for customization are endless. So, grab your mixing bowl, preheat your oven, and get ready to enjoy a treat that is guaranteed to put a smile on everyone’s face!
PrintSoft & Chewy M&M Cookie Bars
Thick, buttery, and packed with colorful chocolate candies, these M&M Cookie Bars are the ultimate crowd-pleaser. They offer the perfect balance of a soft, chewy center and slightly crisp edges, all without the hassle of scooping individual cookies.
- Prep Time: 10 minutes
- Cook Time: 20 minutes
- Total Time: 30 minutes
- Yield: 9 bars
- Cuisine: American
Ingredients
Softened butter – 1/2 cup
Light brown sugar – 1/2 cup
Granulated white sugar – 1/4 cup
Vanilla extract – 1 tsp
Large egg – 1
Baking soda – 1/3 tsp
Salt – 1/3 tsp
All-purpose flour – 1 cup
Semi-sweet chocolate chips – 1/2 cup
M&Ms (milk chocolate) – 1/2 cup
Instructions
Preheat your oven to 350°F (175°C) and line an 8×6 or 9×7 inch baking pan with parchment paper.
In a large mixing bowl, cream together the softened butter, brown sugar, and white sugar until the mixture is smooth and pale.
Add the egg and vanilla extract to the creamed butter mixture and beat well until fully incorporated.
In a separate smaller bowl, whisk together the flour, baking soda, and salt.
Gradually add the dry ingredients to the wet mixture, stirring or beating on low speed until just combined.
Fold in the chocolate chips and about 2/3 of the M&Ms using a spatula.
Spread the dough evenly into the prepared baking pan, smoothing the top with a spatula.
Press the remaining M&Ms onto the surface of the dough for a vibrant finish.
Bake for 18–20 minutes, or until the edges are lightly golden and the center is set.
Remove from the oven and let the bars cool completely in the pan before slicing into squares.
Notes
• Ensure your butter is softened to room temperature, but not melted, for the best texture.
• Do not overbake; the bars will continue to firm up as they cool in the pan.
• Use a parchment paper sling to easily lift the entire block of bars out for clean slicing.