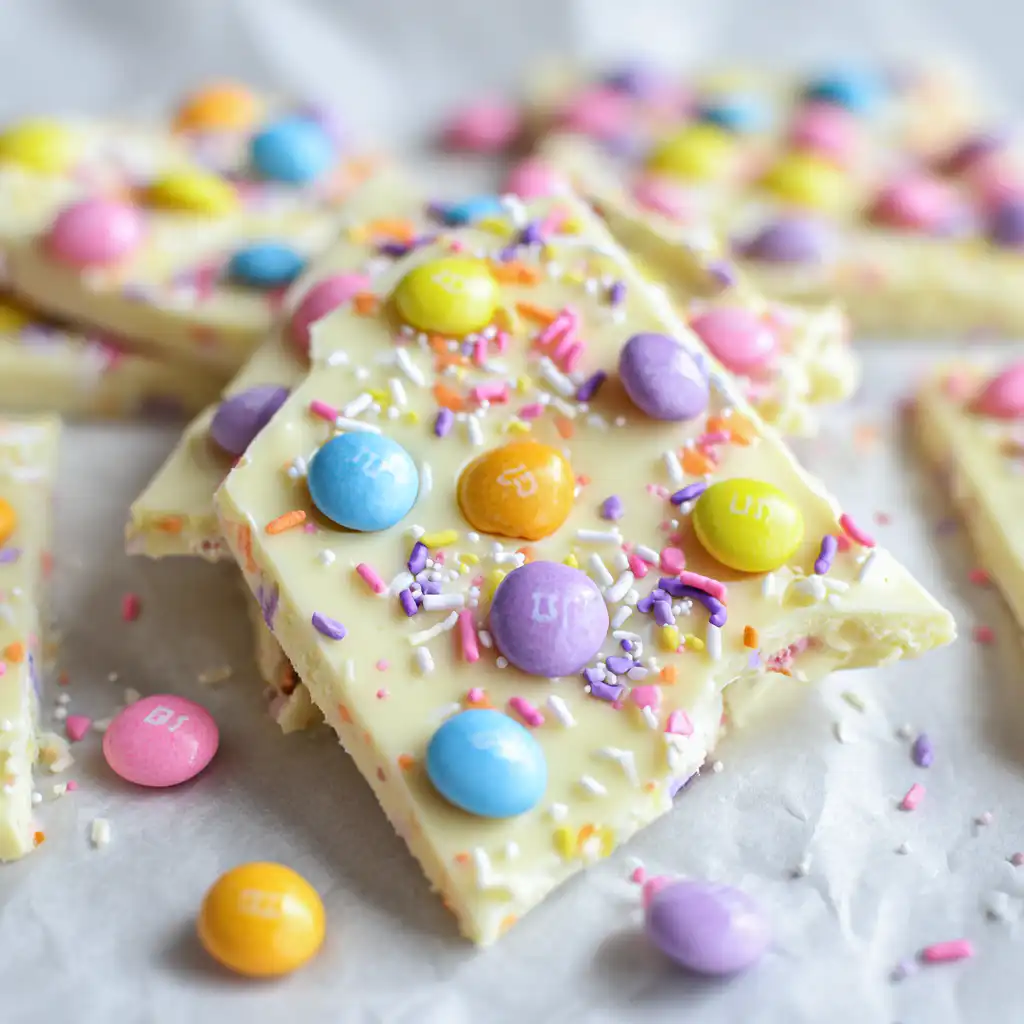
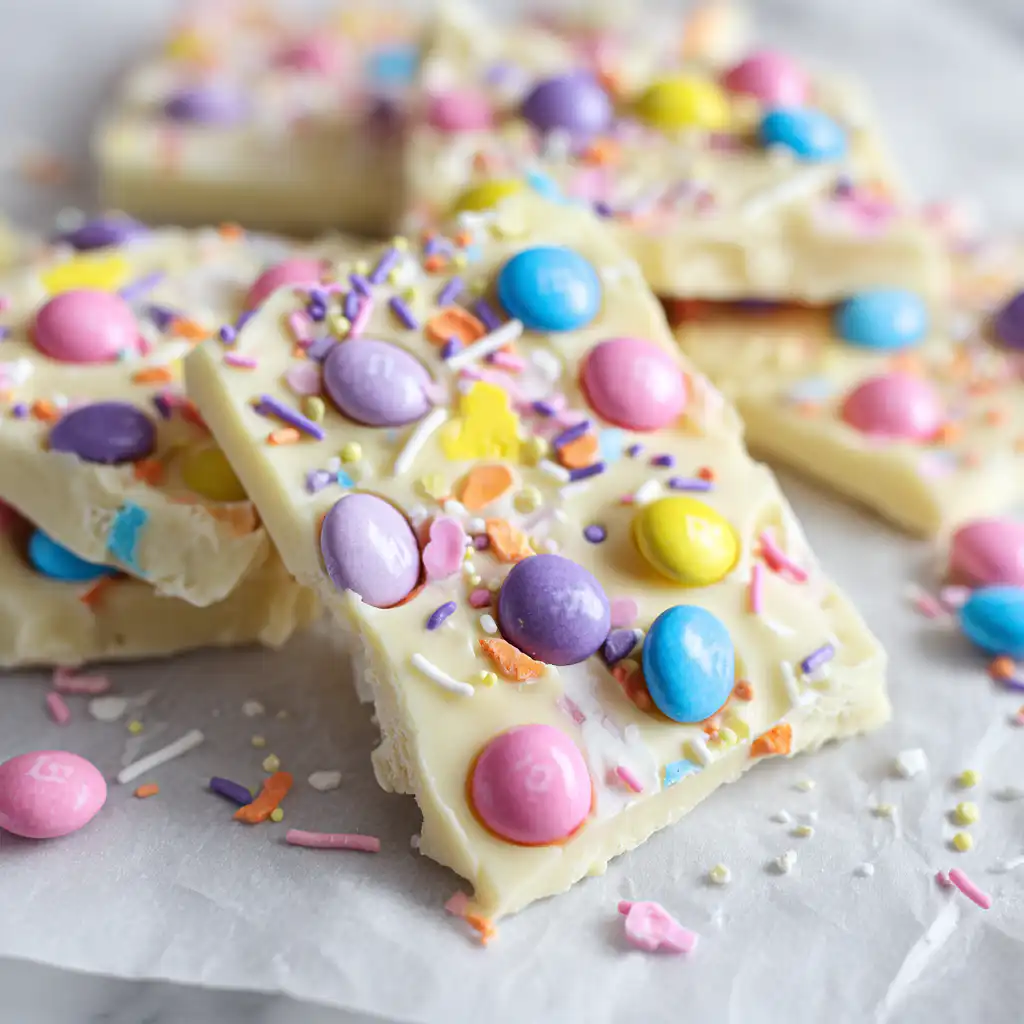
As the flowers begin to bloom and the air turns crisp and sweet, there is no better way to celebrate the arrival of spring than with a treat that is as beautiful as it is delicious. This Easter Bunny Bark is a vibrant, whimsical dessert that captures the very essence of the holiday in every bite. Whether you are looking for the perfect addition to an Easter basket, a centerpiece for your brunch dessert table, or a fun kitchen project to do with the kids, this recipe is a guaranteed winner. It requires no baking, very little prep time, and offers a canvas for endless creativity. With its creamy white chocolate base and a kaleidoscope of pastel candies, this bark is more than just a snack—it is a celebration of the season that anyone can master in minutes.
Why You’ll Love This Recipe
You are going to fall in love with this Easter Bunny Bark for its sheer simplicity and stunning visual impact. First and foremost, it is a no-bake recipe, which means you won’t have to fight for oven space during a busy holiday weekend. It is incredibly customizable; you can swap the candies, change the colors of the swirls, or even adjust the type of chocolate to suit your preferences. Additionally, it is a fantastic “make-ahead” treat that stays fresh for weeks, taking the stress out of holiday hosting. Kids love helping with the “sprinkling” phase, making it a wonderful way to create lasting family memories in the heart of the home.
What Is Easter Bunny Bark?
At its core, “bark” is a type of confection made by spreading melted chocolate into a thin sheet and topping it with various nuts, candies, or fruits. Once the chocolate hardens, it is broken into irregular, rustic shards. Easter Bunny Bark is the festive, spring-inspired cousin of the traditional peppermint bark we see during the winter. It typically utilizes a white chocolate base to make the pastel colors of the season “pop.” The “Bunny” moniker refers to the playful inclusion of Easter-themed candies like malted milk eggs, bunny-shaped sprinkles, and the soft, muted tones associated with the holiday. It is a light, sweet, and crunchy treat that bridges the gap between candy and dessert.
What you will need
The beauty of this recipe lies in its short ingredient list, but the quality of these components makes a world of difference.
- White Chocolate or Candy Melts: This is the foundation of your bark. If you want a rich, creamy flavor, look for high-quality white chocolate bars or chips that contain real cocoa butter. If you are looking for ease of use and a bright, opaque white finish, candy melts are a fantastic choice as they melt smoothly and set quickly.
- Pastel-colored M&M’s or Chocolate Eggs: These provide the necessary crunch and a burst of chocolatey goodness. Look for “Spring” or “Easter” editions to get those perfect duck-egg blues, soft pinks, and pale yellows.
- Easter-Themed Sprinkles: This is where the magic happens. A mix of nonpareils, jimmies, and perhaps some gold stars or bunny shapes adds texture and a professional “bakery” look to your bark.
- Optional Food Coloring: To achieve those beautiful swirls, use gel-based food coloring. Gel is crucial because liquid coloring can cause the chocolate to “seize,” turning it into a grainy, unworkable mess.
Ingredient Substitutions & Tips
If you aren’t a fan of white chocolate, feel free to use milk or dark chocolate as your base. While it won’t have the same “pastel” aesthetic, it will still taste incredible with the candy toppings. For a vegan-friendly version, utilize dairy-free white chocolate chips and vegan-certified sprinkles. If you want to add some saltiness to balance the sweet, consider crushing some pretzels or adding a handful of lightly salted pistachios. For those with nut allergies, ensure your candy eggs are nut-free. Always remember to check the labels of your sprinkles, as some contain common allergens.
Step-by-Step Instructions
- Preparation: Begin by lining a large rimmed baking sheet with parchment paper or a high-quality silicone baking mat. This ensures your bark won’t stick and makes cleanup a breeze.
- Melting the Chocolate: Place your white chocolate or candy melts into a microwave-safe glass bowl. Microwave on medium power in 30-second intervals. After each interval, stir the chocolate thoroughly with a rubber spatula. Even if it looks like it hasn’t melted, the residual heat will continue the process. Stop once it is completely smooth.
- Coloring (Optional): If you want to create a marbled effect, set aside two small bowls with about two tablespoons of melted chocolate each. Add a drop of gel food coloring (like pink or teal) to each and stir until combined.
- Spreading: Pour the main batch of white chocolate onto the center of the parchment paper. Using an offset spatula, spread the chocolate into an even layer, approximately 1/4 inch thick. It doesn’t need to be a perfect rectangle; the rustic edges add charm.
- Swirling: If using colored chocolate, drop small spoonfuls onto the white base. Use a toothpick or the tip of a knife to gently swirl the colors together in a figure-eight motion.
- Topping: While the chocolate is still wet, immediately scatter your M&Ms and sprinkles across the surface. Press down very lightly on the larger candies to ensure they are anchored into the chocolate.
- Setting: Let the bark sit at room temperature until firm (about 1-2 hours). If you are in a hurry, you can place the tray in the refrigerator for 15-20 minutes.
- Breaking: Once fully hardened, lift the parchment paper and break the bark into pieces by hand, or use a sharp knife to cut it into more uniform triangles.
Expert Baking/Cooking Tips
To achieve the best results, pay close attention to the temperature. White chocolate is more delicate than dark chocolate and can burn easily. Never let a single drop of water touch your chocolate, as this will cause it to seize immediately. If your chocolate seems too thick to spread smoothly, stir in one teaspoon of coconut oil or vegetable shortening; this will thin it out and give it a beautiful glossy sheen. Also, ensure your toppings are ready to go before you pour the chocolate. White chocolate sets faster than you might think, especially if your kitchen is cool!
The Art of the Perfect Swirl
Creating a professional-looking marble swirl is easier than it looks. The key is “less is more.” When you drop your colored chocolate onto the white base, keep the dollops small. When swirling with your toothpick, don’t over-mix; if you stir too much, the colors will blend into one muddy hue rather than distinct, elegant streaks. Aim for long, sweeping motions. If you want even more dimension, you can use three different colors (like lavender, mint, and peach) to create a truly spectacular rainbow effect that looks like it came straight from a high-end candy shop.
Serving Suggestions
Present your Easter Bunny Bark on a white ceramic platter to let the colors pop, or tuck shards into clear cellophane bags tied with a pastel ribbon for an adorable party favor. It also makes a fantastic topping for Easter-themed cupcakes or as a decorative garnish on a strawberry layer cake. If you’re hosting a brunch, place a few pieces in a bowl alongside fresh berries and honeycomb for a sophisticated yet playful dessert option.
Storage & Make-Ahead Tips
This treat is perfect for planning ahead. Store the broken bark in an airtight container at room temperature for up to two weeks. If your house is particularly warm, keep it in the refrigerator to prevent melting, though be aware that chocolate can sometimes develop a “bloom” (a harmless white coating) from moisture in the fridge. You can also freeze the bark for up to three months; just thaw it at room temperature before serving.
FAQs
Q: Can I use chocolate chips instead of bars?
A: Yes, you can use white chocolate chips, though they often contain stabilizers that make them slightly more resistant to melting. If using chips, be extra patient during the melting process and consider adding a tiny bit of coconut oil.
Q: Why did my chocolate turn grainy?
A: This is called seizing. It usually happens if a drop of water gets into the bowl or if the chocolate is overheated. To prevent this, use dry utensils and melt in short bursts.
Q: Do I have to use gel food coloring?
A: Yes, gel or oil-based coloring is essential. Standard liquid food coloring is water-based and will cause the chocolate to clump and harden instantly.
Q: How long does it take for the bark to set?
A: At room temperature, it takes about 60 to 90 minutes. In the fridge, it will be ready in about 20 minutes.
Q: Is this recipe gluten-free?
A: Most white chocolate and M&Ms are gluten-free, but always check the labels on your sprinkles and candies to be certain, as some manufacturing facilities may have cross-contamination.
This Easter Bunny Bark is the epitome of festive fun. It is a low-effort, high-reward recipe that brings a touch of magic to your holiday celebrations. With its creamy texture, sweet crunch, and beautiful pastel palette, it is sure to be a hit with guests of all ages. Don’t be afraid to experiment with different toppings and colors to make it your own. Happy Easter and happy snacking!
PrintEasy Easter Bunny Bark Recipe
A colorful, crunchy, and creamy white chocolate bark loaded with pastel candies and spring sprinkles. The perfect no-bake treat for Easter baskets!
- Prep Time: 10 minutes
- Cook Time: 5 minutes
- Total Time: 45 minutes
- Yield: 12 pieces
- Cuisine: American
Ingredients
White chocolate or candy melts – 12 oz
Pastel-colored M&M’s or chocolate eggs – 1 cup
Easter-themed sprinkles – 1/2 cup
Gel food coloring (optional) – 2-3 drops
Instructions
Prepare a baking sheet by lining it with parchment paper or a silicone mat.
Melt the white chocolate or candy melts in a microwave-safe bowl. Heat in 30-second intervals, stirring thoroughly between each, until completely smooth.
If creating swirls, divide a small portion of the chocolate into bowls and add gel food coloring.
Pour the main batch of white chocolate onto the prepared baking sheet. Use an offset spatula to spread it to about 1/4 inch thickness.
Drop spoonfuls of the colored chocolate (if using) onto the white base and swirl with a toothpick.
Generously scatter the M&Ms and sprinkles over the wet chocolate, pressing down slightly to ensure they stick.
Allow the bark to set at room temperature for 1-2 hours or refrigerate for 20 minutes until completely hard.
Break or cut the bark into irregular, rustic pieces and serve.
Notes
• Use high-quality white chocolate bars for better flavor, or candy melts for a brighter white finish.
• Avoid liquid food coloring as it can cause the chocolate to seize; use gel or oil-based colors.
• If the chocolate is too thick, add a teaspoon of coconut oil or shortening to thin it out.