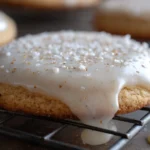
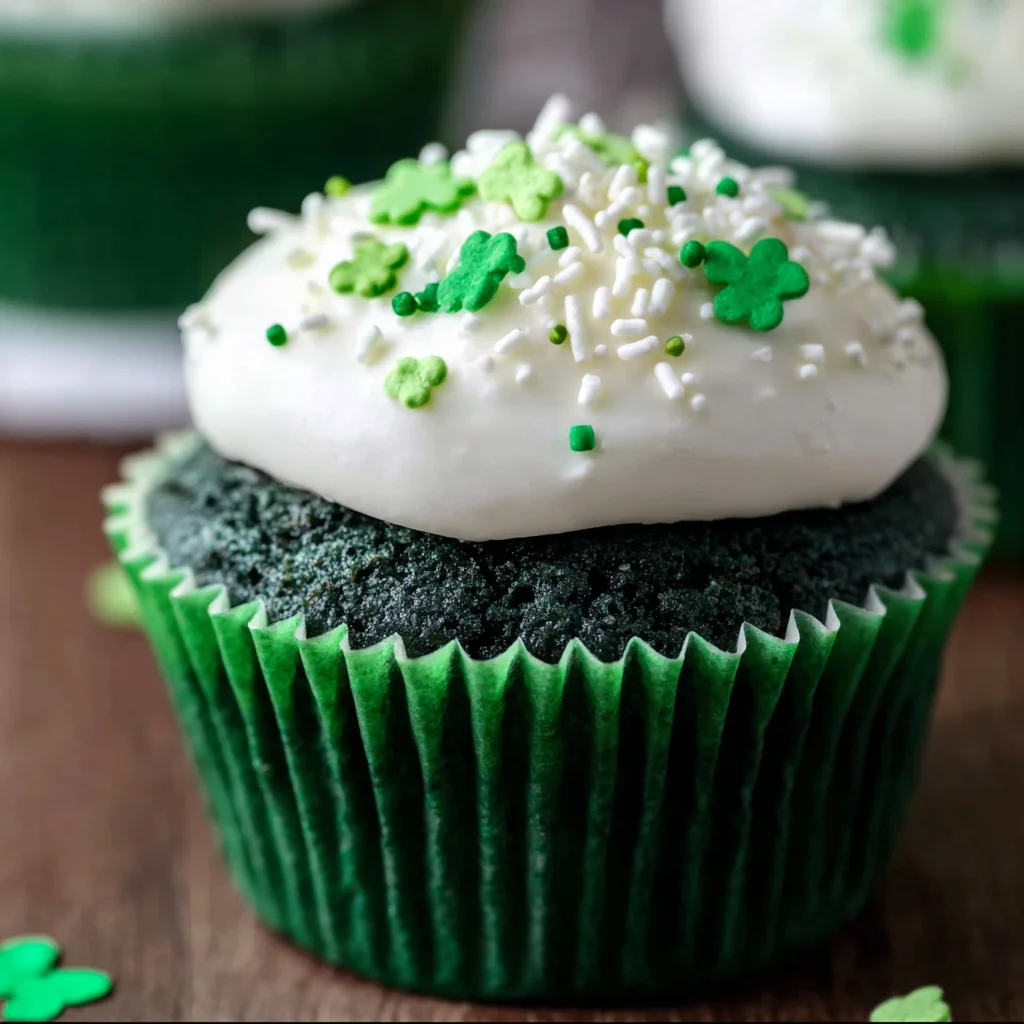
When it comes to show-stopping desserts that demand attention, nothing quite compares to the vibrant allure of a Green Velvet Cake. While its red cousin often steals the spotlight during Valentine’s Day, this emerald-hued masterpiece is the undisputed queen of St. Patrick’s Day, Christmas, and garden-themed celebrations. But this recipe isn’t just about the color; it’s about that signature “velvet” texture—a crumb so tender and moist it practically melts on your tongue.

Whether you are looking to impress at a bake sale or simply want a festive treat to brighten your kitchen, this recipe delivers professional results with an easy-to-follow process. Paired with a thick, tangy cream cheese frosting that balances the richness of the cake, every bite is a harmonious blend of flavors. Get ready to discover your new favorite holiday tradition!
Why You’ll Love This Recipe
There are several reasons why this Green Velvet Cake stands out in a sea of dessert recipes. First, the moisture level is unparalleled; thanks to the combination of oil and buttermilk, the cake stays fresh for days. Second, the flavor profile is sophisticated. Unlike a standard vanilla cake, the hint of cocoa adds a subtle depth that interacts beautifully with the acidity of the vinegar.
Third, it is incredibly versatile. You can bake this batter as a multi-layered cake, standard cupcakes, or even trendy whoopie pies. Finally, the visual impact is undeniable. Slicing into a seemingly standard frosted cake to reveal a brilliant green interior never fails to elicit “oohs” and “aahs” from guests.
What Is Green Velvet Cake?
Traditionally, “velvet” cakes were born in the Victorian era as a way to describe cakes with a finer, softer crumb compared to the coarser “sponge” cakes of the time. The modern velvet cake is defined by the chemical reaction between acidic buttermilk, vinegar, and cocoa powder.
In a standard Red Velvet cake, this reaction originally created a reddish tint (though food coloring is now used for vibrancy). Green Velvet Cake follows this exact same scientific principle but swaps the red dye for green. It maintains that classic tangy flavor and tight, velvety crumb, making it a true velvet cake in every sense of the word, just dressed up for a different occasion.
Ingredients Overview
To achieve the perfect bake, understanding your ingredients is key to E-E-A-T (Experience, Expertise, Authoritativeness, and Trustworthiness) in the kitchen.
- All-Purpose Flour: This provides the structure. Sifting it with the cocoa ensures there are no lumps in your delicate crumb.
- Vegetable Oil: While many cakes use butter, oil is the secret to a velvet cake’s moistness. It remains liquid at room temperature, ensuring the cake doesn’t feel dry.
- Buttermilk: This is the MVP. The acid in the buttermilk tenderizes the gluten in the flour and reacts with the baking soda to help the cake rise.
- Vinegar & Baking Soda: This duo creates carbon dioxide bubbles, giving the cake its lift and airy texture.
- Cocoa Powder: We only use a tablespoon. It’s not meant to make the cake taste like chocolate, but rather to provide that signature “velvet” flavor depth.
- Green Food Coloring: For that “wow” factor, a full ounce of liquid coloring or a high-quality gel is necessary to overcome the brownish tint of the cocoa.
- Cream Cheese & Butter: For the frosting, ensure these are truly softened to avoid a lumpy finish.
Ingredient Substitutions & Tips
If you find yourself missing an ingredient, don’t panic. For buttermilk, you can create a DIY version by adding one tablespoon of lemon juice or white vinegar to a cup of regular milk and letting it sit for five minutes.
If you prefer to avoid artificial dyes, you can use spinach powder or liquid chlorophyll, though the color will be more of an “earthy” forest green rather than a neon emerald. For a gluten-free version, a high-quality 1:1 gluten-free flour blend works remarkably well in this recipe due to the high moisture content of the oil and buttermilk.
Step-by-Step Instructions
- Preparation: Preheat your oven to 350°F (175°C). This ensures the leavening agents react immediately upon entering the oven. Grease your pans thoroughly; for cakes, I recommend lining the bottoms with parchment paper.
- Mix the Wet Ingredients: In a medium bowl, whisk your eggs lightly. Add the oil, buttermilk, vinegar, vanilla, and the star of the show—the green food coloring. Whisk until the color is uniform.
- Combine Dry Ingredients: In a large mixing bowl, combine the flour, sugar, cocoa powder, salt, and baking soda. Sifting these together is recommended for the smoothest texture.
- The Emulsion: Pour the liquid mixture into the dry ingredients. Use a hand mixer or stand mixer on medium-high speed. Mix for about 60 to 120 seconds. You are looking for a smooth, glossy batter where all the flour streaks have vanished.
- The Bake: Pour the batter into your prepared pans.
- 8-inch Round Cake: Bake for 22 minutes.
- Standard Cupcakes: Bake for 16 minutes.
- Mini Cupcakes/Whoopie Pies: Bake for 13 minutes.
- The Toothpick Test: Insert a toothpick into the center; it should come out clean or with a few moist crumbs.
- Cooling: Allow the cakes to cool in the pan for 10 minutes before transferring to a wire rack. They must be completely cold before frosting!
- Frosting: Beat the cream cheese and butter until fluffy. Gradually add powdered sugar and milk until you reach a pipeable consistency.
Expert Baking Tips
- Temperature Matters: Use room temperature eggs and buttermilk. Cold ingredients can cause the batter to “seize” or emulsify poorly, leading to a dense cake.
- Don’t Overmix: Once you combine the wet and dry ingredients, stop mixing as soon as the batter is smooth. Overworking the flour develops gluten, which turns a “velvet” cake into a “tough” cake.
- Measure Flour Correctly: Use the “spoon and level” method. Packing flour into a measuring cup can result in up to 25% more flour than needed, leading to a dry result.
- Check Your Soda: Ensure your baking soda is fresh. If it’s been open for more than six months, it may have lost its leavening power.
The Science of Green Velvet
Why do we use vinegar and cocoa in a green cake? It seems counterintuitive, but the science is fascinating. The small amount of cocoa powder contains anthocyanins, which are pH-sensitive. When they interact with the acidic vinegar and buttermilk, they help preserve the moisture and create a specific “tangy” flavor profile that defines the velvet genre. Even though we add green dye to mask the natural color, the chemical interaction between the acid and the cocoa is what creates that specific “tight” crumb structure that makes the cake feel like velvet on the palate.
Serving Suggestions
For a stunning presentation, garnish the frosted cake with a few fresh mint leaves or a dusting of gold sprinkles (perfect for a “pot of gold” theme). If you are making a layer cake, crumble one of the cupcake tops to create “green sand” to decorate the edges of the frosting. Serve with a cold glass of milk or a sharp espresso to cut through the sweetness of the cream cheese frosting.
Storage & Make-Ahead Tips
Because of the cream cheese in the frosting, this cake must be stored in the refrigerator. It will stay moist for up to 5 days if kept in an airtight container. If you want to make it ahead of time, you can bake the cake layers, wrap them tightly in plastic wrap, and freeze them for up to a month. Frost the cake while the layers are slightly chilled for easier handling!
FAQs
Q: Can I make this cake without food coloring?
A: Yes, but it will be a “light tan” or “pale cocoa” color. The green coloring is strictly for the visual “Green Velvet” effect and does not change the flavor.
Q: Why did my green cake turn brown?
A: This usually happens if you use too much cocoa powder or if the oven is too hot. The browning (Maillard reaction) on the outside is normal; once you slice into it, the interior should be vibrant green.
Q: Is Green Velvet the same flavor as Red Velvet?
A: Yes! The base flavor profile—a mild, tangy cocoa-vanilla—is identical. The only difference is the color of the dye used.
Q: How do I get my frosting extra white?
A: Beat the butter by itself for 5 minutes before adding other ingredients. This aerates the butter and turns it from yellow to nearly white.
Q: Can I use low-fat buttermilk?
A: You can, but full-fat buttermilk provides a richer flavor and a more tender crumb.
This Green Velvet Cake is more than just a festive novelty; it is a technically sound, delicious dessert that satisfies the most discerning cake lovers. Its balance of tangy, sweet, and rich flavors, paired with that unmistakable velvety texture, makes it a reliable addition to your baking repertoire. Whether you’re celebrating St. Paddy’s Day or just want to experiment with the science of velvet cakes, this recipe is your ticket to success!
PrintMoist Green Velvet Cake with Cream Cheese Frosting

A stunningly vibrant Green Velvet Cake that is ultra-moist, tender, and perfectly balanced with a tangy homemade cream cheese frosting. Ideal for holidays and celebrations.
- Prep Time: 20 minutes
- Cook Time: 22 minutes
- Total Time: 42 minutes
- Yield: 24 servings
- Cuisine: American
Ingredients
All-purpose flour – 2 1/2 cups
Granulated sugar – 2 cups
Unsweetened cocoa powder – 1 Tablespoon
Salt – 1 teaspoon
Baking soda – 1 teaspoon
Large eggs – 2
Vegetable oil – 1 cup
Buttermilk – 1 cup
White vinegar – 1 Tablespoon
Vanilla extract – 1 teaspoon
Green food coloring – 1 oz
Cream cheese, softened – 8 oz
Unsalted butter, softened – 1/4 cup
Vanilla extract (for frosting) – 1 teaspoon
Powdered sugar – 2 lb bag
Milk – 2-4 Tablespoons (as needed)
Instructions
Preheat your oven to 350 degrees F. Grease and flour your choice of cake pans or muffin tins.
In a medium bowl, lightly whisk the eggs. Add the oil, buttermilk, vinegar, vanilla, and green food coloring. Whisk until fully blended.
In a separate large mixing bowl, sift together the flour, sugar, cocoa, salt, and baking soda.
Pour the wet ingredients into the dry ingredients. Mix on medium-high speed for 1-2 minutes until the batter is smooth and well-combined.
Pour batter into prepared pans. Bake 22 minutes for 8-inch rounds, 16 minutes for cupcakes, or 13 minutes for mini-cupcakes.
For the frosting, cream the softened cream cheese, butter, and vanilla until smooth.
Gradually add powdered sugar while mixing. Add milk one tablespoon at a time until your desired consistency is reached.
Allow the cake to cool completely before frosting. Store in the refrigerator.
Notes
• Use room temperature eggs and buttermilk for the smoothest batter.
• Do not overbake; start checking for doneness 2-3 minutes before the timer ends.
• If using gel food coloring, use about 1-2 teaspoons instead of a full ounce.
• Store leftovers in an airtight container in the fridge for up to 5 days.