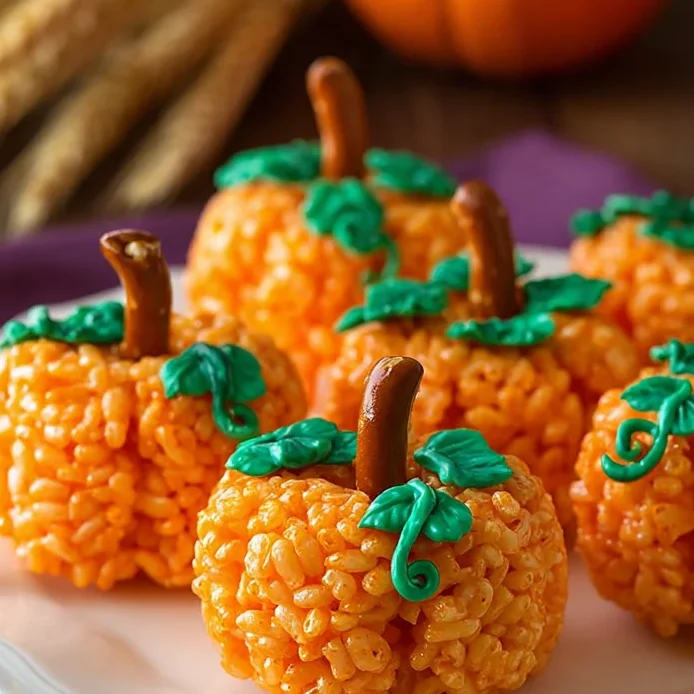
When the air turns crisp and the leaves start to fall, there is an undeniable urge to bring those festive autumn vibes into the kitchen. These Rice Krispie Treat Pumpkins are the perfect solution for anyone seeking a whimsical, delicious, and incredibly easy snack that captures the spirit of the season. Whether you are prepping for a classroom Halloween party, a neighborhood trunk-or-treat, or simply want a fun weekend project with the kids, these no-bake wonders are a guaranteed hit. They combine the nostalgic, gooey crunch of a classic marshmallow treat with a vibrant, festive aesthetic that looks like it came straight from a boutique bakery. Best of all, they require zero oven time, making them a stress-free addition to your holiday baking lineup.
Why You’ll Love This Recipe
You will fall in love with these Rice Krispie pumpkins because they strike the perfect balance between simplicity and creativity. First, the “no-bake” factor is a lifesaver during the busy holiday season when oven space is at a premium. Second, they are highly customizable; you can adjust the “pumpkin” size from mini gourds to jumbo pumpkins. Third, they are a fantastic “edible craft” for children, allowing them to help with the shaping and decorating without the risks of a hot stove or complex machinery. Finally, the flavor is timeless—sweet, buttery, and satisfyingly crunchy—ensuring that they aren’t just cute to look at, but genuinely delicious to eat.
What Is a Rice Krispie Treat Pumpkin?
At its core, a Rice Krispie Treat Pumpkin is a festive reimagining of the traditional American Rice Krispie treat. By adding a touch of orange food coloring to the melted marshmallow and butter base, the mixture takes on a vibrant hue. Once the cereal is incorporated, the mixture is hand-molded into spheres rather than pressed into a flat pan. To complete the transformation, a piece of a pretzel rod serves as a rustic “stem,” and green candy or fondant is shaped into leaves and curling vines. It is a creative exercise in food styling that uses pantry staples to create a recognizable and charming seasonal icon.
Ingredients You will need
To achieve the best results, the quality and type of your ingredients matter significantly.
- Rice Krispies Cereal: Ensure your cereal is fresh. Stale cereal will result in a dense, cardboard-like texture. For a fun twist, you can use cocoa-flavored cereal for “muddy” pumpkins, though the orange color won’t show.
- Mini Marshmallows: I always recommend mini marshmallows over the jumbo size. They melt faster and more evenly, reducing the risk of scorching the butter or ending up with unmelted lumps. Freshness is key here too; old marshmallows don’t melt as smoothly.
- Salted Butter: The salt in the butter is crucial. It cuts through the intense sweetness of the marshmallows, providing a balanced flavor profile.
- Orange Gel Food Coloring: This is a professional tip—use gel, not liquid. Liquid coloring can alter the moisture content of the marshmallow glue, making it too sticky or runny. Gel provides a concentrated, vibrant color without affecting the texture.
- Pretzel Rods: These provide the perfect salty contrast and a sturdy “stem” that holds up well.
- Airheads or Fondant: For the leaves, green Airheads offer a tangy, chewy element that kids love. Fondant allows for more intricate detail if you are aiming for a more “adult” or professional look.
Ingredient Substitutions & Tips
If you find yourself missing an ingredient or have dietary restrictions, this recipe is quite flexible. For a vegan version, substitute the butter with a high-quality plant-based butter stick and use vegan-friendly marshmallows (like Dandies). If you don’t have pretzel rods, you can use green gummy worms or even a piece of celery for the stem. For the coloring, if you prefer natural dyes, you can use a small amount of turmeric and beet juice powder, though the color may be more muted. Always remember to grease your tools and hands; the marshmallow mixture is incredibly tacky!
Step-by-Step Instructions: Mastering the Shape
- Preparation: Start by measuring 6 cups of Rice Krispies into a large bowl. This ensures you can move quickly once the marshmallows are melted.
- Melt the Base: In a 4-quart non-stick pot, melt 3 tablespoons of salted butter over medium-low heat. Do not rush this step with high heat, as browned butter (while delicious) can change the final color of your orange pumpkins.
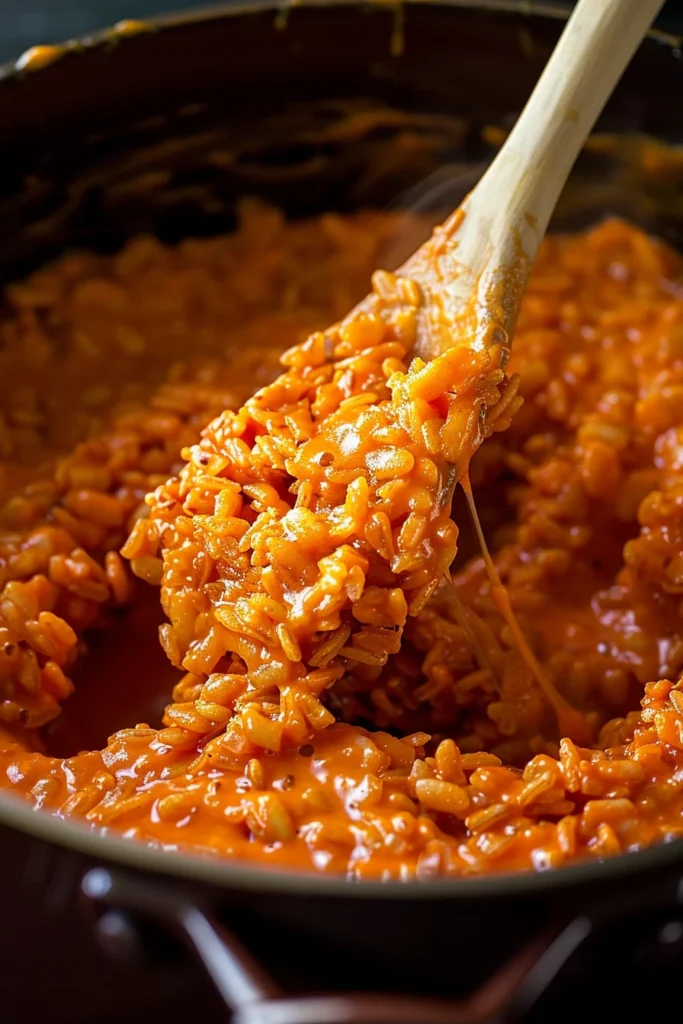
- The Marshmallow Phase: Add the 10 oz package of mini marshmallows. As they begin to soften, drop in your orange gel coloring. Stir constantly. By adding the color now, you ensure an even, streak-free orange throughout the cereal.
- Combining: Once smooth, remove the pot from the heat. Pour in the cereal and use a greased spatula to fold it all together. Every piece of puffed rice should be glowing orange and sticky.
- Cooling and Shaping: Let the mixture sit for 2-3 minutes. It needs to be cool enough to touch but still warm enough to mold. Spray your hands liberally with non-stick cooking spray.
- Forming the Pumpkins: Scoop out a portion roughly the size of a baseball. Roll it between your palms into a sphere. Don’t squeeze too hard! You want them to hold their shape but remain airy and soft.
- Decorating: While the ball is still slightly tacky, press a 2-inch pretzel piece into the top. Use clean scissors to snip “leaves” from your green Airheads and wrap thin “vines” around the stem.
Expert Baking Tips for Success
The biggest mistake people make with Rice Krispie treats is packing them too tightly. If you compress the mixture with too much force, the treats become hard and difficult to chew. Use a gentle “light touch” when shaping your pumpkins. Another pro-tip: keep your heat low. If you boil the marshmallow and butter mixture, the sugar will reach a “hard ball” stage, and your treats will be rock-hard once they cool. Lastly, if the mixture becomes too cold to work with and isn’t sticking, you can pop the pot back on the lowest heat setting for 30 seconds to soften it up again.
Special Section: Airheads vs. Fondant
Deciding between candy and fondant for your pumpkin leaves depends on your audience. For children’s parties, Airheads are the winner. They have a nostalgic, sweet-and-sour flavor that pairs perfectly with the marshmallow. They are also very easy for kids to manipulate. However, if you are making these for a fall-themed dinner party or a more formal gathering, green fondant (specifically a homemade marshmallow fondant) offers a much more polished look. Fondant can be rolled thinner and embossed with “vein” lines using a toothpick, giving your pumpkins a more artisanal, realistic appearance that will impress adult guests.
Serving Suggestions
Serve these Rice Krispie pumpkins on a large wooden board or a slate platter to lean into the rustic fall aesthetic. They look wonderful when nestled among some real mini-gourds or scattered with a few candy corn pieces. For a Halloween party, you can place each pumpkin in a festive cupcake liner to make them “grab-and-go” friendly. They also make excellent party favors when wrapped individually in clear cellophane bags and tied with a piece of twine or a black ribbon.
Storage & Make-Ahead Tips
These treats are best enjoyed within 24 to 48 hours of making them. To keep them soft, store them in a strictly airtight container at room temperature. Do not refrigerate them; the moisture in the fridge will make the cereal soggy, while the cold will make the butter and marshmallow base too hard. If you need to make them ahead of time, you can prepare the pumpkin shapes a day in advance and add the pretzel stems and leaves right before serving to ensure the pretzel stays crunchy.
FAQs
Q: Can I use large marshmallows instead of mini ones?
A: Yes, but keep a close eye on them. Large marshmallows take longer to melt and can easily burn on the bottom of the pan if not stirred constantly.
Q: Why are my Rice Krispie treats falling apart?
A: This usually happens if there isn’t enough marshmallow to “glue” the cereal together, or if the mixture wasn’t stirred thoroughly. Ensure you use the full 10 oz bag for the 6 cups of cereal.
Q: My pumpkins are turning out flat on the bottom. How do I fix this?
A: Because the mixture is soft, gravity will naturally flatten the base. To prevent this, let the mixture cool a bit longer before shaping, or place the finished pumpkins on a sheet of parchment paper and “re-shape” them slightly after 10 minutes.
Q: Can I use liquid food coloring?
A: You can, but you will need a lot more of it to get a deep orange, which can make the treats a bit soggy. Gel is always the superior choice for vibrant colors in confectionery.
Rice Krispie Treat Pumpkins

These adorable Rice Krispie Treat Pumpkins are a festive, no-bake dessert perfect for autumn celebrations. Using classic marshmallow cereal treat techniques, we transform them into vibrant pumpkins complete with pretzel stems and candy vines.
- Prep Time: 15 minutes
- Cook Time: 10 minutes
- Total Time: 25 minutes
- Yield: 6 pumpkins
- Cuisine: American
Ingredients
Rice Krispies cereal – 6 cups
Salted butter – 3 Tbsp
Mini marshmallows – 1 pkg (10 oz)
Orange gel food coloring – as needed
Pretzel rods – 3 rods (broken into 2-inch pieces)
Mini green Airheads or green fondant – 6 pieces
Non-stick cooking spray – for hands and tray
Instructions
Measure out the cereal and set aside. In a large non-stick pot, melt the salted butter over medium-low heat.
Add the mini marshmallows to the melted butter. As they begin to melt, stir in the orange gel food coloring until you reach a vibrant pumpkin orange.
Once melted and smooth, remove from heat. Immediately fold in the Rice Krispies cereal until every piece is coated.
Allow the mixture to cool for a few minutes until safe to handle. Spray your hands with non-stick spray.
Shape the cereal mixture into balls roughly the size of a baseball. Press a 2-inch pretzel piece into the top center.
Cut leaf shapes out of the Airhead candy using clean scissors. Roll the scraps into thin ropes for vines.
Attach the candy leaves and vines to the top of each pumpkin near the pretzel stem. Store in an airtight container.
Notes
• Use gel food coloring rather than liquid to ensure the marshmallow mixture doesn’t become too runny.
• If making for adults, consider using a high-quality green fondant for the leaves for a more sophisticated look.
• Do not pack the cereal balls too tightly, or the treats will be hard to bite into.
• Ensure your marshmallows are fresh; stale marshmallows will result in a tough, rubbery texture.