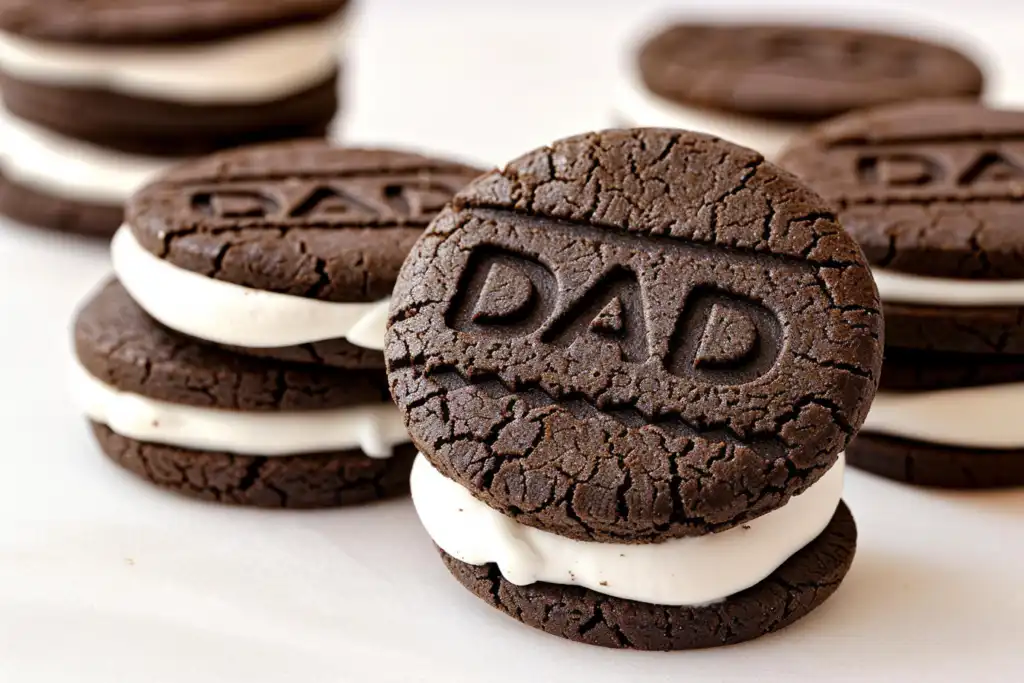
There is something undeniably nostalgic about a sandwich cookie. It’s more than just a dessert; it’s an interactive experience of pulling apart two crunchy layers to reveal a creamy center. This Father’s Day, skip the store-bought aisles and gift Dad something that speaks to his inner child but appeals to his refined palate. These Father’s Day Chocolate Sandwich Cookies are the definitive homemade upgrade. Featuring a deep, cocoa-rich cutout cookie and a marshmallow cream filling that is light as air, they are designed to impress. Whether Dad is a dunker who needs a tall glass of cold milk or a connoisseur who enjoys a treat with his afternoon coffee, these cookies offer the perfect balance of sophisticated dark chocolate and whimsical sweetness.
Why You’ll Love This Recipe
You will love this recipe because it strikes the perfect balance between texture and flavor. Unlike store-bought versions that can be overly waxy or artificial, these cookies use high-quality butter and real cocoa for a “melt-in-your-mouth” experience. The cutout dough is incredibly forgiving and holds its shape beautifully, making it ideal for creating perfectly uniform rounds. Furthermore, the marshmallow filling provides a nostalgic “fluff” factor that isn’t cloyingly sweet, thanks to a pinch of salt and high-quality vanilla extract. It’s a versatile recipe that allows you to involve the kids in the kitchen—let them help with the cookie cutters while you handle the delicate filling.
What Is A Father’s Day Chocolate Sandwich Cookie?
These aren’t your average cookies; they are a premium, handcrafted version of a classic chocolate sandwich. The base is a “cutout” chocolate cookie, which means the dough is chilled, rolled out, and cut into specific shapes (usually circles for that classic look). The texture is crisp on the edges but slightly soft in the center, providing a sturdy vessel for the filling. The “sandwich” element comes from a decadent marshmallow buttercream. By combining marshmallow cream with softened butter and powdered sugar, we create a filling that is more stable than plain marshmallow but lighter than traditional frosting. It’s the ultimate tribute to Dad’s favorite snacks, elevated for a special occasion.
Ingredients needed
To achieve bakery-quality results, the quality of your ingredients matters immensely.
- Imperial Sugar Extra Fine Granulated & Light Brown Sugar: Using a blend of both sugars provides the perfect structural integrity from the granulated sugar and a hint of moisture and molasses-depth from the brown sugar.
- Cocoa Powder: This is where the flavor lives. A high-quality unsweetened cocoa powder provides that deep, dark mahogany color and intense chocolate punch.
- The “Spoon & Sweep” Flour Method: This is the most critical technical aspect. Using a spoon to fill your measuring cup prevents the flour from compacting. If you scoop directly with the cup, you’ll end up with too much flour, resulting in a dry, crumbly cookie that cracks when rolled.
- Marshmallow Cream: This provides the iconic “stretch” and lightness to the filling that you simply cannot get from powdered sugar alone.
- Unsalted Butter: Using unsalted butter allows you to control the seasoning perfectly with your own pinch of salt.
Ingredient Substitutions & Tips
If you find yourself missing an ingredient, there are ways to adapt. For a darker, “Oreo-style” appearance, you can substitute half of the regular cocoa powder with black cocoa powder. This will give the cookies a very dark hue and a distinct roasted flavor. If you don’t have marshmallow cream, you can make a standard vanilla buttercream, though you will lose that specific marshmallow texture. For a dairy-free version, high-quality vegan butter sticks (the kind designed for baking) can be substituted 1:1, though ensure they are cold when starting the dough. Lastly, if Dad loves a “sweet and salty” combo, a light sprinkle of sea salt on top of the cookies before baking is a game-changer.
Step-by-Step Instructions
- Cream the Base: Start by creaming the 10 tablespoons of softened butter with the granulated and light brown sugars. Use a stand mixer or hand mixer on medium-high for about 3 minutes until the mixture looks pale and fluffy.
- Incorporate Wet Ingredients: Add the egg and 1/2 teaspoon of vanilla extract. Beat until well combined, scraping down the sides of the bowl to ensure no butter streaks remain.
- Mix Dry Ingredients: In a separate medium bowl, whisk together the flour (measured via spoon & sweep), cocoa powder, salt, and baking powder.
- Combine: Turn your mixer to low and gradually add the dry ingredients to the wet. Mix only until the white streaks of flour disappear. Over-mixing at this stage leads to tough cookies.
- The Big Chill: Divide the dough into two discs, wrap in plastic, and refrigerate for at least 1 hour. This is non-negotiable for cutout cookies; it prevents spreading.
- Roll and Cut: On a surface lightly dusted with cocoa powder (to prevent sticking without adding white flour marks), roll the dough to 1/4 inch thickness. Cut into 2-inch rounds.
- Bake: Arrange on parchment-lined sheets and bake at 350°F for 8-10 minutes. They will look slightly matte when done. Let them cool completely on a wire rack.
- Make the Filling: Whip the marshmallow cream, softened butter, powdered sugar, vanilla, and salt until completely smooth and voluminous.
- Assemble: Match cookies of similar sizes. Pipe a dollop of filling onto the flat side of one cookie, then press another cookie on top until the filling reaches the edges.
Expert Baking Tips
The secret to the perfect sandwich cookie is temperature control. If your kitchen is warm, your dough will soften quickly as you roll it. If it becomes sticky, pop it back in the freezer for 5 minutes. Additionally, when baking chocolate cookies, it is notoriously difficult to tell when they are “browned.” Watch for the surface to transition from shiny to a dull, matte finish—that is your signal they are ready. Finally, always use a piping bag for the filling. While a spoon works, piping ensures a uniform height for every sandwich, giving them that professional, “ordered from a bakery” appearance that Dad deserves.
The Best Cocoa for the Job
When making chocolate cutout cookies, you might wonder about the difference between Natural and Dutch-process cocoa. Natural cocoa (like Hershey’s) is more acidic and reacts with baking soda. However, this recipe uses baking powder, making it versatile. For these cookies, I recommend a Dutch-process cocoa if you can find it. It has been treated with an alkalizing agent to reduce acidity, resulting in a smoother, more mellow chocolate flavor and a significantly darker color. This creates that classic “sandwich cookie” look that we associate with premium treats. If you only have natural cocoa, the cookies will be slightly lighter in color and have a bit more of a “tangy” chocolate snap.
Serving Suggestions
Present these cookies on a rustic wooden board or in a classic cookie jar for a cozy Father’s Day feel. They pair beautifully with a glass of cold milk, but for a more adult twist, serve them alongside a stout beer or a glass of bourbon. If you are gifting them, place them in a tin with parchment paper separators. The marshmallow filling is stable, but for the best experience, serve them at room temperature so the filling stays soft and the cookie stays crisp.
Storage & Make-Ahead Tips
These cookies are excellent make-ahead treats. The dough can be made and kept in the fridge for up to 3 days before baking. Once assembled, the cookies stay fresh in an airtight container at room temperature for about 3 to 5 days. If you need to store them longer, they actually freeze remarkably well. Freeze them in a single layer on a tray before transferring to a freezer bag; they will last for up to 2 months. Just thaw at room temperature for an hour before serving.
FAQs
Can I use a different shape for the cookies?
Absolutely! While rounds are classic, you can use “DAD” letter cutters or even mustache shapes to lean into the Father’s Day theme. Just ensure all cookies are roughly the same size so they bake evenly.
My cookies are too hard. What happened?
This usually happens from over-baking or using too much flour. Ensure you use the “Spoon & Sweep” method and pull them out of the oven as soon as the shine disappears. They will firm up as they cool.
Does the filling need to be refrigerated?
Because of the sugar and butter content, these are safe at room temperature for a few days. However, if your house is very warm, the marshmallow filling may soften too much. In that case, keep them in the fridge.
Can I make these gluten-free?
Yes, you can substitute the all-purpose flour for a high-quality 1:1 gluten-free baking flour blend. The texture will be slightly different, but the cocoa and marshmallow flavors will still shine.
Homemade gifts always carry more weight than something bought from a store, and these Father’s Day Chocolate Sandwich Cookies are a testament to that effort. With their rich cocoa base and cloud-like marshmallow center, they are sure to become a new holiday tradition in your household. Put on a pot of coffee, grab a plate of these treats, and spend some quality time celebrating Dad. Happy Father’s Day and happy baking!
PrintFather’s Day Chocolate Sandwich Cookies
Rich chocolate cutout cookies with a decadent marshmallow cream center, perfect for Father’s Day gifting.
Ingredients
10 tablespoons unsalted butter, softened slightly
1/2 cup Imperial Sugar Extra Fine Granulated Sugar
1/4 cup Imperial Sugar Light Brown Sugar, packed
1 egg
1/2 teaspoon vanilla
1 3/4 cups all-purpose flour
1/3 cup cocoa powder
1/2 teaspoon salt
1/4 teaspoon baking powder
3/4 cup marshmallow cream
1/4 cup unsalted butter, softened
1/4 cup Imperial Sugar Confectioners Powdered Sugar
1 1/2 teaspoons vanilla extract
Pinch of salt
Instructions
1. In a large bowl, cream 10 tbsp butter with granulated and brown sugars until light and fluffy.
2. Beat in the egg and 1/2 tsp vanilla extract.
3. In a separate bowl, whisk flour, cocoa powder, salt, and baking powder.
4. Gradually add dry ingredients to wet, mixing until a dough forms.
5. Wrap dough in plastic and chill for at least 1 hour.
6. Preheat oven to 350°F. Roll dough to 1/4 inch thickness and cut into rounds.
7. Bake for 8-10 minutes. Let cool completely.
8. For filling, beat marshmallow cream, 1/4 cup butter, powdered sugar, 1.5 tsp vanilla, and salt until smooth.
9. Pipe or spoon filling onto half the cookies and top with the remaining cookies.
Notes
Use the Spoon & Sweep method for flour to ensure the cookies aren’t too dry.
Store in an airtight container for up to 5 days.