There are few desserts in the culinary world as visually stunning and texturally intriguing as the Pavlova. Named after the ethereal Russian ballerina Anna Pavlova during her tours of Australia and New Zealand in the 1920s, this dessert is designed to mimic the lightness and grace of a tutu. If you have ever been intimidated by the prospect of whipping egg whites into a structural masterpiece, you are in the right place. This guide will walk you through the nuances of creating a Pavlova that boasts a delicate, eggshell-thin crust that shatters upon impact, revealing a soft, pillowy, marshmallow-like interior. Whether you are hosting a summer garden party or a sophisticated holiday dinner, mastering this recipe is a rite of passage for every home baker looking to elevate their repertoire with a naturally gluten-free showstopper.
Why You’ll Love This Recipe
You will fall in love with this recipe because it balances simplicity with high-impact results. Unlike heavy cakes or rich chocolate tortes, the Pavlova is incredibly light, making it the perfect canvas for seasonal fruits and lightly sweetened cream. This particular recipe focuses on the structural integrity of the meringue, ensuring you don’t end up with a “weeping” mess or a flat disc. The inclusion of vinegar and cornstarch provides that iconic chewy center that differentiates a Pavlova from a standard hard meringue. Furthermore, it is a fantastic “make-ahead” base, allowing you to focus on your guests while the meringue cools peacefully in the oven, developing its signature texture.
What Is Pavlova?
At its core, a Pavlova is a meringue-based cake. While traditional French meringues are baked until they are crisp all the way through, the Pavlova is unique because of its dual texture. The addition of an acid (vinegar) and a stabilizer (cornstarch) allows the interior to remain moist and soft, resembling a marshmallow. There has been a long-standing, friendly rivalry between Australia and New Zealand regarding the dessert’s origin, but regardless of its birthplace, it has become a cultural icon in both nations. It is traditionally served during the Christmas season and summer months, topped with a generous layer of unsweetened or lightly sweetened whipped cream and tart fruits to cut through the sweetness of the sugar.
Ingredients
To achieve the perfect Pavlova, the quality and temperature of your ingredients are paramount. You will need:
- 4 Large Egg Whites: These must be at room temperature to ensure maximum volume when beaten. Even a tiny speck of yolk will prevent the whites from stiffening.
- 1/8 Teaspoon Table Salt: Salt helps to break down the proteins in the egg whites, allowing them to expand more easily during the initial whipping phase.
- 1 Cup Granulated Sugar: Use extra-fine (caster) sugar if possible, as it dissolves faster. If using standard granulated sugar, add it very slowly to prevent grittiness.
- 1 Teaspoon Vanilla Extract: This provides the classic aromatic base. For a different profile, you could use almond or lemon extract.
- 1 Teaspoon White Balsamic or Cider Vinegar: The acid is the secret weapon that stabilizes the egg white foam and creates that soft, chewy interior.
- 2 Teaspoons Cornstarch: Working in tandem with the vinegar, cornstarch helps the meringue retain its moisture internally, preventing it from becoming brittle throughout.
Ingredient Substitutions & Tips
While the classic recipe is tried and true, you can make minor adjustments. If you don’t have white balsamic or cider vinegar, plain white distilled vinegar works perfectly well. Avoid using dark balsamic or red wine vinegar, as they will discolor the pristine white meringue. For the sugar, if you only have coarse granulated sugar, you can pulse it in a food processor for 30 seconds to create a finer texture. For a vegan alternative, you can substitute the egg whites with 3/4 cup of aquafaba (the liquid from a can of chickpeas), though the whipping time will increase significantly. Always ensure your equipment is “squeaky clean”—wipe your bowl with a little lemon juice before starting to remove any residual fat.
Step-by-Step Instructions
- Preparation: Preheat your oven to 300°F (150°C). Prepare your baking sheet by lining it with parchment paper. A pro tip is to trace a 9-inch circle using a cake pan as a guide, then flip the paper over so the pencil mark doesn’t touch the food.
- The Frothy Stage: Place your room-temperature egg whites in the bowl of a stand mixer fitted with the whisk attachment. Begin beating on medium-low speed until the whites become frothy and covered in small bubbles.
- Adding the Salt and Sugar: Add the salt. Increase the speed to medium-high. As soft peaks begin to form (the peaks will curl over when the whisk is lifted), start adding the sugar one tablespoon at a time. This slow incorporation is vital to ensure the sugar dissolves and the meringue remains stable.
- Achieving Stiff Peaks: Once all the sugar is in, turn the mixer to high. Beat for approximately 2 more minutes until the peaks are stiff and shiny. The mixture should feel smooth, not grainy, when rubbed between your fingers.
- The Final Fold: Stop the mixer. Using a flexible spatula, gently fold in the vanilla, vinegar, and cornstarch. Do this carefully to avoid deflating the air you’ve worked so hard to incorporate.
- Shaping: Spoon the meringue onto the center of your parchment circle. Use the back of a spoon to spread it to the edges, building up the sides slightly to create a “nest” or shallow well in the center.
- The Bake and Cool: Place the tray in the oven and immediately reduce the heat to 250°F (120°C). Bake for 1.5 hours.
- The Long Rest: Once the time is up, turn off the oven but do not open the door. Let the Pavlova sit in the cooling oven for at least 1 hour (or overnight). This slow cooling prevents the meringue from cracking due to sudden temperature shifts.
Expert Baking Tips
The biggest enemy of a Pavlova is humidity. On a rainy or very humid day, the sugar in the meringue will absorb moisture from the air, making it sticky or limp. If you must bake on a humid day, consider adding an extra half-teaspoon of cornstarch. Another expert tip is to check for “weeping” (sugar syrup leaking from the bottom). This usually means the sugar wasn’t fully dissolved. To prevent this, always add sugar slowly and beat until the mixture is glossy and smooth. Lastly, never grease your parchment paper; the meringue needs to “grip” the surface to rise effectively without spreading too thin.
The Science of the “Well”: Why Shape Matters
When you shape your Pavlova, creating a shallow well in the center isn’t just for aesthetics; it serves a structural purpose. Meringue expands slightly in the oven. By pushing more volume toward the edges, you create a reinforced “wall” that supports the weight of the toppings later. The center remains thinner, allowing the heat to penetrate just enough to set the exterior while keeping the heart of the Pavlova moist. This central depression acts as a natural bowl for the whipped cream, ensuring that every bite contains the perfect ratio of crunchy shell, soft interior, creamy topping, and tart fruit.
Serving Suggestions
A Pavlova should only be assembled right before serving, as the moisture from the cream will begin to soften the crust immediately. Top the center with a generous mound of unsweetened whipped cream. For fruit, think high-contrast: the tartness of passionfruit pulp, the acidity of fresh raspberries, or the brightness of kiwi fruit beautifully balances the sweet meringue. For a winter version, try poached pears or a drizzle of dark chocolate and pomegranate seeds.
Storage & Make-Ahead Tips
The meringue base can be made up to 2 days in advance if stored in a completely airtight container in a cool, dry place. Do not refrigerate the plain meringue, as the moisture in the fridge will turn it into a sticky mess. Once the Pavlova is decorated with cream and fruit, it must be eaten within 2-3 hours. Leftovers (if there are any!) can be kept in the fridge for 24 hours, but the shell will lose its crunch.
FAQs
Q: Why did my Pavlova turn brown?
A: This is usually due to the oven temperature being too high. Every oven is different; if your Pavlova is browning, try reducing the temperature by 10-15 degrees next time.
Q: Can I use carton egg whites?
A: It is not recommended. Pasteurized egg whites from a carton often lack the structural proteins needed to achieve the stiff peaks required for a Pavlova. Fresh eggs are always best.
Q: My meringue is “weeping” sugar syrup. What happened?
A: Weeping is caused by undissolved sugar. Make sure to beat the egg whites long enough after adding the sugar, and always add the sugar gradually.
Q: Can I make mini Pavlovas with this recipe?
A: Absolutely! Simply dollop smaller circles onto the parchment. Reduce the baking time to about 45-60 minutes, but keep the cooling process the same.
Q: Is Pavlova gluten-free?
A: Yes! This recipe is naturally gluten-free, making it an excellent choice for guests with dietary restrictions.
Baking the perfect Pavlova is a rewarding experience that combines chemistry with artistry. While it requires patience—especially during the cooling phase—the result is a dessert that looks like it came from a high-end patisserie. Remember to keep your tools grease-free, add your sugar slowly, and resist the urge to peek in the oven. Follow these steps, and you’ll be rewarded with a spectacular, cloud-like treat that will have everyone asking for seconds.
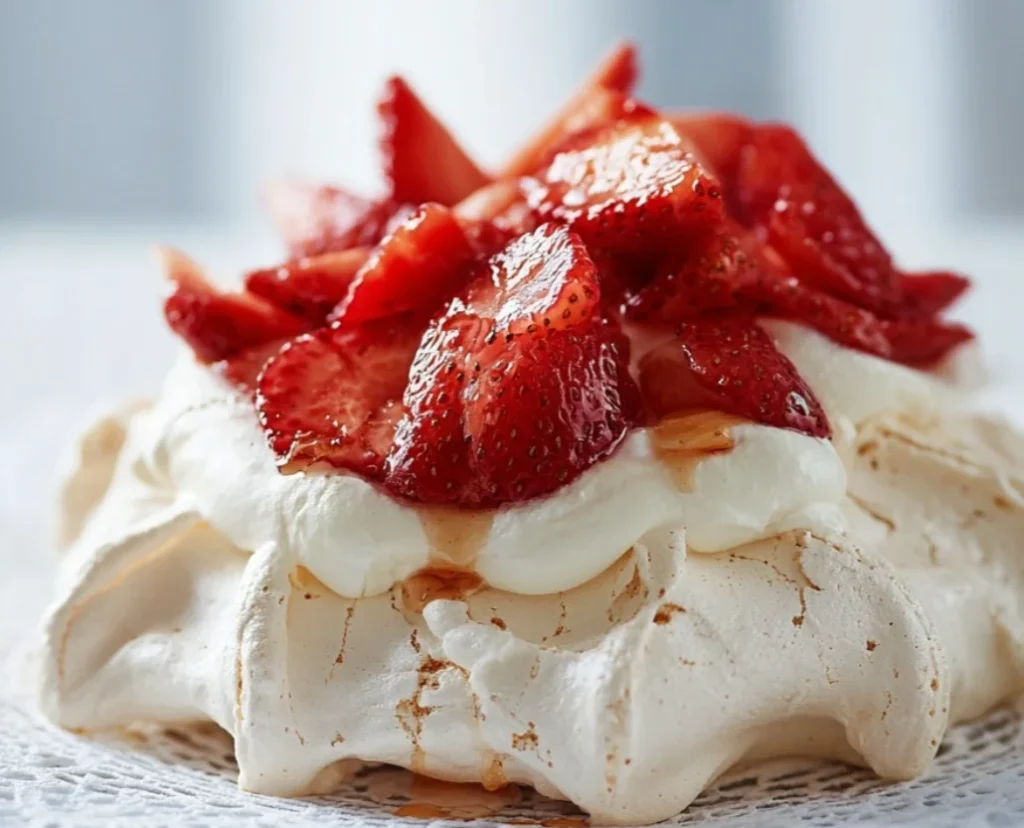
PrintStrawberry Pavlova Cake
This classic Pavlova recipe yields an ethereal dessert with a signature crisp crust and a hidden marshmallow-like center. Named after the Russian ballerina Anna Pavlova, it is a staple of Australian and New Zealander cuisine, perfect for topping with seasonal fruits and whipped cream.
Ingredients
4 large egg whites, room temperature
1/8 teaspoon table salt
1 cup granulated sugar
1 teaspoon vanilla extract
1 teaspoon white balsamic or cider vinegar
2 teaspoons cornstarch
Instructions
1. Preheat oven to 300°. Line a sheet pan with parchment paper, trace a 9-inch circle in the center, and turn the paper over.
2. In the clean bowl of a standing mixer with a whisk attachment, beat egg whites until frothy. Add salt and continue beating.
3. As soft peaks form, slowly add sugar in a thin stream, beating as you go. Once sugar is incorporated, beat on high speed until firm, shiny peaks begin to form, about 2 more minutes.
4. Stop beating; then gently fold in vanilla, vinegar, and cornstarch with a spatula.
5. Spoon the meringue into the center of the traced circle and use the back of the spoon to spread it out to the edges, creating a shallow well in the middle.
6. Put into the oven, reduce heat to 250°, and bake 1-1/2 hours. Turn off the oven, leaving meringue inside until it turns crisp and pale, but still a bit soft inside, about 1 hour. Remove from oven and let cool completely.
Notes
Ensure your mixing bowl is completely free of grease.
Do not open the oven door during the baking or cooling process.
Top with whipped cream and tart fruits like passionfruit or berries to balance the sweetness.