When the sun starts staying out a little longer and the sound of distant fireworks fills the evening air, I know it’s time to break out the berries. There is something so incredibly nostalgic about a patriotic dessert. Whether you’re hosting a Memorial Day cookout, a backyard 4th of July bash, or a Labor Day celebration, these American Flag Brownies are always the first thing to disappear from the dessert table.
While many people opt for a classic flag sheet cake, I’ve found that a fudgy, chocolatey brownie base is much more of a crowd-pleaser. Let’s be honest: who can resist a rich, chewy brownie loaded with mini chocolate chips? By topping these brownies with fresh fruit and a creamy vanilla frosting, you get that perfect balance of decadent chocolate and bright, summer freshness.
This recipe is designed to be low-stress and high-impact. You don’t need to be a professional pastry chef to master the piping—the “stripes” are forgiving, and the berries do most of the hard work for you!
Why You’ll Love This Recipe
- The Perfect Texture: We use a “melted butter” method which creates that signature chewy, fudgy brownie texture we all crave.
- Show-Stopping Presentation: It looks like a masterpiece, but the flag design is actually very simple to assemble.
- Kid-Friendly: This is a great recipe to get the kids involved! They can help arrange the “stars” (blueberries) and “stripes” (strawberries).
- Make-Ahead Magic: You can bake the brownie base a day in advance and decorate it just before the party.
- Fresh and Seasonal: It makes the most of summer’s peak strawberry and blueberry season.
Ingredient Notes
Before you preheat that oven, let’s talk about what makes these brownies stand out.
- Unsweetened Cocoa Powder: For the deepest chocolate flavor, use a high-quality cocoa. If you want an extra-dark look, you can use Dutch-processed cocoa powder.
- Butter: We’re using 12 tablespoons (1 ½ sticks). Melting the butter with the sugar and cocoa is the secret to that shiny, crackly brownie top.
- Mini Chocolate Chips: Using mini chips ensures you get chocolate in every single bite without the chips overpowering the texture of the brownie.
- Fresh Berries: Choose firm blueberries and bright red strawberries. If the strawberries are huge, slice them thin so the “stripes” stay level.
- White Frosting: You can use two 16-ounce containers of your favorite store-bought white frosting for convenience, or whip up a double batch of homemade vanilla buttercream.
Step-by-Step Instructions
1. Prep the Pan
Start by preheating your oven to 350°F (175°C). Line a 9×13-inch baking pan with aluminum foil, leaving enough overhang on the sides to use as a “handle” later. Spray the foil generously with non-stick cooking spray. This step is crucial for getting the brownies out in one perfect piece!
2. Mix the Base
In a medium saucepan, melt the butter over low heat. Once melted, whisk in the sugar and cocoa powder until smooth. Remove from heat and let it cool for a few minutes. You don’t want to scramble your eggs! Once it’s just warm to the touch, whisk in the eggs one at a time, followed by the vanilla extract.
3. Incorporate Dry Ingredients
Gently stir in the flour, salt, and baking powder. Be careful not to overmix here—overmixing leads to cakey brownies, and we want fudgy! Fold in those mini chocolate chips at the very end.
4. Bake and Cool
Pour the batter into your prepared pan and smooth the top. Bake for 22 to 25 minutes. The edges should be set, but a toothpick inserted into the center should come out with a few moist crumbs. Let the brownies cool completely in the pan. If you try to frost a warm brownie, your “flag” will melt into a puddle!
5. Decorate Your Flag
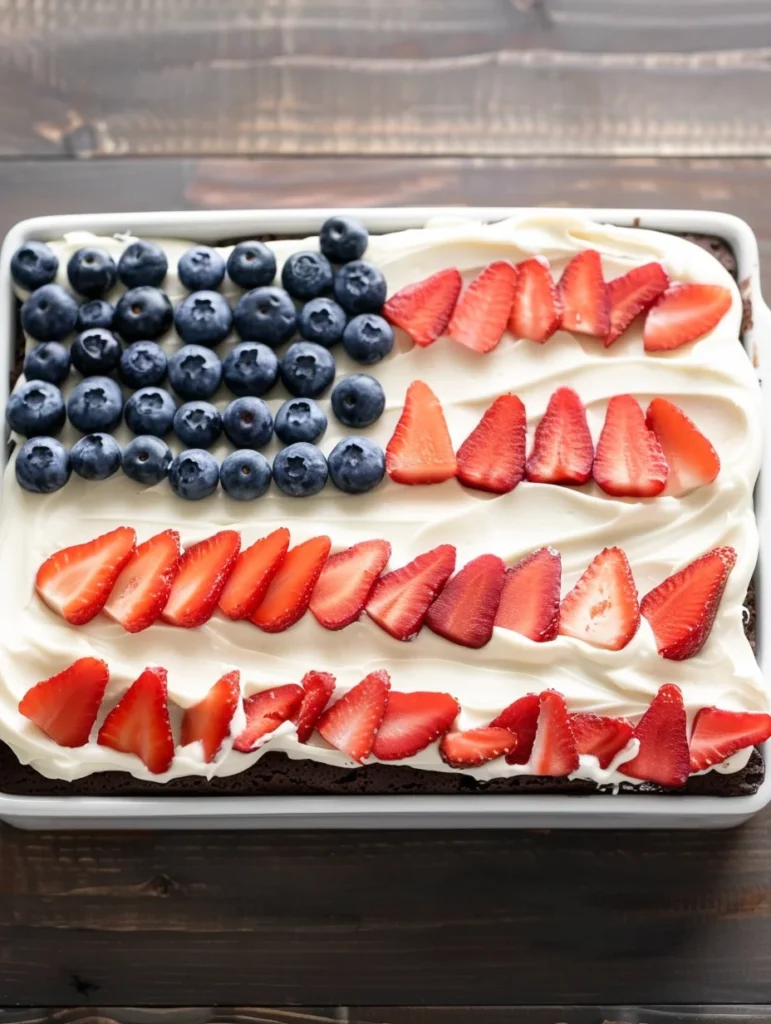
Lift the brownie out of the pan using the foil handles and place it on a serving tray.
- Base Layer: Spread a thin layer of frosting over the entire surface.
- The Stars: Place blueberries in neat rows in the top left corner to represent the blue field of the flag.
- The Stripes: Lay your sliced strawberries in 5 horizontal rows across the brownie.
- The Piping: Fill a pastry bag with the remaining frosting and a large star tip. Pipe beautiful white stripes in the gaps between the strawberry rows.
Expert Tips for Best Results
- The Foil Sling: Don’t skip the foil lining. It allows you to move the entire brownie onto a decorative board or tray without it cracking.
- Dry Your Fruit: After washing your berries, pat them very dry with paper towels. Any excess water will cause the frosting to break or the red color from the strawberries to bleed into the white frosting.
- Wipe the Knife: When it’s time to serve, wipe your knife with a warm, damp cloth between every single cut. This keeps the white frosting and chocolate layers from smearing into each other.
- Temperature Matters: Make sure your eggs are at room temperature before adding them to the cocoa mixture. This helps the batter emulsify better, leading to a smoother texture.
Variations and Substitutions
- Gluten-Free: You can easily swap the all-purpose flour for a 1:1 gluten-free flour blend. The texture remains remarkably similar!
- Cream Cheese Frosting: If you prefer a bit of tang, replace the white vanilla frosting with a stiff cream cheese frosting. It pairs beautifully with the berries.
- Raspberry Stripes: Not a fan of strawberries? You can use fresh raspberries placed side-by-side to create the red stripes.
- Homemade Brownie Base: If you have a family favorite brownie recipe, feel free to use it! Just ensure it’s a 9×13-inch recipe.
Storage and Freezing
To Store: Because of the fresh fruit, these brownies are best served the day they are decorated. However, you can store leftovers in an airtight container in the refrigerator for up to 2 days.
To Freeze: You can freeze the unfrosted brownie base. Wrap it tightly in plastic wrap and then foil, and freeze for up to 3 months. Thaw at room temperature before frosting and adding the fresh fruit. I do not recommend freezing the decorated brownies as the fruit will become mushy upon thawing.
FAQ
Can I use frozen fruit for the decoration?
I don’t recommend it. Frozen fruit releases a lot of moisture as it thaws, which will cause the colors to bleed and the frosting to become watery. Fresh is definitely best for this recipe!
How do I get perfectly straight frosting lines?
If you aren’t confident in your piping skills, you can use a ruler to lightly mark the frosting before you start placing your berries. This gives you a “map” to follow.
Can I make these into individual brownie bites?
Yes! Bake the brownies in a mini-muffin tin, frost each one, and place one blueberry and a small slice of strawberry on each bite for a “deconstructed” flag look.
Happy Hosting!
These American Flag Brownies are more than just a dessert; they’re a centerpiece. There’s something so satisfying about putting a dish on the table that makes everyone reach for their phones to take a picture before they dive in.
I hope this recipe adds a little extra sparkle to your summer celebrations. If you make these, I’d love to see your creations! Tag me on Instagram or leave a comment below to tell me how they turned out. Happy baking!
PrintAmerican Flag Brownies
A decadent, fudgy chocolate brownie base topped with a creamy white frosting and decorated with fresh strawberries and blueberries to look like the American flag. This is the perfect crowd-pleasing dessert for summer holidays!
Ingredients
12 tablespoons butter
1 1/2 cups sugar
2/3 cup unsweetened cocoa powder
3 eggs
1 1/2 teaspoons vanilla extract
3/4 cup flour
1/2 teaspoon salt
1/4 teaspoon baking powder
1 cup mini chocolate chips
1 cup fresh blueberries
2 cups sliced strawberries
2 (16-ounce) containers white frosting
Instructions
1. Preheat oven to 350 degrees and line a 9X13-inch pan with aluminum foil. Make sure the foil extends up the sides so that you will be able to lift the brownies out of the pan. Spray with cooking spray.
2. Melt butter in a medium saucepan. Whisk in sugar and cocoa powder.
3. Make sure mixture is not hot and then whisk in eggs and vanilla extract.
4. Stir in flour, salt, and baking powder.
5. Fold in chocolate chips. Pour batter into prepared pan. Bake for about 22 to 25 minutes. Let cool completely.
6. Lift brownie out of pan and place on a serving tray. Spread with a thin layer of frosting.
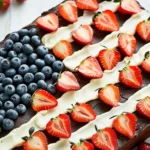
7. Arrange blueberries in rows in top left corner. Place strawberry slices in 5 rows.
8. Place remaining frosting in a large pastry bag fitted with a large star tip. Pipe frosting between rows of strawberries.
9. Refrigerate until ready to serve.
Notes
For the cleanest cuts, wipe your knife with a warm, wet cloth between every slice.
If your strawberries are very juicy, pat them dry with a paper towel before placing them on the frosting to prevent bleeding.
Use a high-quality cocoa powder for the richest chocolate flavor.