
If there is one dish that signifies the end of Lent and the celebration of spring in an Italian household, it is the Pizza Rustica. Also known as Torta Pasqualina or simply Italian Easter Pie, this dish is a magnificent, towering savory pie that sits somewhere between a quiche and a meat lover’s dream.
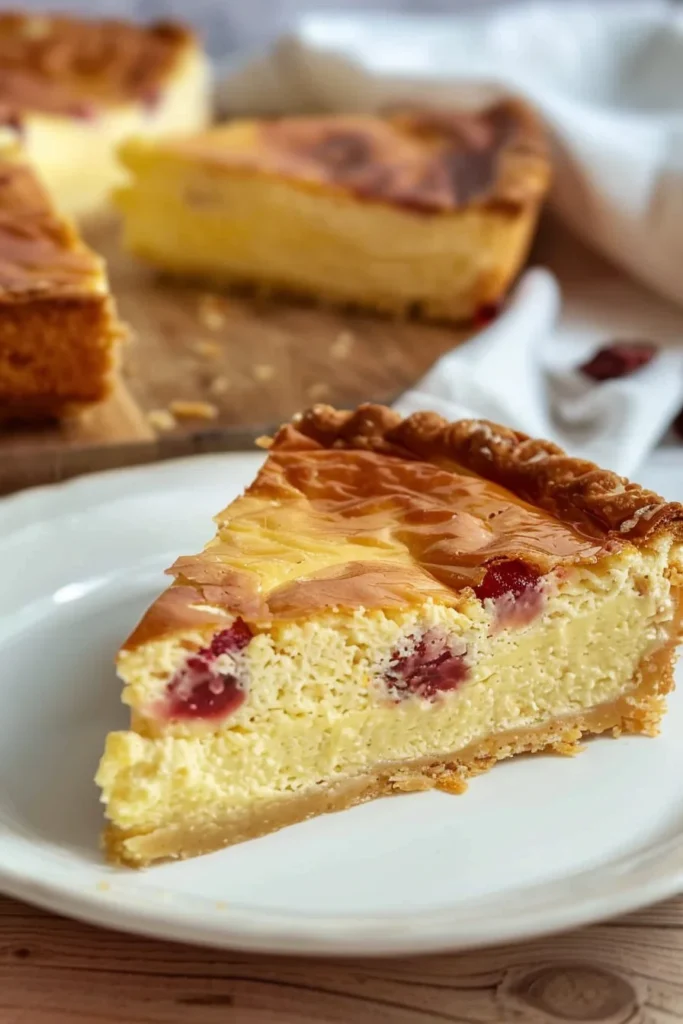
Imagine a golden, flaky crust that gives way to a dense, creamy center of ricotta and mozzarella, studded with salty bites of prosciutto, salami, and ham. It is rich, it is decadent, and it is the ultimate centerpiece for your Easter brunch or dinner.
In my family, the smell of the crust baking is the official signal that the holiday has arrived. Whether you’ve been making this for decades or this is your first time trying a traditional Italian savory pie, this recipe is designed to be foolproof and absolutely delicious.
Why You’ll Love This Pizza Rustica Recipe
- A Texture Masterpiece: You get the crunch of the crust, the creaminess of the ricotta, and the chewy, savory bite of the cured meats.
- Perfect for Crowds: This recipe uses a springform pan, creating a deep-dish pie that easily feeds a large family.
- Make-Ahead Friendly: It actually tastes better after it has sat for a few hours (or even overnight), making it the perfect low-stress holiday dish.
- Versatile: Serve it hot, warm, or at room temperature it never fails to impress.
Ingredient Notes: The Secret to a Perfect Pie
The beauty of a Pizza Rustica lies in the quality of the ingredients. Since the filling is simple, each component needs to shine.
- The Crust: Unlike a standard dessert pie crust, we add an egg and a touch of olive oil. This makes the dough more “elastic” and sturdy enough to hold the heavy filling without becoming soggy.
- The Ricotta: Use whole-milk ricotta for the best mouthfeel. If your ricotta is very watery, let it strain in cheesecloth for 30 minutes before mixing.
- The Meat Trio: We use a combination of diced ham, chopped salami, and prosciutto. This provides a variety of salt levels and textures. Feel free to swap in pepperoni or capicola if you want a little extra spice!
- The Cheeses: Mozzarella provides the “melt,” while Parmesan adds a sharp, salty finish that cuts through the richness of the eggs.
Step-by-Step Instructions
1. Prepare the Savory Crust
Start by pulsing your flour, cold cubed butter, olive oil, egg, and salt in a food processor. You’re looking for a texture that resembles coarse sand. While the processor is running, slowly drizzle in your cold water. Stop as soon as the dough begins to clump together into a ball.
Pro Tip: Don’t overwork the dough! Over-mixing leads to a tough crust. Wrap it in plastic and let it chill in the fridge for at least an hour. This allows the gluten to relax and the butter to firm back up.
2. Mix the Decadent Filling
In a large mixing bowl, combine the ricotta, mozzarella, and parmesan. Stir in your four beaten eggs until the mixture is smooth. Fold in the ham, salami, and prosciutto. It will look like a lot of meat—and that’s exactly what you want! Season with salt and pepper, but go light on the salt, as the deli meats are already quite savory.
3. Assemble the Pie
Preheat your oven to 425°F. Take about two-thirds of your chilled dough and roll it out on a floured surface. You want it large enough to cover the bottom and sides of a greased springform pan. Don’t worry if it isn’t perfect; you can patch any holes with dough scraps.
Pour in the filling and smooth it out. Roll out the remaining third of the dough for the top crust. Place it over the filling, trim the excess, and pinch the edges to seal.
4. The “Secret” Bake Method
Brush the top with a beaten egg for that signature golden sheen, and cut a small “X” in the center. Here is the trick: Place the pie in the oven at 425°F, then immediately turn the heat down to 350°F. This initial blast of heat sets the crust, while the lower temperature ensures the dense filling cooks through without burning the exterior.
Expert Tips for Best Results
- The Springform Pan is Key: Because this pie is so tall and heavy, a springform pan is the only way to get it out cleanly. If you don’t have one, a deep-dish pie plate works, but you’ll have to serve it directly from the dish.
- Cold Butter Matters: Just like with biscuits, the cold butter creates steam pockets as it melts, which gives you those coveted flaky layers.
- Let it Rest: Resist the urge to cut into the pie immediately! It needs time to set. If you cut it too early, the cheese filling may be too soft. Waiting 15–20 minutes is essential.
Variations and Substitutions
- Vegetarian Option: Swap the meats for sautéed spinach (squeezed very dry), roasted red peppers, and artichoke hearts.
- Spicy Kick: Add half a teaspoon of red pepper flakes to the cheese mixture or use a spicy soppressata in place of the mild salami.
- Crust Shortcut: If you are in a time crunch, you can use store-bought refrigerated pie crusts, though the homemade version is significantly more traditional and sturdy.
Storage and Freezing
In the Fridge: Pizza Rustica keeps beautifully in the refrigerator for up to 4 days. Wrap it tightly in foil or plastic wrap.
To Reheat: I recommend reheating slices in a 325°F oven for about 10 minutes to help the crust crisp back up. The microwave works in a pinch, but the crust will soften.
Freezing: You can freeze the baked and cooled pie. Wrap it in a double layer of plastic wrap and then foil. It will stay fresh for up to 2 months. Thaw in the fridge overnight before reheating.
FAQ
Can I make Pizza Rustica a day ahead?
Absolutely! In Italy, it is very common to make this on Good Friday or Holy Saturday and serve it room temperature on Easter Sunday. The flavors actually meld and improve over time.
My crust is browning too fast—what should I do?
If the top is getting dark but the center still feels jiggly, loosely tent the top of the pan with aluminum foil for the remainder of the bake time.
What should I serve with Italian Easter Pie?
Because this dish is so rich, it pairs perfectly with a bright, crisp green salad dressed with a lemon vinaigrette or some roasted asparagus.
A Savory Tradition
Making a Pizza Rustica is a labor of love, but the results are truly spectacular. It’s a dish that commands attention on the dinner table and brings everyone together for a hearty, happy meal. Whether it’s your first time or your fiftieth, I hope this recipe brings a little taste of Italian tradition into your home.
Happy baking, and Buon Appetito!
PrintAuthentic Pizza Rustica Recipe

A show-stopping savory Italian pie traditionally served for Easter, featuring a rich, buttery crust and a decadent meat and cheese filling.
Ingredients
2 ½ cups all purpose flour
½ cup cold butter, cubed (one stick)
2 tablespoons olive oil
1 large egg
1 teaspoon kosher salt
4 tablespoons cold water
15 ounces ricotta cheese
8 ounces shredded mozzarella cheese (about a cup)
2 ounces shredded parmesan (about ¼ cup)
4 large eggs, beaten
6 ounces ham, diced (about 1 ½ cups)
2 ounces salami, chopped (about ½ cup)
2 ounces prosciutto, chopped (about ½ a cup)
½ teaspoon kosher salt
¼ teaspoon pepper
1 large egg, beaten (for brushing)
Instructions
1. In a food processor, combine flour, butter, olive oil, egg, and salt. Pulse until the mixture resembles coarse sand.
2. Add cold water with the motor running until dough forms a ball. Wrap in plastic and chill for 1 hour.
3. Preheat oven to 425°F. Grease a springform pan.
4. Mix ricotta, mozzarella, parmesan, 4 eggs, ham, salami, prosciutto, salt, and pepper in a large bowl.
5. Roll out 2/3 of the dough to line the bottom and sides of the springform pan.
6. Pour filling into the crust and smooth the top.
7. Roll out the remaining 1/3 of dough, place on top, and seal the edges by rolling the bottom crust over the top.
8. Brush with beaten egg and cut an ‘X’ in the center.
9. Place in oven and immediately lower heat to 350°F. Bake for 75 minutes until golden brown.
10. Cool for 5 minutes, remove collar, then rest for 10 minutes before slicing.
Notes
You can make the dough up to 24 hours in advance. This pie is incredible served warm, but many traditionalists prefer it at room temperature the next day!


