
Table of Contents
There’s nothing quite like the comforting aroma of freshly baked goods, and these Chocolate Chip Cookie Bars deliver every single time. If you’re looking for a dessert that’s quick, easy, and always a crowd-pleaser, then you’ve found your new favorite recipe. Forget scooping individual cookies; we’re talking about a glorious, soft, and chewy slab of pure happiness you can slice and serve.
I’ve made these countless times for potlucks, weeknight treats, and just because. They’re my go-to when I want that homemade cookie taste without all the fuss. You’ll love how simple they are to whip up, and how quickly they disappear from the pan. Get ready to bake some magic!
What Makes This Dish Worth Making
These Chocolate Chip Cookie Bars are a true kitchen MVP. They offer all the deliciousness of classic chocolate chip cookies but with a fraction of the effort. You just press the dough into one pan, bake, and then slice. It saves you so much time and energy compared to baking multiple batches of cookies.
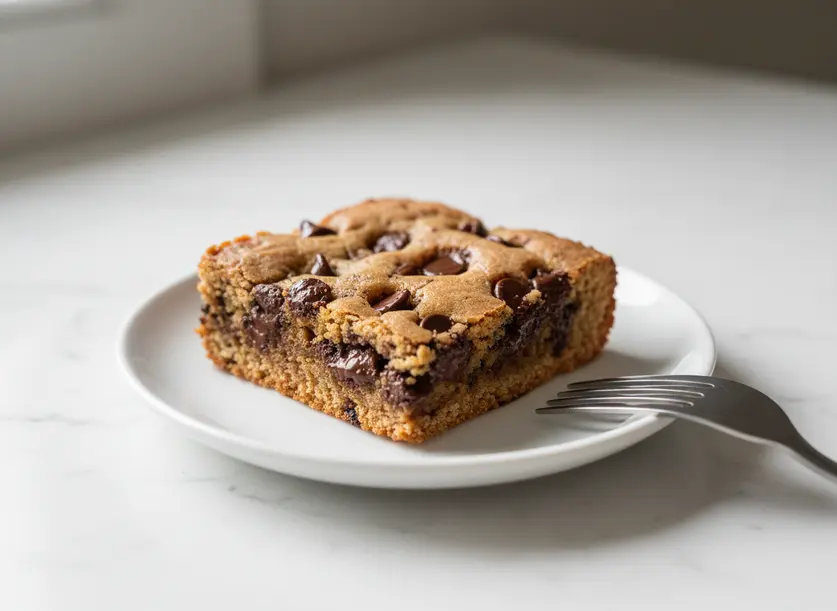
The texture is another huge win. Because they bake all together, the center stays incredibly soft and chewy, almost like raw cookie dough but perfectly baked. The edges get a lovely, slightly crisp bite. It’s the best of both worlds in every single square.
They’re also incredibly versatile. You can easily adjust the type of chocolate chips or add other mix-ins to suit your mood. Plus, they travel well, store wonderfully, and can even be made ahead of time. Trust me, once you try these, you’ll wonder why you ever bothered with individual cookies.
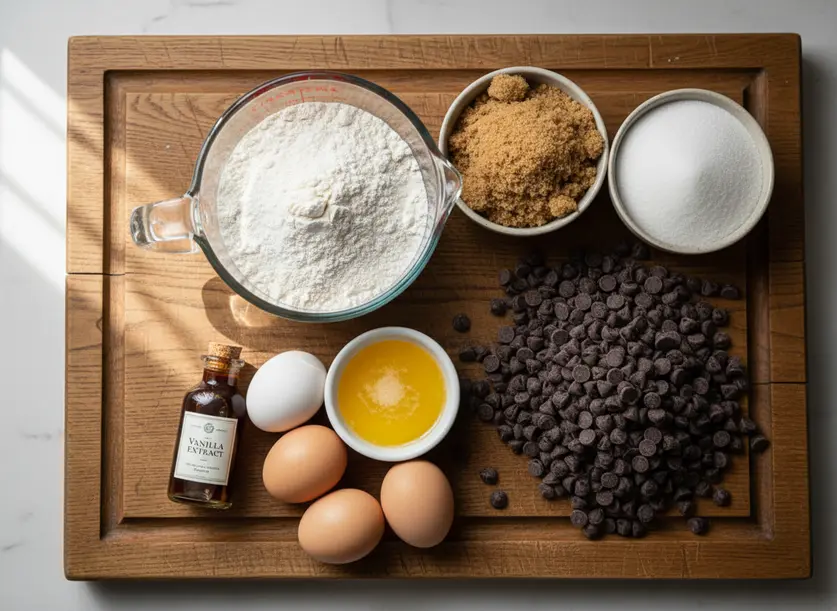
Ingredients You Will Need
To make these delightful bars, you’ll need a few pantry staples. Start with a good quality all-purpose flour; it provides the perfect structure. Baking soda is your leavening agent, ensuring a soft rise, and a pinch of kosher salt balances the sweetness. If you only have table salt, use a bit less because it’s finer.
For the fat, melted butter is key here. It gives these bars their rich flavor and tender texture. Make sure it’s cooled slightly so it doesn’t cook your eggs. Brown sugar provides moisture and chewiness, while white sugar adds to the crisp edges. A mix is perfect.
Large eggs bind everything together and add richness. Don’t skimp on the vanilla extract; it really enhances the cookie flavor. Finally, for the star, grab your favorite chocolate chips! Semi-sweet or dark are my usual picks, but milk chocolate works if you prefer a sweeter bar. You can even mix different kinds. Occasionally, I toss in some toffee bits for an extra layer of flavor and crunch, but they are completely optional.
How to Make It Step by Step
Making these Chocolate Chip Cookie Bars is incredibly straightforward. Just follow these simple steps for a perfect batch every time.
- Preheat your oven to 350°F (175°C). Line a 9×13 inch baking pan with parchment paper or foil, leaving an overhang on the sides. This makes lifting the bars out much easier. You can also lightly grease the pan if you don’t have paper.
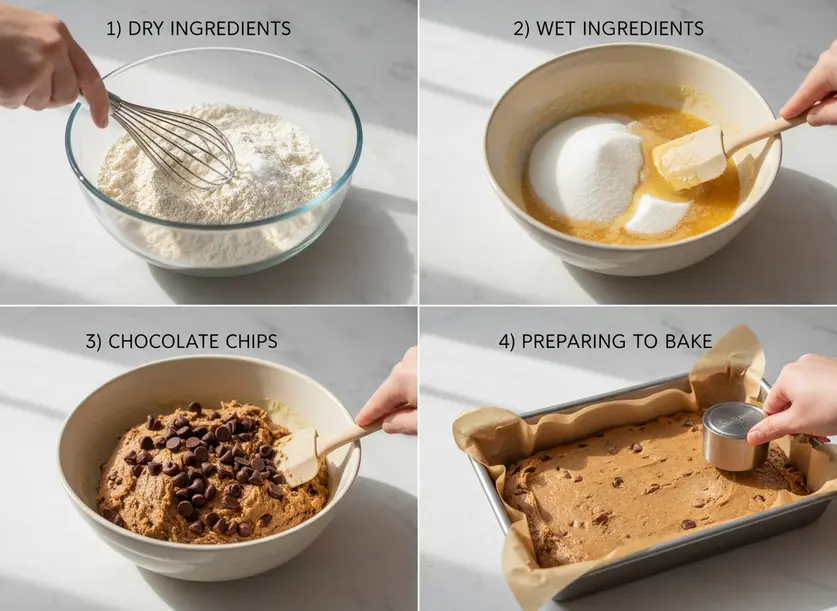
- In a medium bowl, whisk together the all-purpose flour, baking soda, and kosher salt until they are well combined. Set this mixture aside.
- In a large mixing bowl, combine the melted and slightly cooled butter with both the brown sugar and white sugar. Mix thoroughly until the sugars are completely incorporated and the mixture is smooth.
- Add the eggs to the butter and sugar mixture, one at a time, mixing well after each addition. Stir in the vanilla extract until it’s fully combined.
- Gradually add the dry flour mixture to the wet ingredients. Mix on low speed, or by hand, until just combined. Be careful not to overmix the dough, as this can lead to tough cookie bars.
- Stir in the chocolate chips until they are evenly distributed throughout the dough. If you’re using optional toffee bits, stir those in now as well, or save some to sprinkle on top.
- Press the cookie dough evenly into your prepared 9×13 inch baking pan. Make sure the surface is relatively flat for even baking. If you saved any chocolate chips or toffee bits, sprinkle them over the top now.
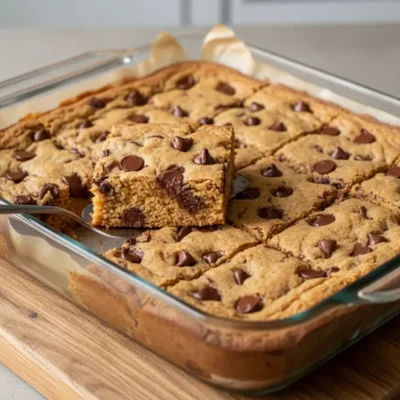
- Bake for 25 to 35 minutes. Start checking at 25 minutes. The edges should be golden brown, and the center will look set but still soft. It will seem a little underbaked, but that’s what gives them their amazing chewy texture after cooling.
- Remove the pan from the oven and let the bars cool completely on a wire rack before attempting to cut them. This is the hardest part, but it’s crucial! Cutting them too soon will result in a gooey, crumbly mess. Patience is key for perfect squares.
- Once fully cooled, use the parchment paper overhang to lift the entire slab of cookie bars out of the pan. Place them on a cutting board and slice into squares.
Tips for the Best Results
Getting perfect Chocolate Chip Cookie Bars isn’t hard, but a few tricks can make them even better. First, don’t overbake them. The center should look slightly underdone and soft when you pull them from the oven. They will continue to set as they cool, giving you that ideal chewy interior. Overbaking leads to dry, crumbly bars.
Always cool your melted butter slightly before adding it to the sugars and eggs. Hot butter can start to cook the eggs, and we don’t want scrambled eggs in our cookie dough. Just a few minutes at room temperature or a quick cool down in the fridge will do.
Resist the urge to cut into them while they’re warm. I know, it’s tempting! But truly, they need to cool completely to firm up and develop their signature chewy texture. If you want a warm treat, scoop it into a bowl and add some ice cream.
For easy removal and clean-up, always line your baking pan with parchment paper or foil, leaving an overhang. This makes lifting the whole slab out incredibly simple. Store leftover cookie bars in an airtight container at room temperature for up to 3-4 days. You can also freeze them for longer storage; they thaw beautifully.
Variations to Try
Once you master the classic Chocolate Chip Cookie Bars, you can get creative with variations. One simple change is to experiment with different types of chocolate. Try a mix of white chocolate chips, milk chocolate chunks, and dark chocolate morsels for a triple chocolate delight. You could even swirl in some peanut butter before baking for a salty-sweet combo.
Add other mix-ins to the dough. Crushed pretzels, chopped nuts (like walnuts or pecans), or even sprinkles can make them unique. For a delightful autumn twist, throw in some cinnamon and a handful of dried cranberries. You can also press a layer of caramel bits into the middle of the dough before baking for a surprise gooey center.
If you need a gluten-free option, simply swap the all-purpose flour for a 1:1 gluten-free baking flour blend. Make sure your blend contains xanthan gum. The rest of the recipe should remain the same, and you’ll still get wonderfully chewy bars. Always check the labels of other ingredients to ensure they are also gluten-free if catering to a strict diet.
FAQ
Can I use different types of chocolate chips?
Absolutely! Feel free to use any combination of chocolate chips you like. Semi-sweet, milk, dark, or even white chocolate chips all work wonderfully in this recipe. Mixing them can add interesting layers of flavor.
How do I store leftover cookie bars?
Store your leftover cookie bars in an airtight container at room temperature. They will stay fresh and chewy for about 3 to 4 days. If you want them to last longer, you can freeze them for up to 3 months.
What if my cookie bars are too gooey?
If your cookie bars seem too gooey, it’s likely they just need more time to cool. They set up considerably as they reach room temperature. If they are still too gooey after cooling completely, they might have been slightly underbaked. Next time, add 5-10 minutes to the baking time.
Chocolate Chip Cookie Bars
Ingredients
- 2.5 cups all-purpose flour good quality
- 1 tsp baking soda
- 0.5 tsp kosher salt If using table salt, use a bit less because it's finer.
- 1 cup unsalted butter melted and slightly cooled
- 1.5 cups brown sugar
- 0.5 cup white sugar
- 2 large eggs
- 2 tsp vanilla extract
- 1.5 cups chocolate chips semi-sweet, dark, milk, or a mix
- 0.5 cup toffee bits optional, for extra flavor and crunch
Instructions
- Preheat your oven to 350°F (175°C). Line a 9x13 inch baking pan with parchment paper or foil, leaving an overhang on the sides. This makes lifting the bars out much easier. You can also lightly grease the pan if you don't have paper.
- In a medium bowl, whisk together the all-purpose flour, baking soda, and kosher salt until they are well combined. Set this mixture aside.
- In a large mixing bowl, combine the melted and slightly cooled butter with both the brown sugar and white sugar. Mix thoroughly until the sugars are completely incorporated and the mixture is smooth.
- Add the eggs to the butter and sugar mixture, one at a time, mixing well after each addition. Stir in the vanilla extract until it's fully combined.
- Gradually add the dry flour mixture to the wet ingredients. Mix on low speed, or by hand, until just combined. Be careful not to overmix the dough, as this can lead to tough cookie bars.
- Stir in the chocolate chips until they are evenly distributed throughout the dough. If you're using optional toffee bits, stir those in now as well, or save some to sprinkle on top.
- Press the cookie dough evenly into your prepared 9x13 inch baking pan. Make sure the surface is relatively flat for even baking. If you saved any chocolate chips or toffee bits, sprinkle them over the top now.
- Bake for 25 to 35 minutes. Start checking at 25 minutes. The edges should be golden brown, and the center will look set but still soft. It will seem a little underbaked, but that's what gives them their amazing chewy texture after cooling.
- Remove the pan from the oven and let the bars cool completely on a wire rack before attempting to cut them. This is the hardest part, but it's crucial! Cutting them too soon will result in a gooey, crumbly mess. Patience is key for perfect squares.
- Once fully cooled, use the parchment paper overhang to lift the entire slab of cookie bars out of the pan. Place them on a cutting board and slice into squares.


