
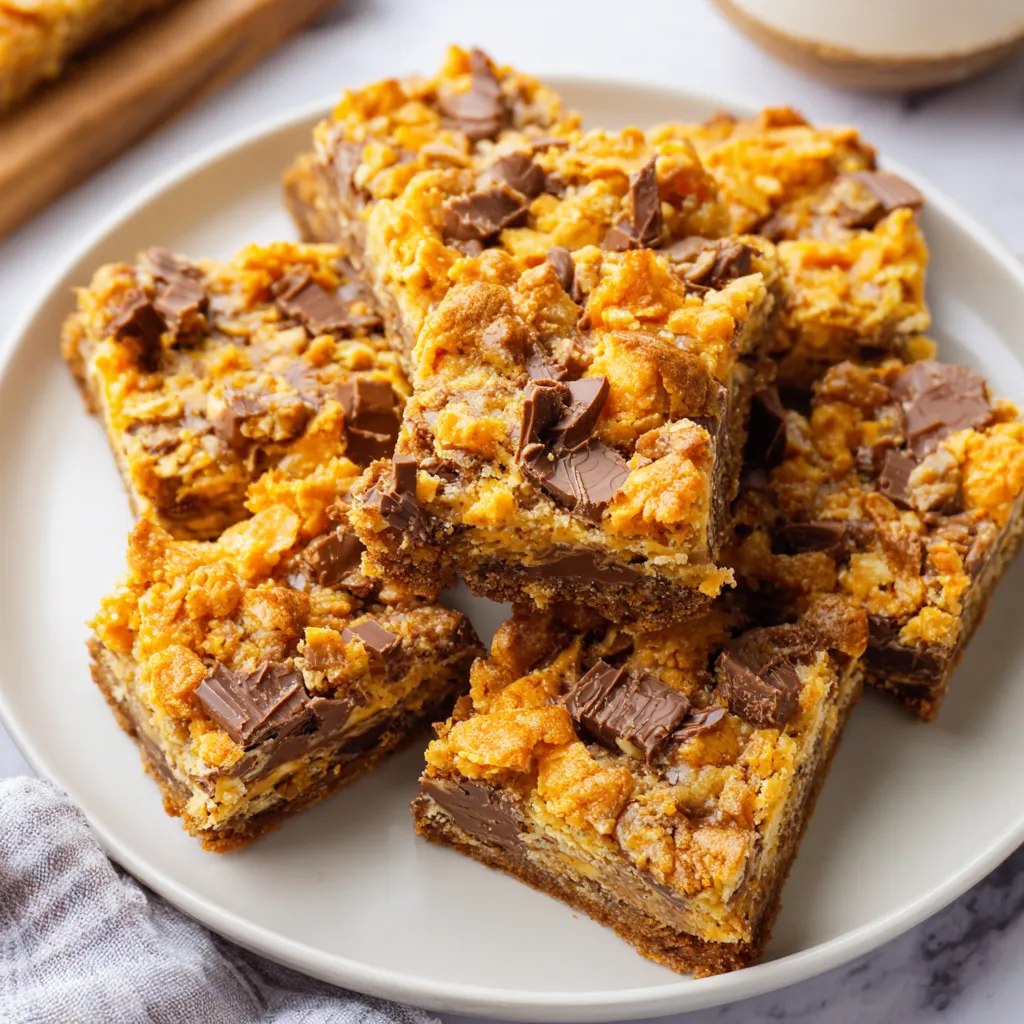
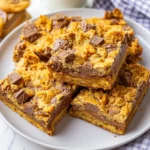
If you are looking for a dessert that delivers a “wow” factor with minimal effort, look no further than these Butterfinger Cookie Bars. There is something truly magical about the combination of crisp, flaky peanut butter candy and a soft, buttery cookie base. It’s a nostalgic flavor profile that reminds us of childhood trick-or-treating, but elevated into a sophisticated, shareable treat. These bars are thick, chewy, and topped with a luscious peanut butter buttercream that makes them impossible to resist. Whether you’re baking for a bake sale, a holiday party, or just a Tuesday night craving, this recipe is designed to be your new go-to. The contrast between the creamy frosting and the “crispety, crunchety” candy topping creates a textural masterpiece that will have everyone asking for the recipe.
Why You’ll Love This Recipe
You will fall in love with these Butterfinger Cookie Bars for several reasons. First, they are incredibly user-friendly; you don’t need to chill the dough or roll out individual cookies, saving you precious time. Second, the flavor balance is impeccable. While many candy-based desserts can be cloyingly sweet, the addition of salt in the dough and the savory notes of the peanut butter frosting provide a necessary counterpoint. Finally, they are highly customizable. You can serve them warm for a gooey experience or chilled for a fudge-like consistency. They travel exceptionally well, making them the perfect candidate for gifting or bringing to a gathering where you want to impress without spending hours in the kitchen.
What Is a Butterfinger Cookie Bar?
A Butterfinger Cookie Bar is a fusion dessert that combines the structural integrity of a blondie with the flavor of a classic peanut butter cookie and the iconic crunch of a Butterfinger candy bar. Unlike a standard cookie, which can sometimes dry out, these bars are baked in a 9×13 pan, which helps retain moisture and results in a denser, fudgier center. The “secret sauce” of this specific version is the dual-layer approach: we incorporate chopped candy into the dough itself and then double down by piling a generous amount of crushed Butterfingers on top of a smooth peanut butter frosting. It’s essentially a candy bar reimagined as a gourmet bakery item.
Ingredients Overview: The Secret to Success
To achieve the perfect texture and flavor, every ingredient plays a vital role.
- Unsalted Butter: Using unsalted butter allows you to control the sodium content. We use a full cup in the base to ensure a rich, buttery crumb.
- The Sugar Duo: A combination of granulated sugar and light brown sugar is essential. The granulated sugar helps the edges crisp up, while the brown sugar provides the molasses notes and chewy texture we crave.
- All-Purpose Flour: This provides the structure. Measuring it correctly (spooned and leveled) is key to avoiding a “cakey” bar.
- Butterfinger Bars: You’ll need about 8 large bars total. The chopped bits inside the dough melt slightly, creating pockets of peanut butter toffee, while the bits on top stay crunchy.
- Peanut Butter: For the frosting, use a standard creamy brand like Jif or Skippy. “Natural” peanut butters that require stirring can be too oily and may cause the frosting to separate.
- Vanilla Extract: High-quality vanilla enhances the chocolate and peanut butter flavors, acting as a bridge between the different components.
Ingredient Substitutions & Tips
If you find yourself missing an ingredient, don’t panic! You can substitute the light brown sugar with dark brown sugar for a deeper, more caramel-like flavor. If you are out of Butterfingers, other crunchy candies like Skor or Heath bars work well, though the flavor profile will shift toward toffee. For a gluten-free version, a 1-to-1 gluten-free baking flour works remarkably well in this recipe because the density of the bars hides any structural differences. If you want to cut down on the sweetness, you can reduce the powdered sugar in the frosting by 1/4 cup or add a pinch of espresso powder to the cookie dough to deepen the flavor.
Step-by-Step Instructions
- Preparation is Key: Start by preheating your oven to 350°F. Line your 9×13 baking dish with parchment paper, leaving an overhang on the sides. This “sling” method allows you to lift the entire block of bars out of the pan for easy slicing once they are cooled.
- Creaming the Base: In your stand mixer or a large bowl with a hand mixer, beat the room-temperature butter and both sugars. You want to see the color lighten—this indicates you’ve incorporated enough air to keep the bars from being too heavy.
- Egg Integration: Add the eggs and vanilla. Beat until the mixture is glossy and smooth.
- Dry Ingredients: Sift in the flour, salt, and baking soda. Mix on low speed just until the white streaks of flour disappear. Overmixing at this stage will develop too much gluten, making the bars tough.
- The Candy Fold: Gently fold in the first 1/2 cup of chopped Butterfingers.
- The Bake: Spread the thick dough into the pan. It might seem stubborn, but an offset spatula will help. Bake for 25 minutes. The center should still have a slight jiggle, as they will continue to set as they cool.
- The Frosting: While the base cools, whip together your frosting ingredients. It should be light, airy, and spreadable.
- The Reveal: Once the bars are stone-cold, spread the frosting and top with the remaining candy.
Expert Baking Tips for Discover-Worthy Results
To get those perfectly clean, “Pinterest-perfect” slices, patience is your best friend. Never attempt to frost a warm cookie bar; the frosting will melt into a greasy puddle. For the best E-E-A-T results, I recommend chilling the frosted bars in the refrigerator for at least 30 minutes before cutting. Use a large chef’s knife and wipe the blade with a damp paper towel between every single cut. This prevents the frosting from dragging and ensures the layers remain distinct. Additionally, don’t overbake! The residual heat of the pan will finish the cooking process. If the edges are starting to pull away from the parchment, they are ready.

The Magic of Peanut Butter Frosting
The frosting on these bars is not just an afterthought; it’s a critical component. By using a high ratio of peanut butter to butter, we ensure the frosting tastes like the interior of a candy bar rather than just sweet sugar. If your frosting feels too stiff, add milk one teaspoon at a time. If it’s too soft, add more powdered sugar. This layer acts as the “glue” for the chopped Butterfingers on top, ensuring that every bite has that signature crunch without the candy falling off. It’s a trick I’ve used in professional bakeries to ensure “shelf-stable” decorations that look great for hours.
Serving Suggestions
Serve these bars at room temperature for the softest bite. They pair beautifully with a cold glass of milk or a hot cup of coffee, which cuts through the richness of the peanut butter. If you want to turn these into a decadent plated dessert, serve a bar warm with a scoop of vanilla bean ice cream and a drizzle of chocolate ganache. They are also excellent candidates for “treat boxes” or holiday cookie trays because their bright orange topping adds a pop of color and texture that stands out among standard cookies.
Storage & Make-Ahead Tips
These bars stay fresh and moist for up to 5 days when stored in an airtight container at room temperature. If you live in a particularly warm climate, you may want to keep them in the fridge to keep the frosting firm. You can also freeze these bars! Wrap individual slices in plastic wrap and store them in a freezer bag for up to 3 months. Simply thaw at room temperature for about an hour before enjoying.
Frequently Asked Questions (FAQs)
Q: Can I use “natural” peanut butter for the frosting?
A: It is not recommended. Natural peanut butters vary in oil content and can make the frosting runny or gritty. For the most stable results, use a processed creamy peanut butter.
Q: How do I make my bars more chewy and less cakey?
A: Be careful not to overmeasure your flour. Also, ensure you are using a large egg, as the fat in the yolk contributes significantly to the chewiness of the bar.
Q: Can I make these in an 8×8 pan instead?
A: Yes, but you will need to halve the recipe. The baking time will also need to be adjusted; start checking them at 18-20 minutes.
Q: My Butterfingers got soft on top of the frosting. Why?
A: Sugar is hygroscopic, meaning it absorbs moisture. If stored in a very humid environment or a completely airtight container while still slightly warm, the candy can lose its crunch. Store them in a cool, dry place.
Q: Can I add chocolate chips to the dough?
A: Absolutely! Adding 1/2 cup of semi-sweet chocolate chips along with the Butterfinger bits is a delicious variation.
These Butterfinger Cookie Bars are the ultimate intersection of ease and indulgence. By following the tips regarding ingredient temperature and cooling times, you’ll produce a bakery-quality dessert right in your own kitchen. They are a testament to the fact that you don’t need complex techniques to create something memorable. Give this recipe a try for your next event, and watch how quickly they disappear—just make sure to snag one for yourself first!
PrintButterfinger Cookie Bars Recipe
Indulge in the perfect marriage of salty and sweet with these Butterfinger Cookie Bars. Featuring a soft, chewy cookie base loaded with candy bits and topped with a velvety smooth peanut butter frosting, these bars are a show-stopper for potlucks, parties, or a cozy night in.
- Prep Time: 15 minutes
- Cook Time: 25 minutes
- Total Time: 40 minutes
- Yield: 16 bars
- Cuisine: American
Ingredients
Unsalted butter (room temp) – 2 sticks (1 cup)
Granulated sugar – 1/2 cup
Light brown sugar – 1 cup
Large eggs – 2
Vanilla extract – 1 tsp
All-purpose flour – 2 1/2 cups
Salt – 1 tsp
Baking soda – 1 tsp
Butterfinger bars (chopped) – 1/2 cup
Peanut butter (creamy) – 3/4 cup
Unsalted butter (room temp) – 1 stick (1/2 cup)
Vanilla extract – 1 tsp
Powdered sugar – 1 1/2 cups
Whole milk – 3 tbsp
Butterfinger bars (chopped topping) – 1 1/2 cups
Instructions
Preheat your oven to 350°F (175°C).
Line a 9×13 inch baking dish with parchment paper and lightly spray with non-stick cooking spray.
In a large mixing bowl, beat 1 cup of softened butter with the granulated and brown sugars until light and creamy (about 2-3 minutes).
Incorporate the eggs and 1 tsp vanilla, beating until well combined.
Gradually add the flour, salt, and baking soda, mixing until just combined.
Fold in 1/2 cup of the chopped Butterfinger bits.
Spread the dough evenly into the prepared pan and bake for 25 minutes until the edges are golden brown.
Allow the cookie base to cool completely in the pan before frosting.
To make the frosting, beat the remaining stick of butter and peanut butter until smooth.
Add vanilla, powdered sugar, and milk, beating until the frosting is light and fluffy.
Spread the frosting over the cooled bars and top with the remaining 1 1/2 cups of chopped Butterfingers.
Slice into 16 bars and serve.
Notes
• Ensure the bars are completely cool before frosting to prevent the buttercream from melting.
• For cleaner slices, chill the bars for 30 minutes after frosting before cutting.
• Use a sharp knife and wipe it between cuts for a professional look.
• You can substitute Butterfinger Bits (found in the baking aisle) if you don’t want to chop full-sized bars.


