
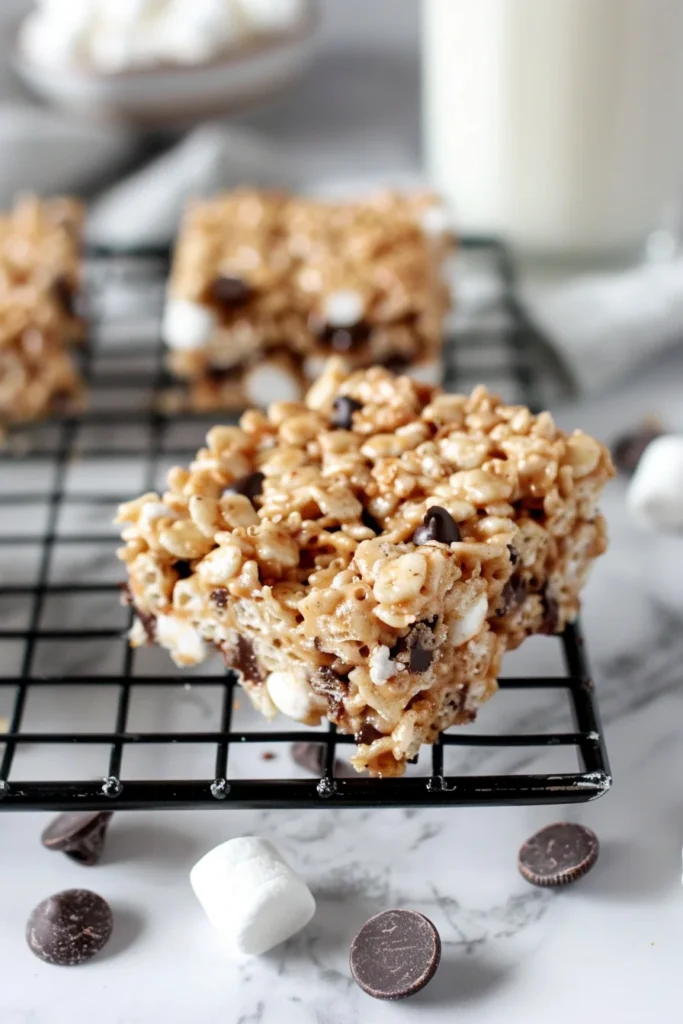
There is a specific kind of magic found in a perfect rice crispy treat. It’s that nostalgic, gooey, marshmallow-laden pull that transports you straight back to childhood bake sales and lunchbox surprises. However, most store-bought versions—and even many homemade ones—suffer from being overly hard, dry, or remarkably bland. That is exactly why this Chocolate Chip Rice Crispy Treats recipe is a game-changer. We aren’t just following the back of the box here; we are elevating a classic with a few professional secrets: extra butter, a pinch of salt to balance the sugar, and a massive ratio of marshmallows. By adding mini semi-sweet chocolate chips into the fold, you get a sophisticated flavor profile that satisfies both kids and adults. These are the softest, most indulgent treats you will ever make.
Why You’ll Love This Recipe
You are going to fall in love with these treats because they strike the perfect balance between ease and excellence. First, they are a strictly “no-bake” dessert, making them ideal for hot summer days or when your oven is occupied with dinner. The texture is the real star here; by reserving a portion of the marshmallows to fold in at the end, you get “marshmallow pockets” that stay soft for days. Furthermore, the addition of mini chocolate chips provides a rich contrast to the airy cereal. Whether you want the chocolate to melt into luxurious swirls or stay as distinct, snappy bites, this recipe gives you total control over the finished product.
What Is a Chocolate Chip Rice Crispy Treat?
At its core, a rice crispy treat is a confection made by binding puffed rice cereal with a mixture of melted butter and marshmallows. While the original recipe was popularized in the 1930s by Kellogg’s employees Mildred Day and Malitta Jensen, the modern “elevated” version has taken the internet by storm. Adding chocolate chips is the ultimate evolution of this snack. It transforms a simple three-ingredient bar into a multi-textured dessert. This specific version focuses on the “extra-gooey” method, which uses a higher marshmallow-to-cereal ratio than the traditional recipe, ensuring the bars never become “bricks” but rather remain pillowy and decadent.
Ingredients
To achieve the best results, every ingredient must be selected with care.
- Unsalted Butter: We use a full half-cup (one stick) to provide a rich, creamy base. Using unsalted butter allows us to control the sodium levels exactly.
- Mini Marshmallows: You will need 10 cups total. The “mini” size is crucial because they melt faster and more evenly than large ones. More importantly, we divide them to ensure texture—8 cups for melting and 2 cups for whole-marshmallow chunks.
- Rice Cereal: 8 cups of crisp rice cereal provide the structure. For those with dietary restrictions, ensure you select a certified gluten-free brand, as some mainstream brands use malt flavoring derived from barley.
- Mini Semi-Sweet Chocolate Chips: The “mini” aspect is vital here. Regular-sized chips can be too heavy and sink or create large, hard chunks. Minis distribute perfectly through every bite.
- Kosher Salt: A large pinch of salt is the secret ingredient. It cuts through the intense sweetness of the marshmallows and makes the chocolate flavor pop. Do not skip this!
Ingredient Substitutions & Tips
If you find yourself missing an ingredient, there are several ways to adapt. For a dairy-free version, you can substitute the butter with a high-quality vegan butter stick or refined coconut oil (though the flavor will slightly change). If you want a deeper, more “adult” flavor, try browning the butter first; simply cook the butter until it turns golden brown and smells nutty before adding the marshmallows. You can also swap semi-sweet chips for dark chocolate chips or even white chocolate for a different sweetness level. If you only have large marshmallows, you can use them for the melting stage, but be sure to cut them into smaller pieces first for an even melt.
Step-by-Step Instructions
- Prep the Pan: Success begins with a well-prepared 9×13 baking dish. Spray the dish with nonstick cooking spray, then line it with a sheet of parchment paper. Ensure the parchment hangs over the long sides like a “sling.” Spray the parchment again. This ensures you can lift the entire block out for easy slicing later.
- Melt the Base: Place a large Dutch oven or a heavy-bottomed pot over medium-low heat. Add the chunks of unsalted butter and the pinch of kosher salt. Once the butter is mostly melted, add 8 cups of the mini marshmallows.
- Low and Slow: Stir the mixture occasionally with a heat-proof spatula. It is imperative to keep the heat low. If you rush this process with high heat, the sugars in the marshmallows will crystallize, leading to a hard, brittle treat once cooled. Stir until the mixture is smooth and glossy.
- Incorporate Cereal: Remove the pot from the heat immediately once the marshmallows are melted. Pour in all 8 cups of rice cereal. Using a folding motion, stir until every single piece of cereal is coated in the marshmallow gold.
- The Final Mix-Ins: Now for the magic. If you want the chocolate chips to melt and create “swirls,” add the remaining 2 cups of marshmallows and the cup of chocolate chips immediately. If you prefer the chips to stay whole, let the mixture cool for about 2-3 minutes before folding them in.
- Press Gently: Transfer the mixture into your prepared 9×13 dish. Spray your spatula (or your hands) with nonstick spray. Gently—very gently—press the mixture to the corners of the pan. Pro Tip: Do not pack the mixture down. If you press too hard, you’ll lose the airy, chewy texture.
- The Waiting Game: Let the treats sit at room temperature for at least 60 minutes. This allows the structure to set so you get clean cuts.
Expert Baking/Cooking Tips
The number one mistake people make is using old marshmallows. If your marshmallows are stuck together in the bag or feel slightly crusty, they have lost their moisture. This moisture is what keeps the treats chewy. Always buy a fresh bag specifically for this recipe. Another expert tip is the “No-Pack Rule.” When you are putting the mixture into the pan, think of it as “leveling” rather than “pressing.” The more air you keep in the mixture, the better the mouthfeel. Finally, always use a large pot—larger than you think you need. It gives you the space to fold the cereal in quickly without crushing the puffs.
How to Get the Perfect Gooey Texture
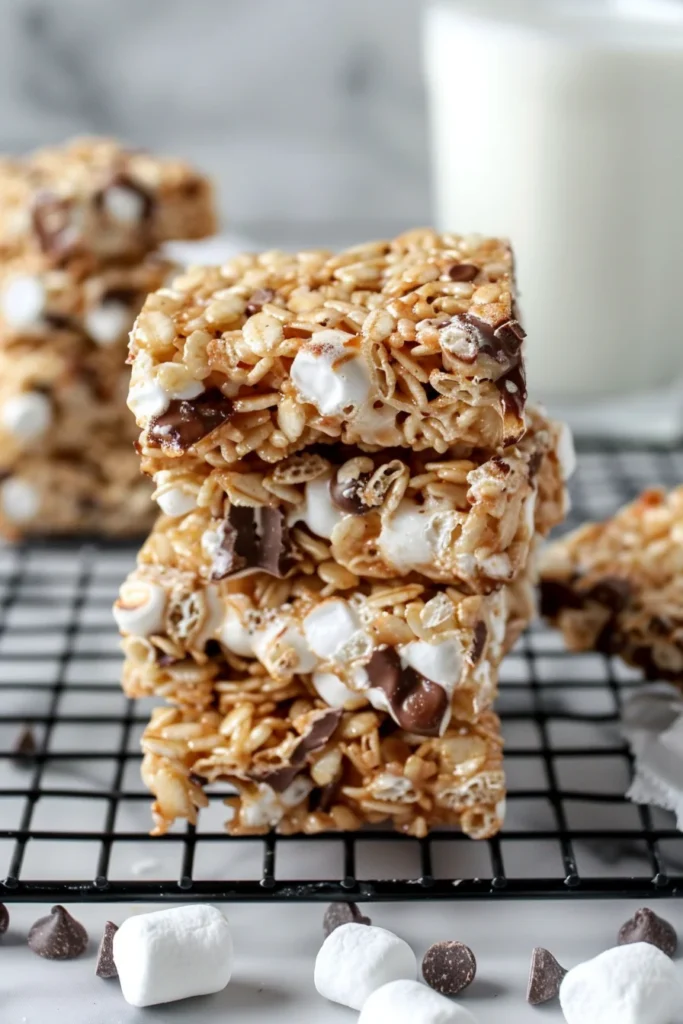
The “secret” to professional-grade rice crispy treats is the marshmallow-to-cereal ratio. Most standard recipes call for a 1:1 ratio or less. By using 10 cups of marshmallows to 8 cups of cereal, we ensure there is more “glue” than “filler.” Furthermore, the technique of adding 20% of the marshmallows after the initial melt creates “pockets of goo.” As you bite into the bar, you hit these soft, un-melted marshmallow clouds that provide a varied texture. This, combined with the low-heat melting method, ensures your treats stay soft for up to four days, rather than turning into rocks by the second morning.
Serving Suggestions
These treats are best served at room temperature, cut into large, generous squares. For a party, you can drizzle the top with extra melted chocolate or a sprinkle of flaky sea salt to signal the “adult” flavors within. They make incredible additions to lunchboxes, but they are also sturdy enough to be stacked on a dessert platter for a backyard BBQ. If you’re feeling extra indulgent, serve a warm square with a scoop of vanilla bean ice cream on top for a “deconstructed” treat experience.
Storage & Make-Ahead Tips
Store your chocolate chip rice crispy treats in an airtight container at room temperature. To prevent sticking, place a small piece of wax paper or parchment between the layers. They will stay fresh and chewy for 3–5 days. Avoid refrigerating them, as the cold air will cause the butter to harden and make the treats difficult to chew. If you need to make them far in advance, these actually freeze remarkably well. Wrap individual squares in plastic wrap, then place them in a freezer bag for up to two months. Thaw at room temperature for 30 minutes before eating.
FAQs
1. Why are my rice crispy treats so hard?
This usually happens for two reasons: the marshmallows were melted over too high a heat, or you packed the mixture into the pan too firmly. High heat breaks down the sugar structure into a hard-crack stage, while over-packing removes the air pockets that keep them soft.
2. Can I make these in the microwave?
Yes! Use a large microwave-safe bowl to melt the butter and 8 cups of marshmallows in 30-second increments, stirring in between. However, the stovetop method is preferred for better heat control.
3. Are these gluten-free?
They can be! While rice is gluten-free, many popular rice cereal brands use malt syrup (from barley). To make these 100% gluten-free, ensure your cereal brand is specifically labeled “Gluten-Free.”
4. Can I use marshmallow fluff instead?
While you can use fluff, the texture will be different. Fluff contains different stabilizers and won’t “set” the same way as melted whole marshmallows, resulting in a treat that might be a bit too messy or sticky to hold its shape.
5. How do I stop the mixture from sticking to my hands?
The best trick is to lightly grease your hands with butter or nonstick cooking spray before pressing the mixture into the pan. Alternatively, use a piece of wax paper to gently level the top.
Once you master this elevated version of Chocolate Chip Rice Crispy Treats, you will never go back to the standard recipe again. The combination of the salty-sweet balance, the extra-gooey marshmallow pockets, and the rich mini chocolate chips creates a dessert that is far more than the sum of its parts. It’s a quick, easy, and reliable recipe that brings joy to every table. Give it a try this weekend and watch them disappear!
PrintChocolate Chip Rice Crispy Treats
These Chocolate Chip Rice Crispy Treats are the ultimate upgrade to your childhood favorite. By using extra marshmallows and a hint of kosher salt, we create a texture that stays soft and gooey for days. The addition of mini chocolate chips adds a rich sweetness that balances the toasted cereal perfectly.
- Prep Time: 10 minutes
- Cook Time: 10 minutes
- Total Time: 1 hour 20 minutes
- Yield: 24 bars
- Cuisine: American
Ingredients
Unsalted butter, cut into chunks – 1/2 cup
Mini marshmallows, divided – 10 cups
Rice cereal (GF if needed) – 8 cups
Mini semi-sweet chocolate chips – 1 cup
Kosher salt – 1 pinch
Instructions
Prepare the pan: Spray a 9×13 baking dish with nonstick cooking spray. Line with parchment paper, leaving an overhang for easy removal, and spray the parchment as well.
Melt the base: In a large dutch oven or heavy-bottomed pot over medium-low heat, combine the butter, salt, and 8 cups of mini marshmallows. Stir frequently until completely smooth.
Combine: Remove the pot from the heat. Add the rice cereal and stir gently with a greased spatula until every piece is evenly coated in the marshmallow mixture.
Fold in additions: Add the remaining 2 cups of marshmallows and the mini chocolate chips. For slightly melted chocolate, stir immediately. For intact chips, let the mixture cool for 2 minutes before stirring.
Press and set: Transfer the mixture to the prepared dish. Using a greased spatula, gently spread the mixture to the edges. Do not pack it down tightly. Let the treats rest at room temperature for at least 1 hour before slicing into squares.
Notes
• Use fresh marshmallows for the best stretch; stale marshmallows result in hard treats.
• Do not over-compress the mixture in the pan, or the bars will become dense and tough.
• Store in an airtight container at room temperature to maintain the chewy texture.


