
Is there anything more nostalgic and comforting than a classic poke cake? If you grew up attending potlucks, church socials, or family reunions, you know exactly what I’m talking about. But today, we are taking that retro favorite and giving it a massive flavor upgrade.
Meet the Butterfinger Poke Cake.
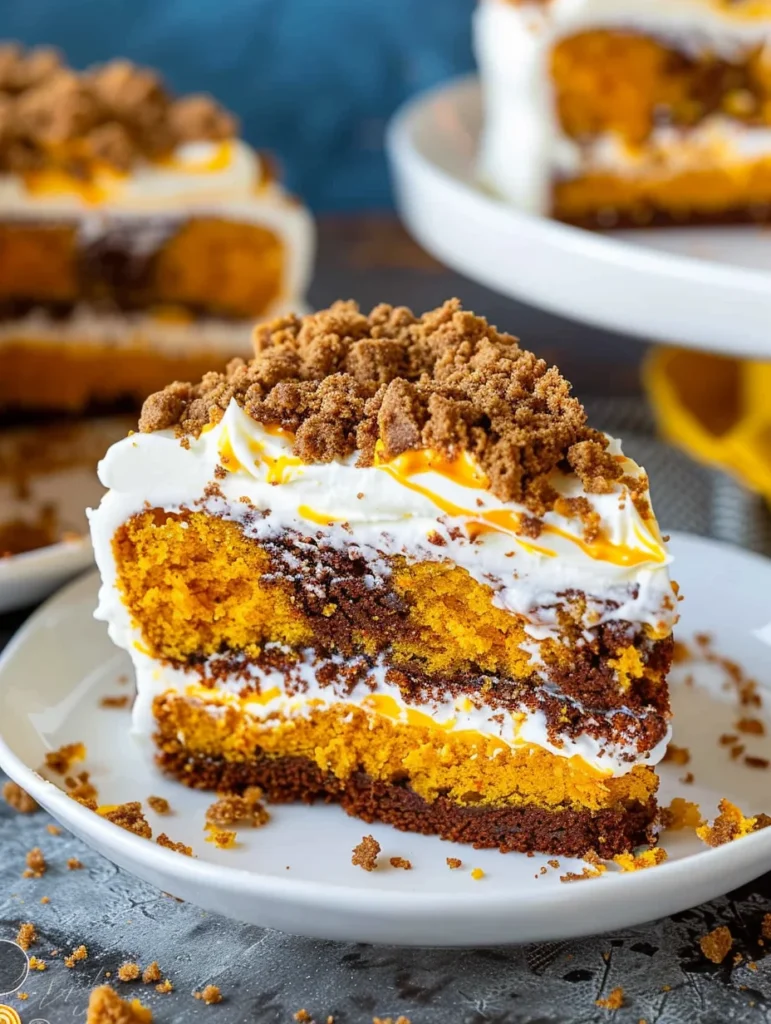
This isn’t just any poke cake; we are using a fudge marble cake base to get those beautiful swirls of chocolate and vanilla, then soaking it in a rich “liquid gold” mixture of caramel and sweetened condensed milk. Top it off with a cloud of whipped topping and the iconic peanut-butter-crunch of crushed Butterfingers, and you have a dessert that people will be begging for the recipe for.
Whether you are a seasoned baker or someone who prefers “semi-homemade” shortcuts, this recipe is virtually foolproof and guaranteed to satisfy every sweet tooth in the room.
Why You’ll Love This Recipe
- The Texture Contrast: You get the moist, tender crumb of the cake, the gooey caramel center, the light whipped cream, and the shatteringly crisp candy bar topping.
- Crowd-Pleaser Status: I have never brought this to a party and come home with leftovers. It is a universal favorite.
- Make-Ahead Friendly: This cake actually tastes better the next day after the caramel has had time to fully penetrate the cake layers.
- Easy Ingredients: Most of these items are pantry staples or easy to find at any local grocery store.
Ingredient Notes
To make this the best Butterfinger Poke Cake possible, here is what you need to know about the ingredients:
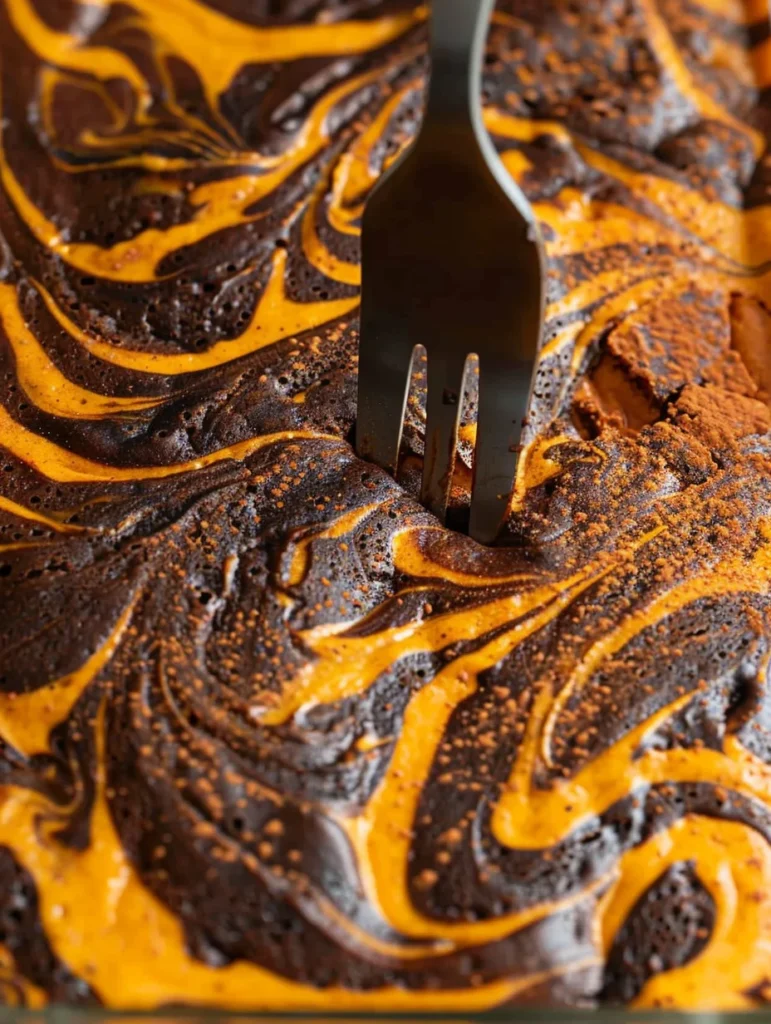
- Fudge Marble Cake Mix: While many recipes call for a standard yellow or chocolate cake, the marble mix offers the best of both worlds. It looks beautiful when sliced and provides a balanced cocoa flavor that doesn’t overwhelm the caramel.
- Sweetened Condensed Milk & Caramel Topping: This is the “soak.” When combined, they create a dulce-de-leche-style syrup that keeps the cake incredibly moist.
- Butterfinger Candy Bars: Use the “large” bars or a bag of fun-size ones. You want enough to create a thick layer of crunch on top. Pro tip: Keep them in the fridge before crushing so the chocolate doesn’t melt in your hands!
- Whipped Topping: I recommend using a stabilized whipped topping like Cool Whip for this recipe because it holds its shape much better than homemade whipped cream when sitting out at room temperature.
Step-by-Step Instructions
1. Bake the Base
Preheat your oven to 350°F. Grease your 9×13 baking dish well—this is a sticky cake, so don’t skip this step! Prepare the marble cake mix according to the box instructions. Once baked, let it sit on the counter for about 5 to 10 minutes. You want it warm, but not “straight-out-of-the-oven” hot.
2. The “Poke” Method
This is the fun part! Take the handle of a wooden spoon or a large serving fork and start poking holes all over the cake. Go about 3/4 of the way down. You want a lot of holes—about one every inch—to ensure the caramel mixture reaches every bite.
3. The Caramel Soak
Whisk together your 14-ounce can of sweetened condensed milk and your 12-ounce jar of caramel. Slowly pour this mixture over the warm cake. I like to use a spatula to gently push the liquid into the holes.
4. The Chill Factor
This is the hardest part: waiting! Place the cake in the refrigerator to cool completely. This allows the liquid to set and the flavors to meld.
5. Topping and Serving
Once the cake is cold to the touch, spread your thawed whipped topping over the top. Just before serving, sprinkle your crushed Butterfingers and add an optional drizzle of chocolate or extra caramel syrup.
Expert Tips for Best Results
- Don’t Rush the Cooling: If you put the whipped topping on a warm cake, it will turn into a puddle. Ensure the cake is completely chilled.
- Crushing the Candy: Place your Butterfinger bars in a gallon-sized Ziploc bag and use a rolling pin or the flat side of a meat tenderizer to crush them. This keeps your kitchen clean and gives you a mix of fine dust and chunky pieces.
- The Spoon Handle Trick: Using the back of a wooden spoon creates larger “tunnels” for the caramel, which results in those beautiful, thick ribbons of sauce when you cut into it.
- Uniform Holes: Try to poke the holes in a grid pattern so that every slice gets an equal amount of caramel goodness.
Variations and Substitutions
- The Chocolate Lover’s Version: Use a Triple Chocolate cake mix and top with chocolate ganache before adding the whipped topping.
- Heath Bar Variant: Not a fan of peanut butter? Swap the Butterfingers for crushed Heath bars or Toffee bits for a “Better Than Sex” cake vibe.
- Homemade Whipped Cream: If you prefer homemade, beat 2 cups of heavy cream with 1/2 cup powdered sugar and 1 tsp vanilla until stiff peaks form. Note that the cake must stay refrigerated!
- Cupcake Style: You can make these in a cupcake tin! Just reduce the baking time and poke 2-3 holes in each cupcake.
Storage and Freezing
To Store: Because of the dairy in the condensed milk and whipped topping, this cake must be stored in the refrigerator. Cover it tightly with plastic wrap or a lid. It will stay delicious for 3-4 days.
To Freeze: You can freeze the baked cake (after the caramel soak but before the whipped topping). Wrap it tightly in a double layer of foil. When ready to serve, thaw it in the fridge overnight, then add your whipped topping and crushed candy.
FAQ
Can I use a different cake mix?
Absolutely. Yellow, white, or dark chocolate cake mixes all work beautifully with this recipe. The marble just adds a little extra visual flair!
Why did my whipped topping melt?
The cake was likely still too warm. Make sure the cake feels cold to the bottom of the pan before spreading the Cool Whip.
Can I make this nut-free?
Since Butterfingers contain peanuts, you would need to swap the candy topping for something like crushed Oreos or chocolate chips to make it nut-free.
Enjoy Your Sweet Success!
There you have it the easiest, most decadent Butterfinger Poke Cake you’ll ever make. It’s the perfect blend of salty peanut butter and sweet caramel, wrapped in a fluffy cake. It’s a nostalgic treat that never goes out of style.
If you make this recipe, be sure to leave a comment and let me know how it turned out! And don’t forget to pin this to your favorite dessert board on Pinterest so you never lose it.
PrintEasy Butterfinger Poke Cake Recipe
A moist, indulgent fudge marble cake soaked in a rich caramel and sweetened condensed milk mixture, topped with fluffy whipped topping and crunchy Butterfinger candy pieces.
- Prep Time: 15 minutes
- Cook Time: 30 minutes
- Total Time: 45 minutes
- Yield: 12 servings
- Category: Dessert
- Method: Baking
- Cuisine: American
Ingredients
1 box (15.25 oz) fudge marble cake mix
Ingredients for cake: eggs, oil, and water (as per box)
14 oz can sweetened condensed milk
12 oz jar caramel topping
8 oz tub whipped topping, thawed (Cool Whip)
1 large Butterfinger candy bar, crushed
Chocolate syrup (optional drizzle)
Instructions
1. Preheat oven to 350°F. Spray a 9×13-inch baking pan with nonstick cooking spray.
2. Prepare the fudge marble cake mix according to the package directions using the required eggs, oil, and water. Bake as directed.
3. Remove the cake from the oven and allow it to cool for about 5-10 minutes.
4. In a medium bowl, whisk together the sweetened condensed milk and the caramel topping until smooth.
5. Using the handle of a wooden spoon or a large fork, poke holes all over the warm cake. Ensure you get plenty of crevices for the liquid to soak in.
6. Slowly drizzle the caramel mixture over the entire cake, aiming for the holes.
7. Place the cake in the refrigerator to cool completely (at least 1-2 hours).
8. Once cooled, spread the thawed whipped topping evenly over the cake.
9. Sprinkle the crushed Butterfinger candy bar over the top and drizzle with chocolate syrup if desired. Slice and serve!
Notes
Store leftovers in the refrigerator for up to 4 days.
You can use the back of a wooden spoon for larger ‘pockets’ of caramel, or a fork for a more even distribution.
Ensure the cake is fully cooled before adding the whipped topping so it doesn’t melt.


