
Table of Contents
There’s nothing quite like the comforting aroma of freshly baked cookies filling your home. And if you’re like me, you love that classic taste but don’t always have time for individual scoops. That’s where Chocolate Chip Cookie Bars come in – they’re the ultimate solution for a quick, delicious treat that feels homemade without the fuss. I’m going to share my number one secret for getting these into the oven in just five minutes flat, delivering that perfect soft, chewy texture every single time.
What Makes These Bars Worth Making
These Chocolate Chip Cookie Bars aren’t just easy; they’re a revelation for busy bakers. The biggest draw is their sheer convenience. Instead of scooping dozens of cookies onto baking sheets, you press one large batch of dough into a pan. This means significantly less prep time and less active baking time, freeing you up for other things.
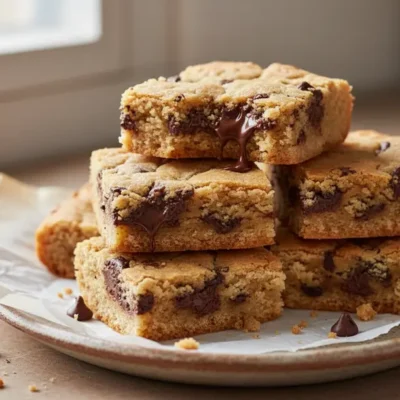
But convenience doesn’t mean sacrificing flavor or texture. These bars boast that ideal soft, chewy center with slightly crisp, golden brown edges – exactly what you want from a perfect chocolate chip cookie. Baking them in a single slab allows the flavors to meld beautifully and creates a consistent, delightful texture throughout.
They’re a guaranteed crowd pleaser. Whether you’re bringing them to a potluck, packing them in lunchboxes, or simply enjoying them at home, everyone loves a good cookie bar. Plus, they travel well and are super easy to cut and serve. They truly are the best of both worlds: quick to make, and utterly delicious to eat.
Essential Ingredients for Your Cookie Bars
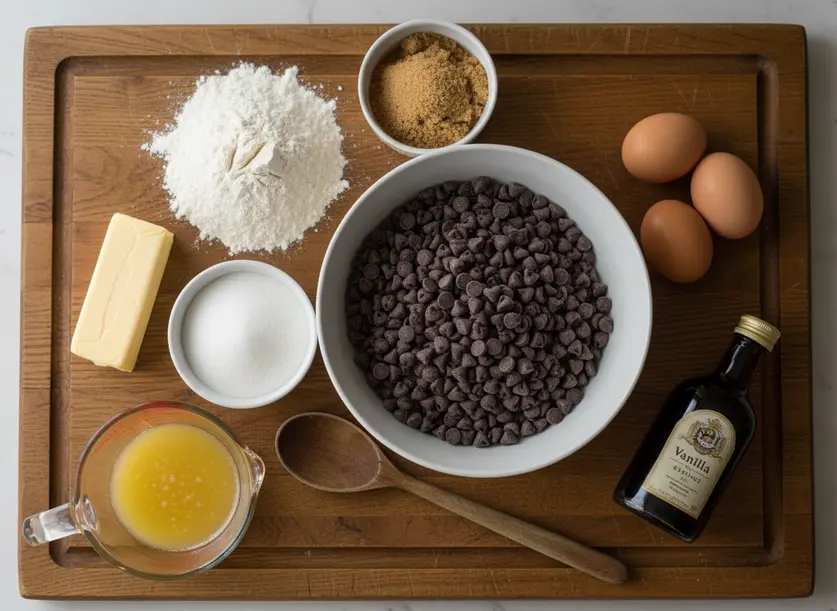
Creating amazing Chocolate Chip Cookie Bars starts with good ingredients. You’ll need all purpose flour, baking soda, and a pinch of salt to form the dry base. For the fats and sugars, grab some real butter – melted and slightly cooled, this is key for an easy mix – along with both packed brown sugar and white sugar. The combination of these two sugars contributes to both the chewy texture and rich flavor. Eggs bind everything together and add richness, while a generous splash of vanilla extract deepens that classic cookie taste. Lastly, the stars of the show: chocolate chips! Use your favorite kind, or even a mix of semi sweet, milk, or dark. If you use table salt instead of kosher, halve the amount. Feel free to use a plant based butter alternative if you have dietary restrictions, but note the texture might vary slightly.
Baking Your Chocolate Chip Cookie Bars Step by Step
Follow these simple steps to create perfect Chocolate Chip Cookie Bars that everyone will adore.
- Prepare Your Pan and Oven: Preheat your oven to 350°F (175°C). Line a 9×13 inch baking pan with parchment paper or foil, leaving an overhang on the sides for easy lifting. This is my secret for effortless cleanup and perfect slices. If you don’t have parchment, spray well with cooking spray.
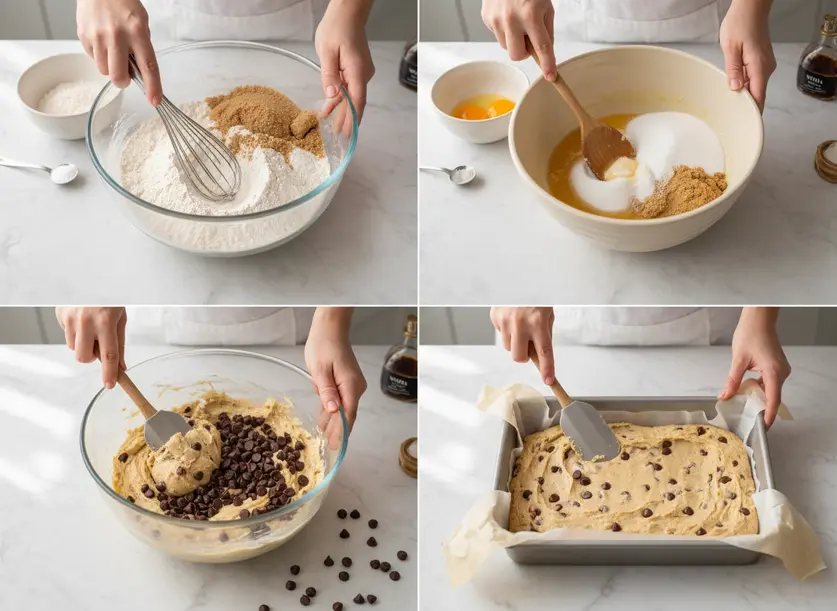
- Combine Dry Ingredients: In a medium bowl, whisk together the all purpose flour, baking soda, and salt until well combined. Set this bowl aside.
- Mix Wet Ingredients: In a large mixing bowl, combine the melted and slightly cooled butter with both the brown sugar and white sugar. Stir vigorously until the mixture is smooth and creamy. Add the eggs, one at a time, mixing well after each addition. Stir in the vanilla extract until fully incorporated.
- Combine Wet and Dry: Gradually add the dry flour mixture to the wet ingredients, mixing on low speed or by hand until just combined. Be careful not to overmix the dough once the flour is added; overmixing can lead to tough bars.
- Stir in Chocolate Chips: Fold in the chocolate chips using a spatula. You can reserve a few to sprinkle on top if you like, for an extra pretty finish.
- Press into Pan: Transfer the cookie dough to your prepared 9×13 inch baking pan. Use a spatula or your hands (lightly floured if sticky) to press the dough evenly into the bottom of the pan. Make sure it’s spread from edge to edge.
- Bake: Place the pan in the preheated oven. Bake for 25-35 minutes, or until the edges are golden brown and the center appears set but still looks soft and slightly underdone. Remember, the center will continue to set as it cools.
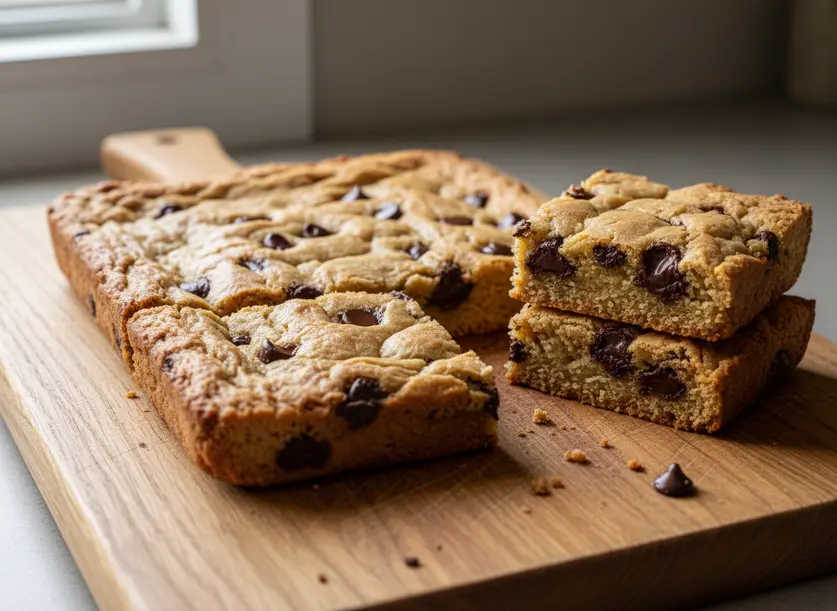
- Cool Completely: This is the hardest but most crucial step! Remove the pan from the oven and place it on a wire rack to cool completely to room temperature. Resist the urge to cut into them while warm, as they will be very gooey and fall apart. Once fully cooled, use the parchment paper overhang to lift the entire slab of cookie bars out of the pan. Slice into squares and serve.
Pro Tips for Perfect Chocolate Chip Cookie Bars
Getting these right every time involves a few simple tricks that make a big difference. Don’t underestimate these small details for the best results.
First, do not overbake your cookie bars. They should look slightly soft in the center when you pull them from the oven. This is the key to achieving that wonderfully chewy, gooey interior. If you wait until they look fully baked and firm, they will be dry once cooled. Trust the process and that soft center will firm up perfectly.
Secondly, cool completely before cutting. I know, it’s agonizing to wait, but cutting warm bars will result in a messy, crumbly experience. As the bars cool, they continue to set and firm up, making clean, perfect squares possible. Patience is truly a virtue here.
Another great tip is to always line your baking pan with parchment paper or foil, leaving an overhang. This makes removing the entire slab of bars incredibly easy once they’re cooled. No more struggling to get the first piece out or scraping the bottom of the pan.
Finally, for storage, keep your Chocolate Chip Cookie Bars in an airtight container at room temperature for up to 3-4 days. For longer storage, they freeze beautifully for up to 3 months. You can freeze them whole or cut into individual squares.
Delicious Variations to Spark Your Creativity
While classic Chocolate Chip Cookie Bars are amazing on their own, don’t hesitate to get creative with add ins and toppings. It’s a fun way to customize them for any occasion.
Try swapping out a portion of the chocolate chips for other sweet treats. White chocolate chips, butterscotch chips, or even chopped toffee bits make fantastic additions. You could also stir in a cup of chopped nuts like pecans or walnuts for a delightful crunch and nutty flavor. Mini M&M’s are always a hit, especially for kids’ parties, adding color and extra sweetness.
For an extra indulgent twist, swirl in some peanut butter or caramel. After pressing the dough into the pan, dollop spoonfuls of warmed peanut butter or caramel sauce on top, then swirl gently with a knife. This creates beautiful marbled patterns and adds another layer of flavor. Another simple variation is to press a layer of mini marshmallows on top during the last 5-10 minutes of baking for a s’mores like experience.
Finally, consider a simple topping after baking and cooling. A light dusting of powdered sugar is elegant, or you can go all out with a simple chocolate ganache or a creamy buttercream frosting. Sprinkles always make everything more festive! These variations keep your cookie bars exciting and fresh.
Frequently Asked Questions About Cookie Bars
Sometimes, even with the best recipe, questions pop up. Here are answers to some common queries about making these delicious bars.
Can I make these ahead of time?
Absolutely! Chocolate Chip Cookie Bars are perfect for making in advance. You can bake them up to 2-3 days before you plan to serve them. Store them in an airtight container at room temperature. They actually taste even better the next day as the flavors have more time to develop and the texture settles beautifully.
What if my bars are too gooey?
If your bars are still overly gooey and fall apart even after cooling completely, it’s likely they were underbaked. Next time, try adding another 5-10 minutes to the baking time, or check the internal temperature – a done cookie bar will register around 200-205°F (93-96°C). Remember that the edges should be golden, and the center set but still look soft when they come out of the oven.
Can I double the recipe?
Yes, you can easily double this recipe, but with a slight caveat. For best results, it’s often better to bake two separate 9×13 inch pans rather than trying to fit a double batch into a larger single pan. A larger pan might alter baking times and lead to uneven cooking. If you must use one larger pan, like a 12×17 inch, be prepared to adjust your baking time and keep a close eye on it, as it will likely take longer.
Chocolate Chip Cookie Bars
Ingredients
- 2 cups all-purpose flour
- 1 tsp baking soda
- 0.5 tsp salt halve if using table salt instead of kosher
- 1 cup unsalted butter melted and slightly cooled
- 1 cup packed brown sugar
- 0.5 cup white sugar
- 2 large eggs
- 1 tsp vanilla extract
- 2 cups chocolate chips or your favorite kind
Instructions
- Preheat your oven to 350°F (175°C). Line a 9x13 inch baking pan with parchment paper or foil, leaving an overhang on the sides for easy lifting. If you don't have parchment, spray well with cooking spray.
- In a medium bowl, whisk together the all-purpose flour, baking soda, and salt until well combined. Set this bowl aside.
- In a large mixing bowl, combine the melted and slightly cooled butter with both the brown sugar and white sugar. Stir vigorously until the mixture is smooth and creamy. Add the eggs, one at a time, mixing well after each addition. Stir in the vanilla extract until fully incorporated.
- Gradually add the dry flour mixture to the wet ingredients, mixing on low speed or by hand until just combined. Be careful not to overmix the dough once the flour is added; overmixing can lead to tough bars.
- Fold in the chocolate chips using a spatula. You can reserve a few to sprinkle on top if you like, for an extra pretty finish.
- Transfer the cookie dough to your prepared 9x13 inch baking pan. Use a spatula or your hands (lightly floured if sticky) to press the dough evenly into the bottom of the pan. Make sure it's spread from edge to edge.
- Place the pan in the preheated oven. Bake for 25-35 minutes, or until the edges are golden brown and the center appears set but still looks soft and slightly underdone. Remember, the center will continue to set as it cools.
- Remove the pan from the oven and place it on a wire rack to cool completely to room temperature. Resist the urge to cut into them while warm, as they will be very gooey and fall apart. Once fully cooled, use the parchment paper overhang to lift the entire slab of cookie bars out of the pan. Slice into squares and serve.


