
If there is one candy that defines the spring season, it’s the marshmallow Peep. Whether you love them or just love how they look, there is no denying that they make for the most festive cake decorations on the planet. Today, we are taking a standard cake mix and transforming it into a “Birds Nest” masterpiece that looks like it took hours but actually comes together in minutes.
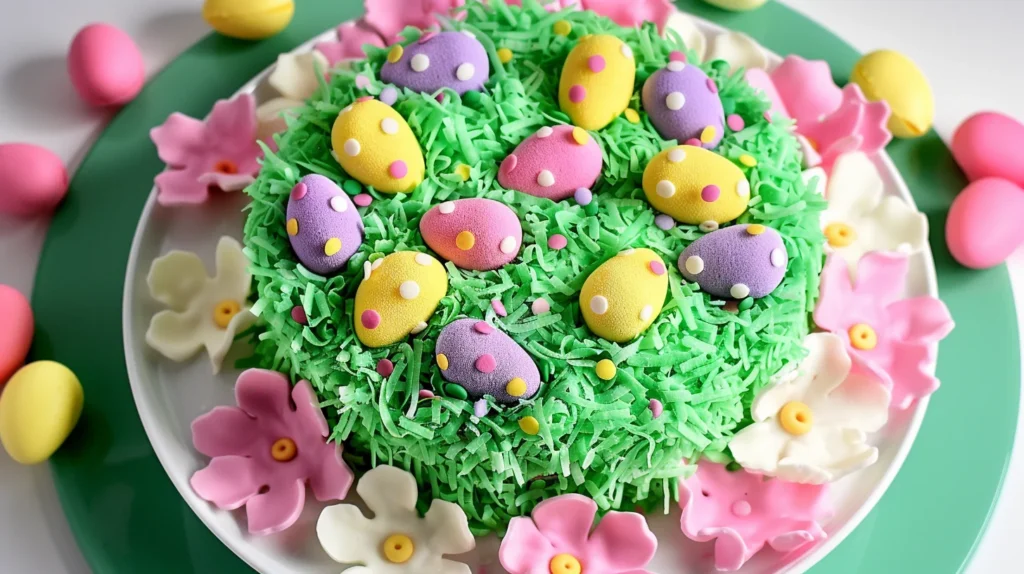
The beauty of this cake is the “grass” texture on top. Using a specific piping tip, we can create a realistic meadow for our candy “eggs” to sit in. It’s a whimsical, bright, and slightly over-the-top dessert that will have everyone reaching for their phones to take a picture before the first slice is even cut.
Whether you’re a seasoned baker or a “box-mix-pro,” this tutorial will show you how to assemble a professional-looking layer cake with zero stress. Let’s get into the pastel goodness!
Why You’ll Love This Recipe
- No-Fuss Assembly: We use a cake mix as the base, so you can focus all your energy on the fun decorating part.
- Kid-Friendly: This is the perfect “helper” cake. Kids love sticking the Peeps around the edges and “planting” the M&M eggs.
- Texture Play: You get soft cake, creamy frosting, chewy marshmallows, and the crunch of chocolate M&Ms.
- Visual Impact: The bright green “grass” against the pastel Peeps creates a stunning color contrast that pops on any dessert table.
- Customizable: You can use any cake flavor you like—lemon, carrot, or classic funfetti all work beautifully here.
Ingredient Notes
To make this cake look truly high-end, the tools and candy choices are key. Here is what you need to have ready:
- Cake Mix: Use your favorite brand and flavor. Since we are doing two 8-inch rounds, one standard box is perfect.
- Green Frosting: You can buy pre-colored frosting or tint your own vanilla buttercream. Aim for a “spring green”—not too dark, but vibrant enough to look like fresh grass.
- Marshmallow Peeps: You’ll need about two boxes to circle the entire cake. I love mixing colors (like yellow and pink) for a striped effect, or keeping it monochromatic for a cleaner look.
- Pastel M&Ms: Look for the “Easter” or “Spring” editions. The speckled “egg” versions add a nice realistic touch to the nest.
- The Grass Tip: This is non-negotiable for the “wow” factor! Ask for a Wilton Tip #233 at the craft store. It has multiple tiny holes that create several strands of “grass” with one squeeze.
Step-by-Step Instructions
1. Bake and Cool
Prepare your cake mix according to the box instructions. Divide the batter evenly between two greased 8-inch round pans. Once baked, let them cool completely. If the cake is even slightly warm, your grass will melt into a green puddle!
2. Level the Layers
To make sure your cake sits straight, use a serrated knife to gently trim the domed top off one of the cakes. This creates a flat surface for the second layer to sit on.
3. Stack and Crumb Coat
Place the leveled cake on your serving plate. Spread a layer of green frosting on top, then place the second cake layer on top of that. Use a knife or offset spatula to spread a thin layer of frosting around the sides of the cake. This doesn’t have to be pretty—it’s just the “glue” for our Peeps.
4. The Peep Perimeter
Take your marshmallow Peeps and press them firmly into the frosting around the edges of the cake. Line them up side-by-side until the entire cake is circled. The frosting will hold them securely in place.
5. Pipe the Grass
Fit your piping bag with the grass tip and fill it with the remaining green frosting. Hold the bag vertically over the top of the cake, squeeze gently, and pull up quickly. Repeat this across the entire top surface until you have a lush, fuzzy green meadow.
6. The Final Flourish
Top the grass with your pastel M&Ms. Scatter them in small clusters to look like little nests of eggs hidden in the field.
Expert Tips for Best Results
- Squeeze and Snap: When using the grass tip, don’t pull up too slowly or the grass will look like long noodles. A quick “squeeze and snap” motion creates the most realistic short blades of grass.
- Cold Frosting: If your hands are warm, the frosting in the piping bag might get too soft. If the grass starts looking runny, pop the bag in the fridge for 5 minutes to firm it up.
- Peep Spacing: If you find you have a small gap at the end of your Peep circle, just stretch the last few marshmallows slightly as you press them on to fill the space.
- Centered Stack: Use a small dab of frosting on the cake plate before laying down the first layer. This acts as an anchor so the cake doesn’t slide around while you’re decorating.
Variations and Substitutions
- The Chocolate Earth: Use a chocolate cake mix and chocolate frosting for the “soil” underneath the green grass for a more garden-realistic look.
- Jelly Bean Eggs: If you can’t find pastel M&Ms, jelly beans make a great colorful substitute for the eggs.
- Different Peep Shapes: While the chicks are classic, the Peep bunnies look adorable standing up in the grass on top of the cake too!
Storage and Freezing
To Store: This cake is best served the day it is decorated so the Peeps stay soft. If you have leftovers, store them in a cake carrier at room temperature for up to 2 days.
Pro-Tip: If you refrigerate the cake, the Peeps can become a bit firm and the M&Ms might lose their “speckled” finish due to moisture. It’s best to keep this one in a cool spot on the counter.
FAQ
Q: Where do I find a grass tip? A: You can find them at Michael’s, Hobby Lobby, or any baking supply store. Look for the number 233. It’s a very common tip and usually costs less than $2!
Q: Can I use a different size pan? A: You can use 9-inch pans, but your cake will be slightly shorter. If you go larger, you may need a third box of Peeps to cover the increased circumference.
Q: Help! My Peeps keep falling off. A: Your frosting might be too thin. Try adding a little bit of powdered sugar to your frosting to stiffen it up so it acts as a stronger adhesive.
Final Thoughts
This Easter Peeps Cake is the definition of “maximum impact, minimum effort.” It’s a joyful, colorful project that brings the spirit of spring right to your table. Whether you use pink chicks, blue bunnies, or a mix of everything, it’s guaranteed to be the star of the show.
Recipe Card: Easter Peeps “Birds Nest” Cake
Prep time: 30 mins | Cook time: 30 mins | Decorating time: 20 mins | Yield: 12 servings
Ingredients
- 1 box Cake Mix (plus ingredients called for on the box)
- 2 boxes Marshmallow Peeps (your choice of colors)
- 2–3 cups Green Frosting (Buttercream works best)
- 1 bag Pastel M&Ms (Speckled or solid colors)
- Piping bag and Grass Tip (#233)
- Two 8-inch round cake pans
Instructions
- Bake: Prepare cake mix and bake in two 8-inch rounds. Let cool completely.
- Level: Cut the domed top off one cake layer to make it flat.
- Stack: Place the flat layer on a plate, frost the top, and place the second layer on top.
- Frost: Spread a layer of green frosting around the sides of the cake.
- Decorate Sides: Press Peeps into the frosting around the perimeter of the cake.
- Pipe Grass: Using the grass tip, pipe green frosting all over the top of the cake.
- Finish: Top the “grass” with M&M candies to look like Easter eggs.


