Table of Contents
Do you ever get a sudden craving for something sweet and chocolatey but just don’t have the energy to turn on the oven? I’ve been there countless times. That’s exactly why I perfected this recipe for No Bake Chocolate Oatmeal Bars. These bars are a true lifesaver when you need a quick, satisfying dessert without any fuss.
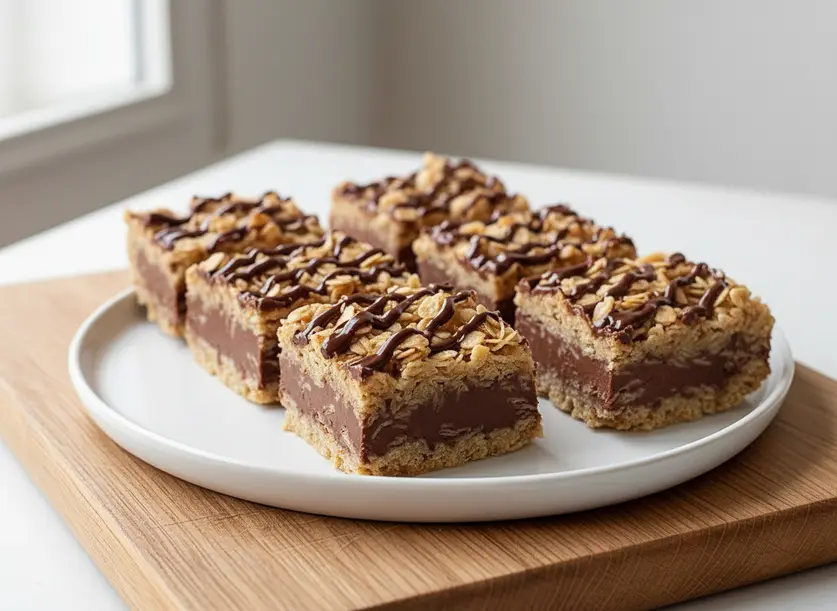
This recipe is incredibly simple, using basic pantry staples, and delivers a delicious result every time. Imagine chewy oats bound together with a rich brown sugar mixture, topped with a creamy peanut butter and chocolate layer, and then another oat layer with a final chocolate drizzle. It’s a dream come true for anyone who loves the combination of chocolate and oats. Plus, the best part? No baking required, making them perfect for hot days or when you just want a speedy treat. You’ll be surprised how quickly these disappear!
What Makes This Dish Worth Making
These No Bake Chocolate Oatmeal Bars are more than just a dessert; they’re a convenient and satisfying solution to your sweet cravings. First off, the “no bake” aspect is a huge win. You don’t need to preheat an oven or worry about exact baking times, which saves you time and keeps your kitchen cool. This makes them ideal for busy weeknights or when you’re entertaining and want a fuss-free dessert option.
They also use incredibly simple ingredients you likely already have on hand. Butter, brown sugar, oats, chocolate chips, and peanut butter – that’s it! These humble components combine to create a truly irresistible flavor profile. You get the comforting chewiness of the oats, the deep sweetness of brown sugar, and the rich, satisfying taste of chocolate and peanut butter. It’s a classic combination that rarely disappoints.
The texture of these No Bake Chocolate Oatmeal Bars is another highlight. They’re perfectly chewy, not too hard or too soft, especially when you follow the tips for getting the sugar mixture just right. They hold together beautifully, making them easy to transport and share. Plus, they’re incredibly versatile. You can easily adapt them to your taste preferences, adding different nuts or chocolates. Whether you need a quick snack, a lunchbox treat, or a simple dessert, these bars are a fantastic choice that everyone will love.
Ingredients You Will Need
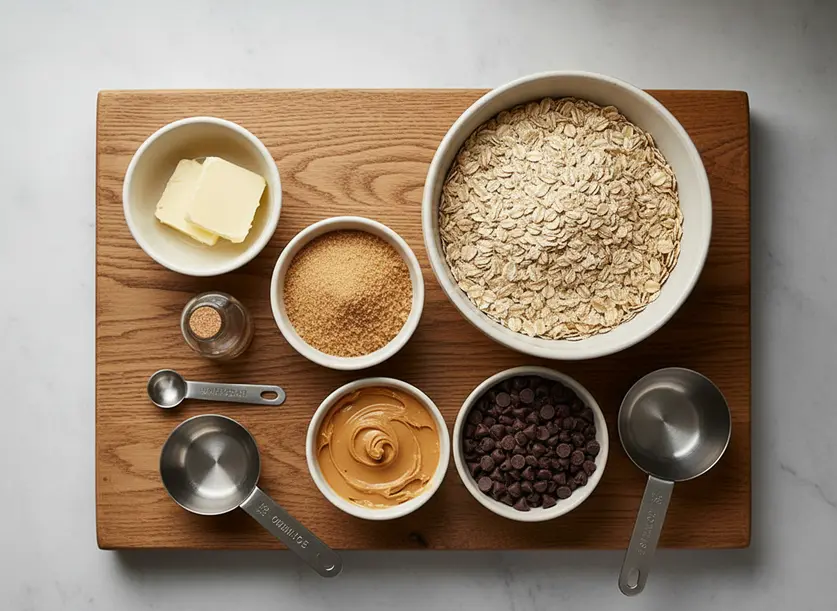
Gathering your ingredients for these delicious No Bake Chocolate Oatmeal Bars is incredibly simple. You will need 1 cup of unsalted butter. I generally use unsalted butter so I can control the salt content, but if you only have salted, that’s perfectly fine; just know the taste might be slightly different. Next, you’ll need 1/2 cup of packed brown sugar. Make sure it’s firmly packed into the measuring cup to ensure you get the right amount for that rich, caramelly sweetness that helps bind the bars together. A teaspoon of pure vanilla extract is essential for adding a warm, aromatic depth to the oat mixture.
For the base and top layers, you’ll need 3 cups of rolled oats. These provide the perfect chewy texture; avoid instant or quick oats as they can make the bars too soft. To create that irresistible chocolate filling, grab 1 cup of semisweet or dark chocolate chips. The choice is yours depending on your preference for sweetness. Lastly, you’ll need 1/2 cup of creamy peanut butter for the filling. Any smooth peanut butter works wonderfully here, adding a nutty richness that complements the chocolate perfectly. That’s all you need for these delightful treats!
How to Make It Step by Step
Making these No Bake Chocolate Oatmeal Bars is a straightforward process. Follow these steps carefully for the best results.
- Prepare Your Dish: Start by lining an 8-inch or 9-inch square baking dish with parchment paper. Allow the parchment to overhang the edges. These “handles” will make lifting the finished bars out much easier. Set the prepared dish aside.
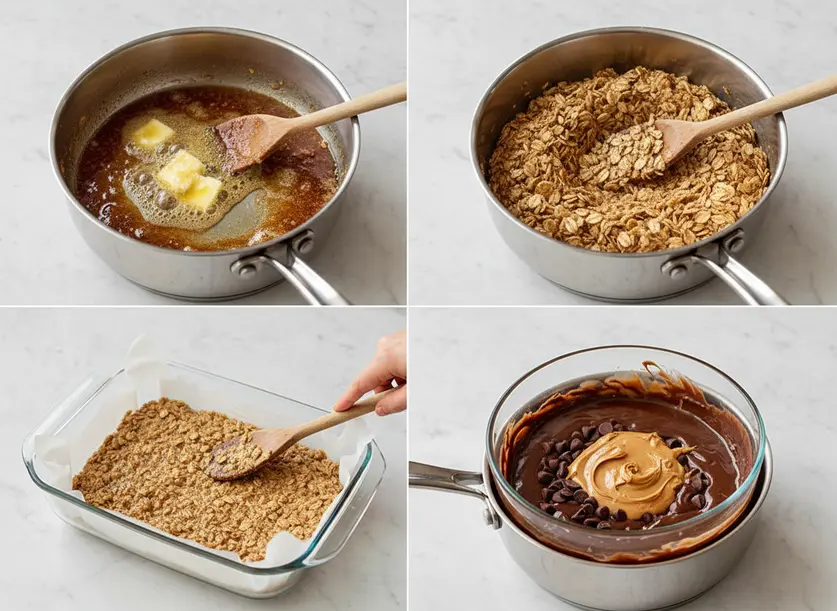
- Melt Butter and Sugar: In a large saucepan, melt the 1 cup of butter over medium heat. Once it’s mostly melted, add the 1/2 cup of packed brown sugar. Continue cooking and stirring until the butter is fully melted and the brown sugar has completely dissolved, forming a smooth, glossy mixture.
- Add Vanilla: Remove the saucepan from the heat. Stir in the 1 teaspoon of vanilla extract. The warm mixture will absorb the vanilla’s aroma beautifully.
- Mix in Oats: Add the 3 cups of rolled oats to the butter and sugar mixture. Stir everything together until the oats are thoroughly coated and well blended with the sweet syrup. Ensure every oat flake is moist.
- Cook Oat Mixture: Return the saucepan to low heat. Cook the oat mixture for 3 to 4 minutes, stirring constantly. This brief cooking time helps to toast the oats slightly and further blend the ingredients, contributing to the final chewy texture. Do not overcook.
- Create First Layer: Pour approximately half of the cooked oat mixture into your prepared baking dish. Spread it out evenly across the bottom. Use the back of a spoon or your hand (lightly greased if it sticks) to press the mixture down firmly and compactly. This forms the sturdy base of your bars. Reserve the other half of the oat mixture for later.
- Make Chocolate Filling: In a small, microwave-safe bowl, combine the 1 cup of chocolate chips and the 1/2 cup of peanut butter. Microwave in 30-second intervals, stirring well after each, until the mixture is completely melted and smooth. Be careful not to overheat the chocolate.
- Add Chocolate Layer: Pour the melted chocolate and peanut butter mixture over the pressed oat crust in the pan. Spread it out evenly to form a smooth, rich layer. Reserve about 1/4 cup of this chocolate mixture for drizzling later.
- Add Second Oat Layer: Carefully pour the remaining half of the oat mixture over the chocolate layer. Gently press it down to adhere to the chocolate, but don’t press too hard, as you don’t want to squish the chocolate layer out the sides.
- Drizzle and Chill: Take the reserved 1/4 cup of chocolate mixture and drizzle it decoratively over the top oat layer. Refrigerate the No Bake Chocolate Oatmeal Bars for 2 to 3 hours, or even overnight, until they are completely firm and set. This chilling time is crucial for the bars to hold their shape.
- Cut and Serve: Once thoroughly chilled, lift the bars out of the dish using the parchment paper overhangs. Let them sit at room temperature for 10-15 minutes before cutting them into squares. This makes them easier to slice cleanly. Enjoy your homemade treat!
Tips for the Best Results
Achieving perfect No Bake Chocolate Oatmeal Bars involves a few key details. Paying attention to these will elevate your homemade treats from good to absolutely amazing.
First, pay close attention to the sugar boiling time. This is the most crucial step for texture. If the butter and brown sugar mixture doesn’t boil long enough (usually 3-4 minutes on low heat after adding oats), your bars might end up too soft and crumbly, struggling to hold their shape. Conversely, if you boil it for too long, the sugar can crystallize, resulting in dry and overly hard bars. The goal is a perfectly chewy consistency, so find that sweet spot of brief, thorough blending on low heat.
Next, ensure even layers. When you press the first half of the oat mixture into the pan, make sure it’s compact and uniformly thick. This creates a stable foundation for the chocolate layer. For the top oat layer, press gently but firmly enough to ensure it adheres to the chocolate without disturbing the layer beneath. Uneven layers can lead to a messy presentation and inconsistent texture.
Chilling is non-negotiable. These are called No Bake Chocolate Oatmeal Bars for a reason – they set in the cold. Refrigerating them for the full 2 to 3 hours, or ideally overnight, is essential. This allows all the ingredients to firm up properly, ensuring your bars hold their shape beautifully when cut. Don’t rush this step.
Finally, for clean cuts, let the bars sit at room temperature briefly before slicing. Take them out of the fridge about 10-15 minutes before you plan to cut them. You can also use a sharp knife that has been warmed under hot water and wiped dry between cuts. This helps the chocolate layer slice smoothly without cracking or dragging, giving you perfect, neat squares every time. Store any leftover No Bake Chocolate Oatmeal Bars in an airtight container in the refrigerator for up to a week. They can also be frozen for longer storage; just thaw them briefly before serving.
Variations to Try
While these No Bake Chocolate Oatmeal Bars are perfect as is, they’re also wonderfully adaptable. Don’t be afraid to experiment with different additions to customize them to your taste.
One easy variation is to change the nut butter. Instead of peanut butter, try using almond butter, cashew butter, or even sunflower seed butter for a nut-free option. Each will lend a slightly different flavor profile to the chocolate layer, offering a delicious twist. Just make sure the consistency is similar to creamy peanut butter for the best results in melting and spreading.
You can also incorporate various mix-ins into the oat layers. Consider folding in 1/2 cup of shredded coconut, chopped walnuts or pecans, or even some dried cranberries or raisins. These additions can provide extra texture, flavor, and visual appeal to your bars. If adding nuts, you might want to lightly toast them beforehand to enhance their flavor even more.
Lastly, experiment with different chocolate types or toppings. Instead of just semisweet chips, you could use milk chocolate or a mix of dark and white chocolate chips for the filling. For a decorative finish, melt some white chocolate and drizzle it over the top in addition to the reserved chocolate mixture. A sprinkle of sea salt flakes over the chocolate drizzle before chilling can also beautifully enhance the flavors, adding a gourmet touch that contrasts wonderfully with the sweetness.
FAQ
Can I use quick oats instead of rolled oats for No Bake Chocolate Oatmeal Bars?
While you *can* use quick oats, I highly recommend sticking to rolled oats for these No Bake Chocolate Oatmeal Bars. Rolled oats provide a much chewier and more substantial texture. Quick oats are cut finer and processed more, so they tend to result in a softer, almost mushy bar that might not hold its shape as well. If quick oats are all you have, the bars will still be edible, but the texture won’t be quite the same. If you do use them, consider reducing the butter slightly to help with firmness.
Why are my No Bake Chocolate Oatmeal Bars too soft or crumbly?
This is almost always due to the critical step of cooking the butter and brown sugar mixture with the oats. If the mixture doesn’t cook long enough (usually 3-4 minutes over low heat after adding the oats), the sugar won’t dissolve and bond sufficiently, leading to bars that are too soft or fall apart. Conversely, cooking it for too long can cause the sugar to crystallize and result in dry, crumbly bars. Ensure you hit that sweet spot of brief, thorough cooking to achieve the perfect chewy texture.
How long do these No Bake Chocolate Oatmeal Bars last?
Once prepared, these delicious No Bake Chocolate Oatmeal Bars can be stored in an airtight container in the refrigerator for up to one week. The cool temperature helps maintain their firm texture and freshness. For longer storage, you can freeze the bars in an airtight container or freezer bag for up to two months. Just be sure to separate layers with parchment paper to prevent sticking, and thaw them in the refrigerator or at room temperature for a few minutes before enjoying.