
There is nothing quite like the aroma of fresh, toasted bagels wafting through your kitchen on a Sunday morning. If you are a sourdough baker, you know the “discard dilemma”—the guilt of pouring perfectly good starter down the drain. This Sourdough Discard Bagels recipe is the ultimate solution. By combining the tangy depth of your fermented starter with a boost from instant yeast, you can achieve that sought-after New York-style chew and golden crust in just a fraction of the time. Unlike traditional 24-hour sourdough recipes, this method is designed for the modern home cook who wants bakery-quality results without the overnight wait. Whether you’re a sourdough novice or a seasoned pro, these bagels will quickly become a staple in your breakfast rotation.
Why You’ll Love This Recipe
You are going to fall in love with these bagels for three main reasons: speed, texture, and flavor. First, this is a “hybrid” recipe, meaning it uses both sourdough discard and instant yeast. This ensures a consistent, high rise in less than three hours. Second, the texture is phenomenal. By using bread flour and a honey-sweetened boil bath, you get a dense, chewy interior and a shiny, crisp exterior. Finally, it is the best way to reduce kitchen waste. Your discard adds a subtle tang and enzymatic complexity that standard bagel recipes simply cannot replicate. It’s the perfect marriage of convenience and artisan craft.
What Is a Sourdough Discard Bagel?
A sourdough discard bagel is a yeast-leavened bread that incorporates “discard”—the portion of sourdough starter that is removed before feeding. In traditional sourdough baking, the wild yeast in the starter does all the heavy lifting, which can take 12 to 24 hours. In this version, the discard is used primarily for flavor, acidity, and added nutrition, while a small amount of commercial instant yeast provides a reliable and rapid rise. This creates a bagel with the complex, slightly sour profile of traditional sourdough but the manageable timeline of a standard yeast bread. It is the perfect entry point for bakers looking to experiment with sourdough flavors.
Ingredients you will need
To achieve the perfect bagel, the quality and type of ingredients you use are paramount. Here is a breakdown of what you’ll need:
- Sourdough Discard (100g): Use discard that is at room temperature. It doesn’t need to be active or bubbly; its role here is to provide moisture and that signature sourdough tang.
- Bread Flour (500g): This is non-negotiable for a true bagel. Bread flour has a higher protein content (usually 12-14%) than all-purpose flour, which is necessary to create the strong gluten network that gives bagels their characteristic chew.
- Warm Water (250g): Aim for 110°F. This temperature is the “sweet spot” for instant yeast activation.
- Sugar (40g): This provides a hint of sweetness and feeds the yeast.
- Salt (11g): Essential for flavor and for controlling the yeast’s fermentation rate.
- Instant Yeast (7g): This ensures the bagels rise quickly and reliably.
- Honey (24g): Added to the boiling water, honey creates a Maillard reaction on the crust, leading to a beautiful golden-brown color and a slight shine.
Ingredient Substitutions & Tips
While I highly recommend following the recipe as written for the best results, there are a few adjustments you can make. If you don’t have honey for the boil bath, barley malt syrup is the traditional professional choice and will provide an even deeper, maltier flavor. If you only have active dry yeast instead of instant, simply bloom it in the warm water with a pinch of the sugar for 5-10 minutes until foamy before adding the rest of the ingredients. For a vegan version, ensure your sugar is vegan-certified and swap the honey in the boil bath for brown sugar or maple syrup.
Step-by-Step Instructions
1. Mixing and Kneading
In the bowl of a stand mixer fitted with a dough hook, combine your sourdough discard, warm water (110°F), bread flour, sugar, salt, and instant yeast. Mix on low speed for 5-6 minutes. The dough should begin to clear the sides of the bowl and feel tacky but not sticky. Transfer the dough to a clean surface and knead by hand about 20 times, folding the dough into the center to build final surface tension.
2. The First Rise
Place the dough in a lightly greased bowl. Cover with a damp cloth or plastic wrap and let it sit in a warm, draft-free spot. The dough needs to double in size, which usually takes 1 to 1.5 hours depending on your kitchen’s ambient temperature.
3. Shaping the Bagels
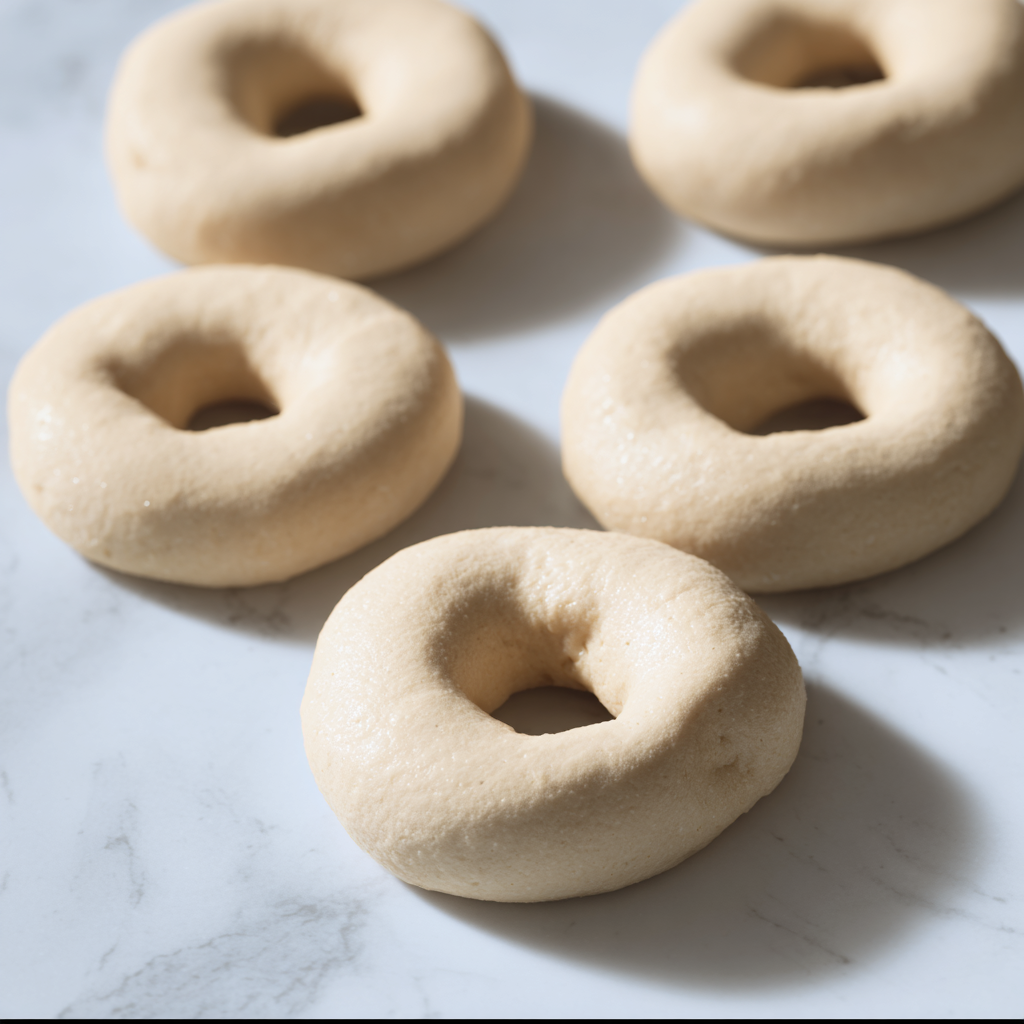
Punch the risen dough down to release air. Divide into 8 equal portions (about 112g each). Roll each piece into a smooth ball. Using your thumb, poke a hole through the center and gently twirl the dough to stretch the hole to about 2 inches. Place the shaped bagels on a parchment-lined baking sheet.
4. The Second Rise and Boil
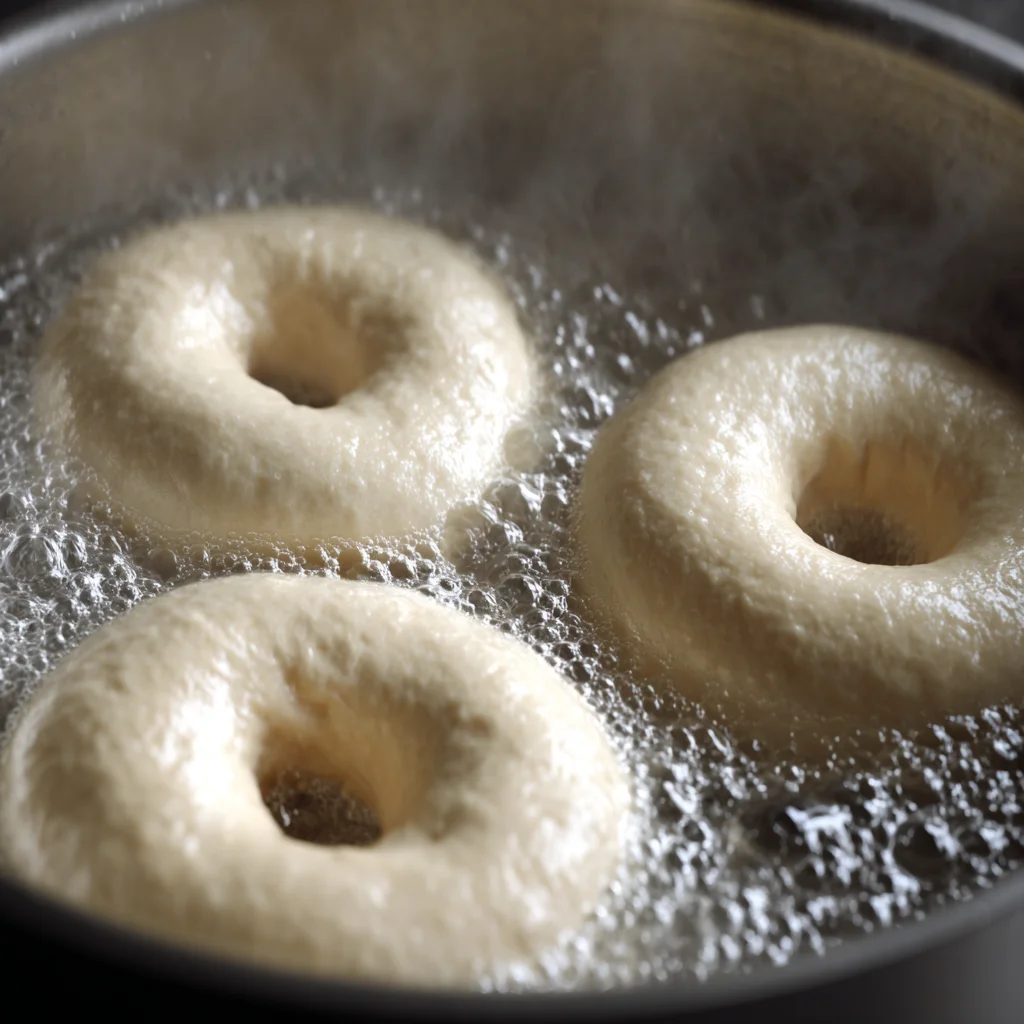
Cover the bagels and let them rest for 30-45 minutes until they look puffy. Meanwhile, bring a large pot of water to a boil and stir in the honey. Boil the bagels in batches for 30 seconds per side. Use a slotted spoon to drain them before placing them on a wire rack.
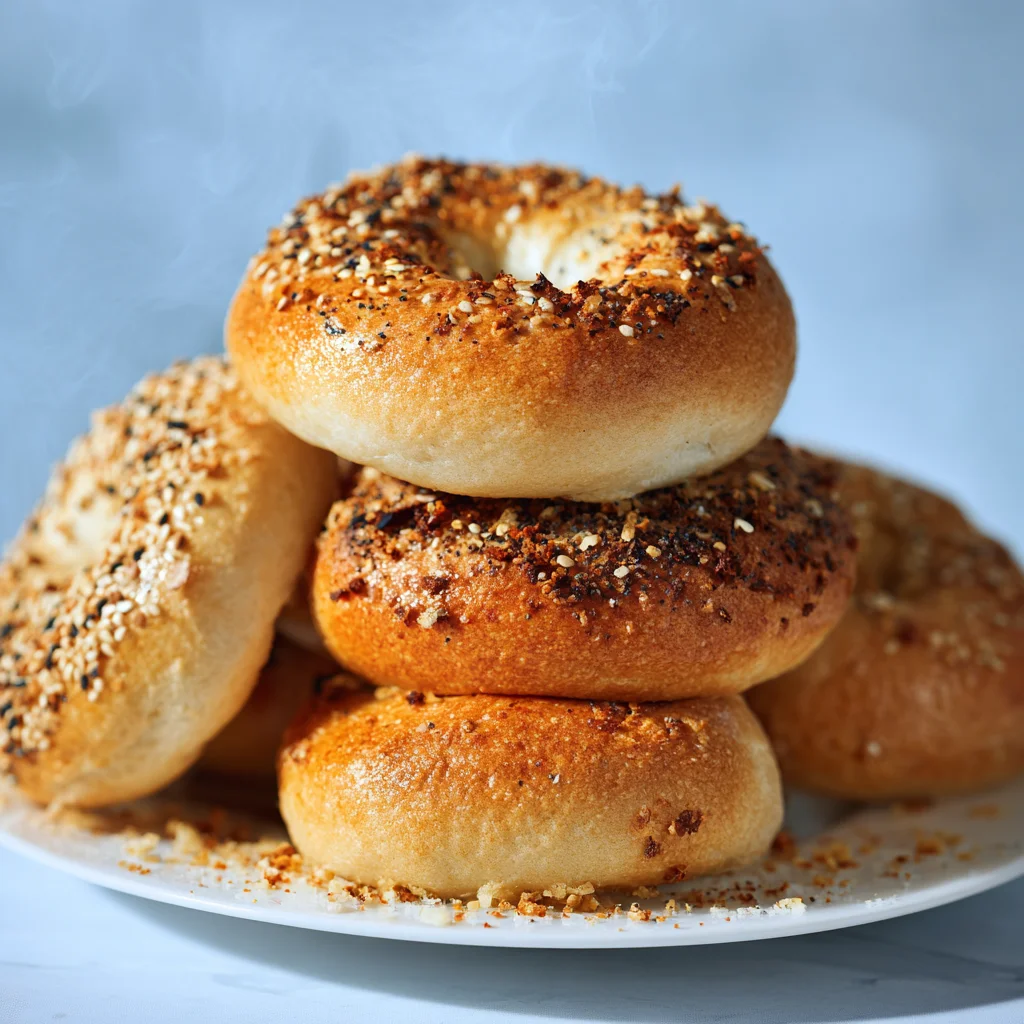
5. Toppings and Baking
If using toppings like Everything Bagel seasoning, dip the damp bagels into the seeds immediately after boiling. Transfer to the baking sheet and bake at 425°F for 20-25 minutes.
Expert Baking Tips
The secret to a professional-grade bagel lies in the water temperature and the boil. First, never use water hotter than 120°F, as this will kill the yeast and leave you with leaden dough. Second, do not skip the boil! The boiling process gelatinizes the starches on the exterior of the dough, which prevents the bagel from rising too much in the oven. This is exactly what creates the dense, chewy texture rather than a fluffy “bread with a hole.” For an extra-shiny crust, add a teaspoon of baking soda to your boiling water; the alkalinity accelerates the browning process during baking.
The Science of the Honey Boil
Why do we boil bagels in honey water? This step is what separates a bagel from a round piece of bread. When the dough hits the boiling water, the heat sets the exterior structure immediately. Adding a sugar source like honey or barley malt syrup to that water is crucial for the Maillard reaction. This chemical reaction between amino acids and reducing sugars gives the bagel its deep mahogany color and distinct “toasted” flavor profile. Without the honey boil, your bagels would look pale and have a dull, floury crust rather than that iconic bakery sheen.
Serving Suggestions
These Sourdough Discard Bagels are incredibly versatile. For a classic experience, slice them warm and slather with high-quality cream cheese. If you want to elevate your brunch game, create a Lox & Capers plate with thinly sliced red onions, fresh dill, and smoked salmon. They also make the perfect base for a breakfast sandwich—try one with a fried egg, sharp cheddar, and crispy bacon. For a sweet twist, toast a plain bagel and top it with almond butter, sliced bananas, and a drizzle of honey.
Storage & Make-Ahead Tips
Bagels are best enjoyed the day they are baked, but they store remarkably well. Store completely cooled bagels in an airtight bag at room temperature for up to 2 days. For longer storage, slice the bagels before freezing them in a freezer-safe bag for up to 3 months. To reheat, simply pop a frozen slice directly into the toaster. This preserves the chewy interior while crisping up the crust perfectly. Avoid refrigerating bagels, as this can cause them to go stale faster.
FAQs
Can I use sourdough discard straight from the fridge?
Yes, you can use cold discard, but ensure your water is at the higher end of the recommended range (115°F) to balance the temperature so the yeast remains active.
Why are my bagels flat after boiling?
This usually happens if the bagels are over-proofed during the second rise. If they have too much air in them, they will deflate when they hit the water. Aim for “puffy,” not “doubled” for the second rise.
What if I don’t have a stand mixer?
You can mix and knead by hand! It will take about 10-12 minutes of vigorous kneading to develop the gluten sufficiently, but the results will be just as delicious.
Can I cold-ferment these overnight?
Absolutely. After shaping the bagels, place the tray in the fridge overnight. Boil and bake them straight from the fridge the next morning for an even deeper sourdough flavor.
Is bread flour really necessary?
Yes. All-purpose flour doesn’t have enough protein to support the heavy, chewy structure of a traditional bagel. Using AP flour will result in a texture closer to a dinner roll.
Final Thoughts
Making Sourdough Discard Bagels at home is a rewarding process that turns a simple byproduct of bread baking into a gourmet treat. This recipe strikes the perfect balance between the traditional tang of sourdough and the convenience of a quick-rise yeast bread. Once you taste the difference between a fresh, home-boiled bagel and a store-bought one, there is no going back. Grab your starter, preheat your oven, and enjoy the best bagels you’ve ever had!


