
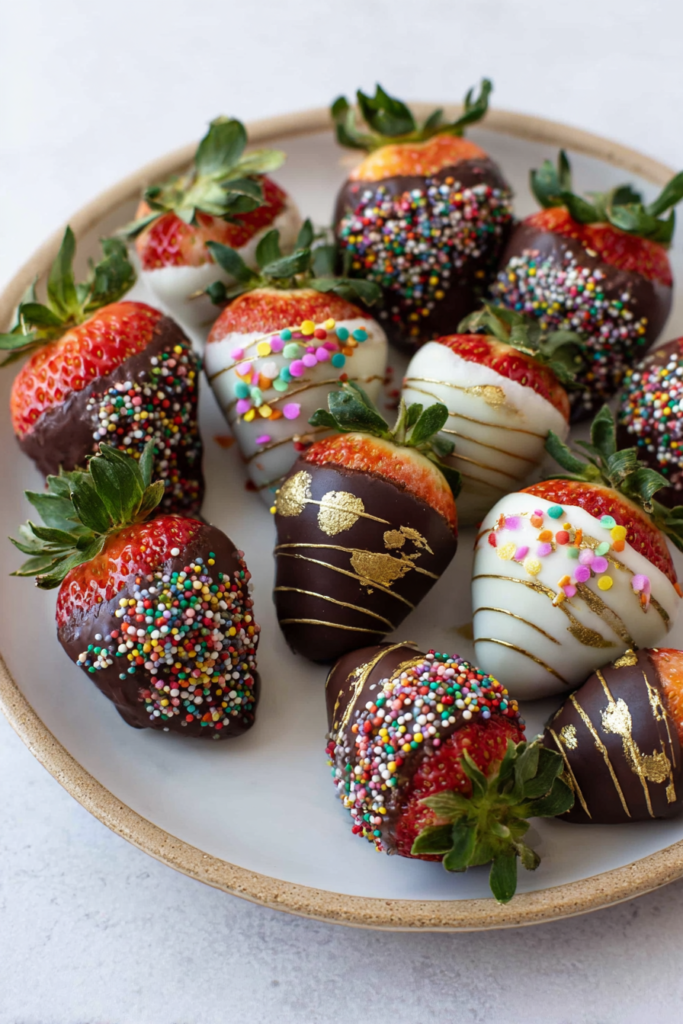
There is something inherently sophisticated about a platter of glossy chocolate-covered strawberries. Whether they are the centerpiece of a Valentine’s Day spread, a thoughtful handmade gift, or a simple weeknight indulgence, they represent the perfect marriage of tart fruit and rich, decadent cocoa. While they look like they belong in a high-end boutique window, the truth is that anyone can master this treat at home with just two primary ingredients and a bit of patience. The secret doesn’t lie in complex machinery, but in the technique ensuring the fruit is bone-dry and the chocolate is melted to the perfect consistency. In this guide, we will walk through every nuance of the process so you can achieve that professional “snap” and a mirror-like finish every single time you head to the kitchen.
Why You’ll Love This Recipe
This recipe is a favorite for home cooks because it offers maximum visual impact for minimal effort. Unlike baking a complex cake, these strawberries require no oven time and only about twenty minutes of active work. You’ll love the versatility; once you master the basic dip, the creative possibilities are endless. It’s also a budget-friendly way to enjoy a luxury dessert that usually carries a heavy markup at specialty grocers. Furthermore, because you are making them at home, you have total control over the quality of the chocolate and the freshness of the berries, ensuring a flavor profile that is far superior to anything pre-packaged or store-bought.
What Are Chocolate Covered Strawberries?
At its core, a chocolate-covered strawberry is a fresh, whole strawberry that has been partially submerged in melted chocolate—typically semi-sweet, dark, milk, or white—and then chilled until the coating hardens into a crisp shell. Historically, the creation of this dessert is often attributed to Lorraine Lorusso in the 1960s at a gourmet shop in Chicago called Stop-N-Shop. Since then, it has evolved from a simple fruit treat into a global symbol of romance and celebration. The contrast between the cold, juicy, acidic berry and the creamy, sweet chocolate creates a balanced sensory experience that appeals to almost every palate, making it a staple of modern dessert culture.
Ingredients Overview
To achieve professional results, you must start with high-quality components.
- The Strawberries: Choose berries that are bright red from tip to stem. Avoid any with white or green shoulders, as these will be overly tart. Look for medium-sized berries; giant strawberries often have hollow centers and less flavor. The stems should be vibrant green and sturdy, as they act as your “handle” during the dipping process.
- The Chocolate (12 Ounces): You can use semi-sweet chocolate morsels, but for the best flavor, look for “couverture” chocolate, which contains a higher percentage of cocoa butter. Semi-sweet is the classic choice because its bitterness cuts through the sweetness of the fruit. However, milk chocolate provides a creamy, nostalgic flavor, while dark chocolate (70% cocoa or higher) offers a sophisticated, intense experience. White chocolate is excellent for drizzling or for those who prefer a very sweet, vanilla-forward profile.
- Optional Add-ins: A teaspoon of coconut oil or shortening can be added to the chocolate to help it melt more smoothly and provide a glossier finish, though it does make the chocolate slightly softer at room temperature.
Ingredient Substitutions & Tips
If you find yourself without standard chocolate chips, you can use high-quality chocolate bars broken into small, uniform pieces. For a vegan-friendly version, ensure your dark chocolate is dairy-free and use a plant-based white chocolate alternative. If you are looking for vibrant colors for a themed party (like baby showers or birthdays), you can substitute the chocolate for “candy melts.” These are oil-based wafers that come in every color of the rainbow and are designed to melt and set very easily, though they lack the rich cocoa flavor of real chocolate. For those with nut allergies, avoid using crushed peanuts or hazelnuts as a topping and opt for toasted coconut or crushed pretzels instead.
Step-by-Step Instructions
1. Wash and Dry Thoroughly: This is the most critical step. Rinse your strawberries under cold water to remove any debris. Immediately transfer them to a clean kitchen towel or a layer of paper towels. Pat them dry individually, then let them air-dry for at least 30 minutes. If there is even a single drop of water on the skin, the chocolate will “seize” (turn into a grainy, clumpy mess) or simply slide right off the berry.
2. Prepare Your Station: Line a large rimmed baking sheet with parchment paper or a silicone mat. Having your “landing zone” ready is essential because the chocolate begins to set quickly.
3. Melt the Chocolate: Use a microwave-safe glass or ceramic bowl. Heat the chocolate in 30-second bursts at 50% power. After each burst, stir thoroughly. Even if the chips still look whole, the residual heat will often melt them as you stir. Stop heating when only a few small lumps remain, and stir until smooth. Overheating chocolate causes it to become thick and chalky.
4. The Dipping Process: Pull back the green leaves of the strawberry and hold it by the stem. Submerge the berry into the chocolate, leaving a small sliver of red at the top for a classic aesthetic. Lift the berry out and let the excess chocolate drip back into the bowl. Gently swipe the bottom of the strawberry against the edge of the bowl to prevent a “pool” of chocolate from forming on the tray.
5. Setting: Place the berry on the parchment paper. If you are adding toppings, do so immediately while the chocolate is wet. Let the tray sit at room temperature in a cool, dry area for about 30 to 60 minutes.
Expert Baking/Cooking Tips
- Temperature Control: Never dip cold strawberries into hot chocolate. If the berries are straight from the fridge, the temperature shock can cause the chocolate to crack once it sets. Bring the berries to room temperature first.
- The “Drip” Technique: To get a clean look, give the strawberry a little “shake” as you pull it out of the chocolate. This helps level the coating.
- Microwave Safety: Ensure your bowl and spoon are completely dry. Even a drop of water from a recently washed spoon will ruin the entire batch of chocolate.
Preventing Weeping and Condensation
The biggest challenge with chocolate-covered strawberries is “weeping”—when liquid leaks out from under the chocolate. This usually happens because the strawberry is continuing to ripen and release moisture, or because of condensation from the refrigerator. To minimize this, always store your finished berries in a cool, dry place at room temperature if you plan to eat them the same day. If you must refrigerate them, place a paper towel at the bottom of an airtight container to absorb any moisture. Do not cover the container tightly; a bit of airflow helps prevent the “sweat” that ruins the glossy finish.
Serving Suggestions
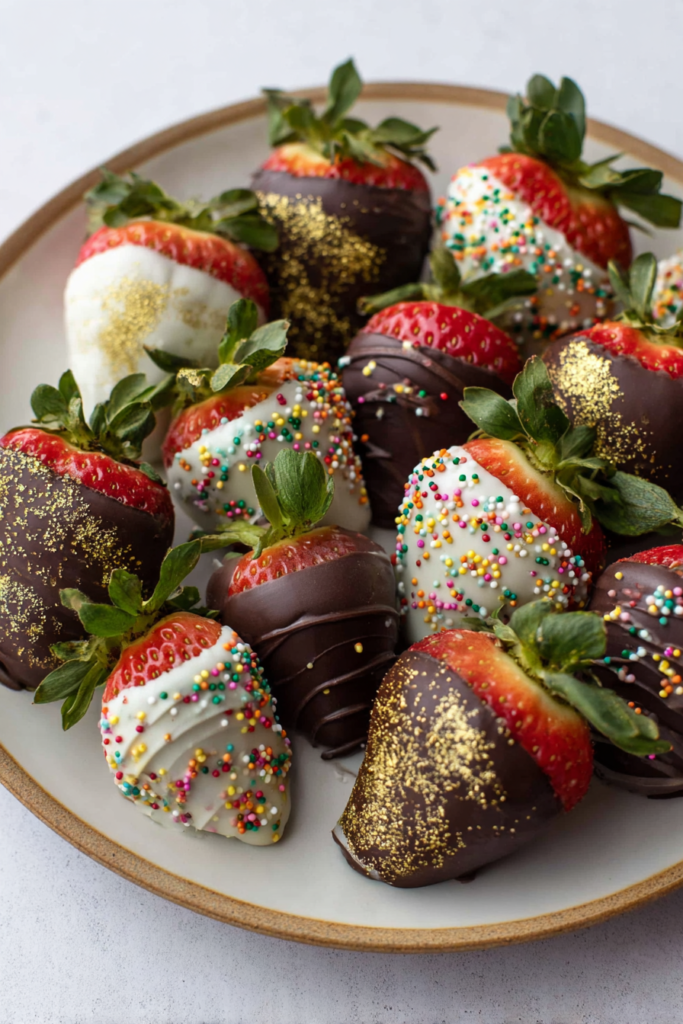
Serve these strawberries on a white marble platter for a modern look, or nestled into individual gold cupcake liners for a party. They pair beautifully with a glass of dry sparkling wine or Champagne, as the bubbles cleanse the palate between the rich bites of chocolate. For a fun “DIY” dessert board, serve the dipped strawberries alongside shortbread cookies, marshmallows, and a small bowl of whipped cream.
Storage & Make-Ahead Tips
These are best enjoyed within 8 to 12 hours of making them. If you need to make them ahead of time, do so no more than 24 hours in advance. Store them in a single layer in a container lined with paper towels. Avoid freezing chocolate-covered strawberries; as they thaw, the cells of the fruit break down, leaving you with a mushy berry and a watery mess inside the chocolate shell.
FAQs
Which chocolate is best for melting?
Semi-sweet chocolate chips or high-quality chocolate bars (like Ghirardelli or Guittard) are excellent. Look for chocolate with a high percentage of cocoa butter for the smoothest melt.
Why did my chocolate turn white or cloudy?
This is called “bloom.” It happens when the chocolate gets too hot or is stored in an area with high humidity. It’s still safe to eat, though it doesn’t look as professional.
How do I make a white chocolate drizzle?
Melt a small amount of white chocolate, transfer it to a piping bag or a small Ziploc bag with the corner snipped off, and quickly zig-zag it over the set dark chocolate.
Can I use frozen strawberries?
No. Frozen strawberries are too wet and soft once they begin to thaw. Only fresh, firm strawberries should be used for dipping.
My chocolate is too thick. How do I fix it?
Stir in one teaspoon of coconut oil or vegetable shortening. This will thin the chocolate and give it a beautiful sheen without changing the flavor significantly.
Mastering chocolate-covered strawberries is a culinary “cheat code”—it requires very little technical skill but yields results that never fail to impress. By focusing on the details—properly drying the fruit, melting the chocolate gently, and letting them set at room temperature—you can create a dessert that is as beautiful as it is delicious. Now that you have the secrets, grab a carton of berries and start dipping!
PrintHomemade Chocolate Covered Strawberries

Indulge in the ultimate classic treat with these handcrafted chocolate-covered strawberries. Whether you’re preparing for a romantic evening or a festive party, this recipe ensures a glossy finish and a satisfying chocolate snap.
- Prep Time: 15 minutes
- Cook Time: 5 minutes
- Total Time: 20 minutes
- Yield: 16 Strawberries
- Cuisine: American
Ingredients
12 ounces semi-sweet chocolate morsels (milk, dark, or white chocolate)
16 large fresh strawberries (room temperature for best results)
Instructions
Wash & Dry: Gently rinse the strawberries under cold water. Use a paper towel to pat them completely dry. Any moisture left on the berry will cause the chocolate to seize or slide off.
Prepare Workspace: Line a large baking tray or flat plate with parchment paper or a silicone baking mat to prevent sticking.
Melt Chocolate: Place chocolate morsels in a microwave-safe bowl. Heat in 30-second increments, stirring well between each, until the chocolate is silky smooth. Alternatively, use a double boiler.
Dip: Holding the strawberry by the green leafy stem, dip it into the melted chocolate, swirling to cover the sides while leaving a small amount of red showing at the top.
Decorate: If using toppings like nuts or sprinkles, roll the wet chocolate berry in the topping immediately after dipping.
Set: Lay the strawberries on the prepared parchment paper. Allow them to sit at room temperature for 30-60 minutes until the chocolate is firm and matte.
Notes
• Ensure berries are at room temperature before dipping to prevent the chocolate from “sweating.”
• Use high-quality chocolate couverture for the best flavor and texture.
• If the chocolate is too thick, add one teaspoon of coconut oil to thin it out.
• Candy melts can be used for vibrant colors and a more stable finish in warm weather.


