
When the first hints of spring arrive, candy aisles overflow with bright foil wrappers and the iconic Cadbury Creme Egg. But what if you could skip the processed preservatives and make a version that tastes even better? This Homemade Creme Eggs recipe captures that nostalgic, gooey, buttery fondant center and rich chocolate snap, all without needing expensive specialty molds. By using a simple mini muffin tin, you can create nearly 50 of these decadent treats to share with friends, family, or to keep all for yourself. Whether you’re an Easter traditionalist or just a lover of fine confections, this DIY version is a total game-changer for holiday hosting.
Why You’ll Love This Recipe
You’re going to fall in love with these candies because they offer the perfect balance of texture and flavor. Unlike store-bought versions which can sometimes feel overly waxy, these use real butter and high-quality milk chocolate. The “mini egg” format is also much easier to eat and share. Most importantly, this recipe is accessible. You don’t need to be a master chocolatier or own silicone egg molds; the mini muffin tin creates a “cup” version that holds the creme filling perfectly. It’s a fun, family-friendly kitchen project that yields professional-looking results that will leave everyone asking, “You actually made these?”
What Is a Homemade Creme Egg?
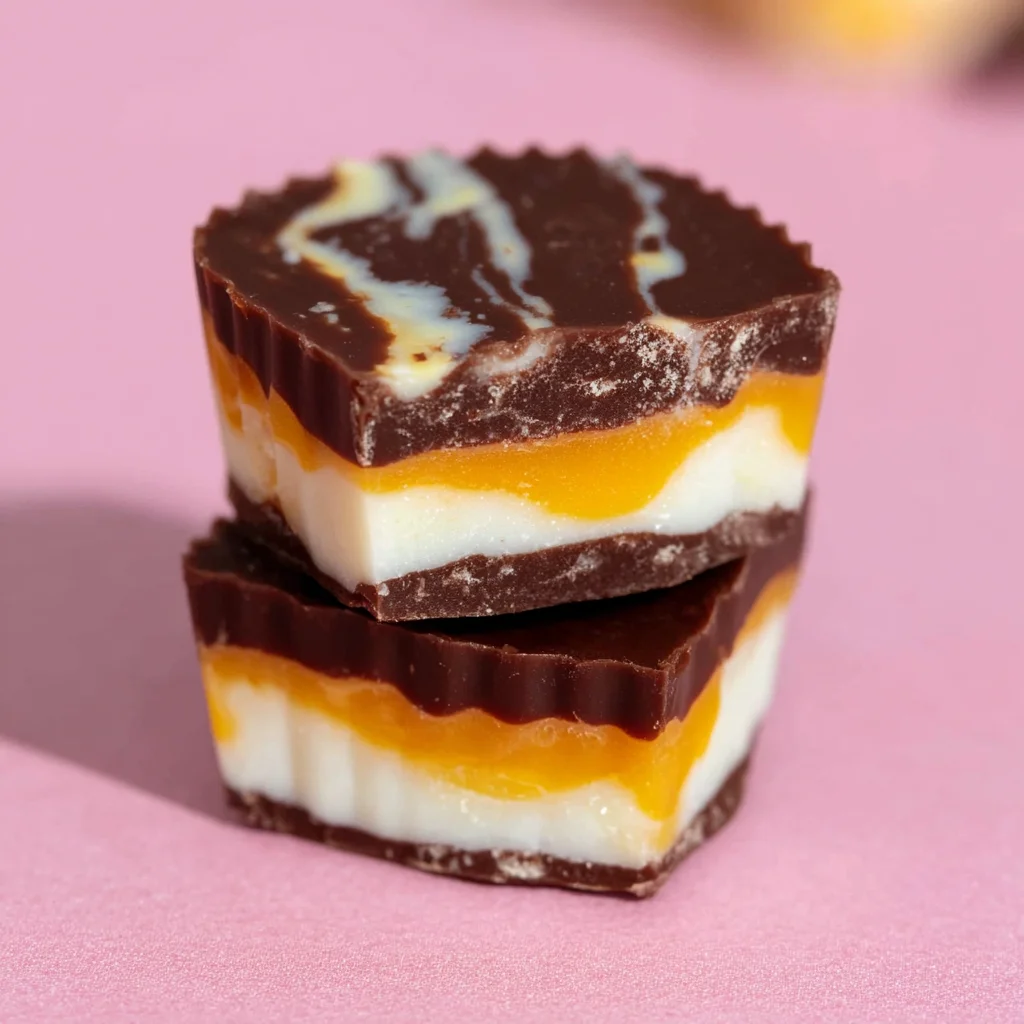
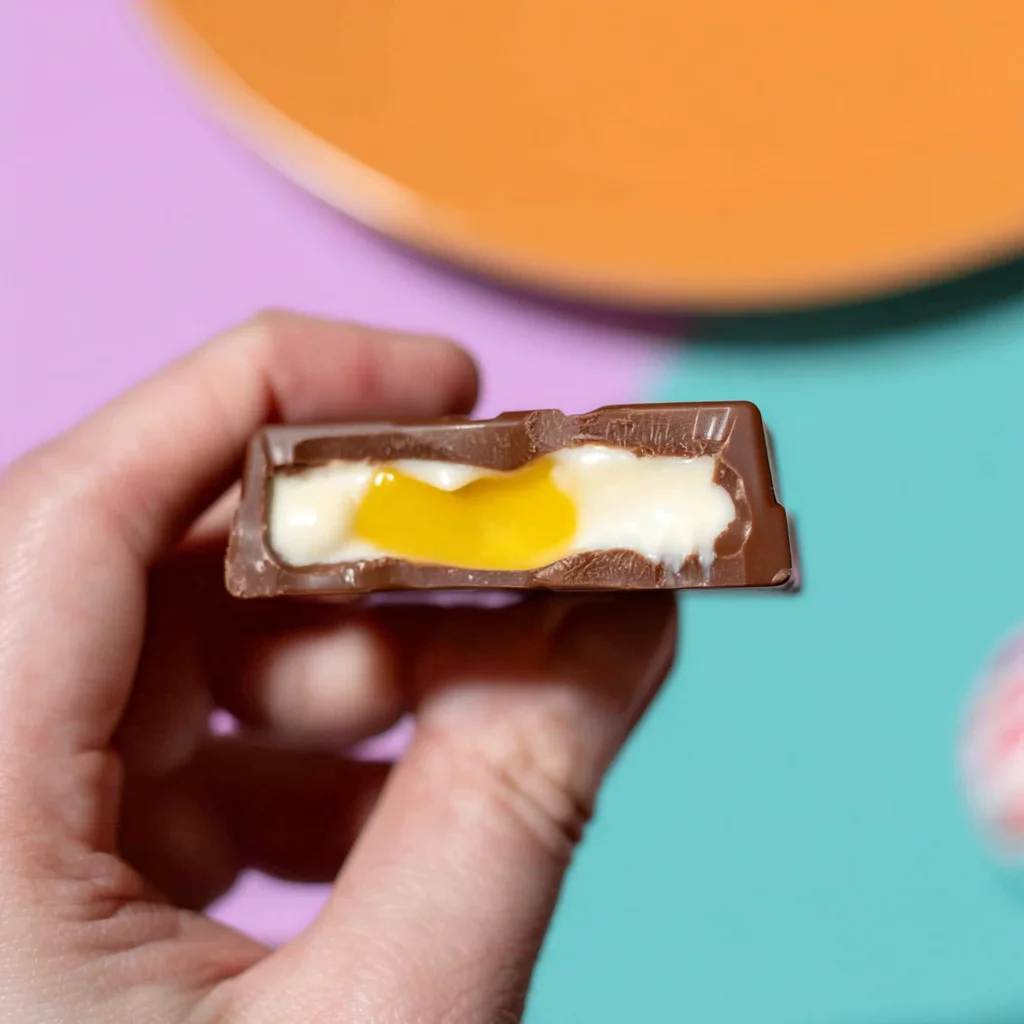
A homemade creme egg is a copycat confection inspired by the world-famous Cadbury treat. Traditionally, these candies consist of a thick milk chocolate shell filled with a liquid-like fondant. The filling is engineered to look like a real egg, featuring a white “albumen” and a bright orange “yolk.” In this version, we use a mixture of light corn syrup, butter, and powdered sugar to achieve that signature “ooze.” By layering white and orange-tinted creme inside a chocolate cup, we replicate the visual magic and the sugary, melt-in-your-mouth experience of the original British classic, but with a fresher, creamier profile.
Ingredients
To create the perfect homemade creme egg, you need a specific set of ingredients that balance sweetness with structure:
- Milk Chocolate (32 oz): Use high-quality melting wafers or chocolate bars. You need 16 ounces for the base and 16 ounces for the lids.
- Light Corn Syrup (1 cup): This is the secret to the gooey, non-grainy texture of the fondant. It prevents the sugar from crystallizing.
- Unsalted Butter (1/2 cup): Softened butter provides a rich, creamy mouthfeel that elevates the filling above a standard sugar glaze.
- Vanilla Extract (2 tsp): High-quality vanilla is essential for that “bakery-style” aroma and depth of flavor.
- Powdered Sugar (6 cups): This acts as the body of your creme. Be sure to measure carefully to ensure the mixture is stiff enough to handle but soft enough to flow.
- Milk (2 Tbsp): A touch of liquid helps thin the fondant to the perfect “gooey” consistency.
- Gel Food Coloring: Orange and yellow gel colors are preferred over liquid drops, as they provide vibrant “yolk” color without changing the consistency of the creme.
Ingredient Substitutions & Tips
If you want to tweak this recipe, there are several successful substitutions you can make. For a more sophisticated palate, swap the milk chocolate for a 70% dark chocolate shell; the bitterness pairs beautifully with the ultra-sweet filling. If you are avoiding corn syrup, you can substitute it with brown rice syrup or golden syrup, though the flavor profile will shift slightly toward caramel. For a dairy-free version, use a high-quality vegan butter stick and plant-based milk, ensuring your chocolate is also dairy-free. Always use gel coloring for the yolk; liquid coloring can cause the sugar mixture to seize or become too runny.
Step-by-Step Instructions
- Prep the Pan: Line 48 mini muffin cups with parchment paper liners. This is crucial for easy removal later.
- The Base Shell: Melt the first 16 oz of milk chocolate in the microwave in 20-second bursts. Pipe a thin layer (about 1/8 inch) into the bottom of each liner. Tap the pan firmly on the counter to level the chocolate.
- The Filling Base: In a stand mixer, cream together the softened butter and corn syrup. Add the milk, vanilla, and salt.
- Incorporate Sugar: Slowly add the powdered sugar one cup at a time. The mixture should be stiff but smooth.
- Create the Yolk: Remove about 1/3 of the white mixture. Add your orange and yellow gel coloring to this portion and mix until it resembles a bright egg yolk.
- Layering: Pipe a generous amount of white creme onto the set chocolate base. Then, pipe a smaller dollop of the orange “yolk” directly into the center of the white creme.
- Settle the Filling: Tap the pan again. The creme will naturally flatten out and fill the gaps over a few minutes.
- The Final Seal: Melt the remaining 16 oz of chocolate. Pipe it over the top of the creme, starting at the edges to ensure a perfect seal so no filling leaks out. Tap one final time for a smooth finish.
- Chill: Place the pan in the refrigerator for at least 30 minutes to set the chocolate.
Expert Baking Tips
To achieve the best results, pay close attention to temperature. Your chocolate should be warm and fluid, but not hot; if it’s too hot, it will melt the creme filling upon contact. When making the filling, ensure your butter is truly “room temperature.” If it’s too cold, you’ll have lumps of butter in your “egg white.” Another pro tip: use a disposable piping bag for the chocolate. It gives you much more control than a spoon, resulting in cleaner edges and a more professional look. Finally, don’t skip the “tapping” steps—this removes air bubbles and creates that perfectly flat, store-bought finish.
The Secret to the Perfect “Yolk”
The visual appeal of a creme egg relies entirely on the contrast between the white and the orange filling. To get the “yolk” just right, aim for a warm apricot hue. Combining two drops of orange with one drop of yellow gel food coloring creates a more realistic yolk color than orange alone. When piping, don’t just put the orange on top; try to “submerge” the tip of the piping bag slightly into the white creme before squeezing. This creates a realistic internal yolk that is only revealed once someone takes a bite.
Serving Suggestions
These homemade treats are a showstopper on any Easter dessert table. Serve them in a decorative basket lined with faux grass, or place them on a white ceramic platter to let the chocolate pop. They also make incredible gifts; wrap individual “eggs” in small squares of colorful foil to mimic the classic Cadbury look. If you’re feeling extra indulgent, try chopping one of these eggs and using it as a topping for a decadent Easter brownie or a vanilla bean milkshake.
Storage & Make-Ahead Tips
These candies are excellent for making in advance. They can be stored in an airtight container at room temperature for up to 7 days, provided your kitchen isn’t too warm. For longer storage, keep them in the refrigerator for up to two weeks. If you prefer the filling to be extra “liquid,” let the candy sit at room temperature for 30 minutes before serving. You can also freeze these for up to three months; just thaw them in the fridge overnight to prevent the chocolate from blooming (turning white).
FAQs
Can I make these without corn syrup?
While corn syrup provides the best “ooze,” you can use golden syrup or a very thick simple syrup. However, the texture may be slightly more crystalline.
Why did my chocolate turn white?
This is called “blooming.” It usually happens if the chocolate is stored in a place with high humidity or extreme temperature fluctuations. It’s still safe to eat, just less pretty!
Can I use white chocolate for the shell?
Absolutely! White chocolate “eggs” are a delicious variation. Just be aware that white chocolate melts faster and is more sensitive to heat than milk chocolate.
The filling is too runny to pipe. What do I do?
Simply add more powdered sugar, 1/4 cup at a time, until it reaches a consistency similar to thick toothpaste.
How do I get the candies out of the muffin tin?
Since we used parchment liners, they should pop right out! If they are stuck, a quick 5-minute stay in the freezer will firm the chocolate enough to release them easily.
Creating your own Homemade Creme Eggs is a rewarding way to celebrate the season with a personal touch. By using high-quality ingredients and a simple mini muffin tin, you bypass the artificial flavors of commercial candy and produce a treat that is truly special. Whether you’re making these for an Easter egg hunt or as a sweet surprise for a loved one, the gooey center and snappy chocolate shell are sure to bring a smile to everyone’s face. Happy “baking” and enjoy your DIY confections!


