
There is something inherently nostalgic about the flavor of cake batter. It takes most of us back to being five years old, hovering in the kitchen while mom mixed a birthday cake, waiting for the moment we could finally lick the spatula. That sweet, buttery, vanilla-heavy scent is pure comfort. But as adults, we usually try to steer clear of eating raw cake batter on the daily.
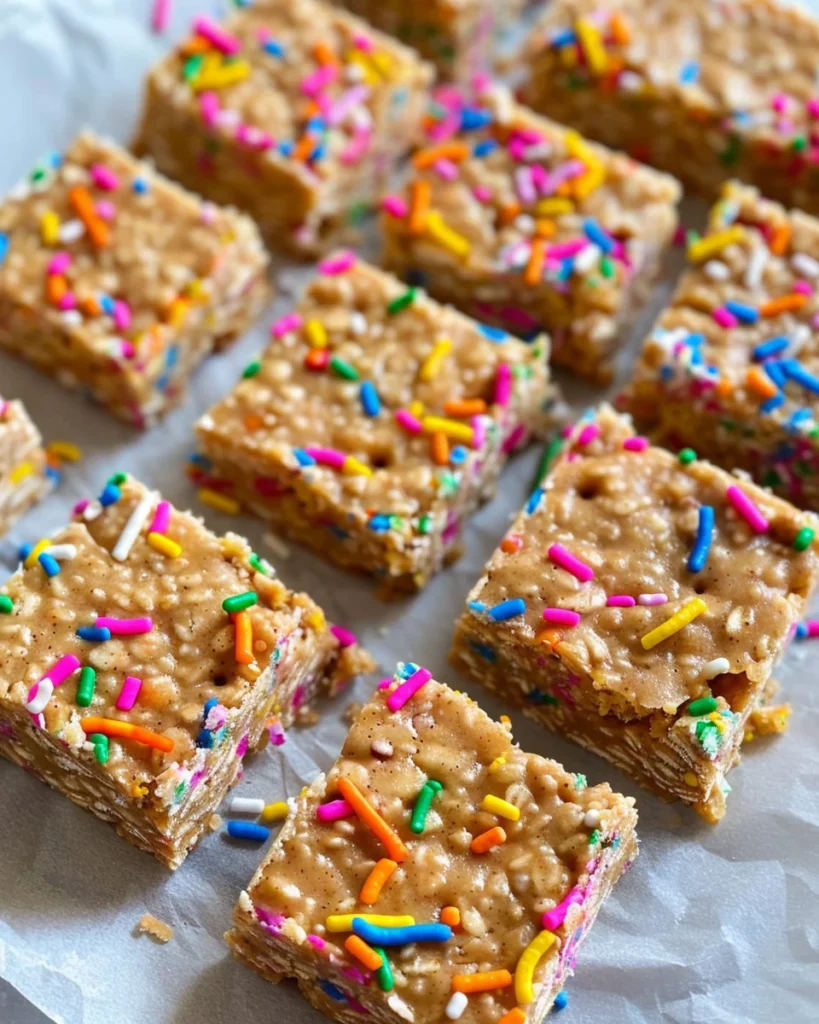
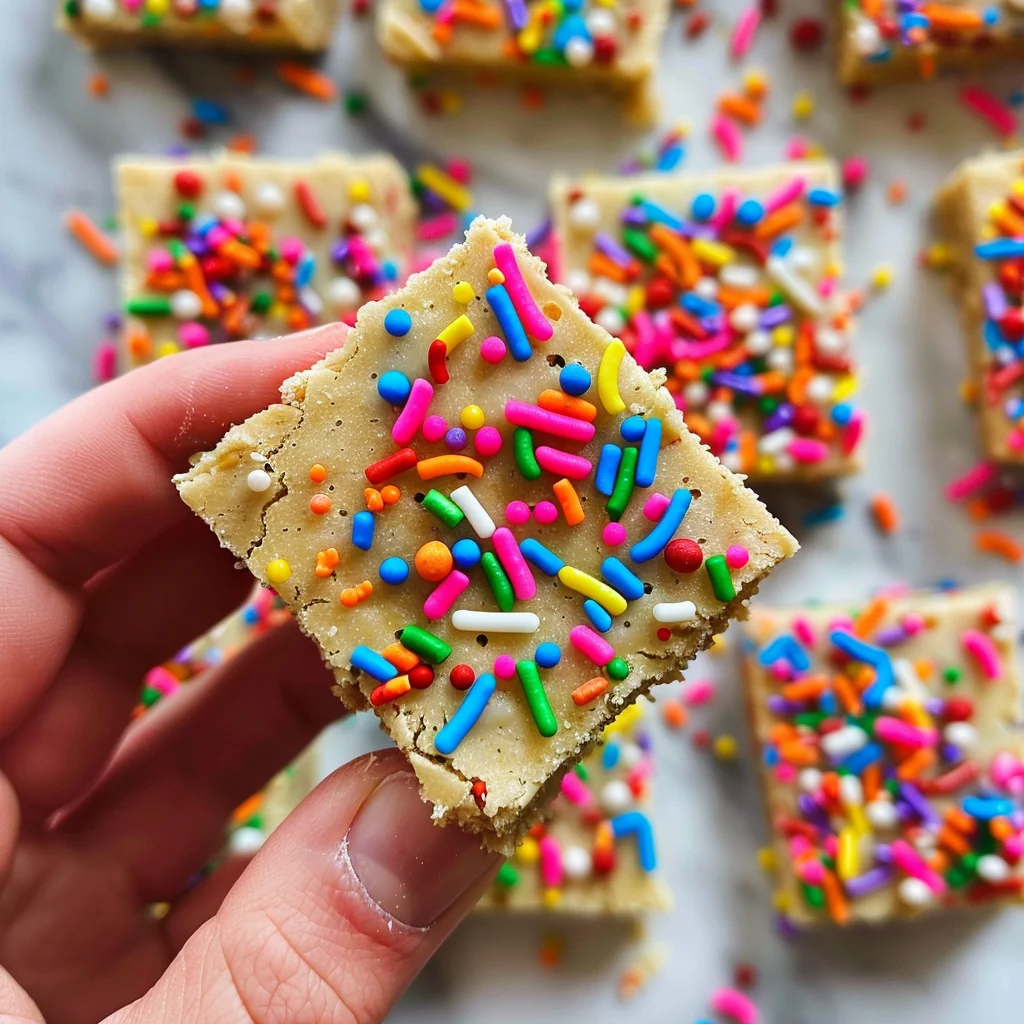
Imagine a snack that tastes exactly like a celebratory dessert but is actually fueled by complex carbohydrates, healthy fats, and high-quality protein. These bars are soft, chewy, and studded with festive sprinkles, making them the perfect afternoon pick-me-up or post-workout treat. Best of all? They are completely no-bake, meaning you don’t even have to turn on your oven.
If you’ve been looking for a way to satisfy your sweet tooth without the sugar crash, this recipe is about to become your new meal-prep staple.
Why You’ll Love This Recipe
- No-Bake Simplicity: You only need a microwave and a freezer. It’s a “dump and stir” recipe that takes less than 15 minutes of active prep time.
- Wholesome Ingredients: Instead of the processed fillers found in store-bought bars, these use whole-grain oats, natural nut butter, and honey.
- High Protein Content: With two full scoops of protein powder, these bars help keep you full and support muscle recovery.
- Kid-Approved: The sprinkles and “cake” flavor make these a hit with little ones, and you can feel good about the ingredients they’re eating.
- Cost-Effective: Stop spending $3 per bar at the gym. Making a batch at home is a fraction of the price.
Ingredient
Success in no-bake treats comes down to the quality and state of your ingredients. Here is what you need to know:
- Oats: We are using standard rolled oats or quick oats and turning them into “oat flour” by blending them. This provides a cake-like structure without the need for raw wheat flour.
- Cashew Butter: This is the secret to that authentic “cake” taste. Peanut butter is too strong and almond butter can be slightly bitter. Cashew butter is naturally sweet and neutral, which lets the cake flavors shine.
- Cake Batter Extract: You can find this in the baking aisle. It’s different from plain vanilla—it has that specific “yellow cake” essence. If you can’t find it, you can use almond extract, but start with just half a teaspoon as it is very strong!
- Vanilla Protein Powder: Choose a brand you actually enjoy the taste of. Whey protein works well for a lighter texture, while plant-based proteins may require a tablespoon or two of almond milk if the dough becomes too dry.
- Honey: This acts as our natural sweetener and the “glue” that holds the bars together. You can substitute with maple syrup or agave for a vegan option.
Instructions
1. Prepare Your Oat Flour
Start by placing your 2 cups of oats into a high-speed blender or food processor. Pulse until the oats have turned into a fine, flour-like consistency. If there are a few small bits of oat left, that’s fine—it adds a nice texture.
2. Melt the “Glue”
In a large, microwave-safe bowl, combine the cashew butter and honey. Heat for about 30 seconds. This step is crucial because it thins out the nut butter and honey, making it much easier to incorporate the dry ingredients without ending up with “clumps” of protein powder.
3. Combine and Flavor
Stir the warm cashew butter and honey until smooth. Add in your vanilla and the cake batter extract. The aroma at this stage is incredible!
4. Mix the Dough
Fold in your oat flour and the vanilla protein powder. Use a sturdy spatula or even your hands. The dough will be thick and slightly sticky—this is exactly what you want. Finally, fold in those colorful sprinkles.
5. Press and Set
Line a 8×8 or 9×9 baking sheet with parchment paper. Transfer the mixture to the pan. Use a second piece of parchment paper or slightly damp hands to press the batter firmly into an even layer. The firmer you press, the better the bars will hold together.
6. The Big Freeze
Place the pan in the freezer for at least one hour. This allows the oats to hydrate and the fats to solidify, creating that perfect fudgy texture. Once set, lift the parchment paper out and cut into 12 bars.
Expert Tips for Best Results
- Wet Your Hands: If the mixture is sticking to your fingers while you’re trying to press it into the pan, lightly dampen your hands with water. It prevents sticking and helps you get a smooth top.
- Check the Consistency: Protein powders vary wildly. If your dough feels more like “sand” and won’t stick together, add 1 tablespoon of water or almond milk at a time until it clumps. If it’s too goopy, add a bit more oat flour.
- Quality Sprinkles: Use “jimmies” (the long ones) rather than “nonpareils” (the tiny balls). Nonpareils tend to bleed their color into the batter, which might turn your bars a weird shade of gray-purple!
Variations and Substitutions
- Vegan Option: Use a plant-based vanilla protein powder and swap the honey for maple syrup or brown rice syrup.
- Nut-Free: You can use Sunflower Seed Butter (SunButter), though it may slightly change the color and flavor profile.
- Chocolate Chip: If you aren’t a fan of sprinkles, swap them for mini white chocolate chips or dark chocolate chips.
- Extra Fiber: Stir in a tablespoon of chia seeds or ground flaxseed for an extra nutritional boost.
Storage and Freezing
Because these are made with natural ingredients and no preservatives, they are best kept cold.
- Freezer (Recommended): Store the cut bars in a sealed container or Ziploc bag in the freezer. They don’t get rock hard; they actually stay perfectly chewy. They will last up to 3 months.
- Fridge: You can keep them in the fridge for up to 10 days. They will be softer than the freezer version but still delicious.
- On-the-go: If you’re taking one to work or the gym, it will be fine at room temperature for a few hours, but it may get a bit soft.
FAQ
Q: Can I use peanut butter instead of cashew butter?
A: You can, but the bars will taste like peanut butter. The “cake batter” flavor relies on the neutral, buttery profile of cashews. If you use peanut butter, I’d suggest calling them “Peanut Butter Birthday Bars!”
Q: My bars are crumbling when I cut them. What happened?
A: This usually means the mixture was a bit too dry or they didn’t freeze long enough. Make sure you press them down very firmly into the pan before freezing.
Q: Is there a substitute for cake batter extract?
A: You can use a combination of extra vanilla extract and a tiny drop of almond extract. However, for that true “Funfetti” taste, the specific extract is worth the $4 investment!
Why These Bars Win at Pinterest SEO
When it comes to healthy snacks, people are always searching for “no-bake,” “high protein,” and “meal prep.” These Cake Batter Protein Bars hit all those marks. By using natural sweeteners and whole grains, you’re creating a recipe that appeals to the “clean eating” community while looking like a total treat. When pinning these, be sure to use high-quality vertical images that show the “chew” of the bar!
These Homemade Cake Batter Protein Bars are proof that eating healthy doesn’t have to be boring or flavorless. They are a celebration in every bite, providing the energy you need to get through your day without the sugar crash of a real slice of cake.
Give them a try this week for your meal prep, and don’t forget to tag me in your photos! There’s nothing I love more than seeing these festive bars in your kitchens.
PrintCake Batter Protein Bars

These no-bake Cake Batter Protein Bars are the ultimate healthy treat for anyone who loves the taste of birthday cake! Made with cashew butter and oat flour, they are soft, chewy, and packed with protein.
- Prep Time: 10
- Total Time: 70
- Yield: 12 bars
- Category: Snacks
- Method: No-Bake
- Cuisine: American
Ingredients
2 cups oats
1 cup cashew butter
2 scoops vanilla protein powder
1/3 cup honey
2 teaspoon vanilla
3 teaspoon cake batter extract
2 tablespoon sprinkles
Instructions
1. Gather all ingredients.
2. Place the oats into a blender or food processor and process until finely ground.
3. Place cashew butter and honey in a large bowl and melt in the microwave for 30 seconds. Stir together.
4. Add remaining ingredients to the bowl.
5. Mix very well until everything is combined.
6. Place a piece of parchment paper onto a baking sheet.
7. Firmly press the batter onto the baking sheet and spread so that it is all one layer.
8. Place the baking sheet in the freezer for at least one hour.
9. Cut into bars and enjoy!
Notes
Store the bars in a sealed container in the freezer for the best texture.
You can substitute maple syrup for honey if preferred.


