
There’s a certain magic to a true NYC-style cookie. It’s not just a cookie; it’s an experience. It’s that incredible thickness, the soft and chewy center that gives way to a slightly crisp edge, and, of course, the sheer abundance of gooey, melted chocolate in every single bite. After chasing that perfect bakery-style texture at home, I’m thrilled to share the recipe that finally cracked the code. I’ve tested and tweaked this Milk Chocolate Chip NYC Cookies recipe over nine times, and I can confidently say it’s the only one you’ll ever need.
My family can’t get enough of these. They have become our go-to comfort bake for family gatherings, movie nights, or whenever we just need a little sweet treat. They are gigantic, satisfying, and have that homemade-with-love taste that you just can’t buy.
If you’re a fan of indulgent, next-level cookies, you’re in the right place. And if you love this style, you absolutely must check out my other creations like these incredible Pistachio NYC Cookies or these decadent Peanut Butter Nutella Cookies.
Why You’ll Fall in Love with This Recipe
I’ve poured a lot of love and testing into this recipe, and I’m so excited for you to try it. Here’s why I know it will become a favorite in your household too:
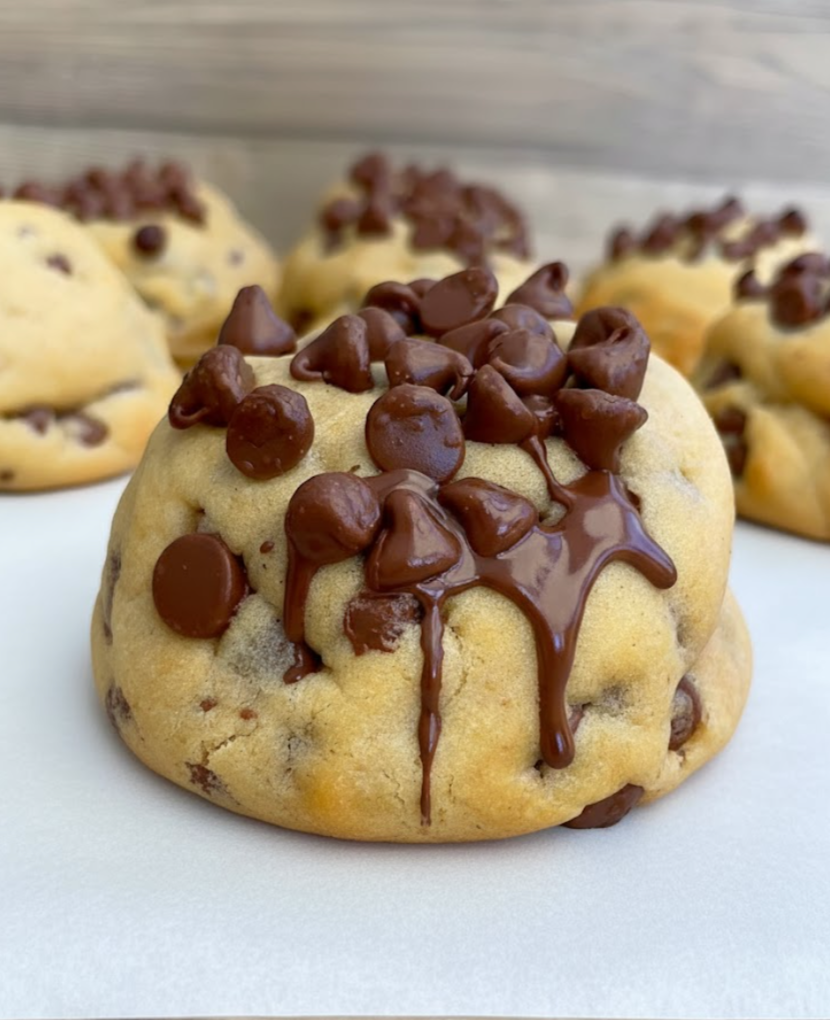
- Iconic NYC Texture: These cookies are seriously THICK. Thanks to a few key ingredients and one non-negotiable step, they bake up tall and proud, not flat and sad.
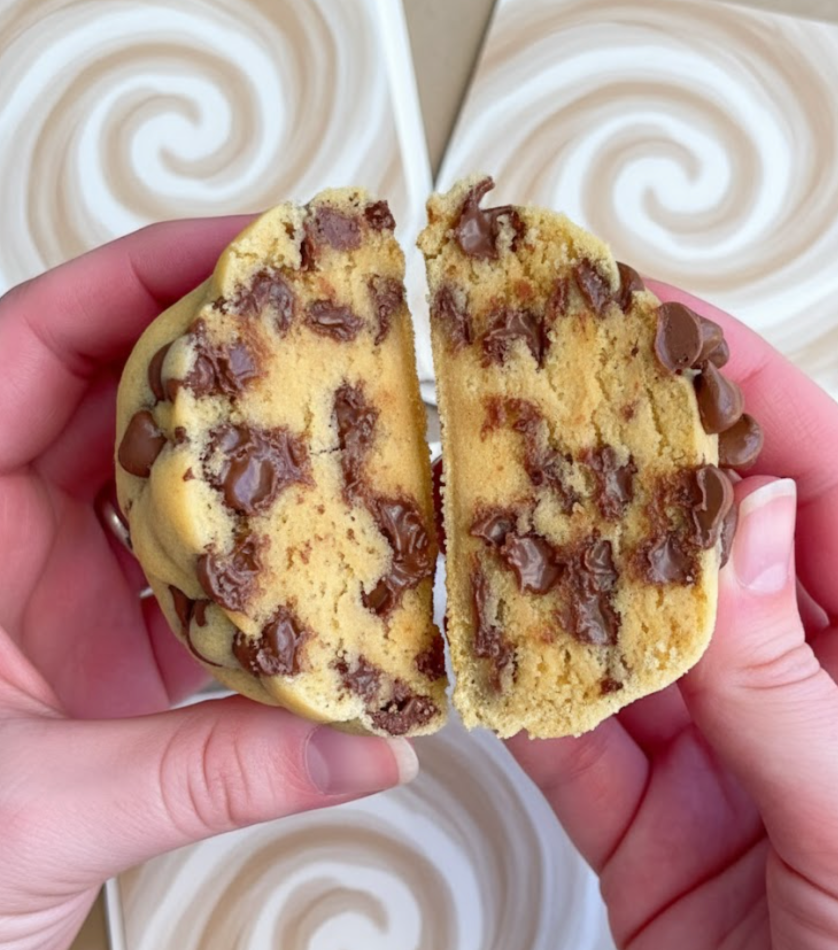
- Perfectly Chewy & Gooey: The center is unbelievably soft and chewy, studded with pools of melted milk chocolate. It’s pure cookie bliss.
- Simple, Accessible Ingredients: No fancy flours or hard-to-find ingredients here. Just pantry staples that come together to create something truly special.
- Tested for Perfection: With over nine test batches, I’ve worked out all the kinks. I’m sharing all my best tips to ensure you get perfect results on your very first try.
- Makes a Perfect Batch: This recipe yields 8 large, satisfying cookies, making it perfect for sharing with family or having a delicious treat on hand for a few days.
The Key Ingredients for Bakery-Style Success
The magic of these cookies lies in the specific combination and ratio of simple ingredients. Let’s break down why each one is so important.
- Margarine: I developed this recipe with baking margarine because it provides great structure and a soft texture. It has a slightly higher melting point than butter, which helps the cookies hold their shape. If you prefer the flavor of butter, you can substitute it 1:1, but the chilling step becomes even more critical.
- Light Brown & Caster Sugar: This duo is the key to the perfect texture. Light brown sugar, with its molasses content, provides moisture and that classic chewy texture. Caster (or superfine) sugar contributes to the spread and the crisp edges.
- Cornflour (Cornstarch): This is my secret weapon! Just half a teaspoon of cornflour makes the crumb incredibly tender and soft, giving you that melt-in-your-mouth center that defines a great NYC cookie.
- Bicarbonate of Soda & Baking Powder: We use both for the perfect lift and spread. Baking powder gives the cookies their height, while the bicarbonate of soda (baking soda) helps them spread just enough and contributes to the golden color.
- Milk Chocolate Chips: The star of the show! I use a generous 200g of quality milk chocolate chips. Using a good brand makes a huge difference in the final taste and meltiness. We even press extra chips on top before chilling to guarantee that picture-perfect, chocolate-studded look.
Step-by-Step Guide to Perfect NYC Cookies
Let’s walk through the process together. It’s simpler than you think to achieve bakery-quality results at home!
Step 1: Cream the Sugars and Margarine
In a large bowl, combine your softened margarine with both the light brown sugar and caster sugar. Using an electric mixer (or some serious arm power!), beat them together until the mixture is light, fluffy, and completely smooth. This step incorporates air, which is the foundation of a good cookie.
Step 2: Add the Wet Ingredients
Add the vanilla extract and the egg. Mix again until everything is just combined. The mixture might look a little split or curdled at this point—that’s completely normal! It will all come together once you add the flour.
Step 3: Combine the Dry Ingredients
Sift your plain flour, baking powder, bicarbonate of soda, and the secret-weapon cornflour directly into the wet mixture. Mix on a low speed until a thick, cohesive dough forms. Be careful not to overmix! Just mix until you no longer see streaks of flour. The final dough should be thick and easy to handle, not sticky.
Step 4: Fold in the Chocolate & Portion
Now for the best part! Add 160g of your milk chocolate chips, reserving about 40g for the topping. Gently fold them into the dough until they’re evenly distributed. Using a kitchen scale for accuracy (or just by eye), portion the dough into 8 large, equal-sized balls. They should be around 100g each.
Step 5: The Crucial Chilling Step
Sprinkle the remaining 40g of chocolate chips onto a small plate. Take each dough ball and gently press the top into the chocolate chips, studding the surface. Place all the dough balls on a plate or tray and put them in the freezer for one full hour. This is the most important step for thick cookies, so please don’t skip it!
Step 6: Bake to Perfection
Towards the end of the chilling time, preheat your oven to 200°C (180°C Fan). Line two baking trays with parchment paper. Place the frozen dough balls well apart on the trays (4 per tray is perfect). Bake for 8-10 minutes. They’re ready when the edges are golden, but the centers still look a tiny bit soft and underdone.
Step 7: Cool and Set
This is my favorite pro tip! As soon as they’re out of the oven, take a large round cookie cutter and “scoot” it around each cookie to make them perfectly circular. Now, the hard part: let them cool completely on the hot baking tray for at least 30 minutes. This allows the centers to finish setting and creates that unbelievably gooey, chewy texture.
Sofie’s Pro-Tips for Cookie Dominance
After making these cookies more times than I can count, I’ve gathered a few tips that guarantee success every single time.
- Measure Flour Correctly: Spoon your flour into the measuring cup and level it off. Scooping directly from the bag can compact the flour, leading to dry, dense cookies. A kitchen scale is your best friend for baking!
- Don’t Overmix: Once you add the flour, mix only until it’s just combined. Overmixing develops the gluten, which can make your cookies tough instead of tender.
- The Freeze is Non-Negotiable: I can’t stress this enough. Freezing the dough balls solidifies the fat. When they hit the hot oven, the outside sets before the fat has a chance to melt completely, forcing the cookie to bake upwards instead of outwards. This is the secret to a thick cookie.
- Bake from Frozen: Don’t let the dough balls thaw. Taking them directly from the freezer to the preheated oven is key to minimizing spread.
Variations and Storing Your Cookies
While the classic milk chocolate chip is a masterpiece, feel free to get creative!
- Chocolate Swaps: Swap milk chocolate for dark chocolate chunks, white chocolate chips, or a mix of all three! If you love white chocolate, you should definitely try my White Chocolate Stuffed Cookies.
- Add-Ins: A handful of chopped walnuts or pecans would be a delicious, nutty addition.
- Stuffed Cookie Fun: For an even more decadent treat, you can press half the dough flat, place a small chocolate truffle or a dollop of Nutella in the center, and wrap the dough around it. My Stuffed Red Velvet Cookies and Creme Egg Stuffed Cookies are perfect examples of how amazing a stuffed cookie can be!
Storage: These cookies are fantastic for making ahead. Store baked cookies in an airtight container at room temperature for up to 7 days.
Freezing: You can freeze the unbaked dough balls for up to 3 months. When you’re ready for a cookie, just bake them straight from frozen, adding an extra 2-3 minutes to the baking time.
Frequently Asked Questions (FAQ)
Why did my NYC cookies spread too much and become flat?
The most common reason for flat cookies is not chilling the dough for long enough. The 1-hour freezer time is essential to solidify the fat (margarine), which prevents it from melting too quickly in the oven. Another reason could be an oven that’s not hot enough, so always ensure it’s fully preheated.
Can I use real butter instead of margarine?
Yes, you can absolutely use unsalted butter instead of margarine in a 1:1 ratio. Butter will provide a richer flavor. If you use butter, the chilling step is even more critical, as butter has a lower melting point than many types of baking margarine.
Do I really have to chill the dough?
Yes, this step is non-negotiable for achieving that iconic thick, tall NYC cookie profile. Chilling solidifies the fat, which controls spread, and it also allows the flour to hydrate, resulting in a chewier texture and more developed flavor. Skipping this step will result in thin, flat cookies.
How do I get my cookies perfectly round?
The best trick is to use a large round cookie cutter or the rim of a glass that is slightly larger than the cookie. As soon as the cookies come out of the oven, while they’re still hot and pliable on the tray, place the cutter around the cookie and gently swirl it. This will tuck in any uneven edges, creating a perfect circle.
Milk Chocolate Chip NYC Cookies
Discover the secret to perfectly thick, chewy, and gooey Milk Chocolate Chip NYC Cookies. This recipe has been tested over 9 times to guarantee that iconic bakery-style texture and flavor right in your own kitchen. Simple ingredients, straightforward steps, and incredible results every time!
- Prep Time: 15 M
- Cook Time: 10 M
- Total Time: 85 M
- Yield: 8M
- Category: Dessert
- Method: Baking
- Cuisine: American
Ingredients
125g Margarine, softened
100g Light Brown Sugar
50g Caster Sugar
1 Tsp Vanilla Extract
1 Large Egg
310g Plain Flour (All-Purpose Flour)
1 and 1/2 Tsp Baking Powder
1/2 Tsp Bicarbonate of Soda (Baking Soda)
½ Tsp Cornflour (Cornstarch)
200g Milk Chocolate Chips, divided (160g for dough, 40g for topping)
Instructions
1. Add the margarine and both sugars into your mixing bowl, then combine them together by hand or with an electric mixer until smooth.
2. Add in the vanilla extract at this stage.
3. Next, add in your egg and mix again until it has been incorporated. It doesn’t matter if the mixture looks curdled at this stage.
4. Pour in your sifted flour, baking powder, bicarbonate of soda and cornflour. Then mix again until a dough has formed. You should be able to pick up your dough easily and it should not be sticky.
5. Add 160g of Milk Chocolate Chips to the dough (saving 40g behind for decorating), then mix again to combine.
6. Portion the dough into 8 evenly sized balls and place them on a plate.
7. Next, take out a small plate and sprinkle the remaining 40g of Milk Chocolate Chips onto it.
8. Dip the top of each cookie into the chocolate chips.
9. Place your cookie dough balls into the freezer to chill for 1 hour.
10. After the cookies have been in the freezer for 45 minutes, preheat your oven to 200°C (180°C for fan ovens).
11. Line 2 Baking Trays with Parchment Paper.
12. Remove the cookies from the freezer and place them onto your baking trays. I recommend 4 cookies per tray.
13. Bake your cookies for 8-10 minutes. You will know they are done when they are a light golden colour.
14. Once baked, feel free to lightly press on the edges of the cookies with a teaspoon to ensure they are completely circular. Do not remove the cookies from their trays.
15. Allow the cookies to cool completely on the trays for a minimum of 30 minutes so that the spread can firm up. Then they are ready to enjoy!
Notes
Cookie Storage: These cookies will last for 5-7 days when stored in an airtight container at room temperature.
Freezing Instructions: You can freeze the baked cookies for up to 3 months. Alternatively, freeze the unbaked dough balls. You can bake them directly from frozen, adding 2-3 minutes to the baking time.


