
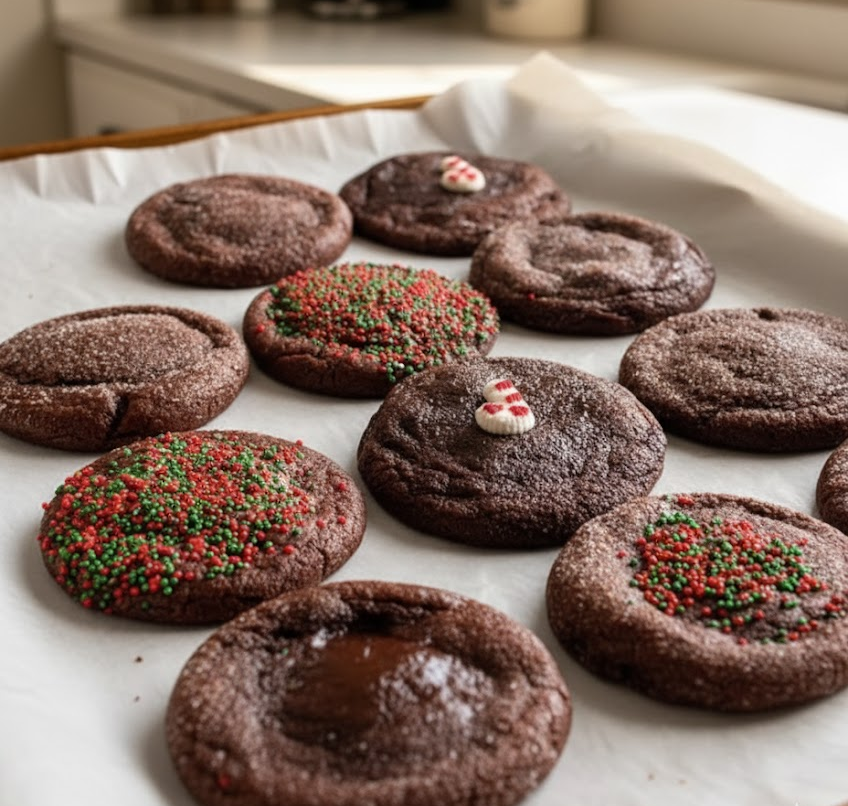
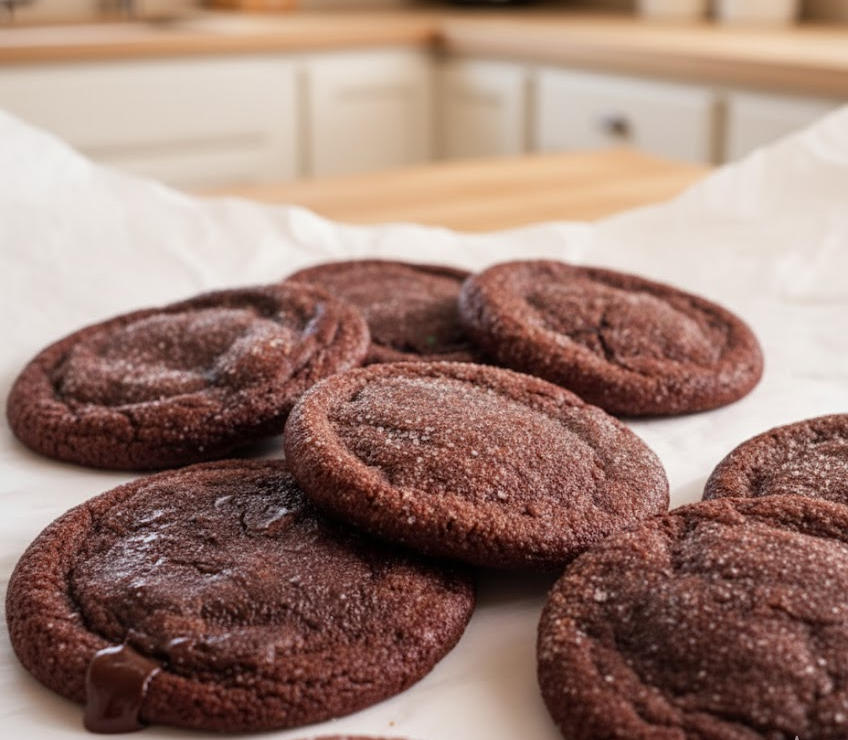
Imagine breaking open a warm, soft-baked chocolate cookie, only to reveal a pool of luscious, melted chocolate waiting inside. That, my friends, is the magic of Molten Chocolate Lava Cookies. This isn’t just a cookie; it’s an experience. It’s the perfect fusion of a fudgy brownie, a chewy chocolate cookie, and a decadent lava cake, all rolled into one unbelievable dessert.
As a recipe developer, my goal is always to create that “wow” moment. After testing this recipe more than nine times, tweaking everything from the type of cocoa to the chilling time of the ganache, I can confidently say this is it. This is the recipe that will make your friends and family’s eyes go wide. It’s the ultimate comfort food treat, perfect for family gatherings, a cozy night in, or whenever you need a serious chocolate fix.
Why This Recipe Will Become Your Favorite
This isn’t just another chocolate cookie recipe. Here’s why you’ll find yourself making it again and again:
- An Unforgettable Molten Center: The star of the show is the liquid gold inside. A rich, dark chocolate ganache is frozen and then baked inside the cookie, creating a truly spectacular molten lava effect when you break it open.
- Deep, Complex Chocolate Flavor: We use both high-quality dark chocolate for the ganache and Dutch-processed cocoa powder in the dough. This combination delivers a rich, sophisticated chocolate flavor that isn’t overwhelmingly sweet.
- Perfect Texture Combination: You get the best of all worlds: slightly crisp, chewy edges give way to a soft, fudgy cookie that finally reveals the warm, gooey center.
- Surprisingly Simple to Make: While they look incredibly impressive, the steps are straightforward and easy for any home cook to follow. It’s all about a few key techniques that I’ll walk you through.
- Showstopper for Any Occasion: Bring these to a party, serve them after dinner with a scoop of vanilla ice cream, or pack them up as a gift. They are guaranteed to impress.
A Closer Look at the Ingredients
Great baking starts with great ingredients. Understanding why we use each component is the first step to becoming a more confident baker. This recipe’s magic lies in the specific choices we make.
- Dark Chocolate (60-70%): This is the heart of the recipe. For the ganache, you absolutely want to use a high-quality chocolate bar, not chips. Chocolate chips contain stabilizers that prevent them from melting into a smooth, liquid pool. A 60-70% cacao content provides a deep, rich flavor that balances the sweetness of the cookie dough perfectly.
- Dutch-Processed Cocoa Powder: Unlike natural cocoa, Dutch-processed cocoa has been alkalized to neutralize its acidity. This results in a darker, richer color and a smoother, less bitter chocolate flavor that is perfect for this fudgy cookie dough.
- Butter & Whipping Cream: These are our essential fats. Unsalted butter gives the cookie its flavor and tender texture. The heavy whipping cream is what transforms our dark chocolate into a silky, luxurious ganache that melts beautifully.
- Light Brown & Cane Sugar: Using a combination of sugars is key for texture. Light brown sugar contains molasses, which adds moisture and creates a wonderfully chewy cookie. The white cane sugar provides stability, structure, and helps the edges crisp up slightly.
- Cornstarch: My “secret weapon” in many cookie recipes! A small amount of cornstarch makes the cookies incredibly soft and tender while also helping to prevent them from spreading too much in the oven.
Step-by-Step Guide to Perfection
We’ll break this down into three simple phases: creating the ganache core, mixing the cookie dough, and bringing it all together.
Part 1: The Molten Ganache Core
This is the most important step for achieving that lava effect. Do not skip the freezing time!
- Melt Chocolate & Cream: In a small saucepan, gently heat your chopped dark chocolate and heavy whipping cream over low heat. Stir frequently until the chocolate is completely melted and the mixture is smooth, glossy, and uniform. You’ve just made a classic ganache.
- Chill Until Scoopable: Pour the ganache into a small bowl and refrigerate it for 20-30 minutes. You want it to firm up to the consistency of thick frosting—solid enough to scoop but not rock hard.
- Scoop & Freeze Solid: Line a small tray or plate with parchment paper. Use a small spoon or a 1-tablespoon cookie scoop to portion out 10-11 mounds of the chilled ganache. Freeze these for at least 20 minutes, or until they are completely solid. This ensures they don’t melt into the dough before the cookie has a chance to bake around them.
Part 2: The Fudgy Cookie Dough
While the ganache freezes, it’s time to make the delicious vessel that will hold it.
- Cream Butter & Sugars: In a large bowl, use an electric mixer to beat the softened butter, light brown sugar, and cane sugar on medium-high speed for 2-3 minutes. It should become pale, light, and fluffy. This process incorporates air, which is crucial for the cookie’s texture.
- Add Wet Ingredients: Pour in the room temperature milk and vanilla extract. Mix on low speed until everything is just combined and smooth.
- Whisk Dry Ingredients: In a separate medium bowl, whisk together the all-purpose flour, Dutch-processed cocoa powder, cornstarch, baking soda, baking powder, and salt. This ensures the leavening agents are evenly distributed, so your cookies rise properly.
- Combine Wet & Dry: Gradually add the dry ingredient mixture to the wet ingredients, mixing on the lowest speed possible. Stop mixing the moment you no longer see streaks of flour. Over-mixing develops gluten and can lead to tough, dense cookies.
- Rest the Dough: Cover the bowl and let the dough rest at room temperature for 30 minutes. This important step allows the flour to fully hydrate, which improves the texture and helps control spread.
Part 3: Assembling and Baking to Perfection
- Preheat & Prep: Preheat your oven to 350°F (175°C). Line a large baking sheet with parchment paper.
- Portion & Stuff: Use a 2-tablespoon cookie scoop (about 50g of dough) to create uniform portions. Flatten one dough ball in your palm to form a small disc. Place one of your frozen ganache balls in the center.
- Seal the Deal: Carefully wrap the cookie dough around the frozen ganache, pinching the seams together to ensure it’s completely sealed. Roll it gently between your palms to form a smooth ball.
- Bake: Place the dough balls on your prepared baking sheet, leaving at least 3 inches of space between them as they will spread. Bake for 10-12 minutes. The edges should look set, but the centers will appear soft and slightly underdone. This is the key to a gooey cookie!
- The “Cookie Scoot”: As soon as you take the cookies out of the oven, grab a round cookie cutter or a glass that’s slightly larger than the cookies. Place it over a warm cookie and gently “scoot” it in a circular motion. This trick nudges the edges in, creating a perfectly round, professional-looking cookie.
- Cool & Enjoy: Let the cookies cool on the baking sheet for 5-10 minutes. This allows the center to set up just enough. For the ultimate lava experience, enjoy them while they’re still warm.
More Decadent Cookie Recipes You’ll Love
If you’re obsessed with the rich, indulgent nature of these stuffed cookies, you’re in the right place! My passion is creating showstopping cookie recipes. If you loved this one, you absolutely have to try my Stuffed Red Velvet Cookies, which have a delightful cream cheese filling. For a sophisticated and nutty flavor, my Pistachio NYC Cookies are a must-try. And you can never go wrong with classic combinations like my Peanut Butter Nutella Cookies or these creamy White Chocolate Stuffed Cookies. If you are a fan of Cadbury, try the Creme Egg Stuffed Cookies Recipe.
Storage & Make-Ahead Tips
- To Store: These cookies are best enjoyed the day they are made, especially if you want that dramatic molten center. However, they can be stored in an airtight container at room temperature for up to 3 days.
- To Reheat: To bring back the gooey lava, simply microwave a cookie for 10-15 seconds before serving. It will be just as good as fresh-baked!
- To Make Ahead: Prepare the recipe through step 11 (stuffing and rolling the dough balls). Place the unbaked, stuffed cookie balls on a baking sheet and freeze until solid. Transfer them to a freezer-safe bag or container. You can bake them directly from frozen for a fresh lava cookie anytime! Just add 1-2 minutes to the original baking time.
Frequently Asked Questions (FAQ)
Can I make the cookie dough ahead of time?
Absolutely! The cookie dough can be made and refrigerated for up to 72 hours. You can also form the dough balls, stuff them with the frozen ganache, and then freeze the unbaked cookie balls for up to 3 months. Bake directly from frozen, adding 1-2 minutes to the baking time.
What is the best type of chocolate for lava cookies?
For the best flavor, use a high-quality dark chocolate between 60% and 70% cacao. A chocolate bar, chopped finely, melts more smoothly than chocolate chips for the ganache. For the cookie dough, a Dutch-processed cocoa powder provides a deep, rich color and non-acidic chocolate flavor.
How do I store leftover molten lava cookies?
Store the cookies in an airtight container at room temperature for up to 3 days. To get that ‘molten’ center back, simply microwave a cookie for 10-15 seconds before enjoying.
Why did my cookies spread and become flat?
Flat cookies are usually caused by a few things: your butter was too soft (it should be softened, not melting), you didn’t freeze the ganache until it was solid, or you didn’t rest the dough. Resting the dough for 30 minutes is a crucial step that helps the flour absorb moisture, leading to a thicker, chewier cookie that spreads less.
I truly hope you love making—and eating—these Molten Chocolate Lava Cookies. They are a labor of love that I’m so excited to share. There’s nothing better than watching someone’s face light up as they discover that incredible gooey center. Happy baking
PrintMolten Chocolate Lava Cookies
Soft-baked chocolate cookies with molten dark-chocolate centers! These Ultimate Molten Chocolate Lava Cookies combine fudgy brownie richness, chewy cookie texture, and gooey lava-cake indulgence. Tested over nine times for a bakery-quality, show-stopping result.
- Prep Time: 45 minutes (plus chilling)
- Cook Time: 12 minutes
- Total Time: 1 hour
- Yield: 10–11 cookies
- Category: Dessert, Cookies, Stuffed Cookies
- Method: Baked
- Cuisine: American
Ingredients
100 g dark chocolate (60–70 % cacao), finely chopped
3 tablespoons heavy whipping cream
**Fudgy Chocolate Cookie Dough**
3/4 cup (170 g) unsalted butter, softened
3/4 cup (150 g) light brown sugar
1/2 cup (100 g) granulated cane sugar
2 tablespoons milk (room temperature)
1 teaspoon vanilla extract
1 3/4 cups (220 g) all-purpose flour
3/4 cup (75 g) Dutch-processed cocoa powder
1 tablespoon cornstarch
1 teaspoon baking soda
1/2 teaspoon baking powder
1/2 teaspoon salt
Instructions
1. Make ganache: In a small saucepan, heat chopped dark chocolate and heavy cream on low until smooth and glossy. Chill 20–30 minutes until thick but scoopable.
2. Scoop & freeze: Portion ganache into 1-tablespoon mounds on parchment and freeze at least 20 minutes until solid.
3. Cream butter & sugars: Beat softened butter, brown sugar, and cane sugar 2–3 minutes until pale and fluffy.
4. Add liquids: Mix in milk and vanilla just until combined.
5. Combine dry ingredients: Whisk flour, cocoa, cornstarch, baking soda, baking powder, and salt in a separate bowl.
6. Make dough: Add dry ingredients to wet mixture on low speed until just combined; do not overmix.
7. Rest: Cover dough and let rest 30 minutes at room temperature to hydrate.
8. Preheat oven to 350 °F (175 °C); line a baking sheet with parchment.
9. Stuff cookies: Scoop ~50 g dough, flatten in palm, place one frozen ganache ball in the center, and wrap dough around to seal. Roll smooth.
10. Bake 10–12 minutes until edges are set but centers still soft.
11. Scoot & cool: Use a round cutter or glass to “scoot” warm cookies into perfect circles. Cool 5–10 minutes on tray before serving warm for that gooey lava effect.
Notes
Storage:
• Best enjoyed fresh for full molten center.
• Store cooled cookies in an airtight container up to 3 days at room temperature.
Reheat:
• Microwave 10–15 seconds to re-melt the chocolate core.
Make-ahead:
• Freeze stuffed dough balls until solid; keep up to 3 months in a freezer bag.
• Bake from frozen, adding 1–2 minutes to bake time.
Tips:
• Use bar chocolate, not chips, for smooth ganache.
• Always freeze ganache solid before stuffing.
• Resting dough prevents excess spread and yields chewier texture.


