
There is something truly magical about the combination of crunchy toasted rice and the deep, caramelized spice of Biscoff cookie butter. If you are looking for a dessert that requires absolutely no oven time, minimal cleanup, and only four simple ingredients, these Biscoff Rice Krispie Kisses are about to become your new favorite obsession. Whether you’re preparing a last-minute treat for a school bake sale or simply craving something sweet to pair with your afternoon coffee, these little bites offer a sophisticated flavor profile that appeals to both children and gourmets alike. They are the perfect blend of nostalgic “Rice Krispie Treat” vibes and modern European cookie flavor.
Why You’ll Love This Recipe
You will fall in love with this recipe because it strikes the perfect balance between texture and taste. Unlike traditional Rice Krispie treats that rely on marshmallows, these use a Biscoff and corn syrup binder which creates a fudge-like consistency that doesn’t get overly stiff. The addition of the milk chocolate kiss on top adds a creamy element that complements the cinnamon and ginger notes of the Speculoos spread. It’s a 15-minute recipe that looks like it took much longer to assemble. Plus, it’s naturally nut-free (depending on your brand of cookie butter), making it a safer option for many gatherings compared to traditional peanut butter-based blossoms.
What Is a Biscoff Rice Krispie Kiss?
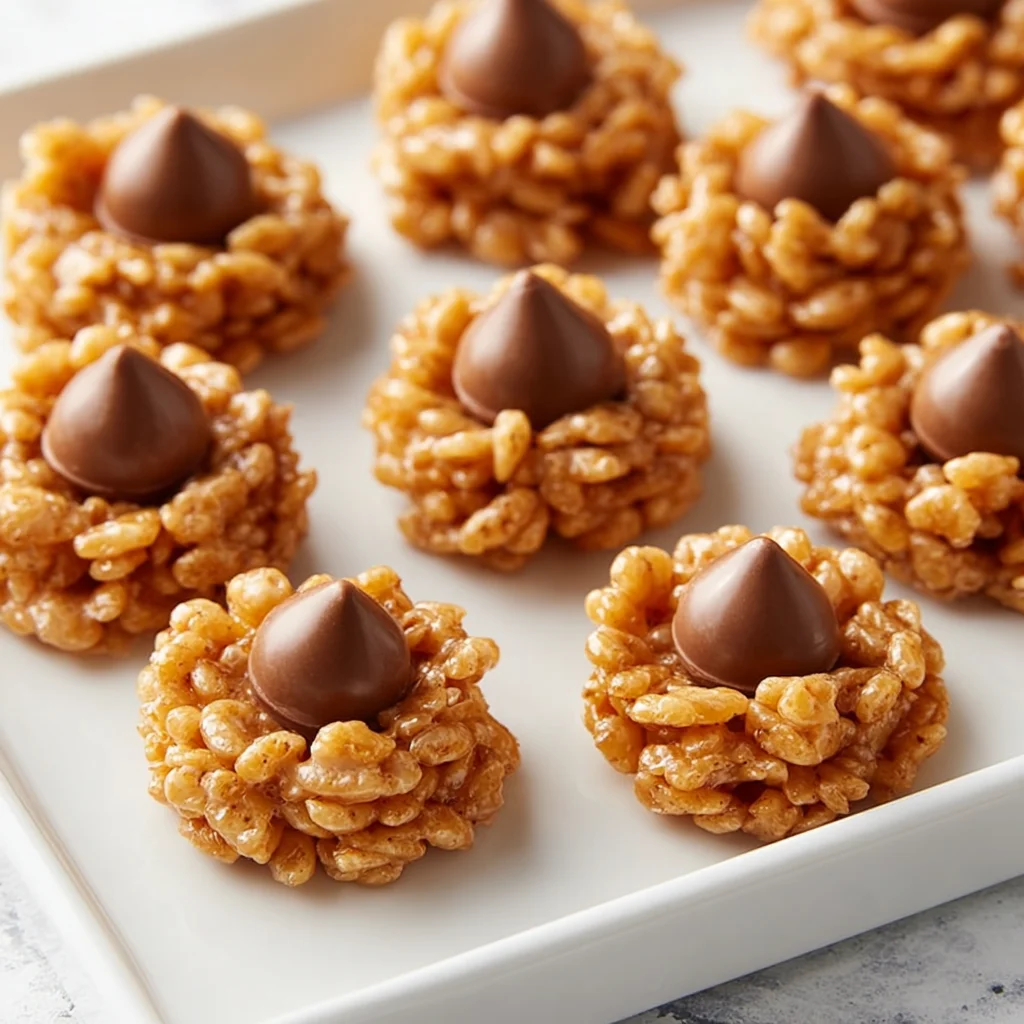
At its core, a Biscoff Rice Krispie Kiss is a no-bake cookie ball. It takes the classic “Peanut Butter Blossom” concept—a soft cookie base with a chocolate kiss pressed into the center—and gives it a trendy, modern update. Instead of a baked dough, we use a mixture of Rice Krispie cereal and melted cookie butter spread. Biscoff spread, often referred to as Speculoos or “cookie butter,” is made from ground Belgian spice cookies. By combining this flavorful spread with a bit of corn syrup for pliability and the iconic cereal for crunch, you create a decadent, bite-sized morsel that is as fun to look at as it is to eat.
Ingredients
To achieve the perfect texture and flavor, each of the four ingredients plays a critical role.
- Biscoff Creamy Cookie Spread (1 cup): This is the star of the show. It provides the fat, the sugar, and the complex spice profile. Ensure you use the “creamy” version rather than “crunchy” to ensure the mixture binds smoothly to the cereal.
- Light Corn Syrup (1/2 cup): The corn syrup acts as the glue. Unlike honey or maple syrup, which can be too thin or have too strong a flavor, light corn syrup provides a neutral sweetness and a chewy, flexible texture that prevents the cookies from becoming brittle once they cool.
- Rice Krispies Cereal (3 cups): This provides the structural integrity and the signature “snap, crackle, and pop.” Ensure your cereal is fresh for the best crunch; stale cereal will result in a chewy, less-than-ideal cookie.
- Milk Chocolate Kisses (32 pieces): The crowning glory. The milk chocolate softens slightly when pressed into the warm cookie, creating a melt-in-your-mouth experience.
Step-by-Step Instructions
1. Prepare Your Station: Before you start the stove, unwrap your 32 chocolate kisses. These need to be ready to go because the cookies set quickly. Line a large baking sheet with parchment paper or a silicone mat.
2. Melt the Base: In a large, heavy-bottomed saucepan, combine the Biscoff spread and the corn syrup. Turn the heat to low. It is vital not to rush this step with high heat. Stir constantly using a rubber spatula until the two ingredients have merged into a glossy, smooth liquid.
3. Combine: Remove the pan from the heat immediately. Pour in the Rice Krispies. Using a folding motion, gently incorporate the cereal into the Biscoff mixture. You want to ensure every single grain of rice is coated in that golden-brown goodness.
4. Shape the Cookies: While the mixture is still warm, use a tablespoon or a small cookie scoop to portion out the mixture. Roll them into 1-inch balls between your palms. If the mixture is sticking to your hands, a tiny bit of butter or non-stick spray on your fingers will help.
5. The Finishing Touch: Place the balls on the prepared parchment paper. While they are still warm, take a chocolate kiss and press it firmly into the center of each ball. You’ll notice the ball flattens slightly and the chocolate starts to adhere.
6. Set and Cool: Let the cookies sit undisturbed at room temperature for at least 30 minutes. This allows the internal sugars to stabilize and the chocolate to “re-set” so they don’t fall apart when you pick them up.
Expert Baking/Cooking Tips
For the absolute best results, focus on temperature control. The most common mistake in no-bake cereal treats is overheating the sugar (the corn syrup). If the mixture boils, the cookies will turn out rock-hard. Aim for a “just melted” state where the mixture is pourable but not bubbling. Another tip is to work in batches if you are making a double recipe. Because the mixture sets as it cools, the last few cookies can be difficult to roll if you move too slowly. Finally, make sure to use fresh Rice Krispies. A newly opened box ensures that light, airy crunch that contrasts so well with the dense cookie butter.
Holiday and Flavor Variations
These Biscoff Rice Krispie Kisses are incredibly versatile for various holidays. For Christmas, use “Grinch” colored chocolate melts or Peppermint-striped Hershey’s Hugs. For a fall version, you can find “Pumpkin Spice” flavored Biscoff spread in some specialty stores, which pairs beautifully with a dark chocolate kiss. If you want to lean into the Belgian heritage of the cookies, drizzle the finished, set cookies with a bit of melted white chocolate for a professional, striped look. You can also roll the balls in cinnamon sugar before adding the kiss for an extra layer of “Snickerdoodle” inspired flavor.
Serving Suggestions
These treats are best served at room temperature to maintain their chewy texture. They look stunning arranged on a white ceramic platter or a tiered dessert stand. They are excellent companions to a hot cup of espresso or a glass of cold milk. Because they are sturdy, they also make fantastic additions to lunchboxes or as a “thank you” gift tucked into a decorative tin lined with tissue paper.
Storage & Make-Ahead Tips
Biscoff Rice Krispie Kisses store remarkably well. Keep them in an airtight container at room temperature for up to 5 days. If your kitchen is particularly warm, you can store them in the refrigerator, but let them sit out for 10 minutes before eating to soften the Biscoff base. You can also freeze these! Simply place them in a freezer-safe bag with parchment paper between layers; they will stay fresh for up to 2 months.
FAQs
1. Can I use crunchy Biscoff spread?
Yes, you can! It will add an extra layer of crushed cookie texture to the bites. Just be aware that the balls might be slightly more difficult to roll smoothly.
2. My cookies are falling apart; what happened?
This usually happens if the mixture wasn’t warm enough when rolling or if there wasn’t enough “glue” (corn syrup). Make sure to measure the syrup accurately and roll the balls immediately after mixing.
3. Is there a substitute for corn syrup?
Light corn syrup provides the best “set.” You can use brown rice syrup as a 1:1 replacement. Honey works but makes the cookies much softer and stickier.
4. Can I make these vegan?
Yes. Biscoff spread is naturally vegan. Simply use a vegan-certified puffed rice cereal and replace the milk chocolate kiss with a dairy-free chocolate chip or a piece of vegan dark chocolate.
5. How do I keep the chocolate from melting too much?
Wait about 2 minutes after rolling the balls before pressing the kiss in. This allows the base to cool slightly so the kiss stays intact but still sticks.
These Biscoff Rice Krispie Kisses prove that you don’t need a hot oven or a long list of ingredients to create a gourmet-level dessert. With their unique spice profile, satisfying crunch, and classic chocolate finish, they are a guaranteed crowd-pleaser. Give this simple recipe a try today and discover why Biscoff is the world’s favorite cookie spread. Happy “no-baking”!
PrintNo-Bake Biscoff Rice Krispie Kisses

These Biscoff Rice Krispie Kisses are a sophisticated twist on the classic peanut butter blossom. Using creamy cookie butter instead of nut butter, these treats offer a warm, spiced flavor profile that pairs perfectly with the crunch of toasted rice cereal and a smooth milk chocolate center. Best of all, they require zero oven time!
- Prep Time: 10 minutes
- Cook Time: 5 minutes
- Total Time: 15 minutes
- Yield: 32 cookies
- Cuisine: American
Ingredients
Biscoff creamy cookie spread – 1 cup
Light corn syrup – 1/2 cup
Rice Krispies cereal – 3 cups
Milk chocolate kisses (unwrapped) – 32 pieces
Instructions
In a large saucepan, combine the Biscoff cookie spread and corn syrup.
Place the pan over low heat and stir constantly until the mixture is smooth and well blended.
Remove the saucepan from the heat immediately to prevent the sugars from hardening.
Stir in the Rice Krispies cereal, folding gently until every piece is thoroughly coated in the Biscoff mixture.
Using a tablespoon or small cookie scoop, shape the mixture into 1-inch balls.
Place the balls onto a sheet of parchment paper or a silicone baking mat.
Immediately press a milk chocolate kiss into the center of each cookie while they are still warm and tacky.
Allow the cookies to stand at room temperature for about 30 minutes until they are fully set and the chocolate is firm.
Notes
• Ensure you use low heat to melt the Biscoff and syrup; high heat will make the cookies too hard once they cool.
• If the mixture is too sticky to roll, lightly grease your hands with butter or non-stick spray.
• For a festive look, use striped Hershey’s Hugs or dark chocolate kisses.


