
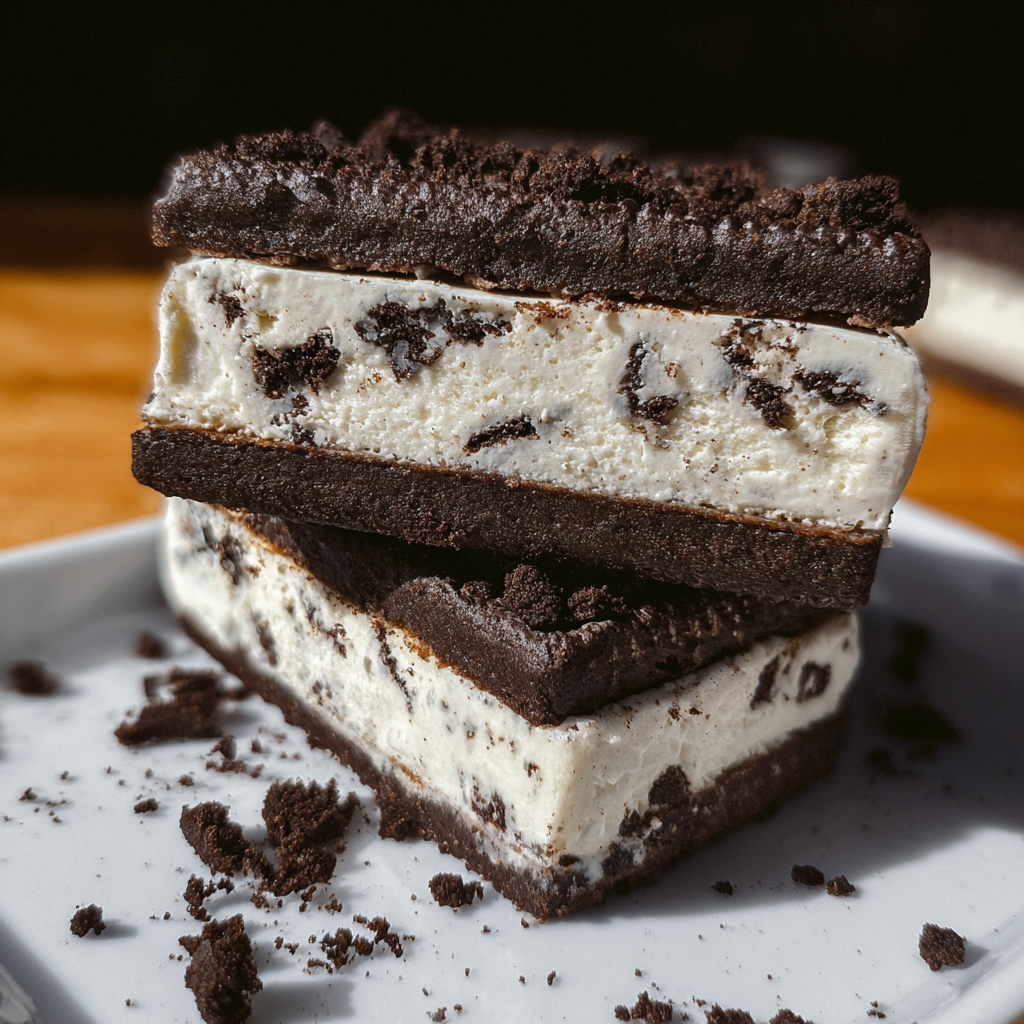
Imagine sinking your teeth into layers of luscious vanilla ice cream, studded with crunchy Oreo chunks, all sandwiched between a rich, buttery Oreo crust. Pure bliss, right? What if I told you this dream dessert requires absolutely no baking and comes together with minimal effort?
That’s exactly what you’ll find with my tried-and-true No-Bake Oreo Ice Cream Sandwich recipe! As Sophie, the recipe developer behind SweetCraftRecipes, I’ve personally tested this recipe more than nine times to perfect every creamy, crumbly layer. It’s a family favorite that has graced countless gatherings at my home, always disappearing faster than I can slice it. Whether you’re looking for the ultimate summer cool-down, a comforting treat for a family get-together, or just a simple, impressive dessert that screams ‘homemade love,’ this recipe delivers. Get ready to whip up a masterpiece that’s as easy to make as it is delightful to eat!
Why This No-Bake Oreo Ice Cream Sandwich Will Be Your New Go-To Dessert
If you’re searching for a dessert that marries convenience with irresistible flavor, look no further. This No-Bake Oreo Ice Cream Sandwich isn’t just a recipe; it’s a solution to your dessert dilemmas, especially when time is tight or the oven is otherwise occupied.
- The Ultimate Comfort-Food Remix: This recipe takes two undisputed champions of the comfort food world – classic cookies and creamy ice cream – and masterfully combines them into one harmonious, irresistible package. It’s a nostalgic nod to childhood favorites, yet sophisticated enough to impress any adult palate.
- Effortless Elegance (No Oven Required!): Forget preheating, hot kitchens, and endless cleanup. This dessert is entirely no-bake, making it a perfect choice for scorching summer days, busy holidays, or simply when you want a show-stopping treat without the fuss. The magic truly happens in your freezer, leaving you free to enjoy your time.
- Crowd-Pleasing & Family-Approved: There’s something universally appealing about Oreos and ice cream. This dessert is a guaranteed hit with everyone, from the pickiest toddlers to the most discerning adults. It’s the kind of treat that elicits oohs and aahs at family gatherings, birthday parties, or just a casual weeknight dinner.
- Customizable & Versatile: While fantastic as is, this Oreo Ice Cream Sandwich is also a blank canvas for your culinary creativity. Want to add a touch of mint? Or perhaps a swirl of caramel? The base recipe is robust enough to handle a myriad of delicious variations, which we’ll explore later!
- Sophie’s Seal of Approval: My commitment to perfection means I’ve personally tested and re-tested this recipe more than nine times. Each iteration was designed to ensure foolproof results, optimal texture, and maximum flavor. You’re getting a recipe that has been refined and perfected through extensive experience, guaranteeing success in your kitchen.
Decoding the Deliciousness: The Key Ingredients
Each ingredient in this No-Bake Oreo Ice Cream Sandwich plays a vital role in creating its iconic texture and flavor profile. Understanding their functions will not only help you troubleshoot but also inspire future variations!
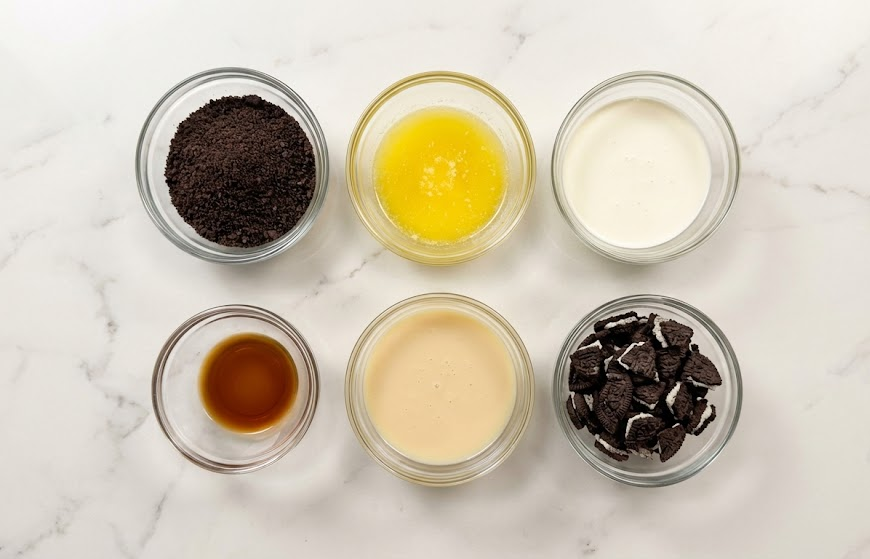
- Oreo Cookies (500g fine crumbs + 100g roughly chopped): The undisputed star of our show! We utilize Oreos in two distinct ways to maximize their impact. Finely crushed, they form the sturdy, rich, chocolatey base and top crust, providing that essential crunch and buttery depth. The roughly chopped Oreos, on the other hand, are folded into the ice cream layer, delivering delightful textural surprises and reinforcing that classic cookies-and-cream experience in every single bite.
- Unsalted Butter (150g, melted): This is the binding agent that transforms our crushed Oreos into a cohesive, sliceable crust. Using unsalted butter gives you complete control over the overall saltiness of your dessert. This ensures a perfectly balanced sweet and savory note without any unexpected saltiness, letting the chocolate and cream truly shine.
- Heavy Cream (500g): This is the backbone of our luxurious “no-churn” ice cream. When whipped to stiff peaks, heavy cream incorporates air, creating an incredibly light, airy, and creamy base that wonderfully mimics the texture of traditional ice cream, all without the need for a specialized ice cream maker.
- Vanilla Extract (1 Tbsp): A deceptively simple yet crucial flavor enhancer. High-quality vanilla extract elevates the entire dessert, adding a warm, aromatic depth that beautifully complements the rich chocolate of the Oreos and the sweet creaminess of the condensed milk. Don’t skimp on the good stuff here!
- Sweetened Condensed Milk (150g): The true secret weapon for our no-churn ice cream. This thick, sweet milk provides both the necessary sweetness and, more importantly, an incredibly smooth, decadent, and scoopable texture. Its high sugar content acts as a natural anti-freeze, preventing the ice cream from becoming rock-hard and icy in the freezer, ensuring a perfectly creamy bite every time.
The Crust Foundation: Building Your Oreo Base
The base and top layers of this ice cream sandwich are critical for structure and flavor.
- Crushing Oreos: You’ll need fine crumbs for the crust. A food processor is the quickest and easiest method, blitzing the cookies (filling included!) into an even, sandy texture. If you don’t have one, place Oreos in a sturdy Ziploc bag, remove the air, and use a rolling pin or the bottom of a heavy pan to crush them. The goal is fine, uniform crumbs, not chunky pieces.
- Mixing with Butter: Melt your unsalted butter gently and pour it over the fine Oreo crumbs. Mix thoroughly until every crumb is moistened and resembles wet sand. This ensures a cohesive crust that won’t crumble when sliced.
- Pressing into Pan: Transfer half of the buttered Oreo mixture into your parchment-lined 8-inch square pan. Use the bottom of a measuring cup or a flat-bottomed glass to press the crumbs down firmly and evenly across the bottom. The firmer you press, the sturdier your crust will be.
- Initial Freeze: Pop the pan with the pressed crust into the freezer while you prepare the ice cream layer. This initial chill helps the crust set, preventing it from mixing with the ice cream layer when you pour it in. Remember to cover the remaining Oreo mixture with plastic wrap and keep it in a warm area so it doesn’t harden.
The Creamy Core: Crafting Your No-Churn Ice Cream
This is where the magic truly comes to life, creating that rich, creamy center.
- Whipping Cream to Stiff Peaks: In a large, very clean mixing bowl (preferably chilled), combine the cold heavy cream and vanilla extract. Beat with an electric mixer on high speed until stiff peaks form. The cream should hold its shape firmly when you lift the beaters. This step is crucial for the light, airy texture of your no-churn ice cream.
- Folding in Condensed Milk: Slowly pour the sweetened condensed milk into the whipped cream. Using a rubber spatula, gently fold the mixture until it’s just combined, ensuring no streaks of condensed milk remain. Be careful not to deflate the whipped cream.
- Incorporating Chopped Oreos: Finally, gently fold in the roughly chopped Oreos. Distribute them evenly throughout the ice cream mixture to ensure every bite has a delightful crunch.
The Grand Assembly & Final Chill
The final layering is simple, but the subsequent freezing time is non-negotiable for success.
- Layering: Carefully pour the prepared ice cream mixture over your chilled Oreo crust in the pan. Use a spatula to smooth the top into an even layer.
- Second Crust: Gently spread the remaining Oreo crumb mixture evenly over the top of the ice cream layer. Again, use the bottom of a measuring cup to gently press the crumbs into the ice cream. Be gentle to avoid pushing the crumbs too deeply into the ice cream, but firm enough to create a set top crust.
- The Overnight Freeze: Cover the pan tightly with plastic wrap and return it to the freezer. This is the most crucial step – it must freeze overnight (at least 12-14 hours) for the ice cream sandwich to become fully firm and sliceable. Rushing this step will result in a messy, soft dessert.
The full, printable recipe card is below!
Expert Tips & Tricks from SweetCraftRecipes
Having personally perfected this recipe over many trials, I’ve gathered some invaluable tips to ensure your No-Bake Oreo Ice Cream Sandwich turns out flawlessly every single time.
- The Parchment Paper Handle Method: This simple trick is a game-changer when it comes to getting your perfectly frozen ice cream sandwich out of the pan. When lining your 8-inch square pan, leave a generous overhang of parchment paper on two opposite sides – these will act as convenient “handles” to gently lift the entire slab out of the pan once it’s frozen solid. This prevents sticking and makes removal effortless.
- Achieving the Perfect Oreo Crumbs: For both the base and top crust, achieving fine, consistent crumbs is paramount. A food processor makes quick work of this, blitzing the whole Oreos (creamy filling included) into a uniform, sandy texture. If you don’t have a food processor, a sturdy Ziploc bag and a rolling pin will do the trick – just ensure you crush them thoroughly until no large chunks remain. The finer the crumb, the more cohesive and less crumbly your crust will be, ensuring cleaner, more elegant slices.
- Whipping Cream to Stiff Peaks is Key: This is where the magic of no-churn ice cream truly happens! For the best results, use very cold heavy cream and a chilled mixing bowl and beaters. Whip the cream with vanilla extract on high speed until it forms stiff peaks – meaning the cream will hold its shape firmly when you lift the whisk. Be careful not to over-whip, which can lead to a grainy texture. This airiness is what gives your ice cream its light, creamy consistency.
- The Gentle Fold for Airiness: When incorporating the sweetened condensed milk and the chopped Oreos into your whipped cream, use a rubber spatula and a gentle, folding motion. You want to maintain as much of the air you’ve whipped into the cream as possible. Over-mixing or beating too vigorously at this stage can deflate the cream, resulting in a denser, less airy, and potentially icier ice cream layer.
- Patience is a Virtue (Especially with Freezing): The overnight freeze isn’t just a suggestion; it’s a crucial requirement for a truly firm, sliceable ice cream sandwich. Rushing this step will inevitably result in a messy, soft dessert that’s difficult to cut and serve neatly. Plan ahead and allow the full 12-14 hours (or more) in the freezer. Trust me, the wait is worth it for perfectly set layers!
- Clean Slices Every Time: To get those beautiful, neat, picture-perfect slices, a simple trick is to run a sharp, thin knife under hot water for a few seconds, wipe it dry, and then make your cut. Repeat this process for each slice. The warm blade glides through the frozen dessert with ease, preventing sticking and crumbling. As an added tip from my notes, re-freezing individual slices for a few hours after cutting helps them re-solidify around the edges, maintaining their pristine shape.
Common Pitfalls and How to Sidestep Them
Even simple recipes can present challenges. Here are some common issues you might encounter with this No-Bake Oreo Ice Cream Sandwich and how to expertly avoid them:
- Crust is too crumbly or falls apart:
- Cause: Not enough melted butter, or the crumbs weren’t pressed firmly enough into the pan.
- Solution: Ensure every Oreo crumb is thoroughly coated with melted butter before pressing. When pressing, use firm, even pressure with the bottom of a measuring cup or glass. You want a compact, sturdy layer.
- Ice cream layer is too icy or hard:
- Cause: The heavy cream wasn’t whipped to stiff peaks, or the sweetened condensed milk wasn’t adequately incorporated (or perhaps you tried to substitute it).
- Solution: Always use very cold heavy cream and whip it until it holds firm peaks. The sweetened condensed milk is essential for preventing ice crystal formation and providing that creamy texture – do not substitute it with regular milk or sugar.
- Difficulty removing from the pan:
- Cause: Not enough parchment paper overhang to create “handles,” or trying to remove it directly from the freezer without letting it sit for a moment.
- Solution: Always use plenty of parchment paper with a generous overhang on two sides. If it’s still stubborn, let the pan sit at room temperature for just 5-10 minutes before attempting to lift it out using the parchment paper handles. A thin knife run around the edges can also help.
- Messy, uneven slices:
- Cause: Not freezing long enough, or using a room-temperature knife.
- Solution: Ensure an overnight freeze is completed. For perfectly clean slices, dip a sharp, thin knife in hot water, wipe it dry, and make each cut. Clean and re-warm the knife between slices.
Endless Possibilities: Flavor Variations & Customizations
One of the joys of this No-Bake Oreo Ice Cream Sandwich is its incredible versatility. While delicious as is, it’s also a fantastic canvas for your creativity! Here are some ideas to inspire your next batch:
- Different Oreo Flavors: Don’t limit yourself to classic Oreos! Try Mint Oreos for a refreshing twist, Peanut Butter Oreos for an extra nutty layer, or even Golden Oreos for a vanilla-forward experience. For another incredible peanut butter and cookie combination, check out our Peanut Butter Nutella Cookie Recipe.
- Adding Mix-ins: Before the final freeze, fold in additional goodies to the ice cream layer. Think mini chocolate chips, chopped nuts (pecans, walnuts), sprinkles, or even small chunks of your favorite candy bars. For ideas on how to incorporate delicious surprises, take a look at our Stuffed Red Velvet Cookies.
- Boozy Twist (for adults only!): For a sophisticated dessert, add a splash (1-2 tablespoons) of your favorite liqueur to the heavy cream mixture before folding in the condensed milk. Kahlua, Irish cream, or a raspberry liqueur could be delicious choices.
- White Chocolate Dreams: If you’re a fan of white chocolate, fold white chocolate chunks or chips into the ice cream base. The creamy sweetness pairs wonderfully with the Oreos. You might also love our White Chocolate Stuffed Cookies for more white chocolate inspiration.
- Fruit Infusion: For a hint of tartness and freshness, consider folding in very finely diced fresh berries (such as raspberries or strawberries). Ensure they are patted very dry to avoid introducing excess moisture and ice crystals. A swirl of berry compote could also work beautifully.
- Caramel or Fudge Swirl: Drizzle a layer of caramel sauce or hot fudge over the first Oreo crust before adding the ice cream, or swirl it directly into the ice cream mixture for ribbons of gooey goodness.
Serving Suggestions & Picture-Perfect Presentation
Making your No-Bake Oreo Ice Cream Sandwich look as good as it tastes is easy with these simple presentation ideas:
- Individual Slices: The classic presentation is a perfectly cut square or rectangle. Serve each slice on a plate, perhaps with a light drizzle of chocolate syrup, a dollop of whipped cream, or a sprinkle of extra Oreo crumbs for garnish.
- Mini Bites: For parties or a dessert buffet, cut the sandwich into smaller squares or even bite-sized cubes. Arrange them artfully on a platter.
- Dessert Bar: Offer a selection of toppings alongside your ice cream sandwich, allowing guests to customize their treat. Think hot fudge, caramel sauce, whipped cream, sprinkles, or extra chopped Oreos.
- Garnish with Flair: A sprig of fresh mint, a dusting of cocoa powder, or a single whole Oreo on the side of the plate can elevate the visual appeal of each serving.
Storage & Make-Ahead Magic
This recipe is not only easy to make but also incredibly convenient for meal prep and entertaining.
- Storage: Once your Oreo Ice Cream Sandwich is fully frozen and sliced, wrap individual slices tightly in plastic wrap. Then, place these wrapped slices in an airtight freezer-safe container or a heavy-duty freezer bag. This double layer of protection is key to preventing freezer burn and preserving its fresh taste and texture.
- Shelf Life: When properly stored as described above, your no-bake treat will last beautifully for up to 2-3 weeks in the freezer. However, for the absolute best creamy texture and optimal flavor, I recommend enjoying them within 1 week of preparation.
- Make-Ahead: This recipe is a dream for planning ahead! You can assemble the entire dessert several days, or even a week, in advance of when you plan to serve it. Simply keep it tightly wrapped and frozen until the big day. When it’s time to serve, just remember to allow the pan to sit at room temperature for a few minutes before cutting to make slicing easier.
Understanding the Goodness: Nutritional Insights
While this No-Bake Oreo Ice Cream Sandwich is an indulgent treat designed for pure enjoyment, it’s always helpful to be aware of its nutritional breakdown. Each generous slice (approximately 1/8th of the pan) packs about 760 calories, making it a hearty dessert. It contains 54g of fat, of which 29g is saturated fat, alongside 65g of carbohydrates (with 43g of sugar). You’ll also find 7g of protein and 2g of fiber.
Remember, this is a decadent dessert intended for enjoyment and sharing, perfect for special occasions, celebrations, or when you simply crave something truly satisfying. As with all treats, portion control and balancing with other healthy choices throughout your diet are always key!
Frequently Asked Questions (FAQs)
How do I prevent my Oreo ice cream sandwich from sticking to the pan?
Lining your 8-inch square pan with parchment paper, ensuring the edges hang over the sides, creates convenient ‘handles’ for easy removal. Once frozen, you can gently lift the entire slab out using these handles. You can also carefully run a thin, sharp knife around the edges before lifting to help loosen it.
Can I make this Oreo Ice Cream Sandwich ahead of time?
Absolutely! This recipe is ideal for making ahead. Since it requires an overnight freeze, assembling it the day before, or even several days in advance, works perfectly. Just ensure it’s tightly wrapped in plastic wrap and then foil to prevent freezer burn.
What are some variations for this no-bake Oreo dessert?
Get creative! You can add mini chocolate chips, chopped nuts, a drizzle of caramel or fudge sauce between layers, use different flavored Oreos (like mint or peanut butter), or even swirl a layer of peanut butter into the ice cream base for added flavor.
How long does the Oreo Ice Cream Sandwich last in the freezer?
When properly wrapped in plastic wrap and then foil, this no-bake treat can last for up to 2-3 weeks in the freezer. For the best creamy texture and flavor, I recommend consuming it within 1 week.
Why is it important to crush the Oreos finely for the crust?
Crushing the Oreos finely creates a more uniform, flat, and stable crust for your ice cream sandwich. This ensures each slice holds together better, has a consistent texture, and prevents the crust from crumbling excessively when cut and served.
Can I use low-fat cream or milk substitutes for this recipe?
For the best creamy texture and to ensure the heavy cream whips up properly to stiff peaks, full-fat heavy cream is highly recommended. Low-fat alternatives may not achieve the desired volume or firmness, resulting in a less airy and potentially icier ice cream layer. Similarly, sweetened condensed milk is crucial for both sweetness and texture, so substitutes are not advised.
Your New Favorite No-Bake Treat Awaits!
There you have it – the ultimate No-Bake Oreo Ice Cream Sandwich recipe! From its irresistible creamy-crunchy texture to its incredible ease of preparation, this dessert is truly a winner in every aspect. It’s a nostalgic nod to classic comfort foods, elevated by its simple elegance and undeniable deliciousness.
I’ve poured my heart (and many, many Oreos!) into perfecting this recipe through extensive testing, and I’m confident it will become a cherished favorite in your home, just as it is in mine. So, why wait? Gather your ingredients, clear some space in your freezer, and prepare to delight your family and friends with this show-stopping, stress-free dessert. Don’t forget to share your sweet creations with us on social media – I can’t wait to see them!
PrintNo-Bake Oreo Ice Cream Sandwich

A delightful combination of creamy, crunchy and chocolatey goodness in every bite.
- Prep Time: 20
- Total Time: 14h 20m
- Yield: 8 Slices
- Category: Dessert
- Method: No-Bake
- Cuisine: American
Ingredients
500g Oreos (Fine Crumbs)
150g Unsalted Butter (Melted)
500g Heavy Cream
1 Tbsp Vanilla Extract
150g Sweetened Condensed Milk
100g Oreos (Roughly Chopped)
Instructions
1. Line an 8-inch square pan with parchment paper making sure the edges hang over the side for easy removal. Set aside.
2. Using a food processor or plastic Ziplock bag and rolling pin. blitz/crush the Oreos until they become a fine crumb.
3. Transfer the Oreo crumbs to a medium bowl. Add the melted butter and mix until well combined.
4. Transfer half of the Oreo mixture to your prepared pan and using a measuring cup, flatten the crumb to evenly layer the bottom of the pan.
5. Place in the freezer while you make the ice cream layer.
6. Cover the remaining Oreo mixture with plastic wrap and keep in a warm area.
7. In a large mixing bowl, beat together the heavy cream and vanilla until it thickens and stiff peaks appear.
8. Slowly pour the condensed milk in while you fold the mixture with a spatula until there is no streaks.
9. Fold in the roughly chopped Oreos until evenly combined.
10. Pour the ice cream mixture on top of your Oreo base and smooth over using a spatula.
11. Freeze for 2 hours or until the ice cream is firm to touch.
12. Gently spread the remaining Oreo mixture on top and evenly spread to cover the ice cream. Using a measuring cup, gently press the crust into a flat even layer.
13. Freeze again overnight.
14. Once fully frozen, remove from the pan (You may need to carefully run a knife around the edges). Cut into as many pieces as you like.
15. Enjoy!
Notes
Pan Removal: Since you need to freeze the ice cream sandwich overnight this does result in it being a bit difficult to remove from the pan. I recommend when lining your tray, leave the parchment paper to hang over the sides so you have handles to help remove the sandwich. Also very carefully using a small knife to run around the edges to help loosen the sides from the frozen ice cream, this should help to remove the sandwich easily.
Once Sliced: Once you have removed the sandwich from the pan and sliced it into little ice cream sandwiches, I recommend putting them back in the freezer for a few more hours to help re-solidify the edges as they do get quite soft when you cut the sandwich up.
Crushed Oreos: I recommend crushing your Oreos quite fine as it creates a flatter and more even sandwich crust.


