
When the temperature rises and the summer sun starts beating down, the last thing anyone wants to do is turn on a hot oven. That is where the magic of the Ice Cream Sandwich Cake comes into play. This recipe is a legendary “cheat code” in the dessert world, offering the decadent, layered look of a gourmet ice cream cake with about 15 minutes of actual effort. Whether you are hosting a neighborhood pool party, a child’s birthday bash, or just need a sweet treat to keep in the freezer for late-night cravings, this Oreo-packed delight is the answer. It combines the nostalgic charm of classic ice cream sandwiches with the rich, crunchy texture of America’s favorite cookie. Prepare to become the hero of the kitchen without breaking a sweat!

Why You’ll Love This Recipe
There is a reason this specific dessert goes viral every single summer. First and foremost, it is entirely no-bake, meaning your kitchen stays cool while you “cook.” Second, the ingredient list is incredibly short; with just four main items, you can pull this together on a whim or a budget. It is also a highly customizable “template” recipe—while we love the Oreo and fudge combination, the possibilities for variation are endless. Most importantly, the texture is phenomenal. As the cake sits in the freezer, the whipped topping and fudge meld with the ice cream sandwiches to create a soft, sliceable consistency that tastes far more complex than the sum of its parts.
What Is Ice Cream Sandwich Cake?
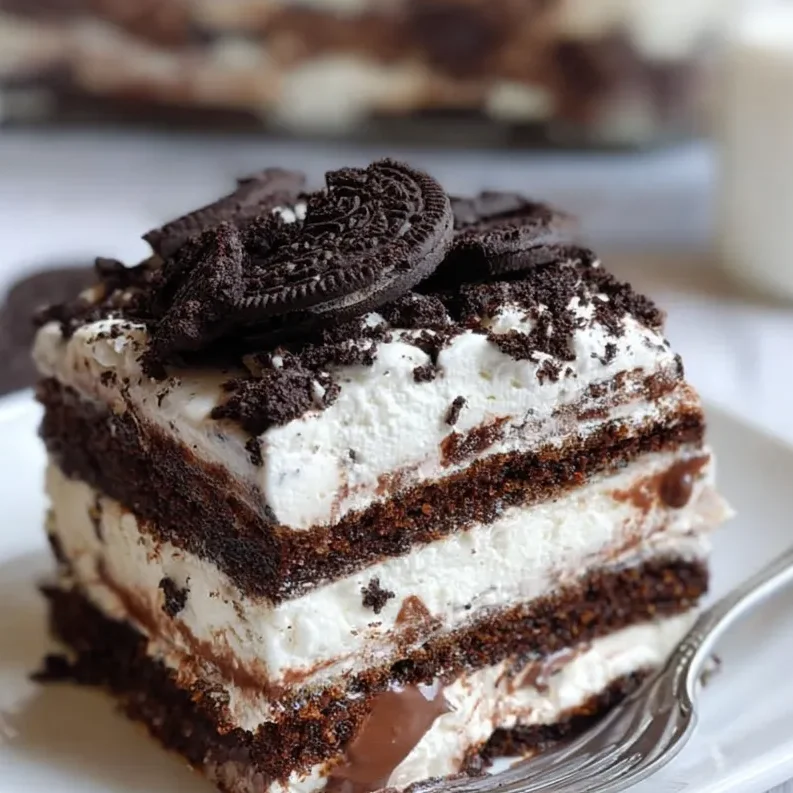
An Ice Cream Sandwich Cake is a layered frozen dessert that uses pre-made ice cream sandwiches as the “cake” layers. Instead of baking sponges and churning ice cream from scratch, you utilize the structural integrity of the sandwiches to build height. In the culinary world, this is often referred to as an “icebox cake,” a tradition dating back to the early 20th century when home cooks used cookies and cream to create chilled desserts. By layering the sandwiches with whipped topping (like Cool Whip), chocolate sauce, and cookie crumbles, you create a beautiful striped effect when the cake is sliced, mimicking the appearance of a professional bakery creation.
Ingredients Overview
To achieve the perfect balance of creaminess and crunch, you will need the following components. Each plays a vital role in the final flavor profile:
- Ice Cream Sandwiches (24 count): These act as your primary structure. Standard rectangular sandwiches work best for a 9×13 pan. You can use vanilla, Neapolitan, or even mint chip sandwiches if you want to get creative.
- Oreo Cookies (12 count): These provide the much-needed textural contrast. When crushed, they offer a chocolatey “snap” that offsets the soft cream. You can use a food processor for fine crumbs or a rolling pin for larger, rustic chunks.
- Hot Fudge Topping (12 oz jar): Do not confuse this with standard chocolate syrup. Hot fudge is thicker and richer, providing a fudgy ribbon that stays somewhat soft even when frozen. This prevents the cake from becoming a solid block of ice.
- Whipped Topping (8 oz): Most home cooks prefer the stabilized nature of store-bought whipped topping (thawed) because it holds its shape perfectly in the freezer. However, you can certainly use a very stiffly peaked homemade whipped cream if you prefer a more dairy-forward taste.
Ingredient Substitutions & Tips
One of the best things about this recipe is its flexibility. If you want a different flavor profile, swap the Oreos for crushed Reese’s Peanut Butter Cups or chocolate chip cookies. If you aren’t a fan of hot fudge, caramel sauce or a strawberry glaze works wonders. For those looking for a lighter option, you can use low-fat ice cream sandwiches and “Lite” whipped topping. If you’re catering to a gluten-free crowd, look for GF ice cream sandwiches and use gluten-free chocolate sandwich cookies. The key is to maintain the ratio of “creamy” to “crunchy” to ensure every bite is satisfying.
Step-by-Step Instructions
Follow these detailed steps to ensure your cake layers are perfectly even and stable:
- Prepare Your Station: Before you start, ensure your whipped topping is fully thawed and your hot fudge is at room temperature. If the fudge is too stiff, microwave it for 10-15 seconds just until it is pourable but not hot.
- The Base Layer: Line a 9×13 inch glass or ceramic baking dish with a single layer of ice cream sandwiches. You will likely fit about 12 sandwiches per layer. If there are gaps at the edges, use a sharp knife to cut a sandwich into smaller pieces to fill the voids.
- The First Cream Layer: Use an offset spatula to spread exactly half of the whipped topping over the sandwiches. Aim for an even thickness so the cake remains level.
- The Flavor Ribbon: Drizzle half of the hot fudge sauce over the whipped topping. I like to use a zigzag pattern to ensure every slice gets a bit of chocolate.
- The Crunch Factor: Sprinkle half of your crushed Oreos over the fudge. This “traps” the crumbs between the layers, keeping them crunchy.
- The Second Layer: Repeat the process. Place the remaining 12 ice cream sandwiches on top, followed by the remaining whipped topping, the rest of the fudge, and a final generous topping of Oreo crumbs.
- Setting the Cake: Cover the pan with plastic wrap. Place it in the coldest part of your freezer for at least 30 minutes. For the best “cake-like” texture, 2 to 4 hours is ideal, as it allows the fudge to set.
- The Reveal: When ready to serve, let the pan sit on the counter for 10 minutes. This makes slicing much easier and prevents the sandwiches from being too hard to bite into.
Expert Baking/Cooking Tips
For a truly professional look, try these “pro” tips. First, line your baking dish with parchment paper or aluminum foil, leaving an overhang on the sides. Once the cake is fully frozen, you can lift the entire cake out of the pan to slice it on a cutting board, giving you clean, visible layers. Second, don’t over-crush your Oreos; having a mix of “dust” and pea-sized chunks provides the best mouthfeel. Finally, always wipe your knife with a warm, damp cloth between every single cut. This prevents the whipped topping from smearing over the dark Oreo layers, keeping your presentation sharp and clean.
Variation Ideas for Every Occasion
While the Oreo version is a classic, you can easily adapt this for holidays. For a Peanut Butter Lovers version, use peanut butter ice cream sandwiches and drizzle melted peanut butter along with the fudge. For a Birthday Party theme, use Funfetti ice cream sandwiches and top with rainbow sprinkles and maraschino cherries. You can even make a Mint Chocolate Chip version by using mint sandwiches and adding a drop of peppermint extract to the whipped topping. The 9×13 pan makes it easy to feed a crowd of 12 to 15 people, making it the ultimate party hack.
Serving Suggestions
Serve this cake on chilled plates to prevent it from melting too quickly. It pairs beautifully with a side of fresh berries, like raspberries or strawberries, which cut through the richness of the chocolate. For a truly decadent experience, serve each slice with an extra dollop of whipped cream and a glass of cold milk. It’s a casual dessert, so feel free to serve it straight from the pan at a BBQ or on a fancy platter for a dinner party.
Storage & Make-Ahead Tips
This cake is the king of “make-ahead” desserts. You can assemble it up to 3 days in advance; just ensure it is tightly wrapped in plastic wrap and then a layer of foil to prevent freezer burn. It can stay in the freezer for up to 7 days, though the cookies will eventually soften over time. Avoid storing it near the freezer door where temperature fluctuations occur, as this can cause ice crystals to form on the whipped topping.
FAQs
Q: Can I use homemade whipped cream?
A: Yes! However, you must beat it to very stiff peaks. Note that real whipped cream melts faster than stabilized whipped topping, so serve the cake immediately after taking it out of the freezer.
Q: How do I get clean slices?
A: The “warm knife” method is best. Dip a large chef’s knife into a tall glass of hot water, wipe it dry, and make your cut. Repeat this for every single slice.
Q: What size pan should I use?
A: A standard 9×13 inch pan is perfect for 24 ice cream sandwiches (two layers of 12). If you have a smaller pan, you can halve the recipe using a 8×8 inch square pan.
Q: Can I make this dairy-free?
A: Absolutely! Use dairy-free ice cream sandwiches (like those made with almond or coconut milk), a vegan whipped topping (like CocoWhip), and ensure your chocolate sauce is vegan-friendly.
Q: Can I refreeze the cake?
A: You can, but it is best to only take out what you plan to eat. Constant thawing and refreezing can ruin the texture of the ice cream and cause the whipped topping to deflate.
Final Thoughts
The Oreo Ice Cream Sandwich Cake is proof that you don’t need a culinary degree or a whole day in the kitchen to create a show-stopping dessert. Its simplicity is its strength, allowing the classic flavors of chocolate and vanilla to shine in a cool, refreshing format. The next time you’re asked to bring a dish to a gathering, reach for these four simple ingredients and watch how quickly this cake disappears!


