
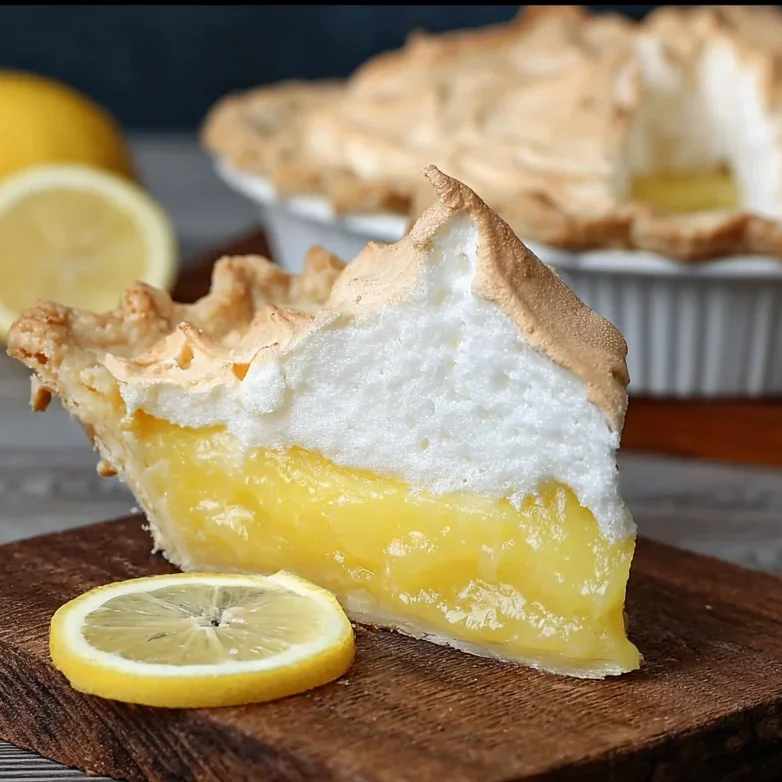
There is something profoundly nostalgic about a homemade lemon pie. While many modern versions rely on heavy creams or instant puddings, the Old-Fashioned Lemon Custard Pie is a masterclass in simplicity and technique. This recipe captures the essence of a bygone era—where the brightness of citrus is balanced by a silky, translucent custard and a crust so flaky it practically shatters at the touch of a fork. If you are looking for a dessert that offers a sophisticated sweet-tart profile without being overly heavy, this vintage gem is your answer.
What truly sets this particular recipe apart isn’t just the filling; it’s the unique finishing technique for the top crust. By brushing the pastry with a combination of melted shortening and milk, followed by a light dusting of flour, you achieve a professional, matte-golden finish that you simply won’t find in grocery store bakeries.
Why You’ll Love This Recipe
You will fall in love with this lemon pie because it celebrates the pure, unadulterated flavor of fresh lemons. Unlike a lemon meringue pie, which can sometimes be cloyingly sweet, or a lemon tart which can be overly dense, this custard version has a light, almost jelly-like clarity that is incredibly refreshing.
The texture is the star here. The cornstarch-based custard provides a clean mouthfeel, while the double crust adds a savory, buttery contrast. It is also a surprisingly approachable recipe for intermediate bakers. There are no complicated meringues to weep or curd to break—just a straightforward stovetop-to-oven process that yields spectacular results every single time.
What Is Old-Fashioned Lemon Custard Pie?
This is a classic “cooked-filling” fruit pie, a staple in American mid-century cookbooks. Unlike a custard pie made primarily with milk or cream (like a pumpkin or egg custard pie), this version uses a water and cornstarch base. This results in a “clear” filling that highlights the vibrant yellow of the lemon zest and the translucency of the citrus juice.
Historically, these pies were popular because they didn’t require expensive dairy products to achieve a rich consistency. Instead, the magic happens through the gelatinization of cornstarch and the gentle thickening power of slightly beaten eggs. The result is a dessert that is bright, acidic, and perfectly set, encased in a traditional double-crust pastry.
Ingredients Overview
To create the perfect lemon custard pie, you need high-quality, simple ingredients. Each component plays a specific role in the chemistry of the bake:
- Cornstarch & Water: This forms the “slurry” that thickens the filling. Using boiling water ensures the cornstarch hydrates quickly, creating that signature clear appearance.
- Granulated Sugar: 1.5 cups may seem like a lot, but it is necessary to balance the high acidity of the lemons.
- Fresh Lemon Rind (Zest): This is where the essential oils live. Use a microplane to get just the yellow part, avoiding the bitter white pith.
- Butter: Just one tablespoon adds a silky mouthfeel and a hint of richness to the filling.
- Eggs: These provide structure and color. They turn the lemon syrup into a stable custard.
- Fresh Lemon Juice: You will need about two large lemons. Fresh juice is non-negotiable here; bottled juice lacks the bright top notes required for an authentic taste.
- The Crust Finish: Melted shortening, milk, and a dusting of flour. This trio creates a unique “bakery-style” crust that is visually stunning and extra crisp.
Ingredient Substitutions & Tips
While the original recipe is perfection, you can make a few adjustments based on what you have in your pantry. If you don’t have shortening for the top crust, you can substitute melted butter, though the texture will be slightly different—butter provides more flavor, but shortening provides that classic “shatter” texture.
For the citrus, if you find yourself short on lemons, you can do a “Citrus Medley” pie by using a mix of lemon and lime juice. However, I recommend sticking to the 1/4 cup total measurement to maintain the liquid-to-starch ratio. For the pastry, while homemade is always best, a high-quality store-bought refrigerated double crust works perfectly well for a time-saving hack.
Step-by-Step Instructions
1. Preparing the Filling Base
Start by preheating your oven to 425°F. In a medium saucepan, whisk together 1/4 cup cornstarch with 1/4 cup of room temperature water until smooth. Gradually whisk in 1-1/2 cups of boiling water. Place the pan over medium heat and stir constantly. It is vital to keep stirring to prevent lumps. Continue cooking until the mixture transitions from cloudy to thick and clear.
2. Adding the Flavor
Once the mixture is thick, remove it from the heat. Stir in the sugar, lemon zest, and butter. The heat from the mixture will melt the butter and help the sugar dissolve. At this stage, you must let the mixture cool for about 10-15 minutes. If you add the eggs while it is boiling hot, you will end up with scrambled eggs in your pie!
3. Tempering and Filling
Once slightly cooled, stir in the two slightly beaten eggs and the fresh lemon juice. Whisk until the color is uniform. Pour this vibrant yellow mixture into your bottom unbaked pie shell.
4. The Signature Crust
Place the top crust over the filling and seal the edges tightly (crimp them with your fingers or a fork). Brush the entire top crust with a mixture of melted shortening and milk. Finally, use a sifter or your fingers to lightly sprinkle a thin layer of flour over the top. Cut several vents in the center to allow steam to escape.
5. The Two-Stage Bake
Bake at 425°F for exactly 10 minutes. This high heat sets the pastry. Then, reduce the temperature to 375°F and bake for an additional 30 minutes. The top should be a beautiful matte golden brown.
Expert Baking Tips
- The “Clear” Rule: When cooking the cornstarch and water, don’t stop too early. The mixture must look like a thick, clear gel. If it’s still opaque, the pie won’t set properly.
- Zest First, Juice Second: Always zest your lemons before you cut them to juice them. It is nearly impossible to zest a squeezed lemon half!
- Venting is Key: Because this filling is high in moisture, it creates a lot of steam. Make sure your vents are large enough; otherwise, the bottom crust might become soggy.
- The Flour Dust: Don’t overdo the flour on the top crust. It should look like a light dusting of snow, not a thick paste. This creates a rustic, artisan look.
The Secret to the Perfect Flaky Top Crust
The most frequent question I get about this recipe is regarding the shortening and flour on the top crust. Most modern recipes call for an egg wash, which gives a shiny, dark finish. However, the shortening-milk-flour method is an old baker’s secret.
The shortening provides a pure fat layer that prevents the milk from soaking into the dough too quickly. The milk provides just enough moisture for the flour to adhere, and as the pie bakes, the flour toasted against the fat creates an incredibly delicate, “dusty” crunch that is characteristic of high-end vintage pastries. It mimics the look of a professional deck oven bake and provides a wonderful textural contrast to the silky lemon interior.
Serving Suggestions
This pie is best served at room temperature or slightly chilled. To get the cleanest slices, ensure the pie has cooled for at least two to three hours.
For a true “blue ribbon” experience, serve a slice with a dollop of unsweetened whipped cream to balance the tartness. If you want to keep it simple, a few fresh raspberries on the side add a pop of color and a complementary berry tartness that pairs beautifully with the lemon. It is the perfect conclusion to a summer barbecue or a heavy holiday meal.
Storage & Make-Ahead Tips
Storage: Because this pie contains eggs, it should be stored in the refrigerator. Cover it loosely with plastic wrap or foil once it has cooled completely. It will stay fresh and delicious for up to 3-4 days.
Make-Ahead: You can prepare the pie crust dough up to two days in advance. However, I do not recommend making the filling ahead of time. It is best to cook the filling and bake the pie in one session to ensure the cornstarch sets correctly within the pastry.
FAQs
1. Can I use bottled lemon juice?
While you can, I strongly advise against it. Bottled juice often has a metallic aftertaste and lacks the vibrant acidity of fresh lemons, which is the heart of this recipe.
2. Why is my filling runny?
This usually happens if the cornstarch and water mixture wasn’t cooked long enough to reach the “clear” stage, or if the pie wasn’t allowed to cool completely before slicing. The cooling period is when the custard fully sets.
3. Does the bottom crust need to be blind-baked?
No, this recipe is designed to be baked from raw. The high initial heat (425°F) helps sear the bottom crust to prevent sogginess.
4. Can I freeze this lemon pie?
Custard-based pies generally do not freeze well, as the cornstarch can break down and become watery upon thawing. It is best enjoyed fresh.
5. How do I know when the pie is done?
The crust should be golden brown, and the filling should have a very slight jiggle in the center (it will firm up as it cools).
The Old-Fashioned Lemon Custard Pie is a reminder that sometimes the best recipes are the ones that have stood the test of time. With its bright, citrusy heart and its uniquely finished crust, it is a dessert that impresses without trying too hard. Whether you’re a seasoned baker or a beginner, this recipe offers a rewarding experience and a slice of pure, zesty sunshine. Give it a try for your next gathering—your guests will be asking for the “secret” to that incredible crust!
PrintOld Fashioned Lemon Custard Pie
A stunningly bright and zesty old-fashioned lemon custard pie. This heirloom recipe uses a unique topping method—brushing the crust with shortening, milk, and a dusting of flour—to create a signature professional finish.
Ingredients
1/4 cup cornstarch
1–1/2 cups boiling water
1–1/2 cups sugar
2 tablespoons grated lemon rind
1 tablespoon butter
2 eggs, slightly beaten
1/4 cup lemon juice (about 2 lemons)
Pastry for a double crust 9-inch pie
1–1/2 to 2 tablespoons shortening, melted, to brush top crust
1–1/2 to 2 tablespoons milk, to brush crust
Sprinkling of flour; to brush top crust
Instructions
1. Preheat oven to 425°F.
2. In a saucepan, blend cornstarch and 1/4 cup of water. Add boiling water and cook over medium heat, stirring constantly, until thick and clear.
3. Add sugar, lemon zest, and butter. Set aside to cool slightly. Stir in eggs and lemon juice.
4. Pour into unbaked pie shell. Cover with top crust, seal edges, then brush with shortening and milk.
5. Lightly sprinkle flour over the entire top crust. Using a sharp knife, cut vents into crust.
6. Bake for 10 minutes, then reduce heat to 375°F. Bake for 30 minutes more.
7. Transfer to cooling rack for at least 2 hours before serving.
Notes
Ensure the cornstarch mixture is completely clear before adding sugar.
Cool the base slightly before adding eggs to prevent scrambling.
For best results, use fresh lemons rather than bottled juice.


