
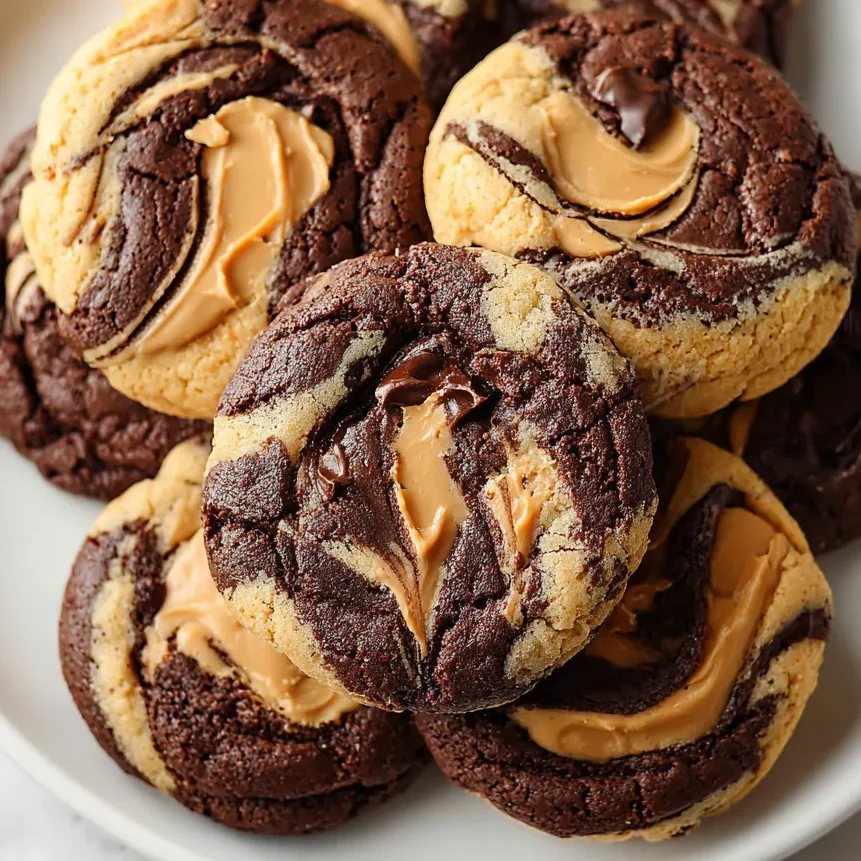
When you can’t decide between a fudgy chocolate brownie and a salty-sweet peanut butter cookie, there is only one logical solution: the Marbled Peanut Butter Brownie Cookie. This hybrid masterpiece, often affectionately known as a “Brookie,” brings together the best of both worlds in a single, visually stunning package. Imagine a deep, cocoa-rich brownie dough intertwining with a velvety, brown sugar peanut butter dough, creating a flavor profile that hits every single note of indulgence.
These cookies aren’t just about flavor, though; they are a textural experience. The brownie side remains dense and fudgy, while the peanut butter side offers a classic, slightly crumbly cookie bite. Whether you’re baking for a holiday cookie exchange, a weekend treat, or just to satisfy a late-night craving, these marbled gems are guaranteed to be the star of the show. Get ready to elevate your baking game with this foolproof guide to the perfect swirl.
Why You’ll Love This Recipe
There are a thousand cookie recipes on the internet, but these marbled peanut butter brownie cookies stand out for several reasons. First and foremost is the balance of flavors. The bitterness of the cocoa powder and the richness of the chocolate chips perfectly offset the salty, nutty profile of the peanut butter.
Secondly, the visual appeal is unmatched. Each cookie is a unique piece of art, thanks to the marbling technique that makes them look like they came straight from a high-end artisanal bakery. Finally, the texture is incredibly satisfying. By using two distinct dough bases, you get a multi-dimensional mouthfeel that keeps you coming back for another bite. Plus, they are surprisingly easy to make with standard pantry staples, requiring no fancy equipment—just a bowl, a whisk, and a little bit of patience while the dough chills.
What Is a Marbled Peanut Butter Brownie Cookie?
At its core, a Marbled Peanut Butter Brownie Cookie is a “mash-up” dessert. It utilizes two completely different dough recipes that are portioned together and swirled before baking. One dough is a traditional cocoa-based brownie batter, thickened with flour to maintain a cookie shape. The other is a classic peanut butter cookie dough made with creamy peanut butter and brown sugar for that signature chew.
This style of cookie has gained massive popularity on social media and in gourmet bakeries because it solves the “paradox of choice.” Instead of picking one flavor, the marbling technique ensures that every bite contains a balanced ratio of chocolate and peanut butter. It is the ultimate evolution of the Reese’s Cup, transformed into a sophisticated, chewy, and decadent baked good that appeals to kids and adults alike.
You will Need
To achieve the perfect marble, you’ll need to prepare two separate doughs. While the list might look long, most are repeating staples you likely already have in your kitchen.
For the Peanut Butter Dough:
- Creamy Peanut Butter: Use a stabilized brand (like Jif or Skippy) rather than natural oil-separated varieties for the most consistent texture.
- Butter & Brown Sugar: Softened butter and brown sugar create the moist, chewy base.
- Egg & Vanilla: These provide structure and that essential aromatic depth.
- Flour, Soda, & Salt: The dry foundation that ensures the cookie rises and stays soft.
For the Brownie Dough:
- Melted Butter & White Sugar: This combination creates that shiny, crackly brownie top we all love.
- Cocoa Powder: Use high-quality unsweetened cocoa powder for a deep chocolate flavor.
- Chocolate Chips: Semi-sweet chips add pockets of melted chocolate throughout the brownie sections.
- Baking Powder: Just a touch to give the brownie side a bit of lift so it matches the height of the peanut butter side.
Ingredient Substitutions & Tips
If you find yourself missing an ingredient, don’t panic! You can easily swap all-purpose flour for a 1:1 gluten-free flour blend with great results. If you have a nut allergy in the house but still want that “peanut” flavor profile, sunflower seed butter is an excellent alternative that mimics the texture of creamy peanut butter perfectly.
For the chocolate side, if you prefer a darker profile, swap the semi-sweet chips for dark chocolate chunks or even bittersweet chips. If you only have salted butter on hand, simply omit the extra salt called for in the recipe to keep the sodium levels balanced. Lastly, if you want a more “caramelized” flavor, you can use dark brown sugar in the peanut butter dough instead of light brown sugar.
Step-by-Step Instructions
1. Prepare the Peanut Butter Dough
Start by creaming together 1/2 cup of creamy peanut butter, 1/4 cup of softened butter, and 1/2 cup of brown sugar. You want this mixture to be light and fluffy, which usually takes about 2-3 minutes of vigorous mixing. Add in one egg and a teaspoon of vanilla extract, beating until fully incorporated. In a separate small bowl, whisk together 1 cup of flour, 1/2 teaspoon of baking soda, and 1/4 teaspoon of salt. Gradually fold the dry ingredients into the wet until a soft dough forms.
2. Create the Brownie Dough
In a fresh bowl, whisk 1/2 cup of melted butter with 1 cup of white sugar. The melted butter is the secret to a fudgy brownie texture. Whisk in 1/3 cup of cocoa powder until the mixture is smooth and dark. Add the egg and vanilla, whisking again. Finally, fold in 3/4 cup of flour, 1/4 teaspoon of baking powder, and 1/4 teaspoon of salt. Once the flour streaks are nearly gone, stir in the chocolate chips.
3. The Chill Factor
This is the most crucial step! Place both bowls in the refrigerator for at least 30 minutes. Chilling the dough solidifies the fats, which prevents the cookies from spreading too thin in the oven and makes the dough much easier to handle when you start the marbling process.
4. Scoop and Swirl
Take about 1 tablespoon of the peanut butter dough and 1 tablespoon of the brownie dough. Place them side-by-side in your palm and gently roll them into a ball. Use a toothpick or the tip of a knife to gently swirl the two colors together. Don’t over-mix, or the colors will blend into a murky brown.
5. Bake to Perfection
Place the balls on a parchment-lined baking sheet about 2 inches apart. Bake at 350°F (175°C) for 9 to 11 minutes. The edges should be set, but the centers should still look slightly soft and “underdone.” They will firm up as they cool on the hot pan.
Expert Baking Tips
- Proper Flour Measurement: Always spoon your flour into the measuring cup and level it off with a knife. Packing the flour into the cup will result in a dry, cakey cookie rather than a chewy one.
- Room Temperature Eggs: Use room temperature eggs to ensure they emulsify properly with the fats, leading to a smoother dough.
- The “Pan Bang” Method: For extra ripples and a denser texture, gently tap the baking sheet on the oven rack halfway through baking. This collapses any air bubbles and creates that classic “bakery” look.
- Don’t Over-Bake: Brownie dough is notoriously difficult to judge by sight. If they look “done” in the center while in the oven, they are likely over-baked. Take them out when the tops are crackly but the middle still has a slight sheen.
The Art of the Perfect Marble
Achieving the perfect “marble” is where the magic happens. The key is to keep the two doughs distinct. When you place the two portions together, think of them as two halves of a globe. When you roll them into a ball, they should remain as two separate hemispheres.
The toothpick technique is where you add the “movement.” Insert the toothpick just a few millimeters into the dough and move it in a figure-eight pattern. This drags the dark cocoa dough into the light peanut butter dough without fully integrating them. Remember: you want high contrast. If you see the peanut butter dough turning light brown, stop swirling immediately! Every cookie should look slightly different, which is part of the charm of this recipe.
Serving Suggestions
These cookies are incredibly rich, so they pair beautifully with a cold glass of whole milk or a hot cup of black coffee. If you want to turn them into an elite dessert, use two cookies to sandwich a scoop of vanilla bean or salted caramel ice cream. The combination of the cold ice cream against the chewy, chocolatey cookie is heavenly. For a dinner party, serve them slightly warm with a drizzle of melted peanut butter and a tiny sprinkle of flaky sea salt on top to enhance the flavors.
Storage & Make-Ahead Tips
Store these cookies in an airtight container at room temperature for up to 5 days. To keep them extra soft, place a slice of white bread in the container; the cookies will absorb the moisture from the bread. You can also freeze the baked cookies for up to 3 months. If you want “fresh from the oven” taste every time, freeze the pre-portioned, marbled dough balls. When a craving hits, just bake them directly from the freezer, adding 1-2 minutes to the total baking time.
FAQs
Can I use chunky peanut butter?
Yes! Chunky peanut butter adds a lovely bit of crunch to the peanut butter side of the cookie. Just ensure it is a creamy-style chunky butter (like Extra Crunchy Jif) rather than a natural brand to maintain the structural integrity of the dough.
Why did my cookies spread too much?
This usually happens if the butter was too warm or if the dough wasn’t chilled long enough. Ensure your brownie dough butter is melted but not hot, and your peanut butter dough butter is “softened” (pliable but still cool to the touch).
Can I make these without a mixer?
Absolutely. While a hand mixer makes creaming the peanut butter and sugar easier, a sturdy wooden spoon and some elbow grease will get the job done perfectly.
Do I need to use parchment paper?
It is highly recommended. Brownie dough can be quite sticky due to the high sugar content. Parchment paper ensures they lift off the tray perfectly without breaking the delicate marbled centers.
Mastering the Marbled Peanut Butter Brownie Cookie is a rite of passage for any serious home baker. It’s a recipe that looks complex but relies on simple techniques and quality ingredients. By following the chilling and swirling tips provided, you’ll produce a batch of cookies that are as beautiful as they are delicious. So, grab your cocoa powder and your favorite jar of peanut butter—it’s time to bake the best cookie of your life!


