
Table of Contents
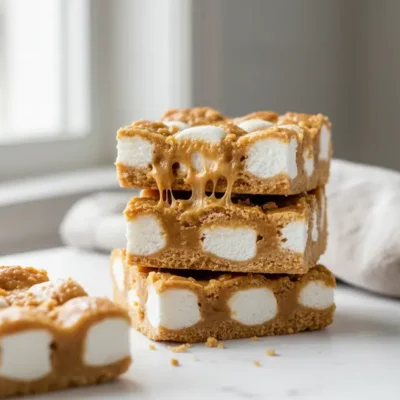
Remember those amazing no-bake treats from childhood? These Peanut Butter Butterscotch Marshmallow Squares are a perfect throwback, bringing that sweet and salty joy right back to your kitchen. They are truly one of the simplest and most delicious desserts you can make, requiring just a few common ingredients and very little hands-on time. If you crave that nostalgic taste and chewy texture, these delightful Marshmallow Squares are definitely for you.
These classic bars hit all the right notes: sweet, savory, and incredibly easy. You don’t need any special skills or equipment. Just a saucepan, a pan for chilling, and a few basic ingredients will get you there. Prepare to impress everyone with these effortless, crowd-pleasing desserts that taste like a trip down memory lane. They’re perfect for any occasion, from casual snacks to holiday dessert platters.
What Makes This Dish Worth Making
These Peanut Butter Butterscotch Marshmallow Squares are a true kitchen MVP. First, they are incredibly easy to make. Seriously, you only need four ingredients, and there’s no baking involved. This makes them a fantastic option for busy days or when you want a delicious treat without a lot of fuss. Imagine having a gourmet-tasting dessert ready in under 15 minutes of active prep time.
Beyond their simplicity, these bars are a huge crowd-pleaser. The combination of sweet butterscotch, salty peanut butter, and chewy marshmallows creates an irresistible flavor and texture profile. Everyone loves them, from kids to adults. They’re perfect for potlucks, bake sales, holiday gatherings, or simply a sweet afternoon snack. You’ll find yourself making them again and again.
Another great aspect is their versatility. While the classic recipe is wonderful on its own, these marshmallow squares are a blank canvas for customization. You can easily add different mix-ins, switch up the chips, or even dip them in chocolate for an extra special touch. Plus, they store wonderfully, meaning you can make a batch ahead of time and enjoy them throughout the week. They bring comfort and joy with every bite.
Ingredients You Will Need
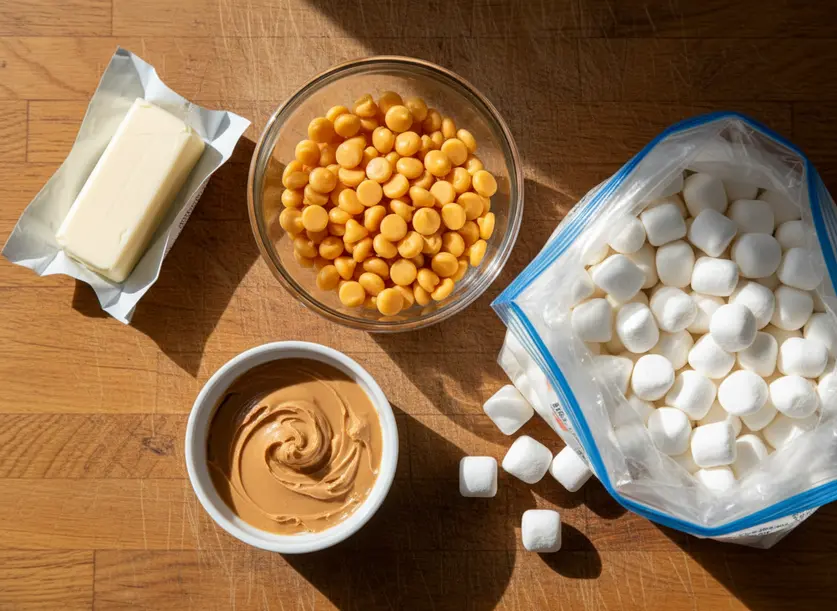
Gathering your ingredients for these delightful Peanut Butter Butterscotch Marshmallow Squares is half the battle won, and it’s a simple one! You’ll start with half a cup of butter. I usually use salted butter because I love that hint of saltiness against the sweet, but unsalted works just as well. Just add a tiny pinch of salt to your mixture if you go with unsalted.
Next, grab a bag of butterscotch chips, typically around 11 to 12 ounces. These are key for that distinct butterscotch flavor. If you’re not a huge butterscotch fan, you can swap them out for peanut butter chips, or even half butterscotch and half chocolate chips for a different twist. One cup of creamy peanut butter is essential. While creamy is traditional for a smooth texture, feel free to use crunchy peanut butter if you want to add some extra bite and nutty goodness to your bars.
Finally, you’ll need one 16-ounce bag of mini marshmallows. Regular white mini marshmallows work perfectly. However, if you want to get truly nostalgic, or add a pop of color, some people use pastel fruity mini marshmallows. The fruit flavor is surprisingly mild and blends well with the other ingredients. Having all these ingredients ready before you start makes the process incredibly smooth.
How to Make It Step by Step
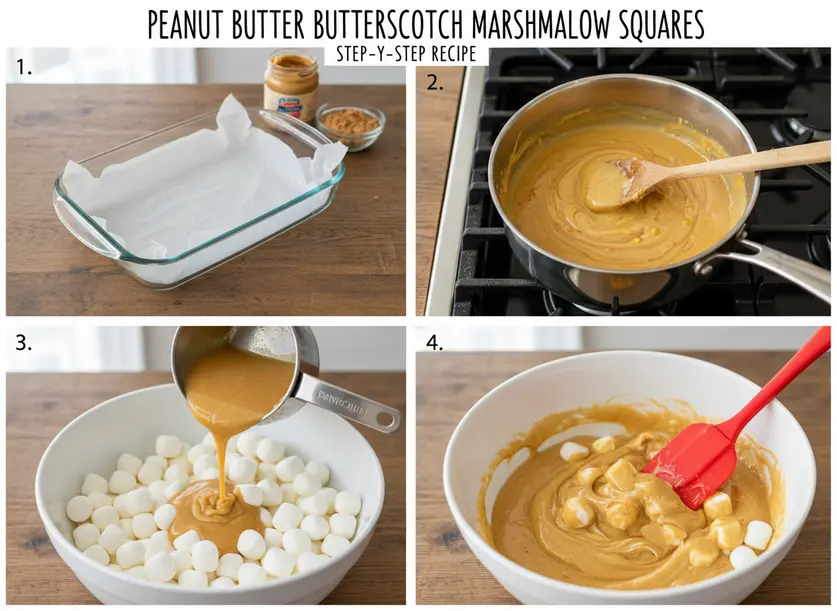
- **Prepare your pan and marshmallows:** First, line a 9×13 inch baking pan with parchment paper, leaving an overhang on the sides. This makes lifting the cooled squares out much easier. While you do this, place your bag of mini marshmallows in the freezer. Chilling them helps prevent them from melting too quickly when combined with the warm mixture, leading to more distinct and evenly distributed marshmallow pieces.
- **Melt the base mixture:** In a medium saucepan, combine the butter, butterscotch chips, and peanut butter. Place the saucepan over medium-low heat. Stir this mixture constantly until everything is fully melted, smooth, and creamy. It’s crucial not to bring this mixture to a boil, as it can cause the butterscotch to seize or become grainy. Just heat it gently until it’s completely incorporated and pourable.
- **Combine with cold marshmallows:** Once your butterscotch and peanut butter mixture is smooth, remove the saucepan from the heat. Quickly pour the warm mixture over the cold marshmallows in a large, heat-safe mixing bowl. The contrast in temperatures is important here.
- **Stir until coated:** Using a rubber spatula, immediately begin stirring the warm mixture into the marshmallows. Stir until every marshmallow is completely coated. Don’t worry if some marshmallows start to melt a little; that’s perfectly normal. The goal is to ensure they are all sticky and covered in the delicious base.
- **Press into the prepared pan:** Pour the entire mixture into your parchment-lined 9×13 inch baking pan. Use the rubber spatula, or the back of a spoon (lightly greased), to gently press the mixture down into an even layer. Work quickly but gently. You want an even surface, but avoid pressing too hard, which can compress the marshmallows too much.
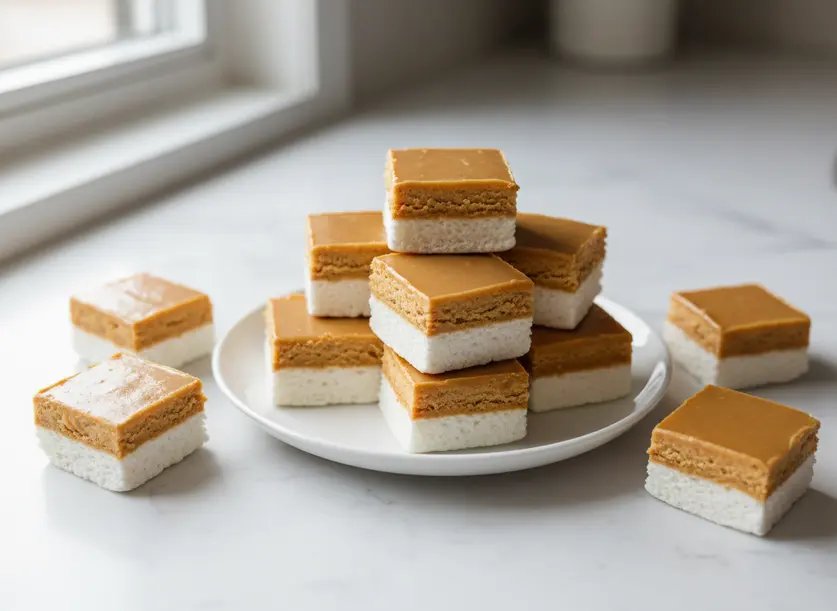
- **Chill to set:** Place the pan into the refrigerator. Allow the Peanut Butter Butterscotch Marshmallow Squares to chill for at least 1 to 2 hours, or until they are completely firm. Proper chilling is key for clean cuts and a good set texture.
- **Cut and serve:** Once fully firm, use the parchment paper overhangs to lift the entire block of bars out of the pan. Place it on a cutting board. Use a sharp knife, running it under hot water between cuts if needed, to slice the squares into your desired size. Wipe the knife clean between cuts for the neatest edges. Serve and enjoy your homemade treat!
Tips for the Best Results
Getting perfect Peanut Butter Butterscotch Marshmallow Squares every time is easy with a few simple tricks. First, always make sure your marshmallows are very cold. Pop the bag into the freezer for at least 15-20 minutes before you start melting your other ingredients. This helps them hold their shape better and prevents them from melting into a sticky mess when they meet the warm peanut butter mixture. You’ll get those lovely distinct marshmallow bits throughout the bars.
When melting the butter, butterscotch chips, and peanut butter, use medium-low heat and stir constantly. It’s vital not to let the mixture come to a boil. High heat can cause the butterscotch to seize, become grainy, or even burn, which will ruin the texture and flavor of your bars. Patience is key here; a gentle melt ensures a smooth, creamy base.
Consider how warm your melted mixture is when you combine it with the marshmallows. If you prefer your Marshmallow Squares to have very distinct, un-melted marshmallows, let your peanut butter-butterscotch mixture cool for about 10-15 minutes after removing it from the heat before adding the marshmallows. If you like a gooier, slightly melted marshmallow texture, combine them immediately. For the most evenly distributed marshmallows throughout the bars, allowing the mixture to cool for a full hour before combining is the secret.
Finally, don’t skimp on the chilling time. These bars need a good 1 to 2 hours in the refrigerator to fully firm up. Trying to cut them too soon will result in a sticky, messy ordeal. Once firm, they’ll slice beautifully. Store any leftovers in an airtight container at room temperature for up to 3-4 days, or in the refrigerator for up to a week. They can also be frozen for up to a month for longer storage, making them perfect for meal prep or future cravings.
Variations to Try
These Peanut Butter Butterscotch Marshmallow Squares are fantastic as they are, but they’re also wonderfully adaptable. You can easily switch things up to create new flavor experiences or cater to different preferences. One popular variation is to make them chocolate-dipped. After the squares are chilled and cut, melt some chocolate chips or candy melts. Dip one end of each square into the melted chocolate, let the excess drip off, and then place them on parchment paper to set. A sprinkle of sea salt on the chocolate before it sets adds a gourmet touch.
Another fun option is to play with textures. For extra crunch, stir in a handful of chopped peanuts or other nuts along with the marshmallows. You could also incorporate about a cup of Rice Krispies cereal. This gives the bars a delightful crispy element similar to traditional Rice Krispie treats, but with the unique peanut butter and butterscotch flavor. This is a great way to add more substance and make them even more satisfying.
Don’t be afraid to experiment with different types of chips too. While butterscotch is classic, using all peanut butter chips will give you a double dose of peanut butter goodness. Or, try a blend of half butterscotch chips and half semi-sweet chocolate chips for a rich, complex flavor. You could even drizzle a contrasting flavor of melted chips over the top of the cooled bars for a pretty finish and an extra flavor kick. The possibilities for these Marshmallow Squares are endless!
FAQ
Can I use crunchy peanut butter?
Yes, absolutely! While creamy peanut butter gives these Marshmallow Squares a very smooth texture, crunchy peanut butter works wonderfully. It will add an extra layer of texture and a pleasant nutty crunch to each bite. Just follow the recipe as written, substituting crunchy for creamy peanut butter.
How long do these last, and how should I store them?
These delightful bars store quite well. In an airtight container at room temperature, they will stay fresh for about 3-4 days. If you prefer them chilled or want to extend their shelf life, store them in an airtight container in the refrigerator for up to 7 days. For longer storage, you can freeze individual squares in an airtight container or freezer bag for up to one month. Thaw them at room temperature or in the fridge before serving.
Why are my squares crumbly or too soft?
If your Peanut Butter Butterscotch Marshmallow Squares are crumbly, the mixture might have been too hot when combined with the marshmallows, causing them to completely dissolve and reduce the binding properties. It could also mean you didn’t press the mixture firmly enough into the pan. If they are too soft, it usually indicates insufficient chilling time. Make sure to chill them for the full 1-2 hours (or longer) in the refrigerator until completely firm before attempting to cut them. Ensure your measurements for butter and peanut butter are accurate for the best consistency.
Peanut Butter Butterscotch Marshmallow Squares
Ingredients
- 0.5 cup butter salted or unsalted (add a pinch of salt if unsalted)
- 11-12 ounces butterscotch chips or peanut butter chips, or a mix with chocolate chips
- 1 cup creamy peanut butter crunchy peanut butter can also be used for extra texture
- 16 ounces mini marshmallows white or pastel fruity mini marshmallows
Instructions
- First, line a 9x13 inch baking pan with parchment paper, leaving an overhang on the sides. Place your bag of mini marshmallows in the freezer.
- In a medium saucepan, combine the butter, butterscotch chips, and peanut butter. Place the saucepan over medium-low heat. Stir this mixture constantly until everything is fully melted, smooth, and creamy. Do not bring to a boil.
- Once your butterscotch and peanut butter mixture is smooth, remove the saucepan from the heat. Quickly pour the warm mixture over the cold marshmallows in a large, heat-safe mixing bowl.
- Using a rubber spatula, immediately begin stirring the warm mixture into the marshmallows until every marshmallow is completely coated.
- Pour the entire mixture into your parchment-lined 9x13 inch baking pan. Use the rubber spatula, or the back of a spoon (lightly greased), to gently press the mixture down into an even layer.
- Place the pan into the refrigerator. Allow the Peanut Butter Butterscotch Marshmallow Squares to chill for at least 1 to 2 hours, or until they are completely firm.
- Once fully firm, use the parchment paper overhangs to lift the entire block of bars out of the pan. Place it on a cutting board. Use a sharp knife, running it under hot water between cuts if needed, to slice the squares into your desired size. Wipe the knife clean between cuts for the neatest edges. Serve and enjoy!


