
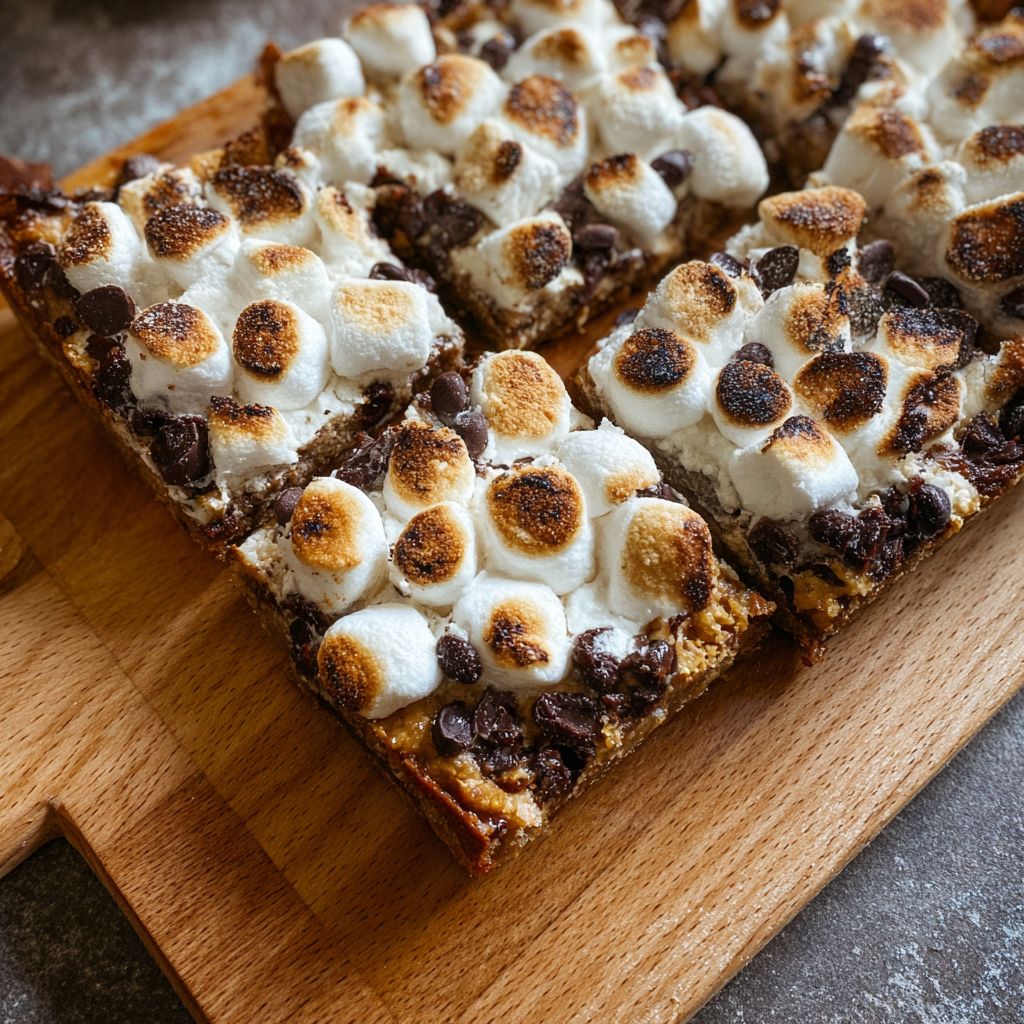
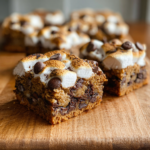
S’mores Blondies are the ultimate campfire-inspired dessert that transforms classic s’mores into convenient bar form, combining buttery blondie base loaded with graham cracker crumbs and dark chocolate chips, then crowned with toasted mini marshmallows for authentic s’mores experience without needing a fire. These delightful s’mores blondies capture every beloved element of traditional campfire s’mores—crunchy graham crackers, melted chocolate, and gooey toasted marshmallows—but in mess-free, shareable form perfect for parties, potlucks, or satisfying s’mores cravings year-round regardless of weather. The digestive biscuit crumbs (or graham cracker crumbs) provide that characteristic slightly sweet, honey-flavored crunch, while dark chocolate chips create melty pockets throughout the fudgy blondie base.

Whether you’re preparing summer picnic treats, hosting indoor campfire-themed parties, looking for unique desserts that wow crowds, or simply craving s’mores without building a fire, these blondies deliver nostalgic satisfaction in just 55 minutes from start to finish. They serve a crowd beautifully and create impressive presentation with their toasted marshmallow topping.
Why You’ll Love This S’mores Blondies Recipe
These s’mores blondies prove that you can absolutely capture campfire magic in your kitchen oven. The combination of graham cracker crumbs mixed into the batter, dark chocolate chips throughout, and toasted marshmallows on top creates authentic s’mores flavor in every bite. Unlike actual s’mores that require fire, roasting sticks, and perfect timing, these bars deliver consistent results every time with minimal effort.
The texture is wonderfully fudgy and dense—that perfect blondie consistency that’s somewhere between brownies and cookie bars. The melted butter creates moisture and richness, while the extra egg yolk beyond the whole egg adds luxurious, fudgy quality. The graham cracker crumbs add subtle crunch and that characteristic honey-sweet flavor essential to s’mores identity.
The toasted marshmallow topping is what truly makes these special. Using a kitchen torch to toast the marshmallows creates those beautiful golden-brown spots and caramelized flavor just like roasting marshmallows over a campfire. The marshmallows become slightly gooey on the bottom where they touch the warm blondies while the tops stay fluffy—the perfect marshmallow texture.
Ingredients for S’mores Blondies
Blondie Base
- 114g (½ cup) unsalted butter, melted and cooled – Creates rich, fudgy texture
- 200g (1 cup packed) brown sugar – Provides sweetness and moisture
- 1 egg, room temperature – Binds ingredients
- 1 egg yolk, room temperature – Adds extra richness and fudgy texture
- 1 tablespoon vanilla extract – Enhances overall flavor
- ¼ teaspoon baking powder – Provides slight lift
- ¼ teaspoon salt – Enhances flavors
- 125g (1 cup) plain flour – Creates structure
- 60g (½ cup) digestive biscuit crumbs – Represents graham crackers
- 170g (1 cup) dark chocolate chips – Provides chocolate component
Topping
- 140g (2½ cups) mini white marshmallows – Creates toasted marshmallow layer
Special Equipment
- Kitchen torch – For toasting marshmallows
Ingredient Notes
Butter Temperature: Melted butter should be cooled to room temperature before mixing. Hot butter can cook the eggs when added. Let melted butter sit for 5-10 minutes to cool.
Extra Egg Yolk: The additional yolk beyond the whole egg creates richer, fudgier texture characteristic of excellent blondies. If you don’t want to separate eggs, use 2 whole eggs instead, though texture will be slightly less fudgy.
Digestive Biscuits vs Graham Crackers: Digestive biscuits are the British equivalent of graham crackers and work perfectly here. However, for the most authentic s’mores flavor, graham cracker crumbs are ideal. Pulse graham crackers in a food processor until they resemble coarse sand.
Chocolate Choice: Dark chocolate chips provide sophisticated flavor and prevent the bars from being overly sweet. Milk chocolate chips create sweeter, more kid-friendly version. Semi-sweet chocolate is the middle ground.
Mini Marshmallows: Mini marshmallows toast more evenly than large ones and create better coverage. If using regular-sized marshmallows, cut them in halves or quarters before toasting.
Kitchen Torch Alternative: If you don’t have a kitchen torch, place the marshmallow-topped blondies under the broiler for 30-60 seconds, watching constantly. The marshmallows toast very quickly and can burn in seconds, so don’t walk away.
Brown Sugar: Packed brown sugar creates moisture and rich flavor. Light or dark brown sugar both work—dark provides slightly deeper molasses notes.
Step-by-Step Instructions
Step 1 – Prepare Pan and Oven
Preheat your oven to 175°C (350°F). Thoroughly grease an 8-inch square baking pan with butter or cooking spray, then line it with parchment paper, leaving overhang on two opposite sides for easy removal. Set aside.
Step 2 – Combine Wet Ingredients
In a large mixing bowl, whisk together the melted and cooled butter with the brown sugar until completely combined and smooth, about 1 minute. Add the egg, egg yolk, and vanilla extract, then whisk vigorously until the mixture is smooth, glossy, and well emulsified, about 1-2 minutes.
Step 3 – Prepare Dry Ingredients
In a separate medium bowl, whisk together the plain flour, baking powder, and salt until evenly distributed.
Step 4 – Combine Wet and Dry
Add the dry flour mixture to the bowl with wet ingredients. Using a rubber spatula, fold the mixtures together with gentle, broad strokes. Mix only until just combined and you no longer see dry flour streaks. Don’t overmix—stop the moment the batter looks uniform.
Step 5 – Add Graham Crumbs and Chocolate
Add the digestive biscuit crumbs (or graham cracker crumbs) and dark chocolate chips to the batter. Fold them in with the spatula until evenly distributed throughout. The batter will be thick—this is correct for blondies.
Step 6 – Spread and Bake
Pour the blondie batter into your prepared pan. Use the spatula to spread it evenly into all corners and smooth the top surface. The thick batter may resist—be patient and work it into an even layer. Bake for 25-30 minutes, checking at 25 minutes. The blondies are done when the top looks set and golden, and a wooden skewer inserted in the center comes out mostly clean with perhaps a few moist crumbs. Don’t overbake—they should look slightly underdone as they’ll continue firming up while cooling.
Step 7 – Cool Briefly
Remove the pan from the oven and let the blondies cool slightly for about 10 minutes. They should be warm but not piping hot when you add the marshmallows.
Step 8 – Add Marshmallow Topping
Sprinkle the mini marshmallows evenly all over the top of the warm blondies, covering the entire surface. Press them down very gently so they make contact with the warm surface.
Step 9 – Toast Marshmallows
Using a kitchen torch, carefully move the flame over the marshmallows, toasting them until they’re golden brown with some darker caramelized spots. Move the torch continuously to avoid burning—aim for that classic toasted marshmallow appearance with golden-brown color and some charred spots. If using the broiler method instead, place the pan under the broiler for 30-60 seconds, watching constantly and rotating if needed for even browning.
Step 10 – Cool Completely and Slice
Allow the s’mores blondies to cool completely in the pan, about 1-2 hours. The marshmallows will set as they cool. Once completely cool, use the parchment overhang to lift the entire slab from the pan. Transfer to a cutting board and use a sharp knife to cut into squares. Wipe the knife clean between cuts for the neatest edges—the marshmallows can be sticky.
Pro Tips for Success
Don’t Overmix the Batter: Mix only until ingredients are just combined. Overmixing develops gluten and creates tough, cakey texture instead of fudgy blondies.
Don’t Overbake: Blondies should look slightly underdone when removed from the oven. They’ll firm up perfectly as they cool. Overbaking creates dry, crumbly texture.
Cool Before Toasting Marshmallows: If the blondies are too hot, the marshmallows will melt completely into puddles instead of toasting nicely on top. Wait about 10 minutes after baking.
Watch Marshmallows Closely: Whether using a torch or broiler, marshmallows go from perfectly toasted to burnt in seconds. Stay attentive and keep the heat source moving.
Line Your Pan: The parchment paper overhang makes removing the blondies foolproof and creates clean edges.
Sharp Knife for Cutting: The sticky marshmallows can make cutting challenging. A sharp knife wiped clean between cuts creates the neatest squares. You can also spray the knife with cooking spray to prevent sticking.
Flavor Variations
Peanut Butter S’mores Blondies: Swirl ¼ cup peanut butter through the batter before baking for peanut butter cup-style s’mores similar to our peanut butter cookies.
Triple Chocolate S’mores: Use chocolate graham cracker crumbs and add ¼ cup cocoa powder to create chocolate blondie base for intense chocolate lovers.
Nutella S’mores Blondies: Swirl ⅓ cup Nutella through the batter before baking for hazelnut-chocolate twist.
Salted Caramel S’mores: Drizzle caramel sauce over the toasted marshmallows and sprinkle with flaky sea salt for gourmet version.
Cookies and Cream S’mores: Replace graham crumbs with crushed Oreo cookies and use white chocolate chips for cookies-and-cream variation.
Serving Suggestions
Serve S’mores Blondies cut into squares for summer picnics, camping-themed birthday parties, or backyard barbecues where they fit the outdoor theme perfectly. The toasted marshmallow topping makes them impressive enough for special occasions while the familiar s’mores flavor appeals to all ages.
Package them in clear boxes for bake sales or stack them in decorative tins for homemade gifts. They make wonderful additions to dessert tables alongside our gingerbread blondies and double chocolate muffins for diverse sweet offerings.
For camping trips, make them ahead and pack in airtight containers for easy, no-campfire-required s’mores satisfaction. They’re also perfect for indoor movie nights, especially when watching camping-themed films.
Serve warm with vanilla ice cream for extra indulgence, or pair with cold milk for classic combination.
Storage and Freezing Instructions
Room Temperature: Store cut s’mores blondies in airtight containers at room temperature for up to 3 days. Layer parchment paper between stacks to prevent the sticky marshmallows from causing blondies to stick together.
Refrigerator: While not necessary, refrigeration extends shelf life to 5 days. The marshmallows will firm up when cold. Bring to room temperature before serving for best texture.
Freezing Without Marshmallows: Freeze baked, cooled, untopped blondies wrapped tightly in plastic wrap and placed in freezer bags for up to 3 months. Thaw, then add fresh marshmallows and toast before serving.
Freezing With Marshmallows: Possible but not ideal—the marshmallows can become sticky and lose texture. If freezing topped blondies, place in single layers in airtight containers and freeze up to 2 months.
Make-Ahead Strategy: Bake blondies 1-2 days ahead and store at room temperature. Add marshmallows and toast them just before serving for freshest presentation.
Nutrition Facts (Per Serving)
| Nutrient | Amount |
|---|---|
| Calories | 238 |
| Protein | 3g |
| Carbohydrates | 34g |
| Fat | 10g |
| Fiber | 1g |
| Sodium | 96mg |
Based on 16 servings. Nutritional values are approximate.
FAQ About S’mores Blondies
Can I make these without a kitchen torch?
Yes! Place the marshmallow-topped blondies under your oven’s broiler for 30-60 seconds, watching constantly. Position the pan on a rack about 6 inches from the heating element. The marshmallows toast very quickly and can burn in seconds, so don’t walk away.
Why are my blondies dry instead of fudgy?
Dry blondies typically result from overbaking. Remove them when they still look slightly underdone—they firm up as they cool. Also ensure you’re not overmixing the batter, which develops gluten and creates dry texture.
Can I use regular marshmallows instead of mini?
Yes, but cut them in halves or quarters before toasting. Smaller pieces toast more evenly and create better coverage. Whole large marshmallows are harder to toast uniformly.
What if I don’t have digestive biscuits or graham crackers?
You can use any honey or vanilla-flavored cookie crumbs. Crush them finely in a food processor. The flavor will be slightly different but still delicious.
S’mores Blondies bring beloved campfire nostalgia into your kitchen, capturing all the magic of traditional s’mores in convenient, shareable bar form that’s perfect for any occasion. The combination of graham cracker crunch, melted chocolate, fudgy blondie base, and toasted marshmallows creates that authentic s’mores experience without requiring campfires, roasting sticks, or perfect weather. Whether you’re satisfying summer cravings, hosting themed parties, or simply wanting impressive desserts that spark conversation, these delightful blondies prove that sometimes the best treats are the ones that remind us of cherished memories while being remarkably easy to make.
PrintEasy S’mores Blondies
These S’mores Blondies are rich, fudgy dessert bars made with brown sugar blondie batter, graham-style biscuit crumbs, and dark chocolate chips, finished with a toasted marshmallow topping. All the flavors of classic s’mores in an easy, bakery-style bar.
- Prep Time: 15 minutes
- Cook Time: 30 minutes
- Total Time: 45 minutes
- Yield: 12 blondies
- Category: Dessert
- Cuisine: American
Ingredients
**Blondie Base**
½ cup unsalted butter, melted and cooled
1 cup packed brown sugar
1 large egg
1 egg yolk
1 tablespoon vanilla extract
¼ teaspoon baking powder
¼ teaspoon salt
1 cup plain flour
½ cup digestive biscuit or graham cracker crumbs
1 cup dark chocolate chips
**Topping**
2½ cups mini white marshmallows
Instructions
**Prepare Pan and Oven**
Preheat oven to 175°C (350°F). Grease and line an 8-inch square baking pan with parchment paper, leaving overhang for easy removal.
**Mix Wet Ingredients**
Whisk melted, cooled butter with brown sugar until smooth. Add egg, egg yolk, and vanilla and whisk until glossy and fully combined.
**Combine Dry Ingredients**
In a separate bowl, whisk flour, baking powder, and salt.
**Combine Wet and Dry**
Fold dry ingredients into wet mixture just until combined. Do not overmix.
**Add Biscuit Crumbs and Chocolate**
Fold in digestive biscuit (or graham cracker) crumbs and dark chocolate chips until evenly distributed.
**Bake Blondies**
Spread batter evenly into prepared pan. Bake for 25–30 minutes until set with a few moist crumbs remaining.
**Cool Slightly**
Let blondies cool for about 10 minutes so they’re warm but not hot.
**Add Marshmallows**
Sprinkle mini marshmallows evenly over the surface and press gently.
**Toast Marshmallows**
Use a kitchen torch to toast marshmallows until golden with some charred spots. Alternatively, broil for 30–60 seconds while watching closely.
**Cool and Slice**
Cool completely for 1–2 hours. Lift from pan and slice into squares.
Notes
• Cool melted butter before mixing to avoid cooking eggs.
• Extra egg yolk creates fudgier blondies.
• Graham crackers can replace digestive biscuits.
• Watch marshmallows closely when torching or broiling.
• Store in an airtight container for up to 3 days.


