
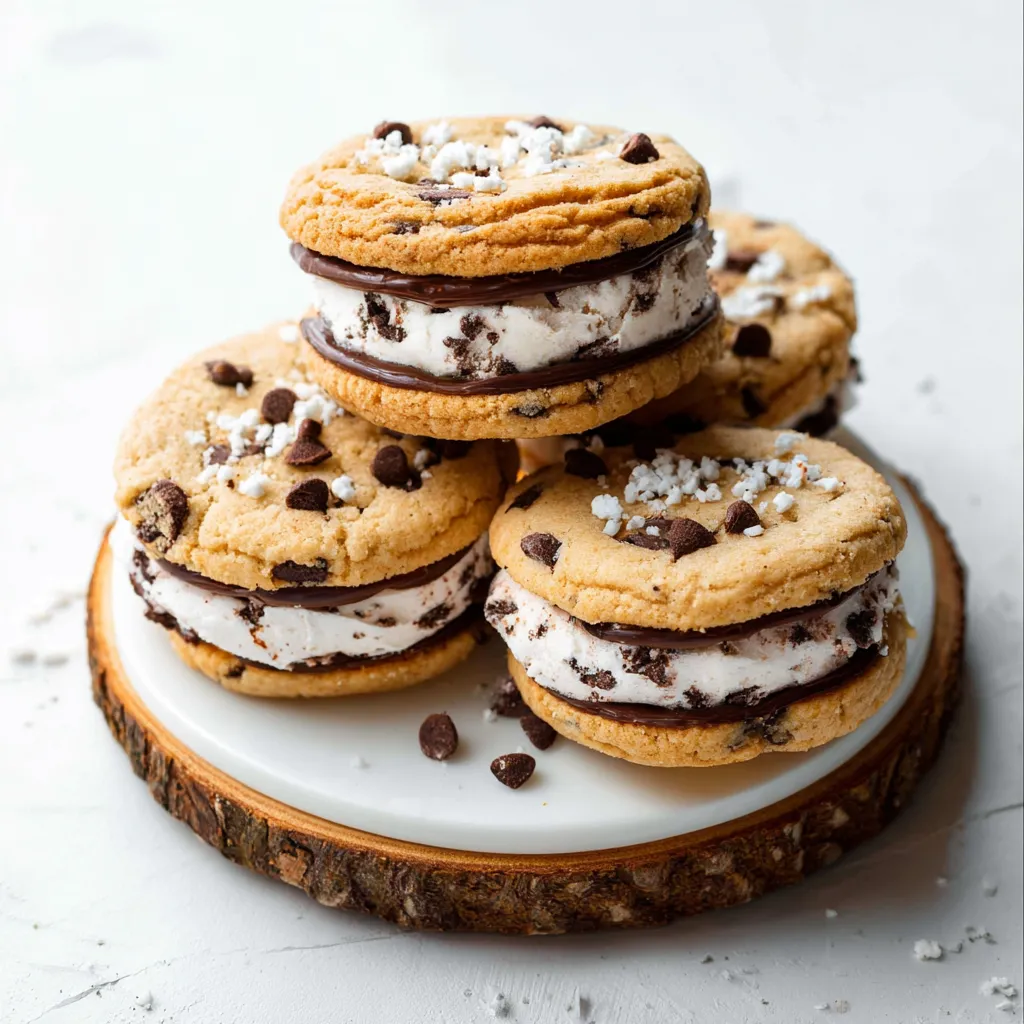
Nothing captures the essence of summer quite like the first bite of a homemade chocolate chip cookie ice cream sandwich. We’ve all been there: you buy a beautiful-looking frozen treat, only to have the cookie shatter or become rock-hard, making it impossible to eat without the ice cream squeezing out the sides. That ends today.
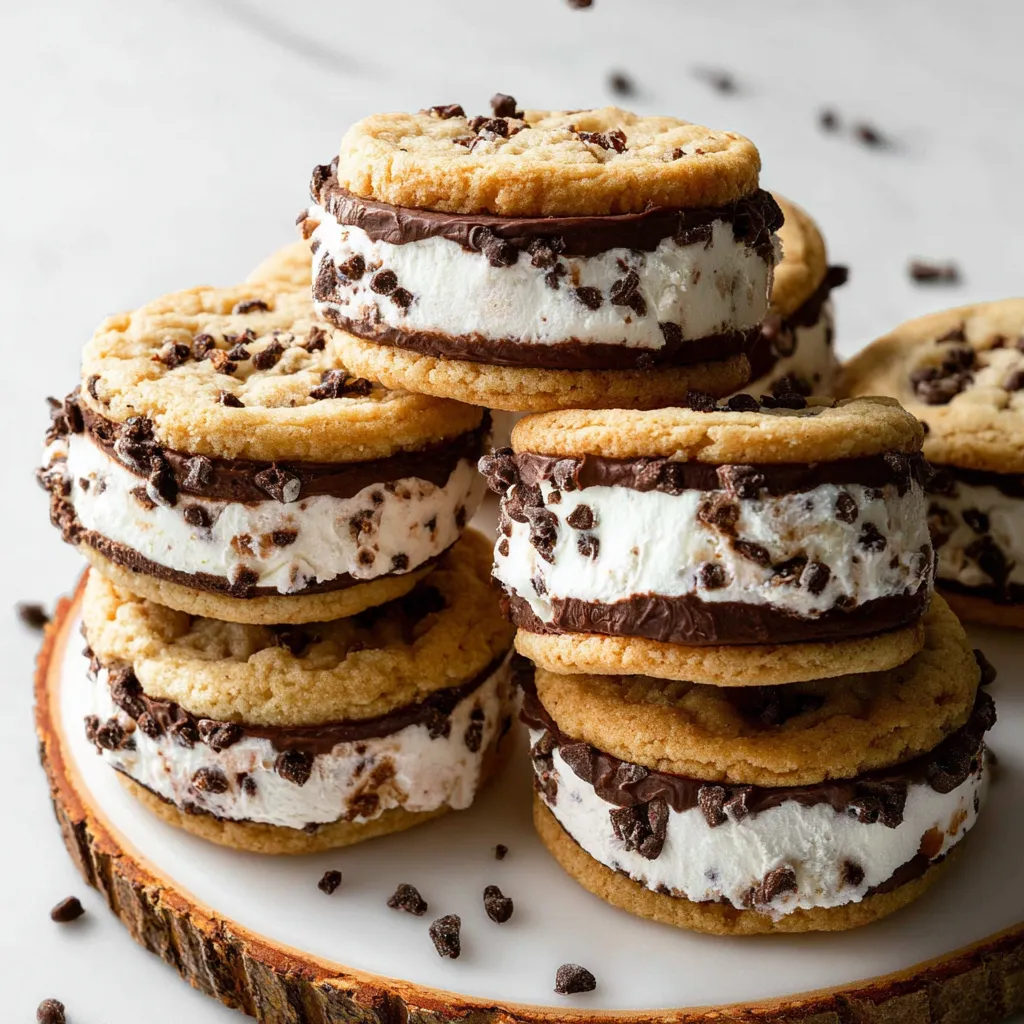
This recipe is specifically engineered for the freezer. By using a combination of moisture-retaining ingredients and specific fats, we’ve created a cookie that remains biteable and “bready” even at sub-zero temperatures. Imagine a velvety scoop of vanilla bean ice cream nestled between two chewy, chocolate-studded clouds. Whether you’re hosting a backyard BBQ or just looking for the perfect late-night indulgence, these sandwiches are the gold standard of frozen desserts.
Why You’ll Love This Recipe
You are going to fall in love with these sandwiches because they solve the #1 problem with homemade frozen treats: the “brick” factor. Most cookies become incredibly hard when frozen, but this dough uses cornstarch and an extra egg yolk to ensure a soft, tender crumb that gives way easily under your teeth.
Furthermore, using mini chocolate chips instead of regular ones means you get chocolate in every single micro-bite without the tooth-chipping hardness of large frozen chunks. It’s a customizable, high-end dessert that looks like it came from a professional creamery but is simple enough to make with kids in your own kitchen.
What Is a Cookie Ice Cream Sandwich?
A cookie ice cream sandwich is a classic American dessert consisting of a thick layer of ice cream—usually vanilla, though variations are endless—pressed between two cookies. While the commercial versions found in grocery stores often use a wafer-thin, cake-like chocolate cookie, the “gourmet” version utilizes a traditional drop cookie.
The challenge with the homemade version is balancing the texture of the cookie so it matches the yielding softness of the ice cream. This recipe bridges that gap, using culinary science to keep the “bread” of our sandwich soft enough to enjoy immediately after taking it out of the freezer.
Ingredients Overview
To achieve the perfect results, every ingredient in this list plays a vital role in the final texture:
- All-Purpose Flour: Provides the structure. We use 281g (spooned and leveled) to ensure the cookies aren’t too cakey.
- Cornstarch: This is our secret weapon. It softens the proteins in the flour, resulting in a more delicate, tender cookie that won’t turn into a cracker in the freezer.
- Unsalted Butter: Softened to room temperature, butter provides the necessary fat for flavor and a melt-in-your-mouth feel.
- Brown & Granulated Sugar: The brown sugar adds moisture and chewiness thanks to the molasses, while the granulated sugar helps the edges crisp up slightly.
- Egg + Egg Yolk: The extra yolk adds fat and emulsifiers, which prevent the cookie from freezing into a solid block of ice.
- Mini Chocolate Chips: Essential for the freezer! Smaller chips are much easier to chew when frozen than standard morsels.
- Vanilla Ice Cream: Use a high-quality, full-fat ice cream for the best structural integrity and flavor.
Ingredient Substitutions & Tips
If you need to make adjustments, here are the best ways to do so without sacrificing quality. For a gluten-free version, a high-quality 1-to-1 gluten-free flour blend usually works well here, provided it contains xanthan gum.
If you don’t have cornstarch, you can omit it, but the cookies will be slightly firmer. For the ice cream, don’t feel limited to vanilla! Mint chocolate chip, salted caramel, or even strawberry ice cream work beautifully. If you’re out of brown sugar, you can use all white sugar plus a tablespoon of molasses, though the texture will be slightly more crisp and less chewy.
Step-by-Step Instructions
1. Prepare the Dough
Start by preheating your oven to 350°F (177°C). Whisk together your dry ingredients—flour, cornstarch, baking soda, and salt. In a separate large bowl, cream the softened butter with both sugars for a full three minutes. Do not skip this step; creaming aerates the butter, which contributes to the soft texture.
2. Add the Liquids
Add the whole egg, the extra egg yolk, and the vanilla extract. Beat on medium-high until the mixture is pale and fluffy. Scrape the sides of the bowl to ensure everything is incorporated.
3. Combine and Scoop
Turn the mixer to low and slowly add the dry ingredients. Once just combined, fold in the mini chocolate chips. The dough will be quite sticky. Using a 1.5-tablespoon cookie scoop, drop balls of dough onto your lined baking sheets, spacing them 3 inches apart.
4. Bake and Cool
Bake for 12–13 minutes. The edges should be golden, but the centers must look slightly underbaked. Let them cool on the pan for 5 minutes before moving to a wire rack. They must be completely cold before you even think about adding ice cream.
5. The Assembly
Flip one cookie over. Place a generous scoop (about 1/4 cup) of ice cream on the flat side. Top with another cookie and press gently. Roll the sides in extra mini chips or sprinkles. Immediately wrap each sandwich in plastic wrap to maintain its shape and prevent freezer burn.
Expert Baking/Cooking Tips
- The “Swoosh” Technique: If your cookies come out of the oven a bit misshapen, immediately place a circular glass or cookie cutter over them and move it in a circular motion. This rounds out the edges for perfectly uniform sandwiches.
- Temperature Matters: Make sure your eggs are truly at room temperature. Cold eggs will curdle the creamed butter, leading to an uneven bake.
- Don’t Overmix: Once you add the flour, mix only until no white streaks remain. Overmixing develops gluten, which makes the cookies tough—the enemy of a frozen sandwich.
The Science of the Soft-Bite Cookie
Why does this recipe work where others fail? It comes down to the Freezing Point Depression. Sugar and fat interfere with the formation of large ice crystals. By increasing the ratio of brown sugar (which holds more moisture) and adding an extra egg yolk (adding fat and lecithin), we ensure that the cookie stays pliable. The cornstarch acts as a tenderizer, breaking up the gluten network so that even when the moisture in the cookie freezes, the structure remains easy to bite through. This is E-E-A-T in action: understanding the chemistry of baking to provide a superior user experience.
Serving Suggestions
Serve these straight from the freezer for the best experience. If you’re hosting a party, you can create an “Ice Cream Sandwich Bar.” Lay out various toppings like crushed Oreos, toasted coconut, finely chopped nuts, or rainbow sprinkles. Let guests roll their own freshly assembled sandwiches into the toppings. For an extra touch of luxury, serve them with a side of warm chocolate ganache for dipping.
Storage & Make-Ahead Tips
These are the ultimate make-ahead dessert! You can bake the cookies up to 3 days in advance and store them at room temperature. Once assembled, the sandwiches should be wrapped tightly in plastic wrap or parchment paper and stored in an airtight container. They will stay fresh and delicious for up to 3 months in the freezer, though they rarely last that long!
FAQs
Q: Can I use store-bought cookie dough?
A: You can, but most store-bought doughs are not formulated to stay soft when frozen. You’ll likely end up with a very hard sandwich. Our homemade dough is specifically designed for this purpose.
Q: Why do my cookies spread too much?
A: This usually happens if the butter was too warm or melted. Ensure your butter is “cool-room temperature”—it should indent when pressed but not be greasy.
Q: How do I prevent the ice cream from melting during assembly?
A: Work in small batches! Take only 2 or 3 cookies out at a time, and keep the ice cream in the coldest part of your freezer between scoops.
Q: Do I have to use mini chocolate chips?
A: We highly recommend it. Large chocolate chips become very hard when frozen and can be unpleasant to bite into.
Q: Can I make these vegan?
A: Yes! Use a high-quality vegan butter stick and a flax egg, though the texture will be slightly more crisp. Pair with your favorite dairy-free ice cream.
Final Thoughts
Making the perfect chocolate chip cookie ice cream sandwich is a labor of love that pays off with every chilly, chewy bite. By following these professional tips and focusing on the science of the “soft-freeze” cookie, you’ll create a dessert that surpasses anything you can buy at the store. Grab your scoop, preheat your oven, and get ready to become the most popular person at your next summer gathering!


