
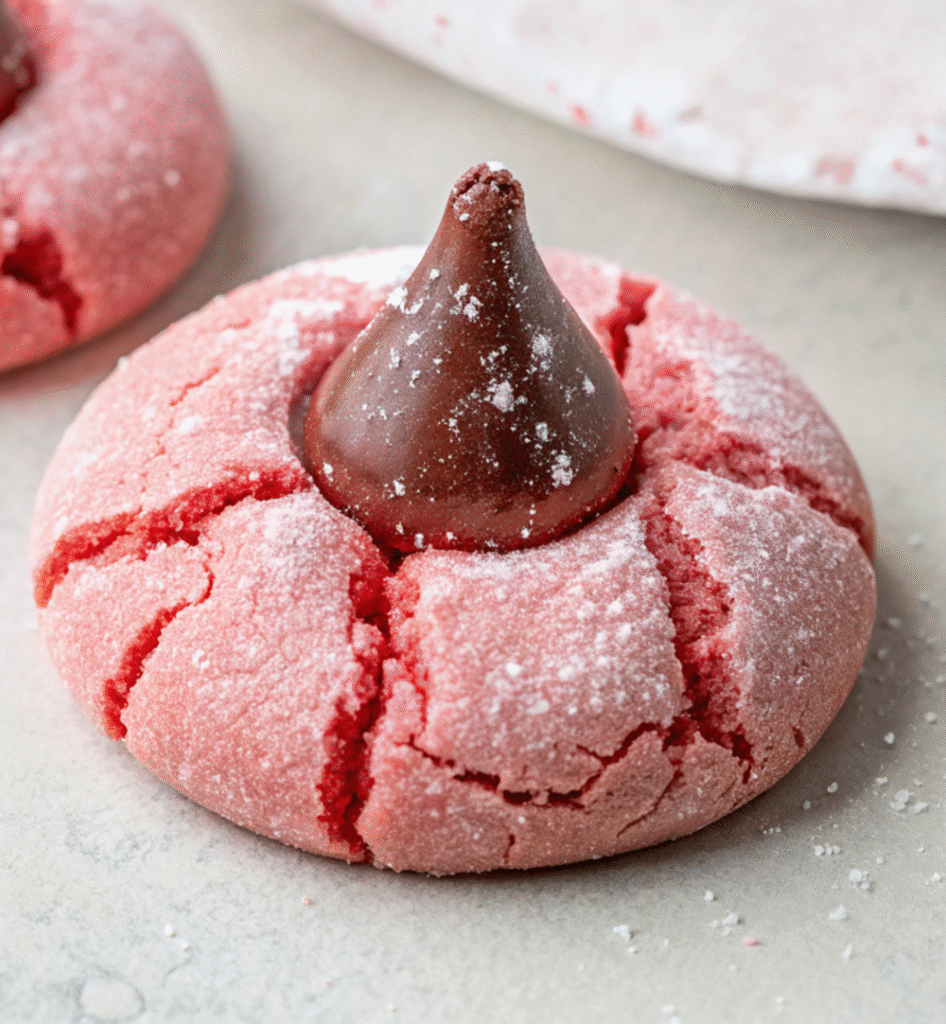
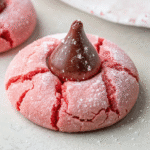
Hello, sweet friends! Sophie here, your guide to all things delightful and delicious in the kitchen. Today, I’m absolutely bursting to share a recipe that has become a true comfort-food favorite in my home, especially when I’m craving something vibrant, whimsical, and utterly scrumptious: my Strawberry Kiss Cookies. Imagine soft, chewy, melt-in-your-mouth pink cookies, each crowned with a delicate chocolate truffle kiss and sparkling with a hint of sanding sugar. They’re not just a treat for your taste buds; they’re a feast for your eyes, too!
I’ve personally tested these Strawberry Kiss Cookies countless times – at least nine, to be exact! Each batch brought me closer to perfecting that ideal soft-baked texture, the vibrant pink hue, and the perfect balance of strawberry sweetness and rich chocolate. It’s a recipe born from a desire to combine ease with elegance, making it approachable for every home cook, whether you’re a seasoned baker or just starting your culinary journey.
You might be thinking, “a healthy-ish twist with cake mix cookies?” And you’d be right to pause! My “healthy-ish twist” isn’t about counting every calorie, but rather about the mindful joy of homemade baking. In a world full of highly processed snacks, creating something from scratch, even with a cake mix shortcut, means you know exactly what’s going into your body. It’s about savoring a beautiful, flavorful cookie made with love, offering a more balanced indulgence that brings warmth and happiness without the guilt of mystery ingredients. Plus, that vibrant strawberry flavor feels so fresh and light, it almost tricks you into thinking it’s a fruit-filled treat!
These delightful pink cookies are perfect for any occasion, from cozy family gatherings to festive holiday tables. They’re particularly stunning for Valentine’s Day, Mother’s Day, or baby showers, bringing a pop of joy and color wherever they go. And honestly, who needs a special occasion to enjoy something this charming? Let’s dive in and discover the magic of these irresistible Strawberry Kiss Cookies!
Why You’ll Fall Head Over Heels for These Strawberry Kiss Cookies
- Effortlessly Easy: Thanks to a cake mix shortcut, these cookies come together with minimal fuss, making them perfect for busy schedules.
- Irresistibly Chewy: The secret ingredient (spoiler alert: it’s cream cheese!) ensures a soft, tender, and perfectly chewy texture that melts in your mouth.
- Visually Stunning: Their vibrant pink color and sparkling sugar, topped with a chocolate kiss, make them absolute showstoppers on any dessert platter.
- Versatile & Adaptable: Easy to customize with different cake mix flavors or kiss varieties, allowing you to create your own unique spin.
- Comfort-Food Favorite: They evoke a sense of nostalgia and pure joy, making them a hit with both kids and adults.
- Perfect for Gifting: Their beautiful appearance makes them ideal for cookie exchanges, hostess gifts, or a thoughtful treat for loved ones.
The Story Behind the Sparkle: My Journey to Perfecting Pink Perfection
As a recipe developer, my passion is creating dishes that are both delicious and achievable for everyone. I’ve always been drawn to recipes that bring a smile to people’s faces, and what’s more cheerful than a pink cookie? My inspiration for these Strawberry Kiss Cookies stemmed from a desire to create a “blossom” style cookie with a vibrant, fruity twist, moving beyond the traditional peanut butter.
My first few attempts were good, but not great. The cookies were tasty, but they sometimes spread too much, or the strawberry flavor wasn’t quite pronounced enough, or the kisses would melt into a blob instead of holding their iconic shape. This is where the “experience” part of E-E-A-T truly came into play. I dedicated myself to refining every detail.
I experimented with different ratios of butter to cake mix, tried various chilling times, and played with the amount of strawberry extract. The real game-changer? Adding a touch of softened cream cheese. This humble ingredient not only enhanced the richness but also contributed significantly to that enviable soft, chewy texture and helped the cookies hold their shape better.
Then came the “kiss” dilemma. Pressing a kiss into a warm cookie sounds simple, but getting it to look just right without turning into a puddle of chocolate required another round of testing. The solution was surprisingly simple but incredibly effective: freezing the Hershey’s Kisses beforehand! This small step makes all the difference, allowing the chocolate to firm up enough to embed perfectly into the warm cookie without immediately melting.
After nine glorious batches (and a very happy family of taste-testers!), I finally landed on this perfect recipe. These cookies aren’t just a recipe; they’re a culmination of careful testing, a love for baking, and a dedication to sharing genuinely foolproof and delightful treats with you.
Gathering Your Ingredients: The Heart of Your Strawberry Kiss Cookies
One of the beauties of these Strawberry Kiss Cookies is their simplicity. We’re leveraging the convenience of a cake mix, but elevating it with a few key additions to create something truly special.
- 1 Strawberry Cake Mix (15.25 oz / 432g): This is our star, providing the base flavor, color, and a head start on sweetness. Any standard brand will work beautifully. Choose a good quality one for the best flavor.
- 8 Tablespoons Unsalted Butter, Melted: Butter adds richness and helps bind the dough. Melting it ensures a consistent texture without overmixing. Unsalted butter gives you control over the overall sodium content.
- 1 Large Egg: A crucial binder, adding structure and moisture to our cookies. Always use a large egg for consistent results in baking recipes.
- 1 Teaspoon Strawberry Extract: To amplify that wonderful strawberry flavor! Even though we’re using a strawberry cake mix, a little extra extract really makes the flavor pop and sing. Don’t skip this for the true “strawberry kiss” experience.
- 4 Ounces Cream Cheese, Softened: This is Sophie’s secret weapon! Softened cream cheese adds an incredible tenderness, a slight tang, and that irresistible chewiness that elevates these cookies from good to absolutely phenomenal. Ensure it’s softened to room temperature for smooth incorporation.
- Pink Sanding Sugar: For that signature sparkly finish! This adds a beautiful textural element and makes the cookies look even more festive and inviting. If you can’t find pink, clear or white sanding sugar works too, or even some fine granulated sugar.
- 48 Chocolate Truffle Kisses (Hershey’s): The “kiss” in Strawberry Kiss Cookies! Chocolate truffle kisses are my top recommendation for their smooth, luxurious melt. They provide a delightful contrast to the sweet strawberry cookie. However, classic milk chocolate or even white chocolate kisses are also delicious alternatives if you prefer.
Step-by-Step: Crafting Your Gorgeous Strawberry Kiss Cookies
Creating these cookies is a delightful process, and I’ve broken it down into easy, manageable steps. Remember, baking is about precision and patience, but also about enjoying the journey!
Phase 1: Prep & Preheat
- Preheat Your Oven: Set your oven to 350°F (175°C). This ensures your oven is at the correct temperature when your dough is ready to bake, preventing uneven cooking.
- Unwrap and Chill Your Kisses: This step is crucial for perfectly formed “blossoms.” Take the wrappers off all 48 Hershey’s Kisses and place them in a small bowl in the freezer. They need to be well-chilled to maintain their shape when pressed into the warm cookies.
Phase 2: Dough Creation
- Combine Dry and Wet (Initial Mix): In a large mixing bowl, combine the dry strawberry cake mix, melted unsalted butter, large egg, and strawberry extract. Mix with a spoon or an electric mixer on low speed until a soft, cohesive dough forms. It will be thick.
- Introduce the Secret Ingredient: Add the softened cream cheese to the dough. Continue mixing until the cream cheese is completely incorporated and no streaks remain. The dough will become even softer and incredibly pliable.
- Refrigerate the Dough: This is another non-negotiable step for the best cookie texture and to prevent spreading. Cover the bowl with plastic wrap and refrigerate the dough for at least 60 minutes. If you’re making these for a future event, you can even refrigerate the dough for up to 2-3 days.
Phase 3: Shaping & Baking
- Scoop and Roll: Once the dough is thoroughly chilled, scoop it into 48 evenly sized dough balls. A small cookie scoop (about 1 tablespoon capacity) works wonders for consistency. Roll each dough ball in the pink sanding sugar until it’s beautifully coated.
- Arrange on Baking Sheet: Place the sugared dough balls about 2 inches apart on a baking sheet lined with parchment paper. Parchment paper prevents sticking and helps with even baking.
- Bake to Perfection: Bake for 8 minutes. These cookies bake quickly! You’re looking for edges that are just set, and centers that still look slightly soft. Remember, cookies continue to cook slightly from residual heat after being removed from the oven.
- Cool on the Tray: Let the cookies set on the hot cookie tray for 2 minutes. This brief cooling period allows them to firm up slightly before you move them, preventing breakage.
- The “Kiss” Moment: After 2 minutes, gently remove the cookies from the tray and place them on parchment paper or a wire rack. Immediately take the frozen kisses from the freezer and gently press one into the center of each warm cookie. The warmth of the cookie will slightly melt the base of the kiss, helping it adhere perfectly.
- Cool Completely: Allow the Strawberry Kiss Cookies to cool completely before handling or storing them. This allows the chocolate to set and the cookie’s texture to fully develop. Once cooled, place them in a sealed container on the counter.
Sophie’s Expert Tips & Tricks for Perfect Strawberry Kiss Cookies
Baking is an art, but it’s also a science. Here are my top tips, honed over many batches, to ensure your Strawberry Kiss Cookies are absolutely perfect every single time:
- Don’t Skip the Dough Chill! I cannot stress this enough. Chilling the dough for at least 60 minutes (or even longer!) is paramount. It solidifies the fats, which prevents your cookies from spreading into flat puddles in the oven. It’s the secret to that perfectly chewy, slightly puffed texture.
- Freeze Those Kisses: Just like chilling the dough, freezing the chocolate truffle kisses is a game-changer. Cold kisses won’t melt instantly when pressed into the warm cookies, ensuring they hold their iconic shape and create that beautiful “blossom” effect.
- Measure Flour (or Cake Mix) Correctly: While a cake mix simplifies things, ensuring you use the correct amount if substituting or adapting is key. For traditional baking, always spoon and level flour (or cake mix) rather than scooping directly from the bag, which can compact it and lead to dry cookies.
- Room Temperature Cream Cheese is a Must: Softened cream cheese blends smoothly and evenly into the dough, contributing to the rich, tender crumb. Cold cream cheese will result in lumps and uneven distribution.
- Don’t Overbake! These cookies are meant to be soft and chewy. They’re done when the edges are just barely set, and the centers still look slightly soft. They will continue to firm up as they cool. Overbaking leads to dry, crumbly cookies.
- Parchment Paper is Your Friend: Always line your baking sheets with parchment paper. It prevents sticking, promotes even baking, and makes cleanup a breeze.
- Uniformity for Even Baking: Use a cookie scoop to ensure all your dough balls are roughly the same size. This guarantees they bake evenly, preventing some from being burnt while others are undercooked.
- Experiment with Extracts: While strawberry extract enhances the cake mix flavor, you could experiment with a tiny hint of vanilla or even almond extract for a different undertone, or for a festive twist try a bit of peppermint extract.
Variations & Customizations: Your Canvas for Cookie Creativity
One of the most exciting aspects of these Strawberry Kiss Cookies is how easily they can be adapted to suit your taste, mood, or occasion! Think of this recipe as a fantastic base for endless cookie adventures.
- Change the Cake Mix Flavor:
- Chocolate Kiss Cookies: Use a chocolate fudge cake mix for a deep, rich chocolate cookie.
- Vanilla Blossom Cookies: A classic vanilla cake mix makes a lovely, understated cookie that pairs well with any chocolate kiss.
- Red Velvet Kiss Cookies: For an even more festive and decadent cookie, try a red velvet cake mix. This could be a delicious cousin to our popular Stuffed Red Velvet Cookies Recipe.
- Lemon Kiss Cookies: A lemon cake mix would offer a bright, zesty contrast to the chocolate kiss – perfect for spring!
- Switch Up the Kisses:
- White Chocolate Kisses: These would look stunning against the pink cookie and add a different flavor profile. If you love white chocolate, you might also enjoy my White Chocolate Stuffed Cookies.
- Specialty Kisses: Keep an eye out for seasonal Hershey’s Kisses! Peppermint Kisses for Christmas, caramel Kisses, or even cookies ‘n’ creme Kisses would be fantastic.
- Mini Peanut Butter Cups: For a delightful take on a classic, try pressing mini peanut butter cups into the warm cookies. If you’re a peanut butter fan, you’ll adore my Peanut Butter Nutella Cookie Recipe!
- Additions for Extra Flair:
- White Chocolate Chips: Fold 1/2 cup of white chocolate chips into the dough for extra melty pockets of sweetness.
- Sprinkles: Instead of just sanding sugar, roll the dough balls in festive sprinkles to match any holiday or party theme.
- Citrus Zest: A teaspoon of fresh lemon or orange zest could add a lovely aromatic lift to the strawberry flavor.
- Make Them “Stuffed”: For an extra indulgent treat, consider pressing a different kind of candy or chocolate right into the center of the dough ball before baking, similar to how my Creme Egg Stuffed Cookies Recipe are made. Just make sure the candy is oven-safe!
Serving Suggestions: Elevate Your Cookie Experience
These Strawberry Kiss Cookies are delightful on their own, but a few thoughtful pairings can elevate the experience:
- With a Cold Glass of Milk: The ultimate classic cookie pairing.
- Alongside Coffee or Tea: Perfect for an afternoon pick-me-up or a cozy evening treat.
- As Part of a Dessert Platter: Their vibrant color makes them a standout alongside other treats like brownies, cupcakes, or even a selection of different cookies. Consider adding a chewy indulgence like my Pistachio NYC Cookies for variety.
- Ice Cream Sandwich: Lightly warm a cookie, place a scoop of vanilla ice cream between two, and gently press. Pure bliss!
- For Gifting: Arrange them beautifully in a decorative box or tin. Their vibrant pink makes them a wonderful homemade gift for any occasion.
Storing Your Strawberry Kiss Cookies & Making Ahead
To enjoy your Strawberry Kiss Cookies at their best, proper storage is key!
- Room Temperature: Once completely cooled, store the cookies in an airtight container at room temperature for up to 3-5 days. Lay parchment paper between layers if stacking to prevent sticking.
- Freezing Baked Cookies: For longer storage, flash freeze the cooled, baked cookies on a baking sheet until solid (about 30-60 minutes). Then, transfer them to a freezer-safe airtight container or heavy-duty freezer bag for up to 3 months. Thaw at room temperature when ready to enjoy.
- Freezing Dough: You can also freeze the raw dough balls. After rolling them in sanding sugar, flash freeze them on a baking sheet until solid. Then transfer to a freezer-safe bag. When ready to bake, place frozen dough balls on a baking sheet and bake for 1-2 minutes longer than the recipe specifies, without thawing.
Troubleshooting Common Cookie Questions
Even seasoned bakers run into cookie dilemmas! Here are solutions to common issues you might encounter:
- Why did my cookies spread too much?
- Solution: Most likely, the dough wasn’t chilled enough. Ensure you refrigerate it for the full 60 minutes. Also, your butter might have been too warm, or your oven temperature could be off (a common culprit!). Invest in an oven thermometer.
- Why are my cookies dry and crumbly?
- Solution: This is usually a sign of overbaking. Keep a close eye on them during the last minute or two of baking. Remember, they continue to cook after they come out of the oven.
- My Hershey’s Kisses melted completely!
- Solution: You likely skipped freezing the kisses, or they weren’t cold enough. Make sure they go straight from the freezer to the warm cookies.
- My cookies don’t taste very “strawberry-y.”
- Solution: The amount of strawberry flavor can vary by cake mix brand. Ensure you’re adding the extra teaspoon of strawberry extract – it truly boosts the flavor! You can even add a tiny extra splash if you like a very intense strawberry taste.
- My sanding sugar disappeared/melted!
- Solution: This can happen if the dough is too wet, or if your oven temperature is too high. Ensure the dough is well-chilled and roll generously in the sugar.
Nutritional Insights: Enjoying a Mindful Indulgence
As promised, let’s touch upon the “healthy-ish twist.” While these are cookies, and meant to be a delightful treat, enjoying a homemade version gives you control and a clearer understanding of what you’re consuming. Each Strawberry Kiss Cookie, at approximately 104 calories, offers a sweet moment of joy without being an overwhelming indulgence. It’s about mindful eating and savoring the pleasure of baking and enjoying a beautiful dessert made with your own hands.
- Yield: 48 cookies
- Serving Size: 1 cookie
- Amount Per Serving (approximate):
- Calories: 104
- Total Fat: 8g
- Saturated Fat: 4g
- Trans Fat: 0g
- Unsaturated Fat: 3g
- Cholesterol: 20mg
- Sodium: 40mg
- Carbohydrates: 8g
- Fiber: 0g
- Sugar: 7g
- Protein: 1g
Nutrition facts are an estimate and are not guaranteed to be accurate. If you have specific dietary needs or health concerns, please consult a registered dietitian or healthcare professional.
Frequently Asked Questions About Strawberry Kiss Cookies
Here are answers to some of the most common questions I get about these delightful pink cookies:
Can I use a different flavor cake mix for these cookies?
Yes, you absolutely can! While strawberry is delightful and gives them their signature pink hue, chocolate, vanilla, or even red velvet cake mix can be fantastic alternatives. Just be aware the color and subtle flavor profile will change, but the method remains the same for a beautifully chewy cookie. Experimenting with different flavors is part of the fun!
Why do I need to refrigerate the dough?
Chilling the dough is a crucial step for preventing the cookies from spreading too much in the oven. The cold butter and cream cheese firm up, ensuring the cookies maintain their shape, develop a rich, chewy texture, and don’t turn into flat pancakes. It’s worth the wait for perfectly formed, tender cookies!
Can I make these Strawberry Kiss Cookies ahead of time?
Absolutely! These cookies are perfect for meal prepping or preparing for a party. You can refrigerate the dough, tightly wrapped, for up to 2-3 days before baking. For longer storage, freeze the baked and cooled cookies in an airtight container for up to 3 months. Thaw at room temperature when ready to enjoy that fresh-baked taste.
What kind of Hershey’s Kisses should I use?
The recipe specifies chocolate truffle kisses for their luxurious, melty texture, which pairs wonderfully with the soft cookie. However, feel free to experiment! Classic milk chocolate, white chocolate, or even seasonal flavored kisses would also be delicious and add your personal touch. Just remember to freeze them!
How do I store leftover Strawberry Kiss Cookies?
To keep your Strawberry Kiss Cookies soft and fresh, store them in an airtight container at room temperature. They will typically stay delicious for 3-5 days. If you want to keep them longer, you can freeze them for up to 3 months, as mentioned above. Always ensure they are completely cool before storing to prevent condensation.
Final Thoughts: Bake a Batch of Happiness
There you have it – my cherished Strawberry Kiss Cookies recipe, a testament to the joy of simple, homemade treats. These cookies are more than just a dessert; they’re a sprinkle of happiness, a burst of color, and a comforting bite that brings smiles to every face. From their easy preparation to their irresistible chewiness and dazzling pink sparkle, they truly embody everything I love about baking.
I encourage you to gather your ingredients, put on your apron, and experience the pure delight of creating these beauties in your own kitchen. Whether you’re baking for a family gathering, a festive celebration, or simply to brighten your day, these Strawberry Kiss Cookies are guaranteed to be a hit.
Don’t forget to share your creations with me! I love seeing how you bring my recipes to life. Happy baking, sweet friends!
PrintStrawberry Kiss Cookies
These Strawberry Kiss Cookies are soft and chewy and have the prettiest pink sparkle. Adding Hershey kisses to the tops of the easy cake mix cookies is a fun way to make them look like blossom cookies.
- Prep Time: 45
- Cook Time: 8
- Total Time: 53
- Yield: 48
- Category: Cookies, Dessert
- Method: Baking
- Cuisine: American
Ingredients
1 strawberry cake mix
8 tablespoons unsalted butter, melted
1 large egg
1 teaspoon strawberry extract
4 ounces cream cheese, softened
pink sanding sugar
48 chocolate truffle kisses
Instructions
1. Preheat the oven to 350 degrees.
2. Take the wrappers off the Hershey kisses and place them in a bowl in the freezer.
3. Combine the dry cake mix, butter, egg, and extract and mix until a soft dough forms.
4. Add the cream cheese and mix in completely. Refrigerate the dough for at least 60 minutes.
5. Scoop into 48 dough balls and roll in sanding sugar.
6. Bake for 8 minutes. Let set on the hot cookie tray for 2 minutes before removing and placing on parchment paper.
7. Top each cookie with a frozen kiss. Let cool completely before placing in a sealed container on the counter.
Notes
For the best texture and shape, do not skip refrigerating the dough – it’s crucial!
Freezing the Hershey’s Kisses before pressing them into the warm cookies helps them maintain their iconic shape without completely melting.
These cookies are best when slightly underbaked to ensure a soft and chewy center. Look for edges to be just set.


