
There is something deeply nostalgic about a classic yellow cake. It’s the quintessential birthday cake the kind that reminds you of childhood parties, brightly colored streamers, and the excitement of making a wish. But let’s be honest: many yellow cakes can be dry, crumbly, or lack flavor.
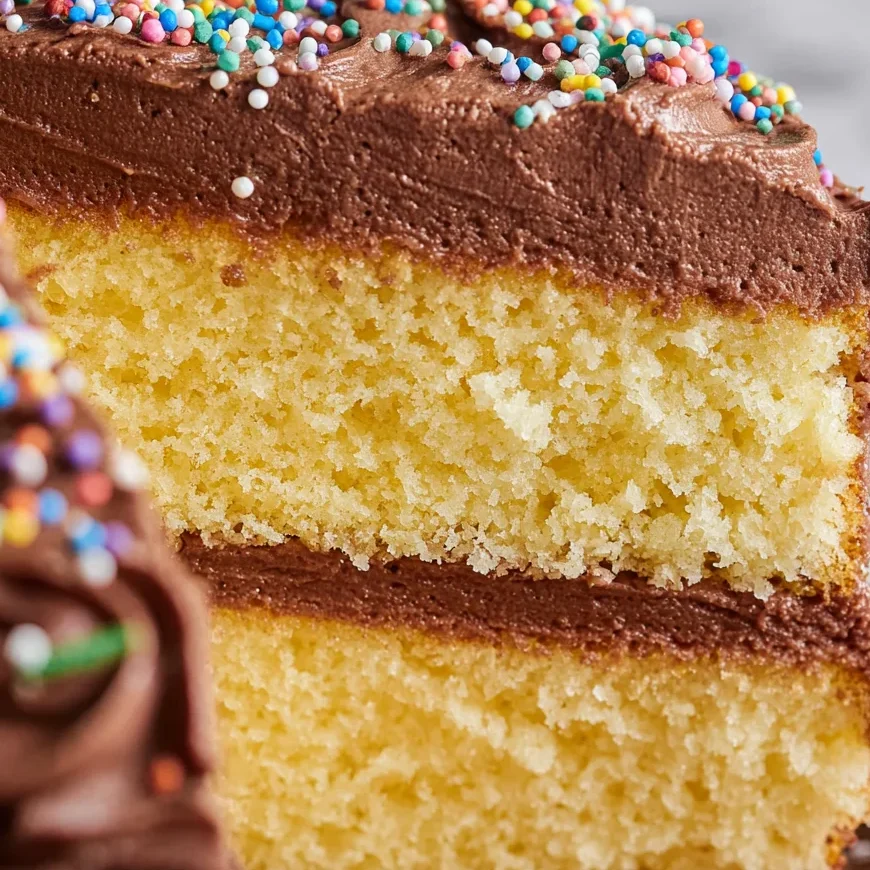
That’s where this recipe changes the game. This isn’t just a basic sponge; it is a Moist Yellow Cake with Chocolate Sour Cream Frosting that strikes the perfect balance between buttery, sweet, and tangy. By using a combination of all-purpose and cake flours, along with buttermilk and sour cream, we create a crumb that is incredibly tender yet sturdy enough to hold up a rich, velvety frosting.
Whether you are celebrating a milestone or just want a weekend treat that feels like a warm hug, this cake is your new gold standard.
Why You’ll Love This Recipe
- Superior Texture: The mix of cake flour and all-purpose flour gives you the best of both worlds—structure and softness.
- Double the Moisture: We use both buttermilk and sour cream in the batter to ensure the cake stays moist for days.
- The Frosting is a Revelation: Forget overly sweet buttercream. This chocolate sour cream frosting is fudgy, tangy, and sophisticated.
- Versatile: This recipe works perfectly for layered cakes, sheet cakes, or even 24 perfectly domed cupcakes.
- Simple Ingredients: Everything you need is likely already in your pantry or fridge.
Ingredient needed
To get that perfect “bakery-style” result at home, the quality and temperature of your ingredients matter. Here is what you need to know:
- The Flour Blend: We use 1 ¾ cups of all-purpose flour and 1 ¾ cups of cake flour. Cake flour has a lower protein content, which keeps the cake delicate, while the all-purpose flour provides the strength needed to prevent the cake from collapsing.
- Buttermilk: This is the secret to a tender crumb. The acid in the buttermilk reacts with the baking powder to create a beautiful lift. If you don’t have store-bought, you can make a quick substitute by adding 1 tablespoon of lemon juice or vinegar to 1 ½ cups of milk and letting it sit for 5 minutes.
- Sour Cream: Adding sour cream to both the batter and the frosting adds a subtle tang that balances the sugar and provides a rich, creamy mouthfeel.
- The Fats: We use unsalted butter for the base. Make sure it is truly “softened” (room temperature), meaning you can leave an indentation with your finger, but it shouldn’t be greasy or melting.
- Milk Chocolate Morsels: For the frosting, milk chocolate provides a creamy sweetness, while the addition of dark cocoa powder adds depth and color.
Step-by-Step Instructions
1. Cream the Butter and Sugar
Start by beating your softened butter for a full 2 minutes. This incorporates air into the fat, which is crucial for a light cake. Add the granulated sugar and vanilla, and keep beating until the mixture looks pale and fluffy.
2. Add the Eggs
Incorporate your three eggs and that extra egg yolk one at a time. That extra yolk is a pro-tip—it adds fat and lecithin, which results in a more “velvety” and yellow-hued cake. Finally, stir in the sour cream.
3. The Alternating Method
In a separate bowl, whisk your dry ingredients. When adding them to the wet ingredients, alternate with the buttermilk (Dry -> Wet -> Dry -> Wet -> Dry). This prevents the batter from breaking and ensures the gluten doesn’t over-develop. Beat for a final 2 minutes to ensure everything is perfectly emulsified.
4. Bake to Perfection
Divide the batter between two greased and floured 9-inch pans. Pro Tip: Ensure your pans have 2-inch sides; this cake rises beautifully! Bake at 350°F (175°C) for 35-38 minutes.
5. Whip Up the Frosting
Melt the chocolate and butter together until smooth. In a large bowl, whisk the sour cream, cocoa powder, and salt into the chocolate. Gradually add the powdered sugar and vanilla, beating for 3-5 minutes. The frosting will transform into a light, airy, yet deeply chocolatey cloud.
Expert Tips for Best Results
- Room Temperature Ingredients: This is non-negotiable! Your eggs, buttermilk, and sour cream should all be at room temperature so they incorporate into the butter without curdling the batter.
- Don’t Overmix: Once the flour is added, mix only until just combined (except for that final 2-minute beat to smooth things out). Overmixing leads to a tough, bready cake.
- The Crumb Coat: If you want that smooth “Instagram-ready” finish, apply a very thin layer of frosting to the outside of the cake first. This “traps” the crumbs. Chill the cake for 10-15 minutes, then apply the rest of your frosting.
- Measure Flour Correctly: Always fluff your flour with a spoon, scoop it into the measuring cup, and level it off with a knife. Packing flour into the cup will result in a dry cake.
Variations and Substitutions
- Make it a Sheet Cake: If you aren’t in the mood for layers, pour the batter into a 9×13 inch pan and bake for 40-45 minutes.
- Cupcakes: This recipe makes about 24 cupcakes. Bake them at 350°F for 15-17 minutes.
- Frosting Swap: If you prefer a darker profile, use semi-sweet chocolate chips instead of milk chocolate in the frosting. For a fruitier twist, try a strawberry buttercream!
- Gluten-Free: A high-quality 1:1 gluten-free flour blend can be used, though the texture will be slightly denser.
Storage and Freezing
This cake stores remarkably well thanks to the high moisture content.
- Room Temperature: Keep it in an airtight cake saver for up to 5 days.
- Refrigeration: You can refrigerate the cake if your kitchen is very warm, but it is best served at room temperature to keep the frosting creamy.
- Freezing: You can freeze the individual cake layers (wrapped tightly in plastic wrap and foil) for up to 3 months. You can also freeze the fully frosted cake! Just freeze it for an hour uncovered to set the frosting, then wrap it tightly.
FAQ
Q: Can I use all-purpose flour instead of cake flour?
A: You can, but the cake will have a slightly coarser crumb. If you don’t have cake flour, you can make a substitute: for every cup of flour, remove 2 tablespoons of all-purpose flour and replace them with 2 tablespoons of cornstarch. Sift together three times!
Q: Why did my cake sink in the middle?
A: This usually happens if the oven door was opened too early or if the baking powder is expired. Always check your leavening agents for freshness!
Q: Does the chocolate sour cream frosting need to be refrigerated?
A: Because of the sugar content and the acidity of the sour cream, it is stable at room temperature for a day or two in a cool kitchen. However, for longer storage, it’s safer to keep it in the fridge.
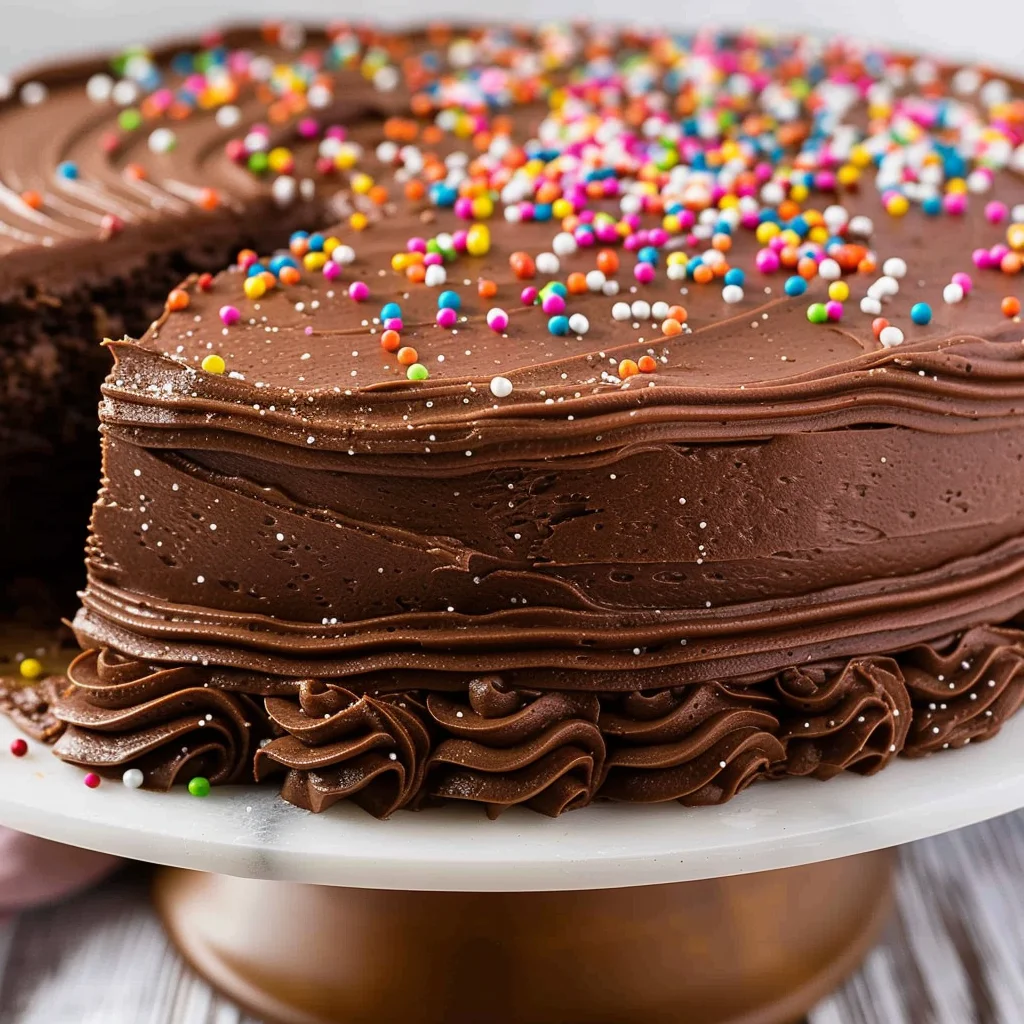
This Moist Yellow Cake with Chocolate Sour Cream Frosting is more than just a recipe; it’s a centerpiece for memories. The combination of the buttery, tender cake and the tangy, fudgy frosting is a match made in dessert heaven. Give it a try for your next celebration, and don’t forget to add those colorful sprinkles for that extra festive flair!
Happy baking!
PrintThe Ultimate Moist Yellow Cake with Chocolate Sour Cream Frosting
A classic, bakery-style yellow cake that is incredibly moist thanks to the addition of sour cream and buttermilk. Paired with a unique, tangy chocolate sour cream frosting, this is the perfect cake for birthdays and celebrations.
- Prep Time: 25
- Cook Time: 35
- Total Time: 60
- Yield: 12 servings
- Category: Dessert
- Method: Baking
- Cuisine: American
Ingredients
3/4 cup unsalted butter softened
2 cups granulated sugar
2 teaspoons vanilla extract
3 large eggs plus 1 egg yolk
1/2 cup sour cream
1 3/4 cup all-purpose flour
1 3/4 cup cake flour
1 Tablespoon baking powder
1/2 teaspoon kosher salt
1 1/2 cups buttermilk
1 cup milk chocolate morsels
1/4 cup unsalted butter
3/4 cup sour cream
1/4 cup dark chocolate unsweetened cocoa powder
pinch of kosher salt
3 cups powdered sugar
1 teaspoon vanilla extract
Sprinkles optional
Instructions
1. Preheat oven to 350 degrees F. Grease and flour two 9-inch cake pans with 2-inch sides.
2. In a large bowl, beat butter for 2 minutes until creamy. Add sugar and vanilla, continuing to beat with an electric mixer.
3. Add eggs and extra egg yolk one at a time, beating well after each addition. Beat in the sour cream.
4. In a separate small bowl, whisk together all-purpose flour, cake flour, baking powder, and salt.
5. Add the dry ingredients to the mixing bowl, alternating with the buttermilk. Start and end with the flour mixture. Beat for 2 minutes after all ingredients are added to ensure a smooth batter.
6. Divide batter evenly between the prepared pans. Bake for 35-38 minutes, or until a toothpick comes out clean.
7. Allow cakes to cool in the pans for 10 minutes, then transfer to wire racks to cool completely.
8. For the frosting: Melt milk chocolate morsels and butter in the microwave in 30-second increments until smooth. Whisk together.
9. In a large bowl, combine sour cream, cocoa powder, salt, and the melted chocolate mixture. Mix until blended.
10. Add powdered sugar and vanilla. Beat for 3-5 minutes until the frosting is light, fluffy, and well-blended.
11. Place one cake layer on a platter, spread frosting over the top. Add the second layer and frost the top and sides. Add sprinkles if desired.
Notes
CRUMB COATING: Spread a thin layer of frosting over the cake and refrigerate for 10 minutes before adding the final layer for a professional look.
CUPCAKES: Fill liners 2/3 full and bake for 15-17 minutes. Yields 24 cupcakes.
BUTTERMILK: You can use store-bought or a homemade substitute (1 cup milk + 1 tbsp lemon juice).
STORAGE: Store in an airtight container at room temperature for up to 5 days or freeze for 3 months.


