I still remember the first time I made cookies that actually looked like they belonged on a bakery shelf. It felt like magic! If you’ve ever felt intimidated by baking, thinking it’s too complicated or that your creations won’t turn out, then this recipe for Snowman Cookies is your new best friend. We’re going to make soft, adorable cookies that will boost your baking confidence with every single bite. You absolutely can do this!

Why You’ll Love Baking This Snowman Cookies
These Snowman Cookies are an absolute joy to bake and decorate!
- Achievable for everyone: The steps are straightforward, perfect for a first-time baker.
- Soft and dreamy texture: These cookies have a melt-in-your-mouth quality that everyone adores.
- Creative decorating: You get to bring your little snowman friends to life with simple decorations.
- Pure baking pride: There’s nothing quite like seeing your homemade, adorable cookies put a smile on someone’s face.
Let’s Talk Ingredients
Understanding your ingredients helps you bake with confidence, not just follow a recipe blindly.
- Unsalted Butter: This gives our cookies richness and tenderness. Using unsalted butter means you control the salt level in your bake.
- Full-Fat Cream Cheese: This is the secret ingredient for that wonderful soft, chewy texture! It adds moisture and a slight tanginess that complements the sweetness.
- Granulated Sugar: Beyond sweetness, sugar helps with browning and keeps your cookies moist. It also tenderizes the dough.
- Large Egg: Eggs bind everything together and add structure. They also contribute to the cookie’s rich flavor and texture.
- Vanilla Extract or Vanilla Bean Paste: This enhances all the other flavors. Vanilla bean paste gives a more intense vanilla flavor and those pretty speckles.
- All-Purpose Flour: This forms the structure of our cookies. It’s important not to overmix once the flour is added, or your cookies can become tough.
- Cornstarch: A little cornstarch helps make these cookies extra soft and tender. It also helps prevent them from spreading too much.
- Baking Powder: This is our leavening agent, which means it helps the cookies rise a little and gives them a soft, cakey crumb.
- Fine Salt: Salt balances the sweetness and brings out all the delicious flavors. Don’t skip it!
- Powdered Sugar: This is the base for our smooth, pipeable buttercream. Its fine texture dissolves easily for a silky frosting.
- Heavy Whipping Cream: This adds richness and helps create that creamy, fluffy buttercream consistency.
- Orange Gel Food Coloring: Gel colors are concentrated, so they won’t thin out your frosting. They give vibrant colors with just a tiny bit!
- Coarse Sanding Sugar: This gives our snowmen a beautiful, sparkly, “snowy” finish.
- Round, Black Sprinkles: Perfect for those adorable snowman eyes and mouths!
How to Make Snowman Cookies (You’ve Got This)
Making these Snowman Cookies is a fun process, and I’ll walk you through each step. First, we’ll create that wonderfully soft cookie dough. Beat the butter and cream cheese together until they are perfectly smooth – no lumps allowed!
Then, gradually add the sugar and beat it for a couple of minutes until the mixture looks lighter and fluffy; this incorporates air, making your cookies tender. When you add the dry ingredients, mix only until just combined; it should look like wet sand, not a smooth batter. Overmixing here can make your cookies tough, and we want them soft!
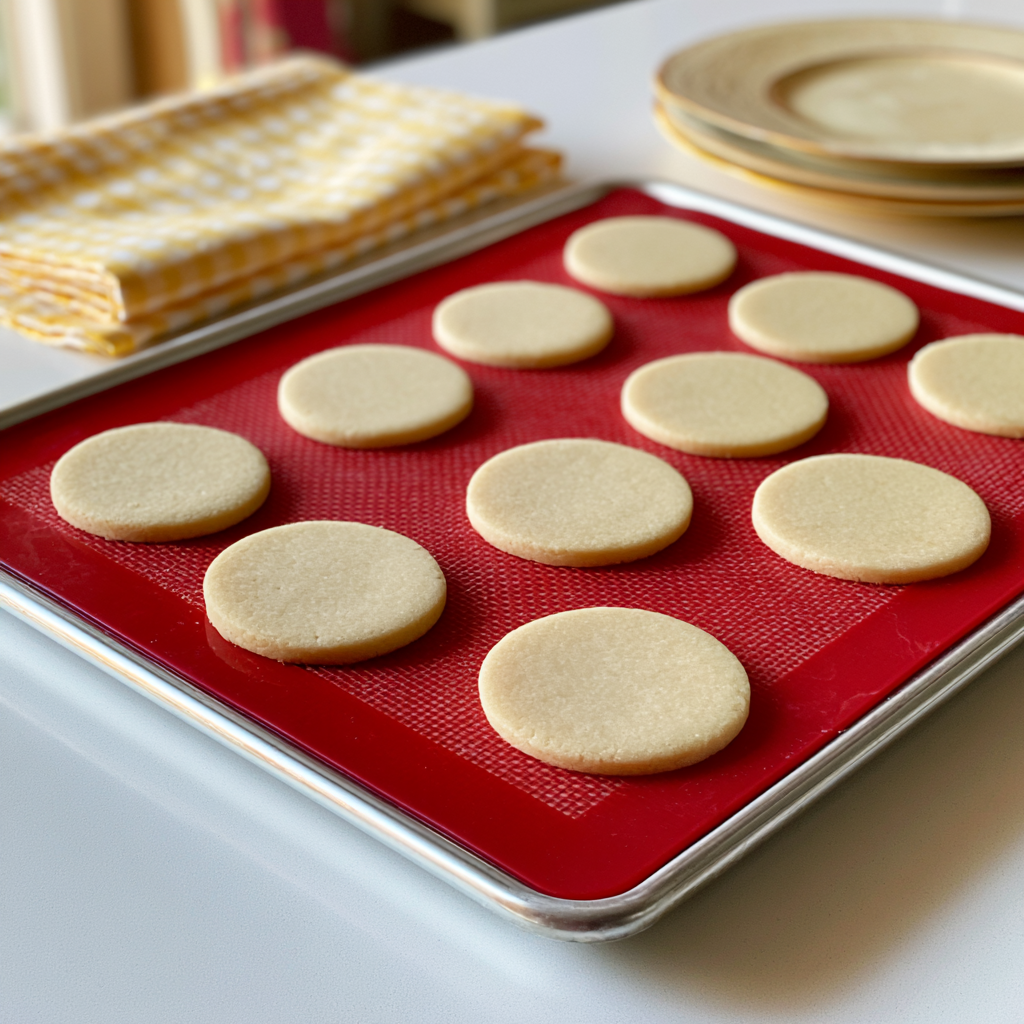
Chilling the dough is a super important step, so don’t skip it. This helps the cookies hold their shape beautifully in the oven. When you roll out the dough, aim for about 1/3 inch thick – not too thin, not too thick. And remember to chill your cut-out cookies again before baking; this is another secret for perfectly shaped cookies!
Bake them until the edges are just set, but the centers still look soft, about 12-14 minutes at 350°F (175°C). Remember, every oven is a little different, so keep a close eye on them! You don’t want any browning on the edges for these pale, snowy cookies. Once they’re baked, let them cool completely before frosting – warm cookies will melt your beautiful buttercream!
My Best Tips for First-Timers
I’ve learned a lot through trial and error, and these tips will help you succeed on your first try!
- I always make sure my butter and cream cheese are at room temperature. This makes for a super smooth, lump-free mixture.
- My first batch taught me the importance of chilling the dough – twice! It truly helps keep those perfect round shapes.
- Promise me you won’t skip lining your baking sheets with silicone mats or parchment paper. It makes for easy cleanup and prevents sticking.
- When mixing the flour into the wet ingredients, mix on low speed and stop as soon as it’s just combined. Overmixing develops gluten, which can make cookies tough.
- Don’t be afraid to adjust the frosting consistency. Baking is a bit like cooking; sometimes you need a tiny bit more liquid or powdered sugar to get it just right.
- Keep an eye on the cookies in the oven! They can go from perfectly baked to slightly browned very quickly. You want them pale and soft.
Beginner Mistakes (I Made Them All)
- Not chilling the dough enough: Your cookies might spread too much and lose their round shape. The cold fat in the dough helps the cookies hold their structure. Just pop them back in the fridge or freezer for a bit longer!
- Overmixing the dough once flour is added: This can lead to tough, chewy cookies instead of soft ones. Flour develops gluten when mixed, so once you see no dry streaks, stop mixing!
- Baking cookies on a warm baking sheet: This causes the cookies to start spreading immediately and can result in uneven baking. Always use a cool baking sheet for each batch.
- Overbaking the cookies: This is a common one! If your cookies brown on the edges, they’ll be crispy instead of soft. Pull them out when they look set but still slightly pale in the center.
- Frosting warm cookies: Your beautiful buttercream will melt right off! Always wait until the cookies are completely cool to the touch before decorating.
How to Store Snowman Cookies
Your adorable Snowman Cookies will stay fresh and delicious for several days at room temperature.
- Countertop: Up to 3-4 days in an airtight container at room temperature.
- Freezer (unfrosted): Up to 2 months in an airtight container. Thaw completely before frosting and decorating.
- Freezer (frosted): Up to 1 month in an airtight container, layered with parchment paper to prevent sticking.
Frequently Asked Questions
Can I use salted butter instead of unsalted?
Yes, you can use salted butter, but you might want to reduce the added fine salt in the cookie dough to 1/4 teaspoon. Taste the dough before baking if you can, to adjust. Unsalted butter gives you more control over the saltiness.
What if I don’t have cornstarch?
Cornstarch helps with the soft texture, but you can omit it if you don’t have any on hand. Your cookies might be slightly less tender, but they will still be delicious. It’s a small but mighty ingredient for softness!
My dough is too sticky to roll out, what should I do?
If your dough is too sticky, it likely needs more chilling time. Pop it back in the fridge for another 30 minutes to an hour. You can also dust your work surface, rolling pin, and hands with a little extra flour to help prevent sticking.
Can I use regular food coloring instead of gel food coloring for the orange nose?
You can, but regular liquid food coloring is much less concentrated and can thin out your frosting. You’ll need more drops to get a vibrant orange, which might make your frosting runny. Gel food coloring is always best for frosting!
How can I make sure my cookies are all the same size?
Using a cookie cutter is the best way to ensure uniform sizes! If you don’t have a specific size, a mason jar lid or round glass that’s similar in size works perfectly. Consistent size means consistent baking, so they all finish at the same time.
See? You just made the most adorable Snowman Cookies! I knew you could do it. Every step you took, every ingredient you mixed, was a step towards becoming a more confident baker. Now go share these festive treats and soak in all the compliments. Come back and tell me all about your baking adventure – I can’t wait to hear it!
PrintSnowman Cookies

These soft and adorable Snowman Cookies are perfect for beginners, featuring a melt-in-your-mouth texture and simple decorating for a festive treat.
- Prep Time: 45
- Cook Time: 14
- Total Time: 200
- Yield: Approximately 24 cookies 1x
- Category: Dessert
- Method: Baking
- Cuisine: American
- Diet: Vegetarian
Ingredients
- 3/4 cup (1 1/2 sticks) unsalted butter, room temperature
- 1/2 cup (4 oz) full fat cream cheese, room temp
- 1 1/2 cups granulated sugar
- 1 large egg, room temperature
- 2 tsp vanilla extract or vanilla bean paste
- 3 cups all-purpose flour
- 1 Tbsp cornstarch
- 1/2 tsp baking powder
- 1/2 tsp fine salt
- 1 cup unsalted butter, room temperature (for frosting)
- 1 Tbsp vanilla extract or vanilla bean paste (for frosting)
- 1/2 tsp fine salt (for frosting)
- 3 1/2 cups powdered sugar
- 1/4 cup heavy whipping cream, room temperature
- orange gel food coloring
- 1 cup coarse sanding sugar
- Round, black sprinkles
Instructions
- Beat 3/4 cup butter and 1/2 cup cream cheese in a large bowl or stand mixer on medium speed until smooth.
- Add 1 1/2 cups granulated sugar and mix on medium-high speed for a couple of minutes until lighter in color.
- Add 1 large egg and 2 tsp vanilla extract. Mix on medium speed until fully incorporated.
- Whisk together 3 cups all-purpose flour, 1 Tbsp cornstarch, 1/2 tsp baking powder, and 1/2 tsp fine salt in a separate bowl.
- Add the flour mixture to the butter mixture in two additions, mixing on low speed until just incorporated.
- Scrape the sides of the bowl with a rubber spatula between additions.
- Divide the dough in half and wrap each portion in plastic wrap, flattening into a 1/2 inch thick rectangle.
- Chill the dough in the fridge for about 2 hours, in the freezer for 30 minutes, or in the fridge overnight.
- Preheat oven to 350°F (175°C) about 30 minutes before rolling out the dough.
- Line two large baking sheets with silicone baking mats or parchment paper.
- Take one piece of chilled dough from the fridge, leaving the other to chill.
- Unwrap the dough and lay the plastic wrap flat on your counter.
- Dust both sides of the cookie dough and your rolling pin with flour.
- Roll the chilled dough to 1/3 inch thick.
- Cut out 2 1/2 inch circles with a flour-dusted cookie cutter (or a mason jar lid/round glass).
- Brush any excess flour off the cookies using a kitchen brush.
- Place cookies about 1 inch apart on the prepared baking sheets.
- Chill the cut-out cookies in the fridge for 15 minutes or freezer for 5 minutes.
- Bake one sheet of cookies at a time for 12-14 minutes on the top rack of your oven.
- Rotate the tray halfway through baking for even cooking.
- Remove cookies from the oven before the edges start to brown.
- Let baked cookies cool on the pan for about 15 minutes.
- Transfer cooled cookies to a wire rack to finish cooling completely.
- Knead together cookie dough scraps and rewrap them in plastic wrap.
- Chill the dough scraps in the fridge.
- Repeat steps 9-25 with the second chilled dough portion and then with the chilled dough scraps.
- Beat 1 cup butter on medium speed for 30 seconds with a paddle attachment until smooth.
- Mix in 1 Tbsp vanilla paste/extract and 1/2 tsp salt on low speed.
- Gradually mix in 3 1/2 cups powdered sugar and 1/4 cup heavy cream.
- Scrape the sides and bottom of the bowl as needed.
- Beat on low speed until frosting is fully incorporated and desired consistency is reached.
- Add more cream (1 Tbsp at a time) if frosting is too thick, or more powdered sugar (1/4 cup at a time) if too thin.
- Scoop 1/4 cup of frosting into a small bowl.
- Color the 1/4 cup frosting orange with gel food coloring.
- Put the orange frosting into a small piping bag fitted with a small round tip (Wilton 10) or snip a 1/4 inch opening at the base.
- Seal the top of the orange frosting bag with a rubber band or clip.
- Place the remaining uncolored frosting into a large piping bag fitted with a large round piping tip (Wilton 1A) or cut a 1/2 inch opening at the base.
- Seal the top of the white frosting bag with a large rubber band.
- Pour about 1 cup of coarse sanding sugar into a small bowl.
- Pipe a thin layer of white frosting on top of a fully cooled cookie.
- Gently press the frosted cookie into the sanding sugar until the entire top is covered.
- Use small black sprinkles to add eyes and a mouth.
- Use the orange frosting to pipe on a carrot nose.
- Repeat decorating steps with the remaining cookies.
Notes
Ensure all dairy ingredients are at room temperature for a smooth, cohesive dough and frosting.
Chill the dough thoroughly at each stage; this prevents spreading and helps cookies hold their shape.
Do not overmix the dough once flour is added to keep the cookies tender and soft.
Bake cookies until edges are just set and centers are still pale to maintain that signature soft texture.
Nutrition
- Serving Size: 1 cookie
- Calories: 250
- Sugar: 24
- Sodium: 75
- Fat: 13
- Saturated Fat: 8
- Carbohydrates: 32
- Fiber: 0
- Protein: 2
- Cholesterol: 35