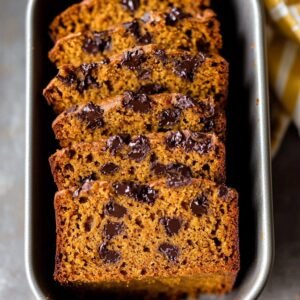
I still remember the first time I baked a bread that actually looked like it came out of a bakery. It wasn’t fancy, just a simple quick bread, but that moment of pulling it out of the oven, golden and fragrant, felt like pure magic. If you’ve ever felt intimidated by baking, like it’s a secret club you’re not part of, I promise you, this is your invitation! Today, we’re making the most comforting, beginner-friendly Pumpkin Bread Recipe (No Mixer!) you could imagine. Get ready to feel like a baking superstar!
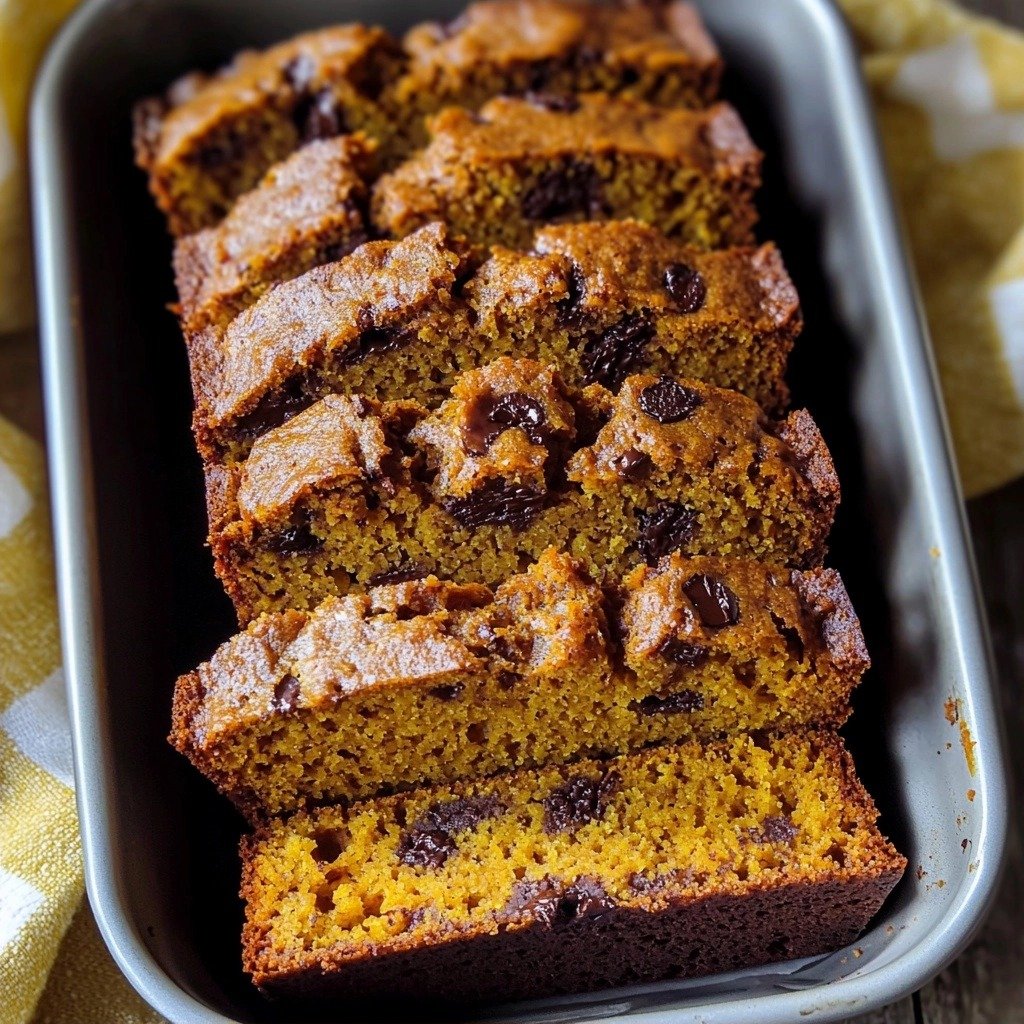
Why You’ll Love Baking This Pumpkin Bread Recipe (No Mixer!)
- It’s incredibly simple, perfect for building your baking confidence.
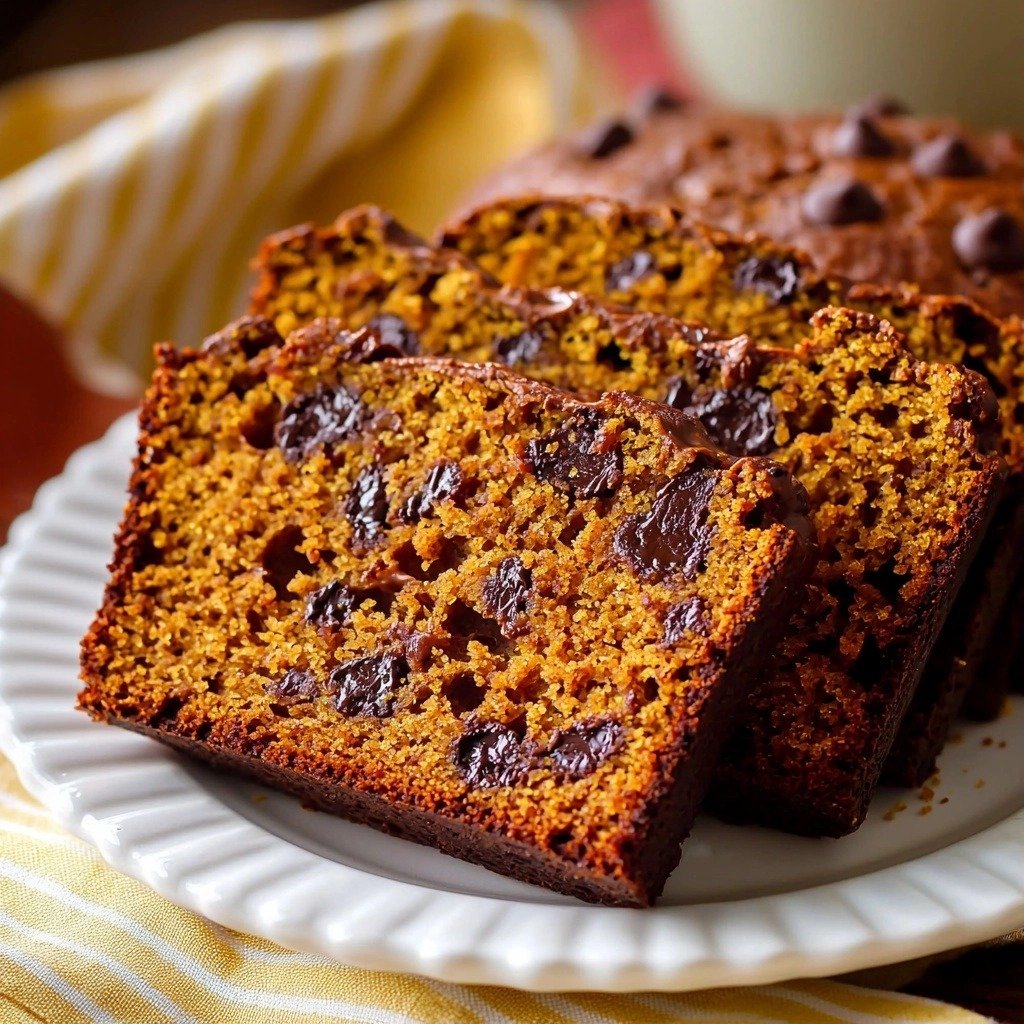
- The texture is wonderfully moist and tender, with just the right amount of spice.
- You get to skip the stand mixer entirely – no special equipment needed!
- That amazing smell filling your kitchen? Pure joy, and totally achievable.
Let’s Talk Ingredients
Understanding your ingredients helps you become a better baker, even if you’re just starting out!
- All-Purpose Flour: This provides the structure for our bread. Make sure to spoon and level it into your measuring cup for accuracy – don’t scoop directly from the bag!
- Baking Soda: This is a leavening agent that helps our bread rise beautifully.
- Ground Cinnamon, Nutmeg, Cloves, Ginger: These spices bring all that cozy, autumnal flavor to our pumpkin bread. Feel free to adjust slightly to your preference, but this blend is perfect.
- Pumpkin Puree: This isn’t pumpkin pie filling! It’s just plain cooked and pureed pumpkin, adding moisture and that signature pumpkin flavor.
- Vegetable Oil (or Canola Oil/Melted Coconut Oil): Oil keeps the bread super moist and tender. It’s an easy fat to work with in quick breads.
- Orange Juice: A little citrus brightens all those warm spice flavors. Don’t skip it!
- Semi-Sweet Chocolate Chips: Totally optional, but they add a lovely burst of sweetness.
How to Make Pumpkin Bread Recipe (No Mixer!) (You’ve Got This)
Baking this pumpkin bread is all about gentle mixing and paying attention to little details. First, you’ll get your oven ready and your loaf pan greased. Adjusting the oven rack to the lower third helps prevent the top from browning too quickly, which is a common beginner worry!
Next, we’ll combine all our dry ingredients in one bowl. Give them a good whisk to make sure everything is evenly distributed – this means no big pockets of baking soda! In a separate bowl, you’ll whisk together the wet ingredients until they’re nicely blended. When you pour the wet into the dry, use a rubber spatula or wooden spoon and mix just until no streaks of dry flour remain. Don’t panic if there are a few small lumps; that’s totally normal and actually helps keep your bread tender. Over-mixing is a common beginner mistake that can make quick breads tough, so mix gently!
Finally, pour your beautiful batter into the prepared pan and pop it into the preheated oven. Bake for 60-65 minutes, but here’s a pro tip: loosely cover the top with aluminum foil about halfway through. This prevents the top from getting too dark before the inside is fully cooked. You’ll know it’s done when a toothpick inserted into the center comes out clean with only a few moist crumbs. Trust your toothpick more than the clock! Let it cool completely in the pan on a wire rack before trying to slice it – this helps it set up properly.
My Best Tips for First-Timers
- I always measure my ingredients carefully, especially the flour. Spooning it into the measuring cup and leveling it off makes a huge difference.
- My first batch taught me that over-mixing is the enemy of tender quick bread. Mix just until combined, even if it looks a little lumpy.
- Promise me you won’t skip greasing your pan thoroughly! Nothing is sadder than a beautiful loaf stuck to the pan.
- Don’t be afraid to use aluminum foil. It’s a simple trick that saves many a quick bread from a burnt top.
- Letting the bread cool completely is tough, but so worth it for clean slices and better texture.
Beginner Mistakes (I Made Them All)
- Over-mixing the batter: This develops the gluten too much, leading to a tough, chewy bread instead of a tender one. Mix until just combined.
- Not greasing the pan enough: The bread will stick, and you’ll have trouble getting it out in one piece. Use non-stick spray generously.
- Under-baking: If the center is still gooey, it needs more time. Always rely on the toothpick test!
- Slicing warm bread: The bread is still setting up and can crumble or become gummy. Patience is a virtue here.
How to Store Pumpkin Bread Recipe (No Mixer!)
Your delicious pumpkin bread will stay fresh and moist for several days at room temperature or even longer in the fridge.
- Room Temperature: Up to 3-4 days when covered tightly.
- Refrigerator: Up to a week when covered tightly.
- Freezer: For longer storage, wrap individual slices or the whole loaf tightly in plastic wrap, then foil. It will keep for up to 2-3 months. Thaw at room temperature.
Frequently Asked Questions
Can I use fresh pumpkin puree?
Yes, absolutely! Just make sure it’s plain pumpkin puree and not seasoned pumpkin pie filling. The consistency should be similar to canned.
What if I don’t have all the spices?
You can definitely adjust! The cinnamon is key, but if you’re missing one of the others, don’t let it stop you. You could also use 2.5 teaspoons of pumpkin pie spice blend instead.
Can I add nuts or dried fruit?
Yes, you can! Feel free to gently fold in about 1/2 cup of chopped nuts like walnuts or pecans, or dried cranberries, along with the chocolate chips.
My bread top got too dark, what happened?
This usually means it browned too quickly in the oven. Next time, try loosely covering it with aluminum foil about halfway through the baking time. Also, make sure your oven rack is in the lower third.
How do I know if my baking soda is still good?
You can test it by mixing a teaspoon with a tablespoon of vinegar. If it fizzes vigorously, it’s still active! If not, it’s time for a new box.
See? I told you you could do it! This Pumpkin Bread Recipe (No Mixer!) is the perfect way to dive into baking and feel proud of what you create. I truly believe anyone can bake, and you’ve just proven it. Go on, slice into that warm, comforting goodness, and then come back and tell me all about your success! I’m cheering you on!
PrintPumpkin Bread Recipe (No Mixer!)
A wonderfully moist and spiced pumpkin bread, perfect for beginners and made easily without a mixer.
- Prep Time: 15
- Cook Time: 65
- Total Time: 80
- Yield: 1 loaf (about 12 slices) 1x
- Category: Baking
- Method: Baking
- Cuisine: American
- Diet: Vegetarian
Ingredients
- 1 and 3/4 cups (219g) all-purpose flour
- 1 teaspoon baking soda
- 2 teaspoons ground cinnamon
- 1/4 teaspoon ground nutmeg
- 1/4 teaspoon ground cloves
- 1/4 teaspoon ground ginger
- 3/4 teaspoon salt
- 2 large eggs, at room temperature
- 1/2 cup (100g) granulated sugar
- 3/4 cup (150g) packed light or dark brown sugar
- 1 and 1/2 cups (340g) pumpkin puree (canned or fresh)
- 1/2 cup (120ml) vegetable oil, canola oil, or melted coconut oil
- 1/4 cup (60ml) orange juice
- 2/3 cup (120g) semi-sweet chocolate chips
Instructions
- Adjust the oven rack to the lower third position.
- Preheat the oven to 350°F (177°C).
- Grease a metal 9×5-inch loaf pan with non-stick spray.
- Set the greased pan aside.
- In a large bowl, whisk together the flour, baking soda, cinnamon, nutmeg, cloves, ginger, and salt until combined.
- Set the dry ingredients aside.
- In a medium bowl, whisk together the eggs, granulated sugar, and brown sugar until combined.
- Whisk in the pumpkin puree, oil, and orange juice into the wet ingredients.
- Pour the wet ingredients into the dry ingredients.
- Gently mix the batter together using a rubber spatula or a wooden spoon until just combined.
- Do not over-mix; a few lumps are okay.
- Gently fold in the chocolate chips, if using.
- Pour the batter into the prepared loaf pan.
- Bake for 60–65 minutes.
- Loosely cover the bread with aluminum foil halfway through baking to prevent the top from browning too much.
- The bread is done when a toothpick inserted in the center comes out clean with only a few small moist crumbs.
- Begin checking for doneness around the 55-minute mark, and every 5 minutes thereafter if needed.
- Allow the bread to cool completely in the pan on a wire rack before removing.
- Slice and serve the cooled pumpkin bread.
Notes
Spoon and level your flour for accurate measuring.
Do not over-mix your batter; mix just until no dry streaks remain.
Always cool the bread completely before slicing for the best texture.
Loosely cover the bread with foil halfway through baking to prevent over-browning.
Nutrition
- Serving Size: 1 slice
- Calories: 300
- Sugar: 26
- Sodium: 300
- Fat: 14
- Saturated Fat: 3
- Carbohydrates: 40
- Fiber: 2
- Protein: 5
- Cholesterol: 30