Okay, friend, let’s talk about that moment of pure, unadulterated baking triumph! I remember the very first time I tried to make a Homemade Ice Cream Cake (Like Dairy Queen). My kitchen was a disaster, and the first layer of ice cream looked more like a melted puddle than a cake base. But you know what? I learned so much, and the next one? *Chef’s kiss!* If I can do it, you absolutely can too. This recipe is your ticket to cheering crowds and feeling like a baking superstar, even if you’re a total beginner.
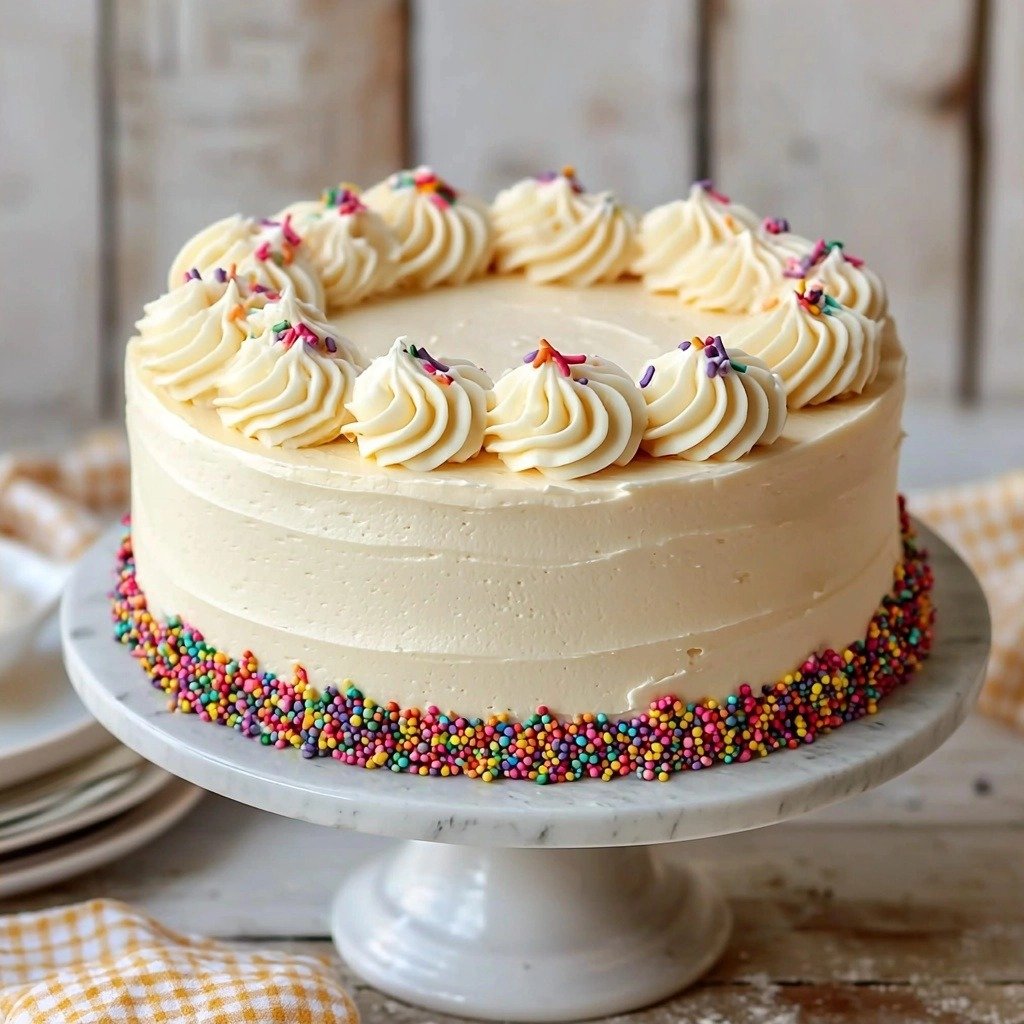
Why You’ll Love Baking This Homemade Ice Cream Cake (Like Dairy Queen)
This cake is super satisfying to make, and it’s a total crowd-pleaser.
- It looks impressive, but it’s surprisingly simple to assemble.
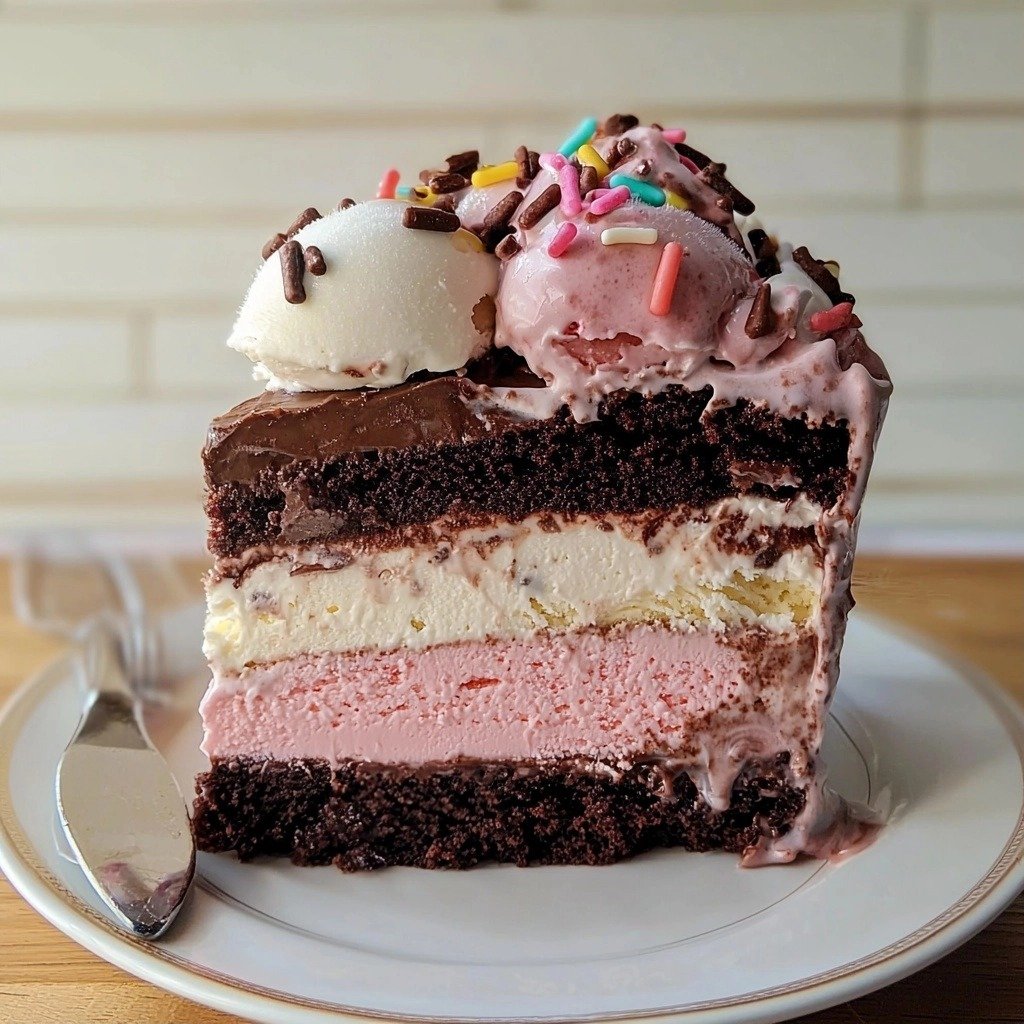
- The layers of cookie, fudge, and two kinds of ice cream are just delightful.
- You can customize the ice cream flavors to make it uniquely yours.
- The “wow” factor when you reveal it is simply the best.
Let’s Talk Ingredients
Understanding your ingredients helps you bake with confidence.
- Oreo cookies: These form the delicious, crunchy base. Don’t worry about getting them perfectly fine; some chunks add great texture!
- Unsalted butter: This binds our cookie crumbs together. Unsalted is best so you control the saltiness.
- Chocolate ice cream: This is your first creamy layer. Make sure it’s softened enough to spread but not completely melted.
- Homemade hot fudge: This provides a rich, gooey ribbon. If you’re using store-bought, warming it gently makes it easy to spread.
- Strawberry ice cream: Our second creamy layer! Again, softened is key for smooth spreading.
- Heavy cream: This whips up into our beautiful topping. Make sure it’s very cold for the best results.
- Confectioners’ sugar: This sweetens and stabilizes the whipped cream. It’s super fine, so it dissolves easily.
- Pure vanilla extract: This adds a lovely warmth to the whipped cream. Don’t skip it!
How to Make Homemade Ice Cream Cake (Like Dairy Queen) (You’ve Got This)
You’re going to layer this cake like a pro, step by step, and it’s going to be amazing.
First, get those Oreos crushed. A food processor makes quick work of it, but a Ziploc bag and a rolling pin work too! You want a coarse crumb, like wet sand, not a fine powder. Mix it with melted butter; this will be your sturdy, delicious foundation. Don’t panic if a few bigger cookie bits are left; they add character!
Now for the ice cream layers. The trick here is to work quickly but calmly. Your chocolate ice cream needs to be softened – not melted into soup, but soft enough to spread easily. Think of it like soft-serve. Press it into your lined springform pan and pop it in the freezer. This chill time is crucial; it helps each layer firm up before the next. When you add the hot fudge and cookie crumbs, don’t worry about perfection; just aim for an even spread. Then, it’s back to the freezer for another chill, letting everything get nice and solid.
The second ice cream layer, your strawberry, gets the same treatment. Softened, spread, and then the whole cake needs a long, cozy nap in the freezer. This long freeze, at least 12 hours, is your secret weapon for a perfectly set, easy-to-slice cake. You’re doing great!
My Best Tips for First-Timers
I learned these tips the hard way so you don’t have to!
- I always line my springform pan with plastic wrap; it makes unmolding a breeze.
- My first batch taught me that softened ice cream is key – too hard, and it’s impossible to spread; too soft, and it melts too fast.
- Promise me you won’t skip the freezing times between layers; it’s what keeps your cake neat and tidy.
- Have all your ingredients measured and ready before you start, especially the ice cream layers.
- Use a warmed, sharp knife for slicing; it makes all the difference for clean cuts.
- Don’t be afraid to use your hands (with gloves!) to gently press down ice cream layers if needed.
Beginner Mistakes (I Made Them All)
We all learn from our bakes, and these are common bumps in the road.
- Not softening the ice cream enough: This makes it really hard to spread evenly and you end up with chunks. Just let it sit out a little longer, maybe 10-15 minutes, until it’s spoonable.
- Over-softening the ice cream: If it’s too soupy, it won’t hold its shape and will melt too quickly. If this happens, pop it back in the freezer for 5-10 minutes to firm up slightly.
- Not freezing layers long enough: This causes layers to bleed into each other, and your cake won’t be as defined. Patience is a virtue here; those 30-minute freezes are important!
- Trying to cut the cake without a warm knife: You’ll end up with jagged, messy slices. A quick dip in hot water makes the knife glide through cleanly.
How to Store Homemade Ice Cream Cake (Like Dairy Queen)
Your Homemade Ice Cream Cake (Like Dairy Queen) should be stored in the freezer for up to 1 month.
- Freezer (long-term): Up to 1 month. Keep it tightly wrapped in plastic wrap and then foil to prevent freezer burn.
- Freezer (short-term, before serving): Up to 1 hour after decorating. Any longer and the whipped cream might start to firm up too much.
- Serving: Slice and serve immediately. Ice cream cakes melt quickly at room temperature.
Frequently Asked Questions
Can I use different ice cream flavors?
Absolutely! This recipe is super flexible. Feel free to swap out the chocolate and strawberry for your favorite combinations like mint chip and cookies and cream.
What if I don’t have a springform pan?
You can use a 9×13-inch baking dish for a rectangular cake. Just be sure to line it with plastic wrap, leaving an overhang, so you can lift the cake out easily after freezing.
Can I make the hot fudge from scratch ahead of time?
Yes, you can! Make your homemade hot fudge a day or two in advance and store it in the fridge. Just gently warm it when you’re ready to use it so it’s a spreadable consistency.
My whipped cream isn’t getting stiff, what should I do?
Make sure your heavy cream is very cold, straight from the fridge. Also, ensure your mixing bowl and whisk attachment are clean and cold. If it’s still struggling, try chilling the bowl in the freezer for 10-15 minutes before whipping.
How do I prevent the cake from melting too fast when serving?
Keep the cake in the freezer until the very last minute. Also, chilling your serving plate or cutting board beforehand can help buy you a few extra precious minutes.
See? You absolutely nailed it! Making a Homemade Ice Cream Cake (Like Dairy Queen) is such a rewarding bake, and I know your kitchen is buzzing with that sweet success. I’m so proud of you for tackling this! Come back and tell me all about your delicious creation.
PrintHomemade Ice Cream Cake (Like Dairy Queen)

Layered with cookies, fudge, and two kinds of ice cream, this cake is an impressive and fun dessert to make at home.
- Prep Time: 30
- Total Time: 750
- Yield: 12 servings 1x
- Category: Dessert
- Method: No-Bake
- Cuisine: American
Ingredients
- 10 Oreo cookies (110g)
- 2 Tablespoons (28g) unsalted butter, melted
- 1.5 quarts (48 ounces/3 pints/1.42L) chocolate ice cream, softened
- 1 cup (8 ounces/227g) homemade hot fudge (or store-bought), divided
- 1.5 quarts (48 ounces/3 pints/1.42L) strawberry ice cream, softened
- 2 cups (480g/ml) heavy cream, cold
- 1/3 cup (40g) confectioners’ sugar
- 1 and 1/2 teaspoons pure vanilla extract
- optional for garnish: sprinkles
Instructions
- Pulse 10 Oreos into a coarse crumb in a food processor or blender.
- Mix the Oreo crumbs with the melted butter.
- Remove chocolate ice cream from the freezer and let it soften for 10 minutes.
- Line a 9×3-inch or 10×3-inch springform pan with plastic wrap.
- Scoop the softened chocolate ice cream into the lined pan.
- Spread the chocolate ice cream into an even layer.
- Place the pan in the freezer for 30 minutes.
- Warm up 1/2 cup hot fudge until it's a spreadable consistency.
- Pour and spread the warmed hot fudge evenly over the frozen chocolate ice cream layer.
- Sprinkle the Oreo mixture evenly over the hot fudge layer.
- Freeze for 30 minutes.
- After 20 minutes of the previous freeze, remove strawberry ice cream from the freezer to soften for 10 minutes.
- Drizzle the remaining 1/2 cup hot fudge on top of the Oreo layer.
- Spoon the softened strawberry ice cream into the pan.
- Spread the strawberry ice cream into an even layer.
- Cover the cake with plastic wrap or aluminum foil.
- Freeze the cake for at least 12 hours and up to 2 days.
- Place your desired cake plate or stand in the freezer for at least 30 minutes if you plan to transfer the cake.
- Beat cold heavy cream, confectioners’ sugar, and vanilla extract on medium-high speed until stiff peaks form (about 4 minutes).
- Remove the frozen ice cream cake from the freezer.
- Remove the rim from the springform pan.
- Lift the cake using the plastic wrap and carefully peel off the plastic.
- Place the cake back on the bottom of the springform pan or the frozen cake plate.
- Spread the whipped cream over the top and sides of the ice cream cake.
- Optionally, pipe a border around the top of the cake.
- Garnish with sprinkles, if desired.
- Slice and serve immediately or freeze for up to 1 hour before serving.
- Use a very sharp knife, dipping it into hot water between slices.
Notes
Always use very cold heavy cream for whipped topping.
Freeze each layer fully to prevent bleeding.
Warm your knife in hot water before slicing for clean cuts.
Line your pan well with plastic wrap for easy removal.
Nutrition
- Serving Size: 1 slice
- Calories: 550
- Sugar: 40
- Sodium: 150
- Fat: 35
- Saturated Fat: 20
- Carbohydrates: 55
- Fiber: 2
- Protein: 7
- Cholesterol: 100