Oh, friend, let me tell you about my very first attempt at swirled cookies. It was… a learning experience! I ended up with something that looked more like abstract art than a perfectly pretty swirl. But you know what? They still tasted amazing, and that’s the magic of baking. Today, we’re diving into Peppermint Swirl Sugar Cookies, and I promise you, with a few simple tricks, yours will look absolutely stunning and taste even better. This recipe is designed to build your confidence, one beautiful, swirly cookie at a time!
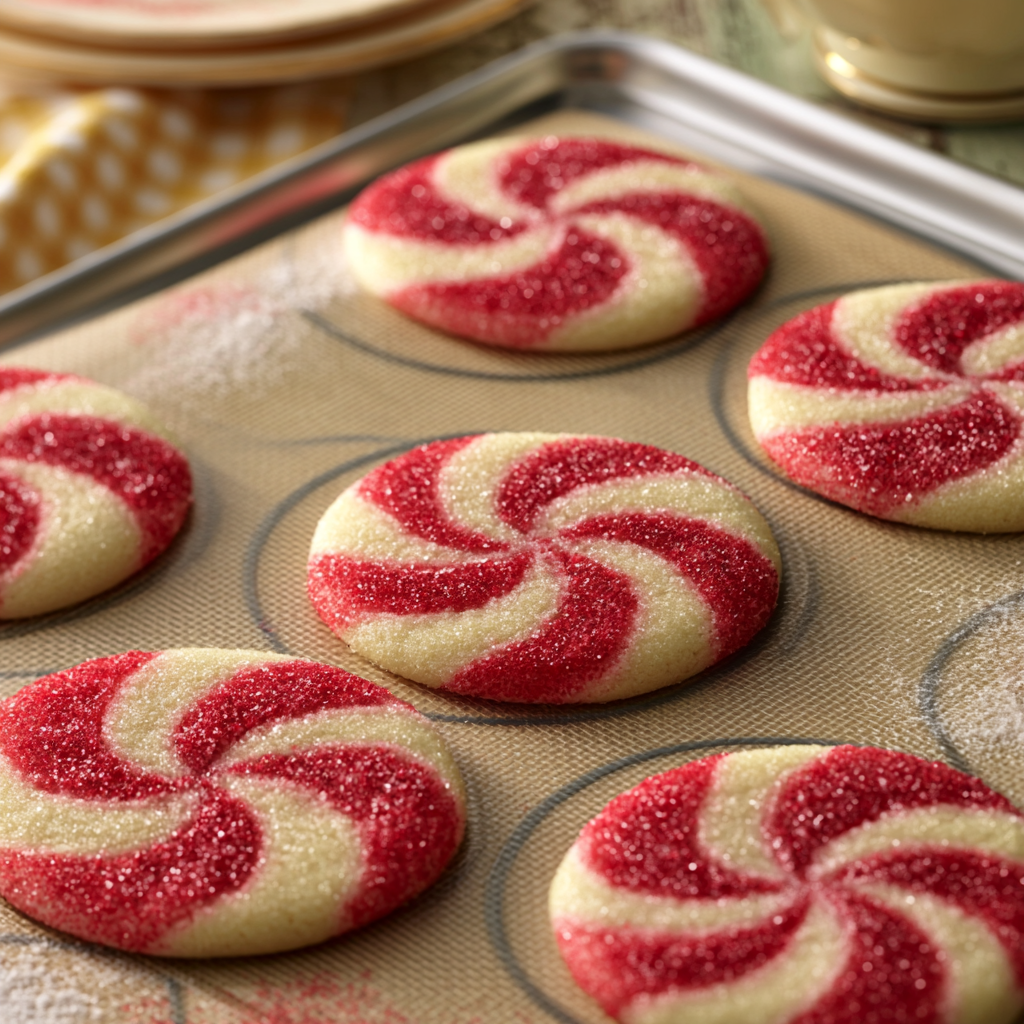
Why You’ll Love Baking This Peppermint Swirl Sugar Cookies
- This recipe is super achievable for beginners, even with the fun swirling technique.
- You’ll get perfectly soft, chewy cookies that hold their shape beautifully.
- The visual “wow” factor of these cookies will make you feel like a baking superstar.
- That proud moment when they come out of the oven, looking just like the pictures? Priceless!
Let’s Talk Ingredients
- Unsalted Butter: Make sure it’s room temperature! This is super important for creaming properly with sugar, which creates tiny air pockets for a light, fluffy cookie. If it’s too cold, it won’t mix well; too warm, and your cookies might spread too much.
- Granulated Sugar: Not just for sweetness, sugar also helps with the texture and browning of your cookies.
- Large Egg + Large Egg Yolk: The extra yolk adds richness and helps keep the cookies chewy and soft, preventing them from becoming too crumbly.
- Peppermint or Almond Extract (Optional): This is where the festive flavor comes in! Peppermint gives that classic holiday feel, but almond is a lovely alternative if you prefer.
- All-Purpose Flour: The main structure of our cookies. Make sure to measure it correctly – spoon it into your measuring cup and then level it off, don’t scoop directly from the bag!
- Cornstarch: This little secret ingredient helps make your cookies extra tender and soft, almost like a “secret weapon” against dry cookies.
- Fine Salt: Don’t skip the salt! It balances the sweetness and brings out all the other flavors.
- Baking Soda: This is our leavening agent, helping the cookies puff up slightly and giving them a soft texture. It reacts with the acidic ingredients (though not many here, it helps with spread).
- Red Gel Food Coloring: Gel food coloring is best because it’s super concentrated, so you don’t need much to get a vibrant color, and it won’t thin out your dough.
- Granulated Sugar or White Sanding Sugar (for coating): This adds a lovely sparkle and a little extra crunch to the outside of your cookies.
How to Make Peppermint Swirl Sugar Cookies (You’ve Got This)
First things first, preheat your oven to 350°F (175°C) and get your baking sheets ready with parchment paper. Parchment paper is your best friend here because it helps prevent sticking and keeps your cookies from spreading too much – trust me on this one!
Next, we’re going to cream together the room-temperature butter and granulated sugar until it’s light and fluffy. This step is key for a tender cookie, so really let your mixer do its work for a couple of minutes. It should look pale yellow and airy, like a cloud! Then, add your egg, egg yolk, and extracts, beating until everything is just combined. Don’t overmix here; just get it blended.
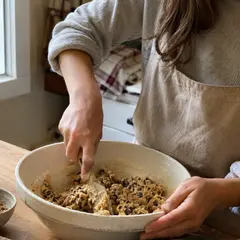
Now for the dry ingredients: gently mix in your flour, cornstarch, salt, and baking soda on a low speed. Mix until it’s *mostly* combined – it might look a little shaggy. Scrape down the bowl, then beat for just a few more seconds until the dough comes together. The dough should be soft and pliable, not sticky. This is where the fun begins! Divide your dough in half, and in one half, add your red gel food coloring. Start mixing with a spatula, but don’t be afraid to get your hands in there and knead it until the color is even. It’s like edible play-doh!
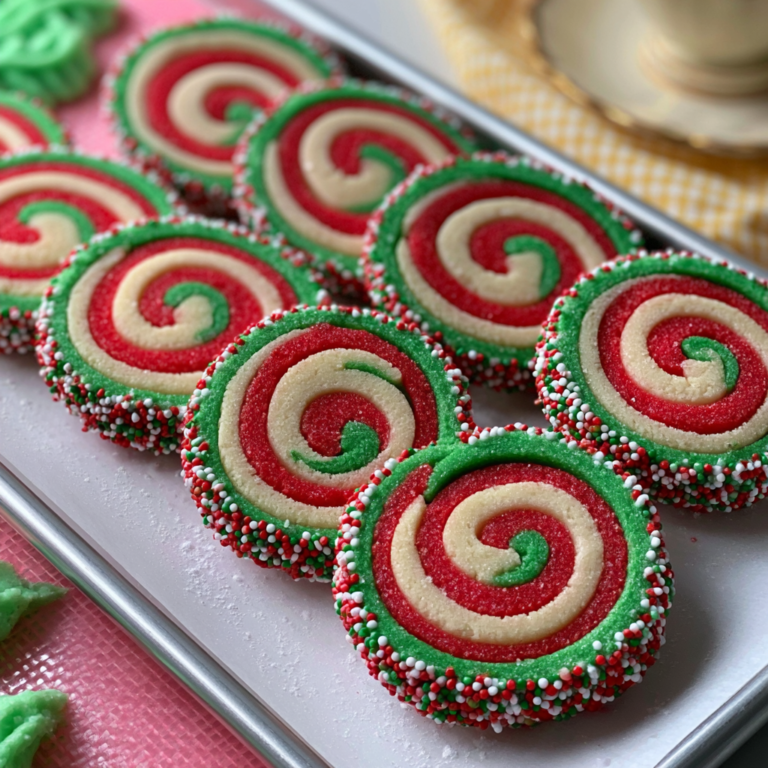
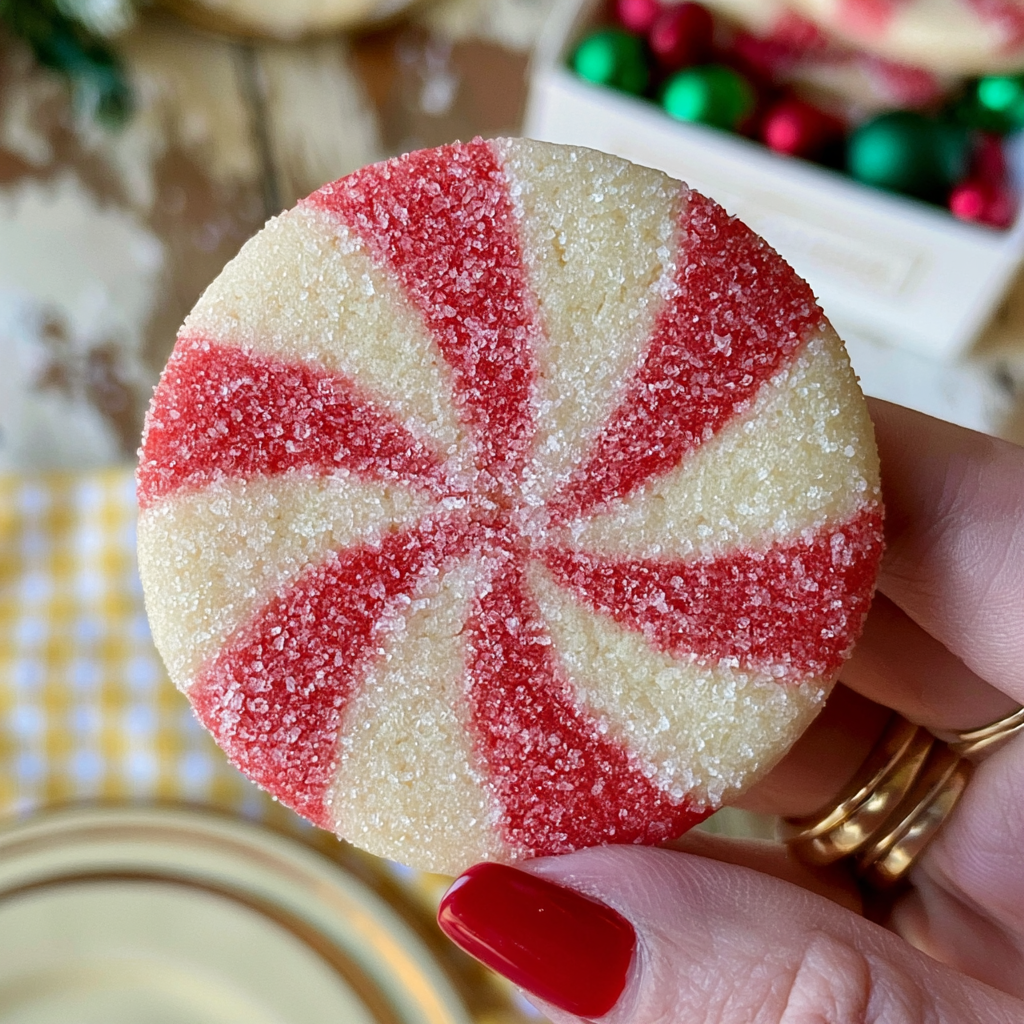
Once you have your two beautiful dough colors, use a teaspoon to scoop out small portions of each. Take three red and three white portions and arrange them in a circle, alternating colors. Gently press them together to close any gaps, then cup your hand around them to round out the edges. Now, for the swirl: use your forefinger to gently push the stripes of color in the same direction. It’s like magic! Once they’re all swirled, you can roll them in extra sugar for a sparkly finish. Pop them in the fridge for 30 minutes (or freezer for 15) before baking – this chill time is super important for keeping their shape. Bake a few at a time on the middle rack for 11-13 minutes, until the edges are just set but not browned. Let them cool on the tray for 15 minutes before moving them to a wire rack. You did it!
My Best Tips for First-Timers
- I always use parchment paper: It’s a non-negotiable for consistent baking and easy cleanup, especially with sugar cookies!
- My first batch taught me to chill the dough: Don’t skip the chilling step! It prevents your cookies from spreading into one giant blob.
- Promise me you won’t overmix the flour: Once flour is added, mix only until just combined. Overmixing develops gluten, leading to tough cookies.
- Use gel food coloring: Liquid food coloring can change the texture of your dough, but gel keeps it perfect and gives vibrant color.
- Bake one tray at a time: This ensures even baking and prevents burnt edges or undercooked centers.
- Watch for visual cues, not just the timer: Cookies are done when the edges look set and just starting to firm up, but the centers still look a little soft.
Beginner Mistakes (I Made Them All)
- Not using room temperature butter: If your butter is too cold, it won’t cream properly with the sugar, leading to dense cookies. If it’s too warm (melty), your cookies will spread too much. Let it sit on the counter for an hour or two until it’s soft enough to make an indent with your finger but still cool.
- Overmixing the dough after adding flour: This develops too much gluten, making your cookies tough instead of tender. Mix just until combined, then stop!
- Skipping the chilling step: Warm dough spreads much more rapidly in the oven, losing its shape and swirl. Chilling firms up the butter, helping the cookies hold their form.
- Baking too many cookies on one sheet: Crowding the baking sheet can lead to uneven baking and cookies merging together. Give them space to breathe!
- Over-baking the cookies: If you bake them until they’re golden brown all over, they’ll be hard and crunchy when cooled. Pull them out when the edges are just set and the centers still look a little soft. They’ll continue to cook slightly on the hot baking sheet.
How to Store Peppermint Swirl Sugar Cookies
You can store these delicious cookies in an airtight container at room temperature for up to 5 days.
- Room Temperature: Up to 5 days in an airtight container.
- Freezer (Baked): Up to 2 months in an airtight freezer-safe container. Thaw at room temperature.
- Freezer (Dough Balls): Up to 3 months. Place unbaked dough balls on a baking sheet and freeze until solid, then transfer to a freezer-safe bag. Bake from frozen, adding a couple of minutes to the baking time.
Frequently Asked Questions
Can I use regular liquid food coloring instead of gel?
While you technically can, liquid food coloring is less concentrated and can add too much moisture to your dough, potentially changing its texture. Gel food coloring is highly recommended for vibrant colors without affecting the consistency.
What if my butter isn’t room temperature?
If your butter is too cold, it won’t cream properly with the sugar, leading to a denser cookie. You can cut it into smaller pieces and let it sit for 15-20 minutes, or gently microwave it for 5-10 seconds at a time until softened, but not melted.
Can I skip the chilling step?
I really don’t recommend skipping the chilling step. It’s crucial for preventing your cookies from spreading too much in the oven, helping them maintain their beautiful swirl and shape.
Can I make these cookies without the peppermint extract?
Absolutely! The recipe notes that peppermint extract is optional. You can use almond extract for a different flavor, or simply double the vanilla extract for a classic sugar cookie taste.
My cookies spread too much, what went wrong?
This usually happens if your butter was too warm, you skipped the chilling step, or your oven temperature was off. Make sure your butter is room temperature but not melted, always chill your dough, and consider checking your oven with an oven thermometer.
See? I told you you could do it! These Peppermint Swirl Sugar Cookies are not just beautiful, they’re a testament to your growing baking skills. I’m so proud of you for tackling this recipe. Go ahead, take a bite, and savor that moment of accomplishment. Don’t forget to come back and tell me how they turned out!
PrintPeppermint Swirl Sugar Cookies
These delightful peppermint swirl sugar cookies are soft, chewy, and surprisingly easy to make, even for beginners!
- Prep Time: 30
- Cook Time: 13
- Total Time: 73
- Yield: 24 cookies 1x
- Category: Dessert
- Method: Baking
- Cuisine: American
Ingredients
- 1 cup unsalted butter, room temperature 226g
- 1 3/4 cups granulated sugar 350g
- 1 large egg + 1 large egg yolk 80g
- 1 1/2 tsp peppermint or almond extract – optional 8g
- 1 tsp vanilla extract or vanilla bean paste 5g
- 2 1/2 cups all purpose flour 325g
- 1 Tbsp cornstarch 8g
- 1 tsp fine salt 6g
- 1/2 tsp baking soda 3g
- Red gel food coloring
- 1 cup granulated sugar or white sanding sugar (for coating)
Instructions
- Preheat your oven to 350°F (175°C).
- Line two large baking sheets with parchment paper or silicone baking mats.
- Set the prepared baking sheets aside.
- In a large bowl, combine the room temperature butter and 1 3/4 cups granulated sugar.
- Using a hand mixer or stand mixer with a paddle attachment, beat the butter and sugar at medium-high speed for a couple of minutes until light and fluffy.
- Add the large egg, large egg yolk, 1 1/2 tsp peppermint or almond extract (if using), and 1 tsp vanilla extract.
- Beat at medium-high speed until all ingredients are just combined.
- Scrape down the sides and bottom of the bowl with a rubber spatula as needed.
- Add the 2 1/2 cups flour, 1 Tbsp cornstarch, 1 tsp fine salt, and 1/2 tsp baking soda to the bowl.
- Mix on low speed until the ingredients are mostly combined and the dough looks shaggy.
- Scrape down the sides and bottom of the bowl with a rubber spatula.
- Increase the speed to medium and beat for a few more seconds until all ingredients are fully combined into a soft dough.
- Split the dough into 2 equal portions (about 490g per bowl).
- Move one portion of dough to a separate large bowl.
- Add red gel food coloring to the other portion of dough.
- Begin mixing the red dough with a spatula.
- Knead the red dough with your hands until the color is evenly distributed.
- Use a teaspoon to scoop out teaspoon-sized portions of the white dough and roll them into small balls.
- Set the white dough balls aside.
- Use a teaspoon to scoop out teaspoon-sized portions of the red dough and roll them into small balls.
- Set the red dough balls aside.
- Take three red dough balls and three white dough balls (six balls total).
- Arrange the six dough balls in a small circle, alternating colors (red, white, red, white, etc.).
- Use your fingers to gently press the different colors together to close any gaps in the middle.
- Cup your hand around the pressed dough to round out the edges of the cookie.
- Gently use your forefinger to push the stripes of color in the same direction to create a swirled look.
- Repeat this process with the remaining dough until you have about 24 cookies.
- If desired, pour 1 cup of granulated sugar or sanding sugar into a small bowl.
- Toss each cookie dough ball in the sugar until it is fully coated.
- Chill the prepared cookies in the fridge for 30 minutes, or in the freezer for 15 minutes.
- Place the chilled cookies a few inches apart on the prepared baking sheets (about 6 cookies per tray).
- Bake one tray at a time on the middle rack of your oven for 11-13 minutes.
- Bake until the edges look set but have not started browning yet.
- Remove the tray from the oven.
- Let the cookies cool on the baking tray for 15 minutes.
- Move the cooled cookies to a wire rack to finish cooling completely.
- Store the cooled cookies in an airtight container at room temperature for up to 5 days.
Notes
Always use room temperature butter for the best texture.
Do not overmix the dough once the flour is added.
Chilling the dough is essential to prevent spreading.
Bake one tray at a time for even cooking results.
Nutrition
- Serving Size: 1 cookie
- Calories: 200
- Sugar: 15
- Sodium: 80
- Fat: 11
- Saturated Fat: 7
- Carbohydrates: 23
- Fiber: 0
- Protein: 2
- Cholesterol: 35