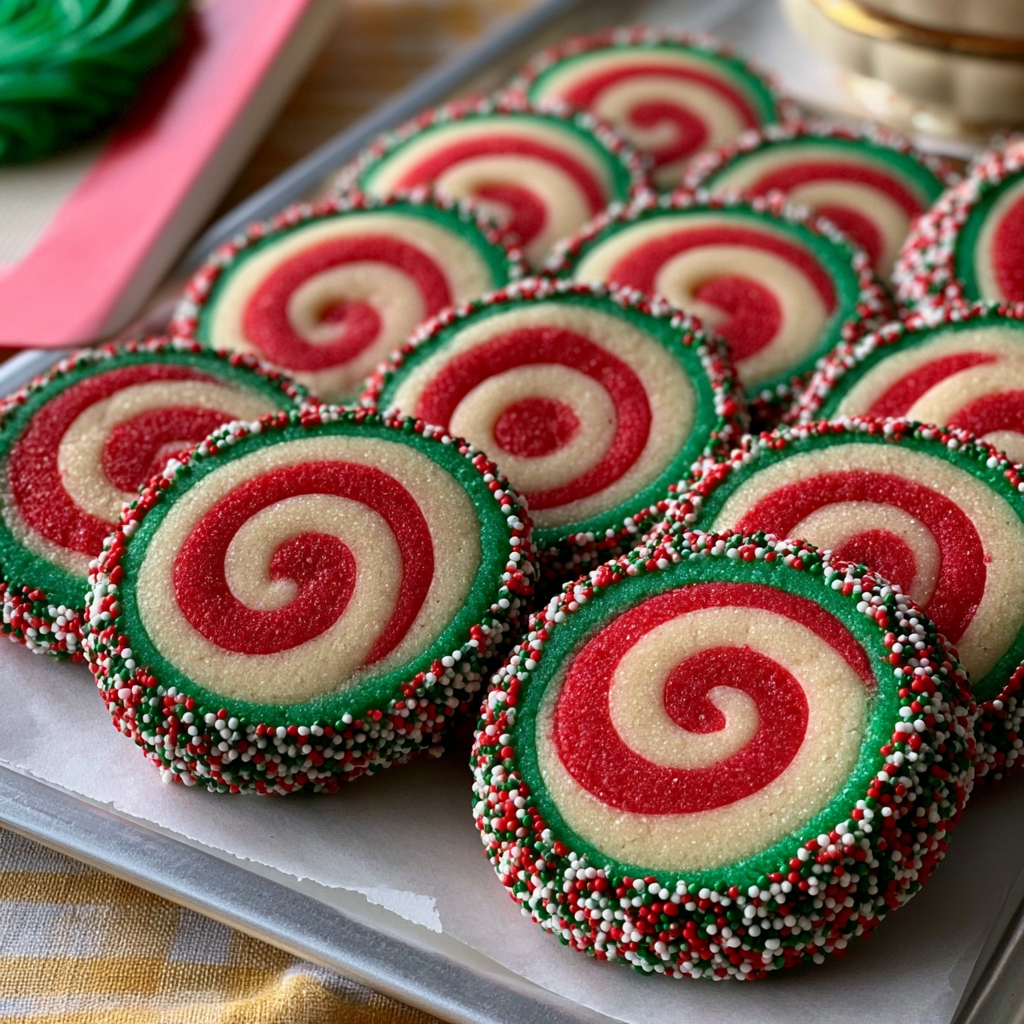
Okay, friend, let’s talk about those holiday cookies that look super fancy but are secretly so achievable. I remember my first time trying a swirled cookie – I was convinced it would be a disaster. But guess what? It wasn’t! We’re going to make some beautiful Swirled Christmas Cookies today, and I promise you, you’ve totally got this. This recipe is designed to build your baking confidence, one colorful swirl at a time. Get ready to impress everyone (including yourself!).
Why You’ll Love Baking This Swirled Christmas Cookies
- They look incredibly impressive, but the steps are totally beginner-friendly.
- The texture is perfectly soft and chewy, with just the right amount of festive crunch from the sprinkles.
- You get to play with vibrant colors, which is always fun.
- That proud moment when you pull them from the oven, perfectly swirled, is pure joy.
Let’s Talk Ingredients
Understanding what each ingredient does helps you feel more in control of your bake.
- Unsalted butter: This is our flavor base and helps with tenderness. Always use unsalted for baking so you control the salt level. Room temperature butter creams beautifully.
- Granulated sugar: Adds sweetness and helps create that tender crumb.
- Large egg: The egg is our binder, holding everything together and adding richness. Room temperature eggs mix better into your batter.
- Almond extract & Vanilla extract: These are your flavor powerhouses! Don’t skip them; they make a huge difference.
- All-purpose flour: The structure of our cookie! Measure it correctly by spooning it into the measuring cup and leveling it off.
- Cornstarch: This little secret ingredient helps make your cookies extra tender and soft.
- Baking powder: Our leavening agent! It helps the cookies spread just a tiny bit and gives them a soft texture.
- Fine salt: Balances the sweetness and brings out all the other flavors. Don’t skip the salt!
- Christmas sprinkles: These are for fun and texture! Nonpareils or jimmies both work great for that festive coating.
- Gel food coloring: Gel colors are concentrated, so you need less to get vibrant hues without adding too much liquid to your dough.
How to Make Swirled Christmas Cookies (You’ve Got This)
Making these cookies is all about gentle mixing and a little patience with chilling. First, you’ll cream your butter and sugar until it’s light and fluffy, which means more air for a tender cookie. Then you’ll add the egg and extracts, mixing until everything is happy and combined. After that, slowly add your dry ingredients – flour, cornstarch, baking powder, and salt – mixing just until it comes together. Overmixing here can make cookies tough, so stop as soon as you see no dry streaks!
Now comes the fun part: dividing and coloring your dough! Separate your dough into three equal parts. Leave one plain, then color one red and one green with your gel food coloring. Don’t be shy; knead the color in until it’s even. Wrap each colored dough portion and chill it for about 30 minutes in the fridge, 10 minutes in the freezer, or overnight in the fridge. This chilling time is super important; it firms up the butter and makes the dough easier to roll without sticking or tearing.
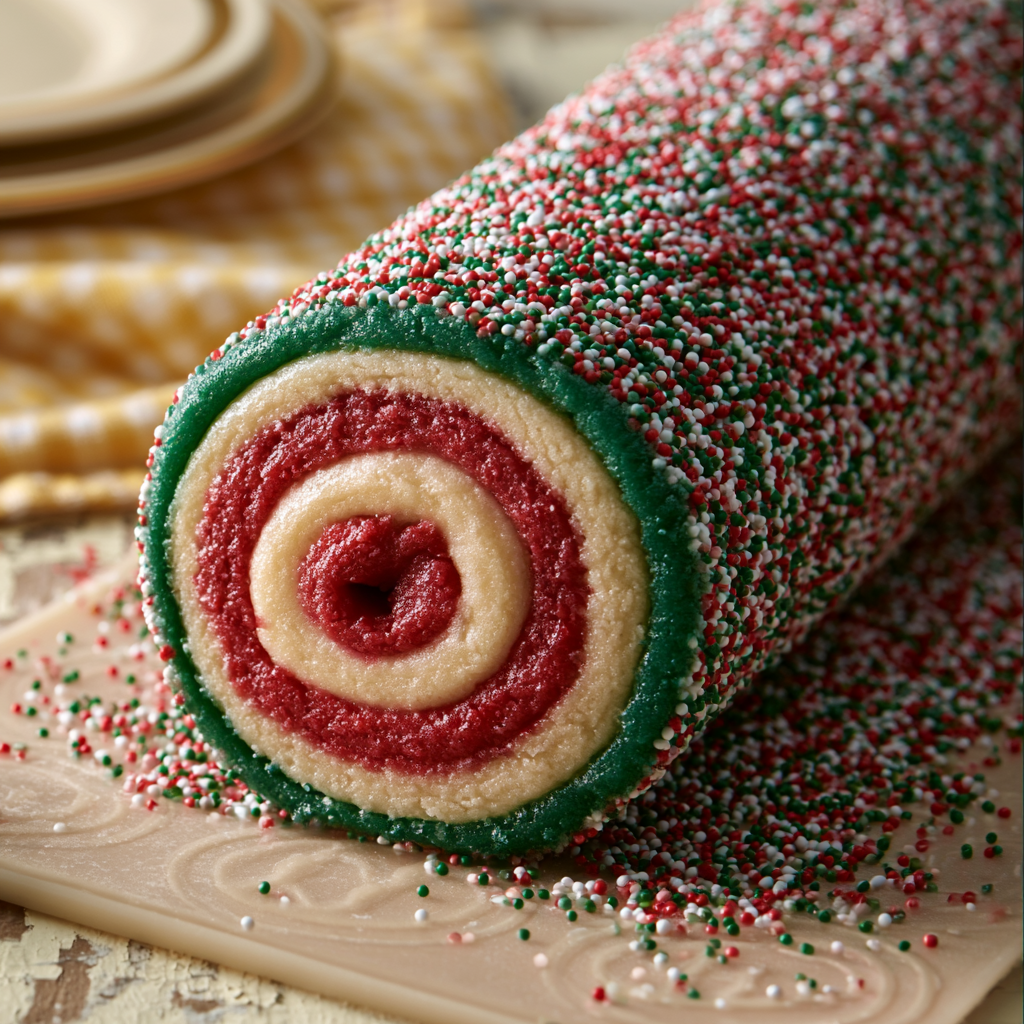
Once chilled, you’ll roll out each color of dough on plastic wrap to about 7×12 inches, then stack them carefully: green on the bottom, white in the middle, and red on top. A gentle roll with your pin helps them stick. Then, you’ll trim and angle one long side before rolling it into a tight log. This angled cut helps create that beautiful swirl! Roll the log in sprinkles, then slice into cookies about 1/3 inch thick. If your log gets soft, pop it back in the fridge for 15-30 minutes to firm up. Bake them at 350°F (175°C) for 12-14 minutes, pulling them out just before the edges brown. They’ll continue to set up as they cool on the pan.
My Best Tips for First-Timers
- I always measure my ingredients by weight if possible; it’s the most accurate way to bake!
- My first batch taught me that room temperature butter and eggs really do make a difference for a smooth dough.
- Promise me you won’t skip the chilling step! It makes handling the dough so much easier.
- When mixing the dry ingredients into the wet, stop as soon as it’s combined. This keeps your cookies tender.
- Don’t be afraid to put the dough log back in the fridge if it gets too soft while you’re slicing. Cold dough holds its shape better!
Beginner Mistakes (I Made Them All)
- Not chilling the dough enough: This makes the dough sticky and hard to roll, and your cookies will spread too much in the oven. Chill it until it’s firm!
- Overmixing the flour: When you add flour, mix just until it comes together. Overmixing develops too much gluten, leading to tough cookies.
- Using liquid food coloring: Liquid colors can change the dough consistency and make it too wet. Gel food coloring is your best friend here!
- Baking too long: These cookies are best when they’re soft and chewy. Pull them from the oven before the edges brown; they’ll firm up as they cool.
- Not trimming the log: If you don’t trim and angle the log before rolling, your swirls might not be as defined. It’s a small step that makes a big visual impact!
How to Store Swirled Christmas Cookies
These Swirled Christmas Cookies stay fresh at room temperature for up to 5 days.
- Counter: Store in an airtight container at room temperature for up to 5 days.
- Freezer (Baked): Place cooled cookies in a single layer on a baking sheet to freeze solid, then transfer to an airtight freezer-safe container or bag for up to 2-3 months. Thaw at room temperature.
- Freezer (Dough Log): Wrap the unbaked log tightly in plastic wrap, then foil, and freeze for up to 1 month. Thaw in the fridge overnight, then slice and bake as directed.
Frequently Asked Questions
Can I use butter straight from the fridge?
No, it’s really best to use room temperature butter. Cold butter won’t cream properly with the sugar, leading to a denser cookie. Let it sit out for about an hour or two before you start.
What if I don’t have almond extract?
You can definitely just use more vanilla extract! The almond extract adds a lovely, subtle flavor, but all vanilla will still make delicious cookies. It’s totally fine to swap it out.
My dough is too sticky to roll. What should I do?
This usually means your dough isn’t cold enough. Pop it back into the fridge for another 15-30 minutes. Cold dough is much easier to handle and less sticky.
Can I make these cookies without the sprinkles?
Absolutely! The sprinkles add a nice festive touch and a bit of crunch, but the cookies will still be delicious without them. You can skip that step if you prefer.
How do I know when the cookies are done baking?
Look for edges that are just barely set, with the centers still looking soft. They shouldn’t be browned at the edges. When in doubt, it’s always better to underbake slightly for a chewier cookie!
You did it! You just created some gorgeous Swirled Christmas Cookies that are going to be the star of any holiday plate. I’m so proud of you for tackling this recipe. Remember, every bake is a learning experience, and you’re getting better with every cookie. Don’t forget to come back and tell me how your beautiful swirls turned out!
PrintSwirled Christmas Cookies
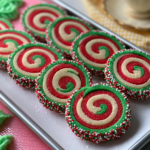
These vibrant Swirled Christmas Cookies are easier to make than they look and perfect for beginner bakers. Enjoy soft, chewy cookies with a festive sprinkle coating!
- Prep Time: 45
- Cook Time: 14
- Total Time: 59
- Yield: 36 cookies 1x
- Category: Dessert
- Method: Baking
- Cuisine: American
- Diet: Vegetarian
Ingredients
- 1 cup (2 sticks) unsalted butter, room temperature
- 1 1/4 cups granulated sugar
- 1 large egg, room temperature
- 2 tsp almond extract
- 1 tsp vanilla extract or vanilla bean paste
- 3 cups all-purpose flour
- 1 tsp cornstarch
- 1 tsp baking powder
- 1 tsp fine salt
- 1 cup Christmas sprinkles
- red gel food coloring
- green gel food coloring
Instructions
- Beat butter and sugar together in a large bowl or stand mixer on medium-high speed for a couple of minutes until light in color.
- Add the egg, almond extract, and vanilla extract.
- Mix on medium speed until incorporated.
- Scrape the sides and bottom of the bowl with a rubber spatula.
- Add flour, cornstarch, baking powder, and fine salt to the butter mixture.
- Mix on low speed until just incorporated.
- Scrape the sides and bottom of the bowl again to ensure everything is mixed.
- Divide the dough into three equal-sized portions (about 10.75 oz or 305g each).
- Leave one portion uncolored.
- Color one portion green using gel food coloring.
- Color the other portion red using gel food coloring.
- Wrap each portion of dough in plastic wrap.
- Flatten each dough portion into a rectangle about 1/3 inch thick.
- Chill the dough in the fridge for 30 minutes, or in the freezer for 10 minutes.
- Preheat the oven to 350°F (175°C) 30 minutes before you plan to cut the cookies.
- Line two large baking sheets with silicone baking mats or parchment paper.
- Unwrap each portion of chilled dough and lay the plastic wrap flat on your counter.
- Roll out each portion of dough to be about 7×12 inches.
- Lay out a piece of parchment paper.
- Stack the green dough on the parchment paper.
- Stack the white dough on top of the green dough.
- Stack the red dough on top of the white dough.
- Use a rolling pin to gently roll over the stacked dough to make them stick together.
- Trim the edges of the stacked dough with a sharp knife to remove uneven parts.
- Cut one of the long sides at an angle, making sure there is slightly less red than green on that edge.
- Start rolling the stacked cookie dough from this angled edge into a long log.
- Use the parchment paper to help roll the dough tightly onto itself.
- Spread the green cookie dough over the seam with your finger to seal the log.
- Pour Christmas sprinkles into a rimmed baking sheet.
- Roll and press the cookie dough log firmly in the sprinkles until it is fully coated.
- Use a sharp knife to slice cookies about 1/3 inch thick.
- If the log softens, chill it in the fridge for 15-30 minutes before slicing.
- Place sliced cookies on the prepared baking sheets, spacing them about 2 inches apart.
- Bake one sheet of cookies at a time on the middle rack for 12-14 minutes.
- Rotate the pan halfway through baking for even cooking.
- Pull cookies from the oven before the edges start to brown.
- Let the cookies cool on the pan for 15 minutes.
- Move cooled cookies to a wire rack to finish cooling completely.
Notes
Always use room temperature butter and eggs for the best texture.
Don’t overmix the flour; mix just until combined to keep cookies tender.
Chilling the dough is essential for easy handling and preventing spread.
If your dough log gets soft while slicing, pop it back in the fridge to firm up.
Underbake slightly for a chewier cookie; they firm up as they cool.
Nutrition
- Serving Size: 1 cookie
- Calories: 150
- Sugar: 10
- Sodium: 70
- Fat: 8
- Saturated Fat: 5
- Carbohydrates: 18
- Fiber: 0
- Protein: 2
- Cholesterol: 25